HA Configuration
Motadata network monitoring system (NMS) can be configured in master-slave High Availability modes for uninterrupted services. With this feature, your Network is always monitored by NMS even in unforeseen scenarios and system Failures. The whole HA setup is managed through physical connectivity to prevent any data loss or communication failure.
In master-slave mode, all your network is monitored through one NMS server (Master server, master RPE and master Report DB). The master server also updates the slave NMS server (Slave server, slave RPE and slave Report DB) in real time. The slave NMS is always in standby mode for any unfortunate scenario. When the master NMS goes down, the slave NMS takes in charge immediately. The observer unit monitors the connectivity of master and slave servers. The Observer decides who and when should be treated as a master. When the master server doesn’t respond, observer changes the slave server into master server. Clickhouse service needs to be kept in up status for HA to work, or else HA sync will not work properly.
This page enables you to configure HA from the portal instead of the terminal server.
To configure HA,
- Navigate to the Admin > Other Settings page. Here, click on the HA Configuration tab.

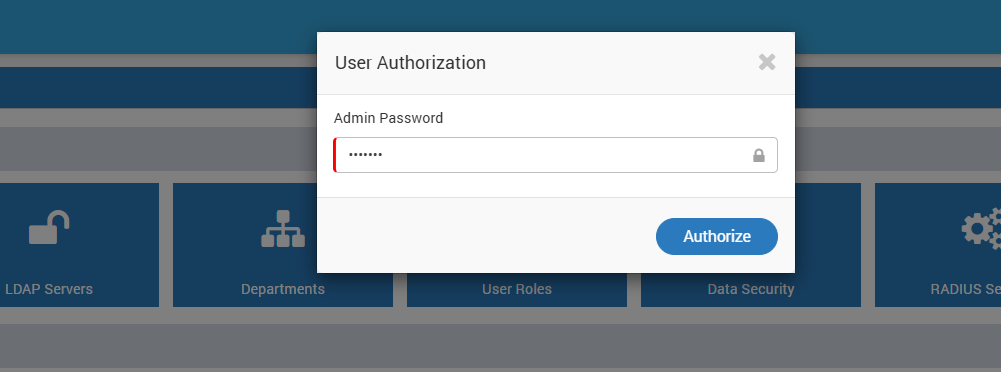
- The User Authentication popup appears. Enter the password and click Authorize.

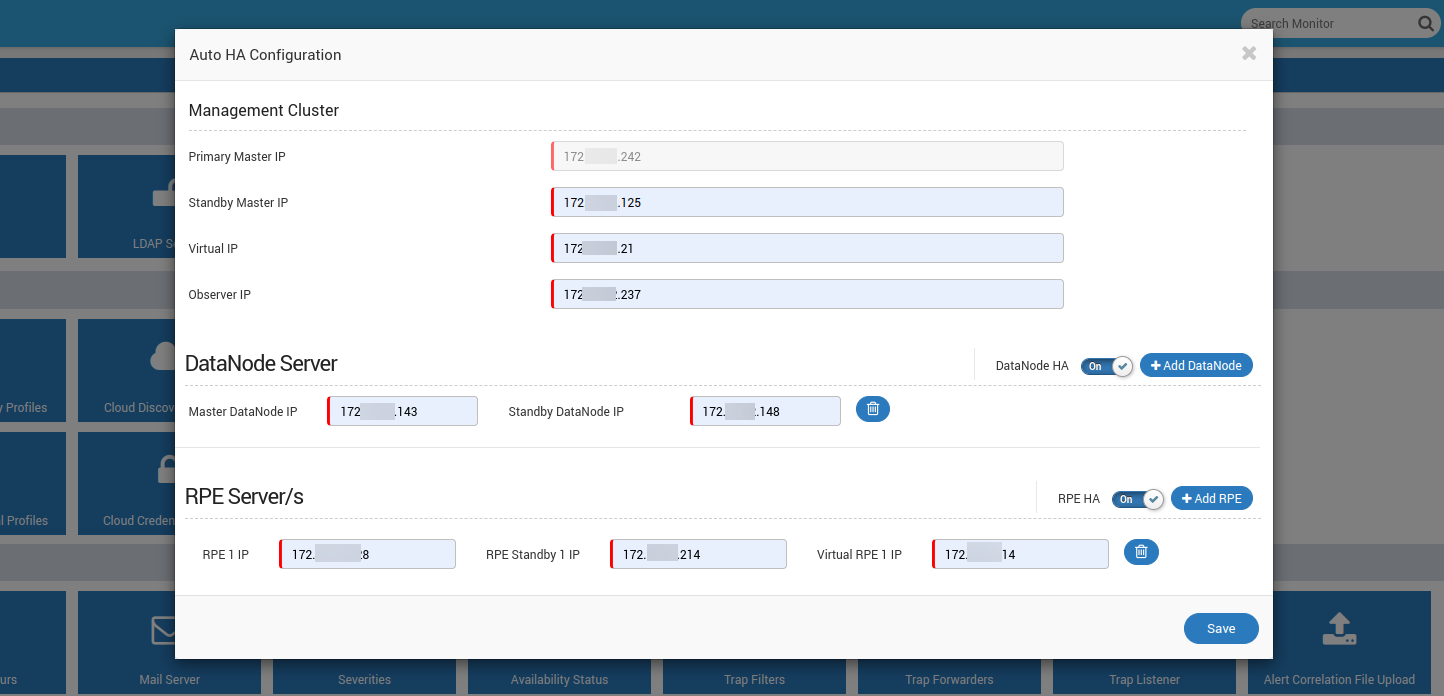
- The Auto HA Configuration page appears. If HA is already in use, its configuration will be displayed in disabled mode.
- When you open the Auto HA page, all the current setup details will be pre-filled and appear in non-editable mode like the Primary Master IP field.
- To configure the Standby or DataNode server using Auto HA, kindly contact the Motadata Support team for the preconfiguration of the server.
- The HA configurations cannot be changed once configured.

To configure HA, enter the following details:
Management Cluster:
- Primary Master IP: The default IPV4 or IPv6 address of Master IP is displayed.
- Standby Master IP: Enter the IP address of the standby master IP.
- Virtual IP: Enter the Master and standby virtual IP of the server.
- Observer IP: Enter the IP address of the Observer server.
DataNode Server
To add the DataNode, first click the Add DataNode button and enter the Master DataNode IP. If it already exists, it will be displayed in disabled mode.
To configure the DataNode in HA mode, enable it using the DataNode HA toggle button and enter the Standby DataNode IP address of the standby DataNode.
RPE Server/s
To add the RPE Server first click the Add RPE button and enter the RPE 1 IP address. If it already exists, it will be displayed in disabled mode.
To configure the RPE server in HA mode, enable it using the RPE HA toggle button and provide the Standby and Virtual IP addresses of the RPE servers.
You can add multiple RPE servers.
- Once done, click Save. Once the configuration is saved, the following is the behavior:
- Changes are detected.
- SSH port reachability is checked for all IPs except Virtual IPs.
- If everything is proper, all server configuration changes will begin. In case of any issue a notification will appear on the UI and audit log.
- Once the changes are done successfully, the following services will stop one by one:
- Cluster Services (Standby, Master DataNode, and Slave DataNode)
- Observer services
- Standby and RPE server services
- Next, it will sleep for 30 seconds and then the Observer service will start. And finally master services will stop.
- Later the Observer server service will start automatically.
- Once the HA is configured, if the username is changed from the Global Settings, it must also be changed in the Observer config file.
- In HA mode you cannot delete the RPE server from UI. However, you can delete it manually from the backend.