8.5. Purchase List View
The Purchase interface is divided into two parts: Purchase List View and the Purchase Details View. The Purchase List View allows Technicians to track and manage all Purchases at one place.
In the Purchase List View, users get to see all the available Purchase Orders in the system. Here a Technician can find a Purchase Order and act upon it.
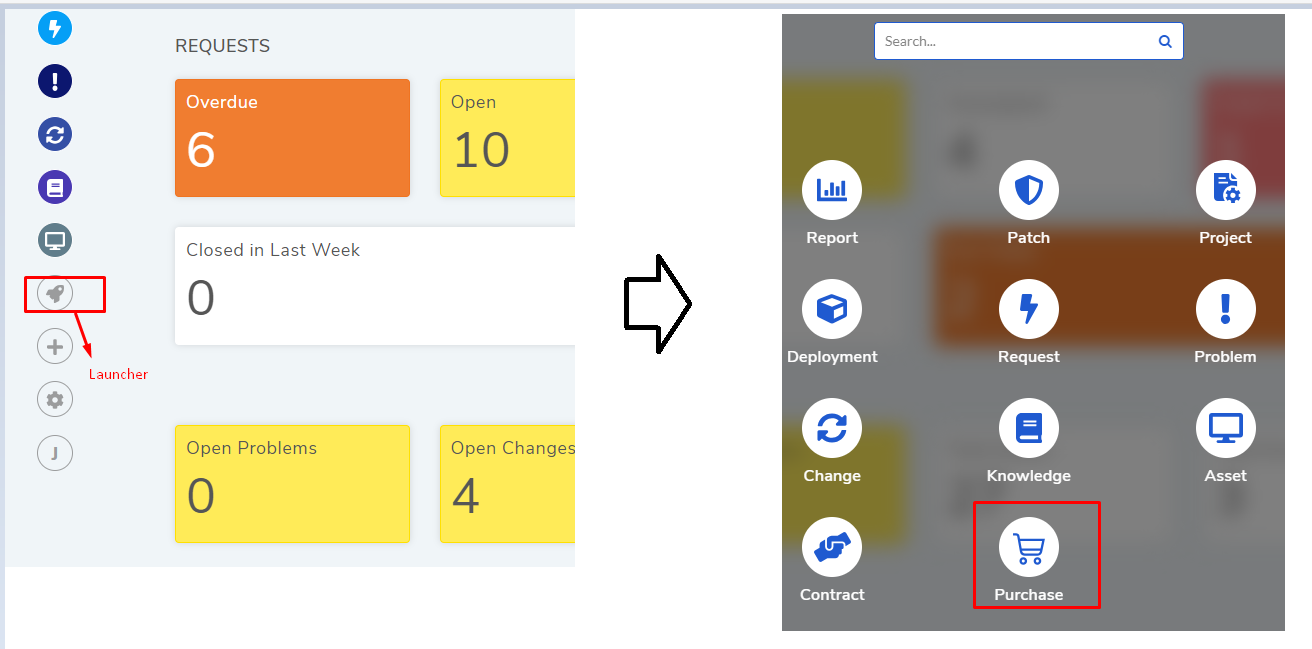
To open Purchase List View:
A Technician clicks on the Launcher icon from the Technician Dashboard.
Then he selects Purchase.

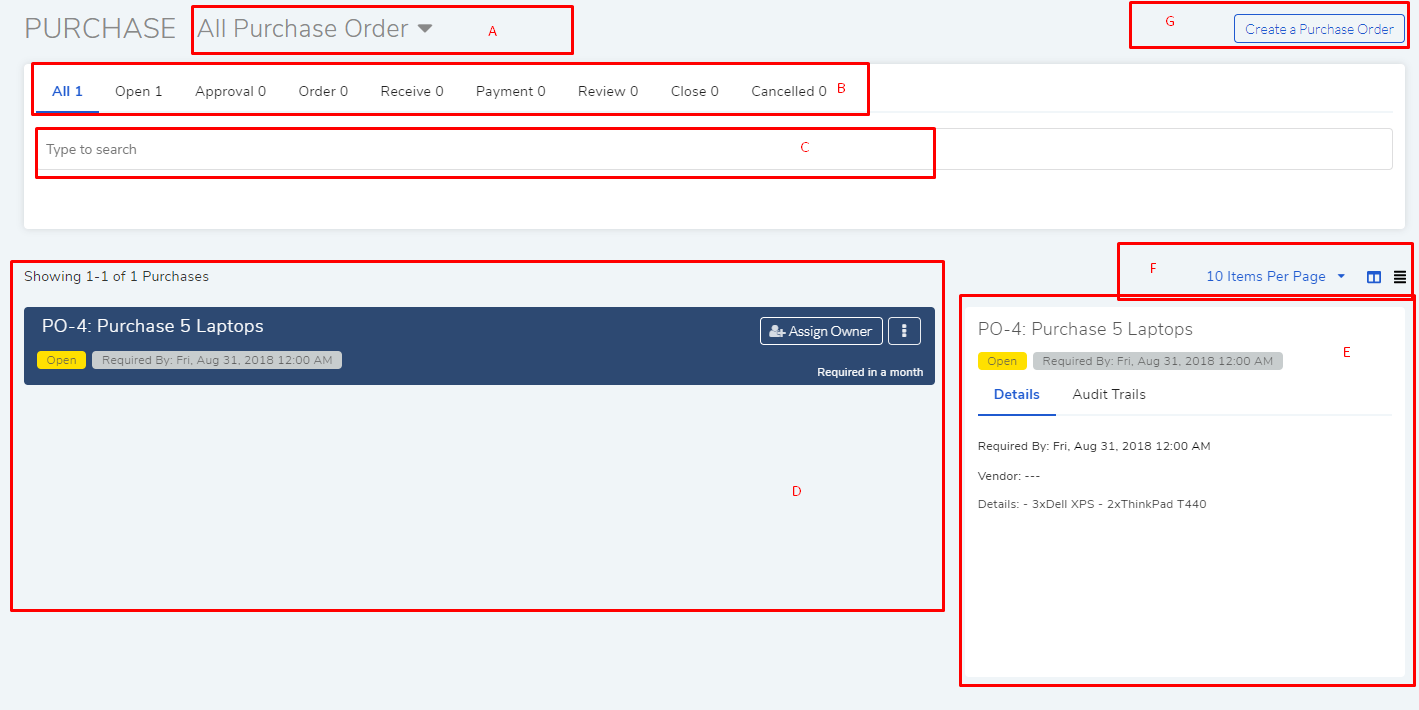
Purchase List View opens. Here all existing Purchase Orders are visible, and you have the following options.

list view
Section A, B and C are the Search Options.
Section D is the list area where the POs are visible. This section has two views Grid View and Table View which you can control from section F. You can view the following information:
Status of the PO: Shows the stage at which the PO is in.
Required By Date & Time: Deadline for the completion of the PO.
Assignment Option: You can assign the PO to a Technician (Learn More).
PO ID and name of the PO.
Action Menu having two options:
Associated Vendor (available only in Table view).
Section E is the Glance pane of a PO in Grid View (refer section F). It appears when you select a PO. It shows the following info:
PO Status and Required by date and time.
PO Details (Required by Date and Time, Vendor and PO description).
Section F gives you the option to set the number of POs visible per page; the highest is 100 per page.
You can toggle between Grid View and Table View.
In Grid View, the listings are more descriptive and explicit compared to Table View. You can view additional information in the Glance pane of a PO.

Table View is minimalist which shows minimum information. The focus is to give you the most critical information.

Section G is the Create PO option.