Create Incident Schedules
The page helps you to create an incident schedule using which an event will occur whenever the schedule runs.
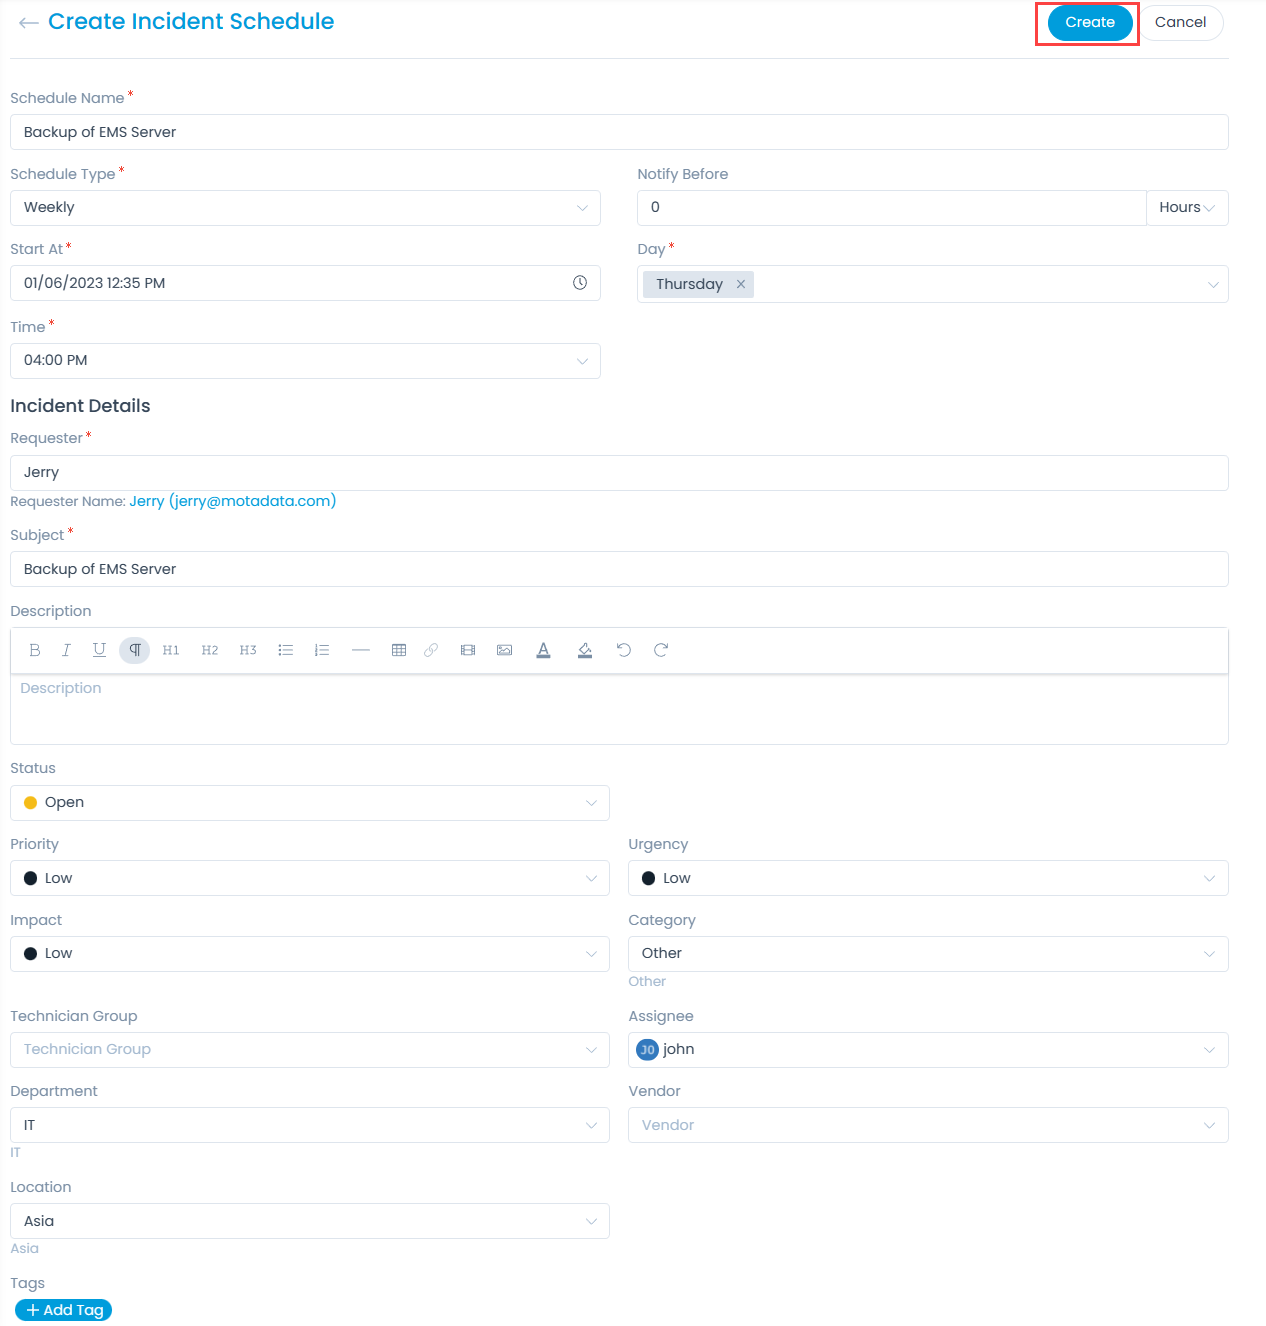
To create an Incident Schedule, click the Create Incident Schedule button on the top-right corner of the page.

Enter the below details:
| Parameter | Description |
|---|---|
| Schedule Name | Enter the name of the incident schedule. |
| Schedule Type | Select the type of schedule. The options are: - Once: If selected, the schedule will run only once. - Daily: If selected, the schedule will run daily as per the selected Time. - Weekly: If selected, the schedule will run once in a week as per the selected Day and Time. - Monthly: If selected, the schedule will run once in a month as per the selected Date and Month. |
| Notify Before | Enter the number of hours or minutes before which you want to send the notification to the requesters. |
| Start At | Select the date and time when the schedule should start. |
| Requester | Enter the requester's email address. You will get notifications about all the events, status updates, and notifications on this email address. |
| Subject | Enter the subject of the request. |
| Description | Enter the description about the request. The description should contains sufficient details about the nature of the request and what do you expect from a technician. |
| Status | Select the status of the request. The values are Open, In Progress, Pending, Resolved, and Closed. You can add more statuses from the Admin Request Status page. |
| Priority | Select the priority of the request. The options are: Low, Medium, High, and Urgent. The default value is Low. |
| Urgency | Select the urgency of the request. The options are: Low, Medium, High, and Urgent. The default value is Low. |
| Impact | Select the impact of the request. The options are: Low, On Users, On Department, and On Business. The default value is Low. |
| Category | Select the category of the request. You can add more categories from the Admin Request Category page. |
| Technician Group | Select the technician group for the request. You can add more options from the Admin Technician Groups page. |
| Assignee | Select the assignee of the request. |
| Department | Select the department for the request. You can add more options from the Admin Departments page. |
| Vendor | Select the vendor from the dropdown list. You can add more options from the Admin Vendor Catalog page. |
| Location | Select the location for the request. You can add more options from the Admin Locations page. |
| Tags | You can add tags if required using the Add Tag button. These are helpful while searching for similar requests. |
Once all the details are filled, click Create. The schedule gets created and a confirmation message appears.