App Notification
The App Notification tab enables you to view and edit the default email templates as per the requirement. These are used to send automatic responses to the recipients when an event is triggered. You can also activate or deactivate them if not required.
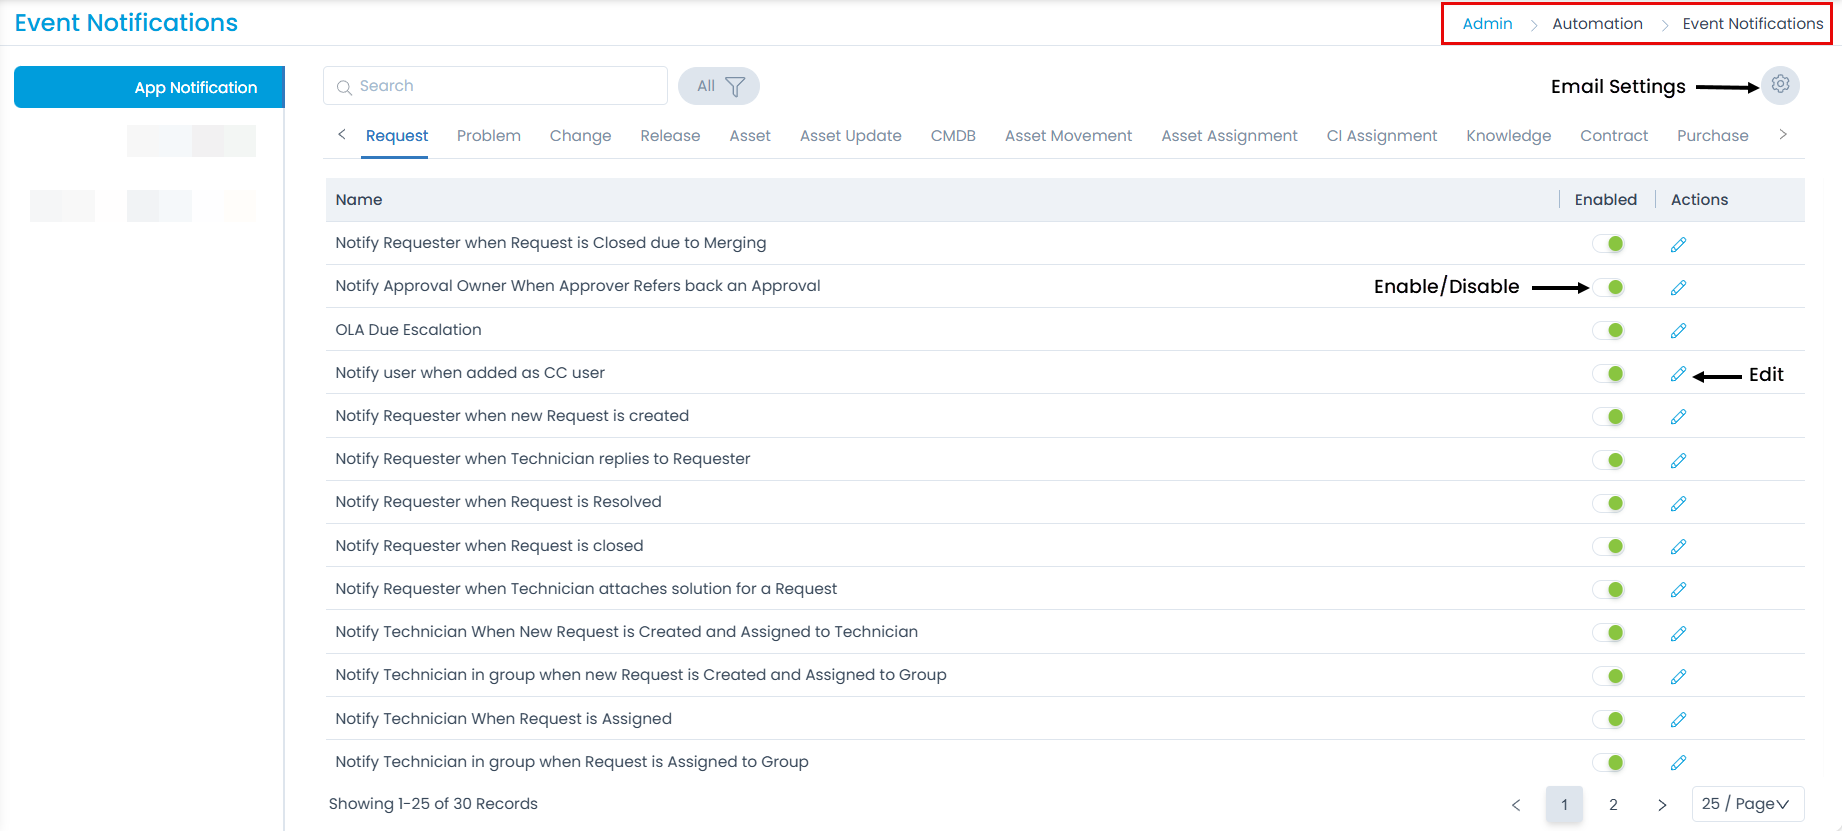
Here, you can do the following tasks:
- Configure the Email header and footer using Email Settings.

- Filter the templates based on their status.
- Enable/Disable Email Template
- Edit Email Template
- Insert Placeholders in the subject and body to display specific text instead of the generic text.
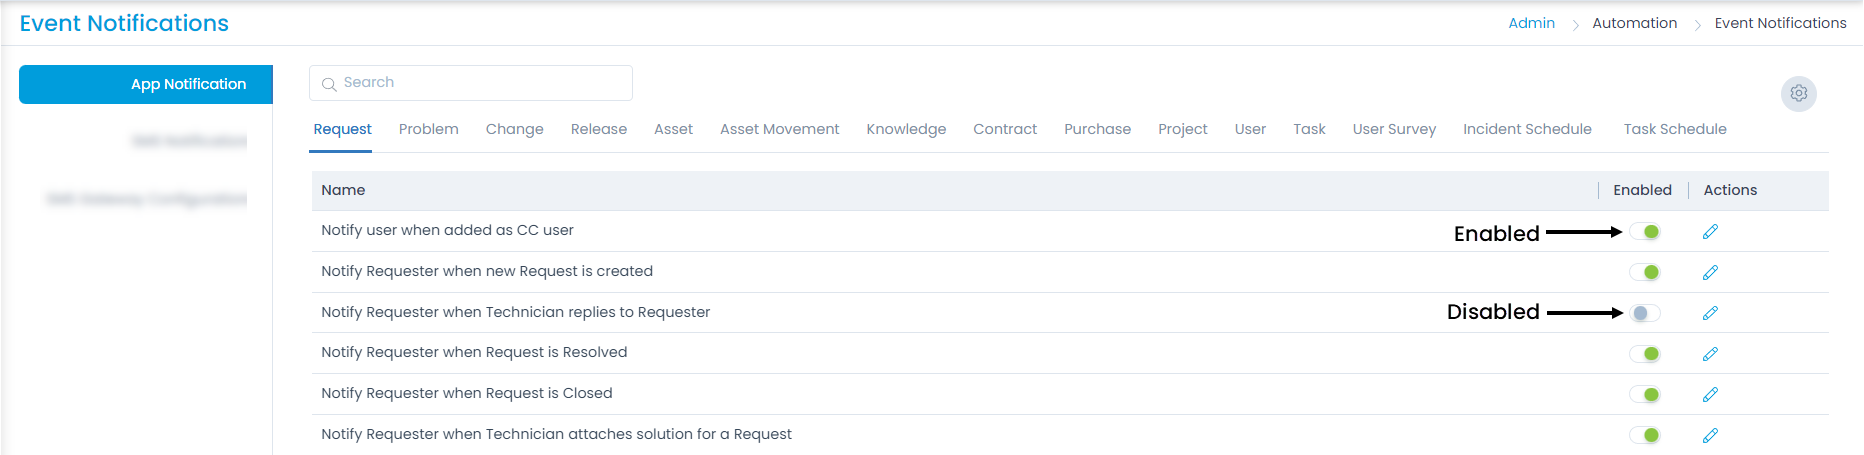
Enable/Disable
To enable or disable the email template, If disabled, click the grey icon in the Enabled column. It turns green and the email template gets enabled.
If enabled, click again the green icon, and the template gets disabled. Its color will turn to grey as shown below. Here, email templates are used from the Request module.
Similarly, you can enable or disable the email templates for all the modules displayed in the tab.
Editing the Email Template
To edit the content of the email template, click the Edit icon, and the page appears. For example: Click on the Edit icon next to the 'Notify Requester when new Request is Created' email template and the page opens as shown below.
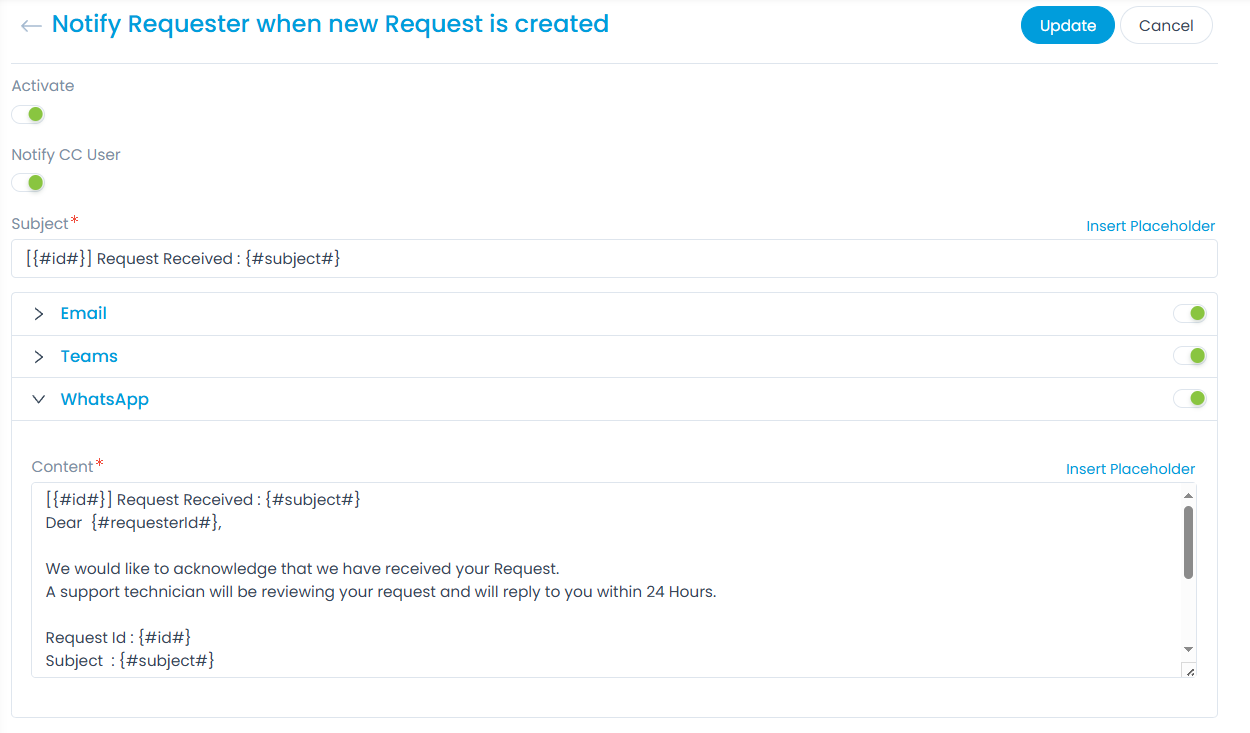
Here, you can do the following:
- Activate: You can activate or deactivate the email template.
- Notify CC User: You can activate or deactivate the notification for the users in CC.
- Edit Subject: You can edit the subject and insert placeholders.
- Edit Content: You can edit the email body and add placeholders as per the requirement. Also, you can now enable or disable event notifications specifically for Email, Teams, and WhatsApp applications. A configuration audit entry will also appear when changing notification settings.
The fields in the page may vary as per the module and template selected.
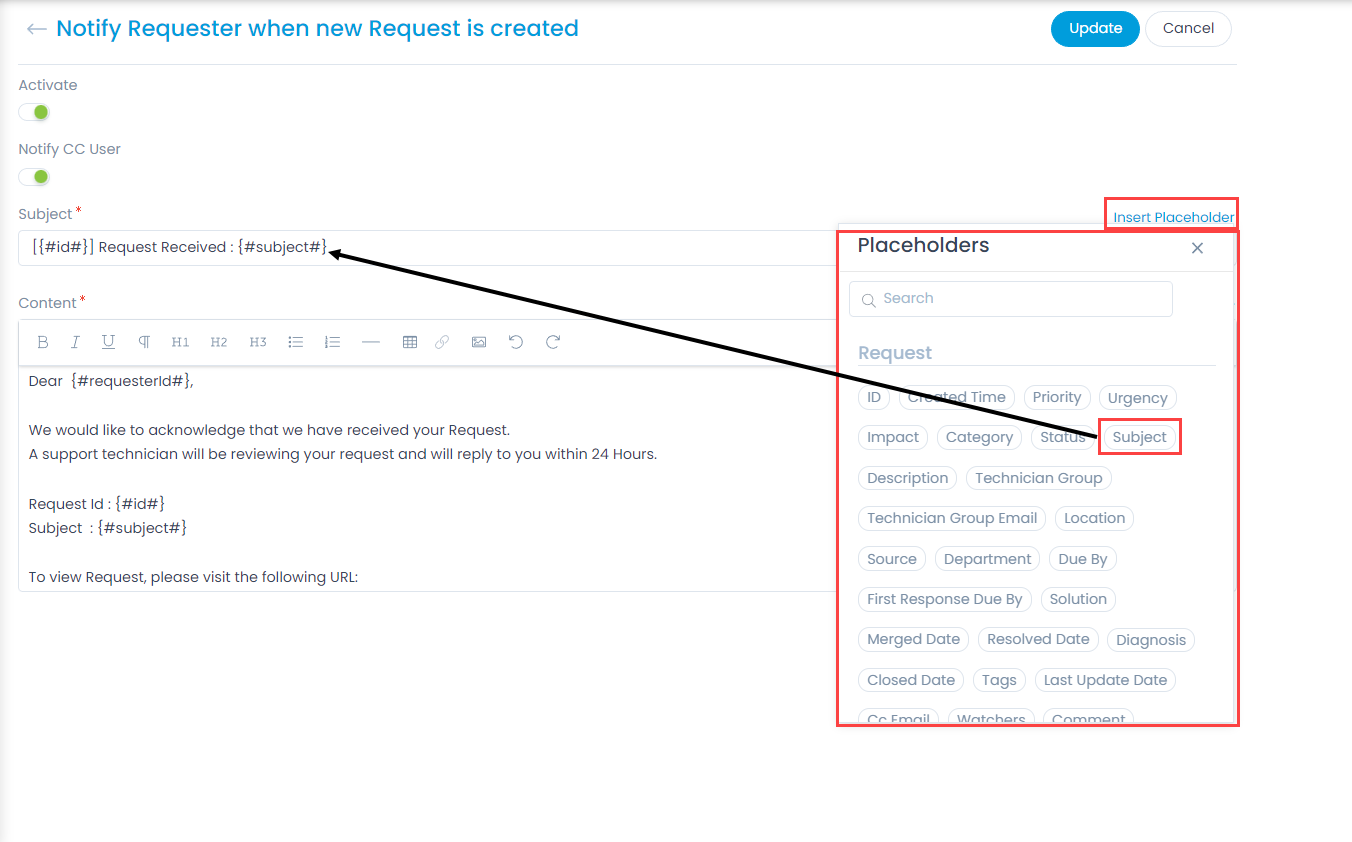
Inserting Placeholders
To insert the placeholders,
Click the blue link on the right-corner, and select the required field. Once clicked, the placeholder gets added in the subject as shown below.
By default, all the templates have necessary placeholders available to provide request specific information. You can add more based on the recommendations from the technicians.
To add or remove a tag, edit the desired template, and use the Insert Placeholder link.
You can only use the placeholders available in the list and cannot create new ones.
Using the placeholder you can also replace the link used for viewing/approving/rejecting approval with the email. For this, replace the "Approval Approve/Reject Button" placeholders with the following email placeholders in the Email notification content:
- approval.approve.mail
- approval.reject.mail
Prerequisite: Outgoing and Incoming Email Servers should be configured.
For example, the Event notification "Notify Approver When Approval is Created" is used here.

On clicking the Approve or Reject button in the above Approval email, you will be redirected to the email client from which you can send the Approval email to ServiceOps. Also, you can add a note above the command, which will be added to the ticket.

Requests can be reopened or closed from notifications sent via Email or Microsoft Teams,
- If only single user who is Requester/creator (Requester ONLY) of Ticket, is added as a recipient, then the URL Link for Reopen/Close will be provided.
- If multiple users are added, the placeholder will not be resolved and URL Link will not be provided.
- If any event notification having Reopen/Close placeholder and Notify CC user flag as enabled, then also the Placeholder will not be resolved and URL Link will not be provided.