SCIM Provisioning in Okta
This guide outlines how to configure SCIM-based user provisioning in Okta. It assumes you have already obtained your SCIM Endpoint and Authentication Token from the ServiceOps SCIM configuration page.
Prerequisites
Before you begin, ensure the following:
ServiceOps
SCIM EndpointURL generated from the ServiceOps SCIM configuration page.- Valid
Authentication Token(Bearer Token) from the same configuration.
Okta
- An Okta license that includes Lifecycle Management.
- Administrative privileges to manage Applications (typically Application Administrator or Super Administrator roles).
Part 1: Create an Application Integration in Okta
Steps:
- Log in to the Okta Admin Console.
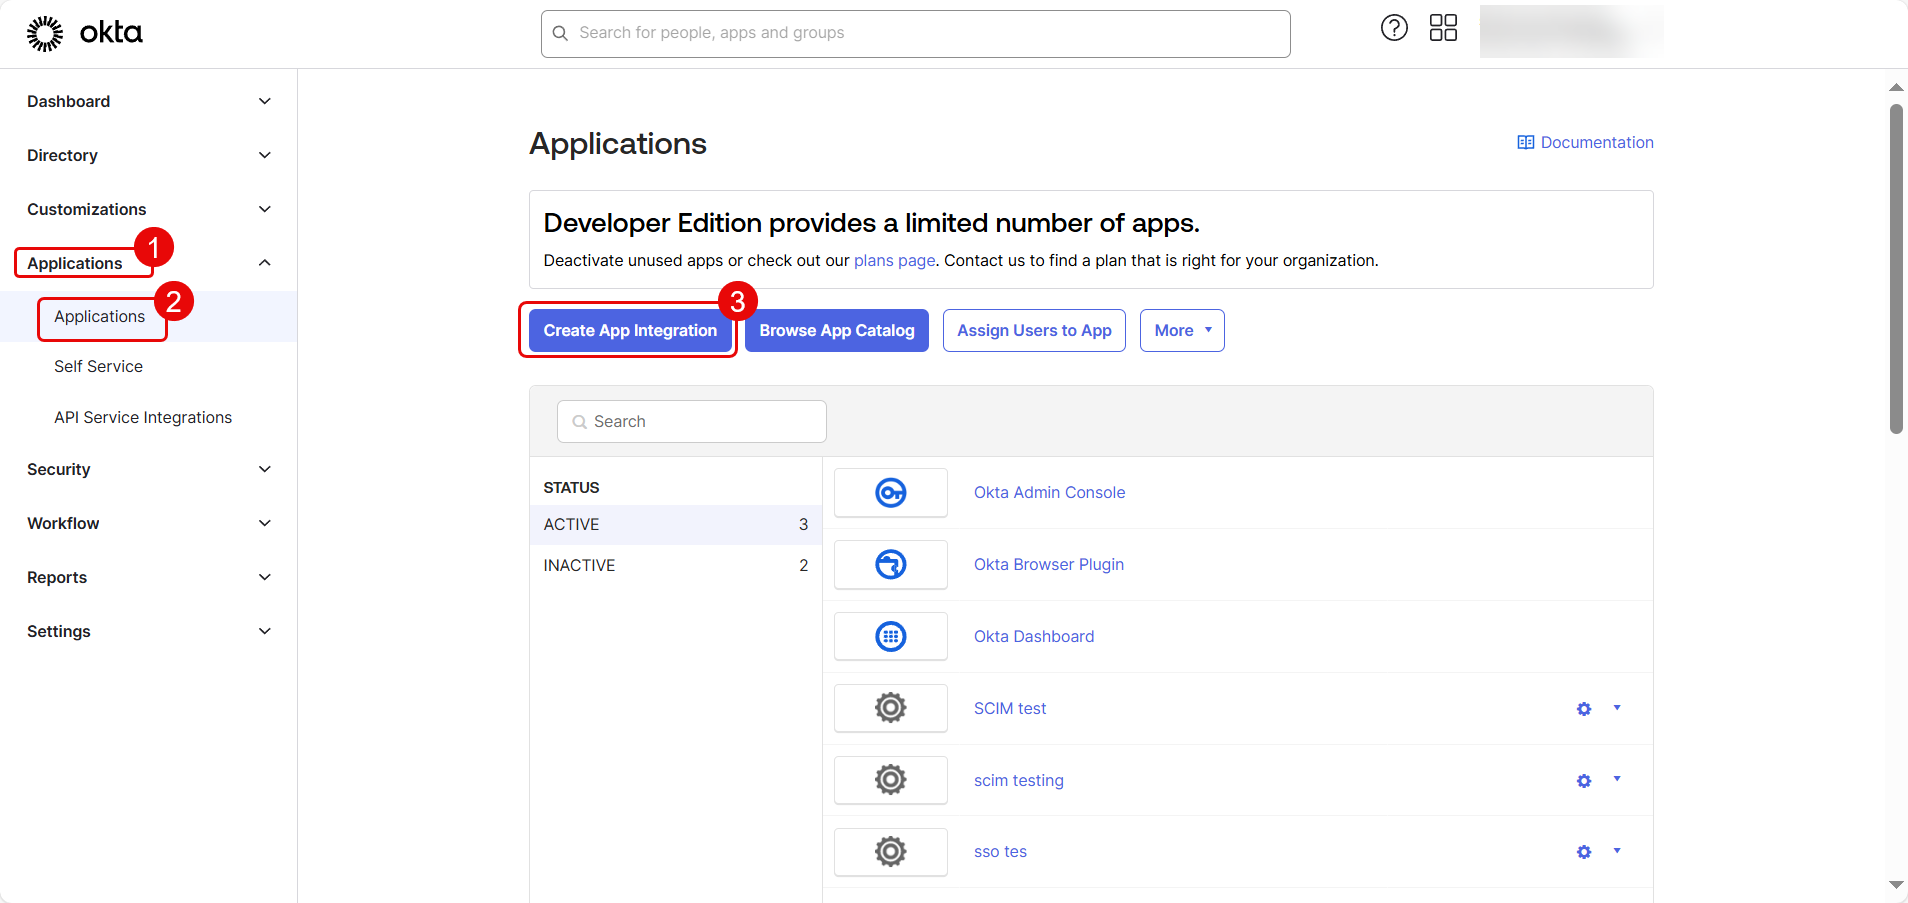
- Navigate to Applications > Applications and click Create App Integration.
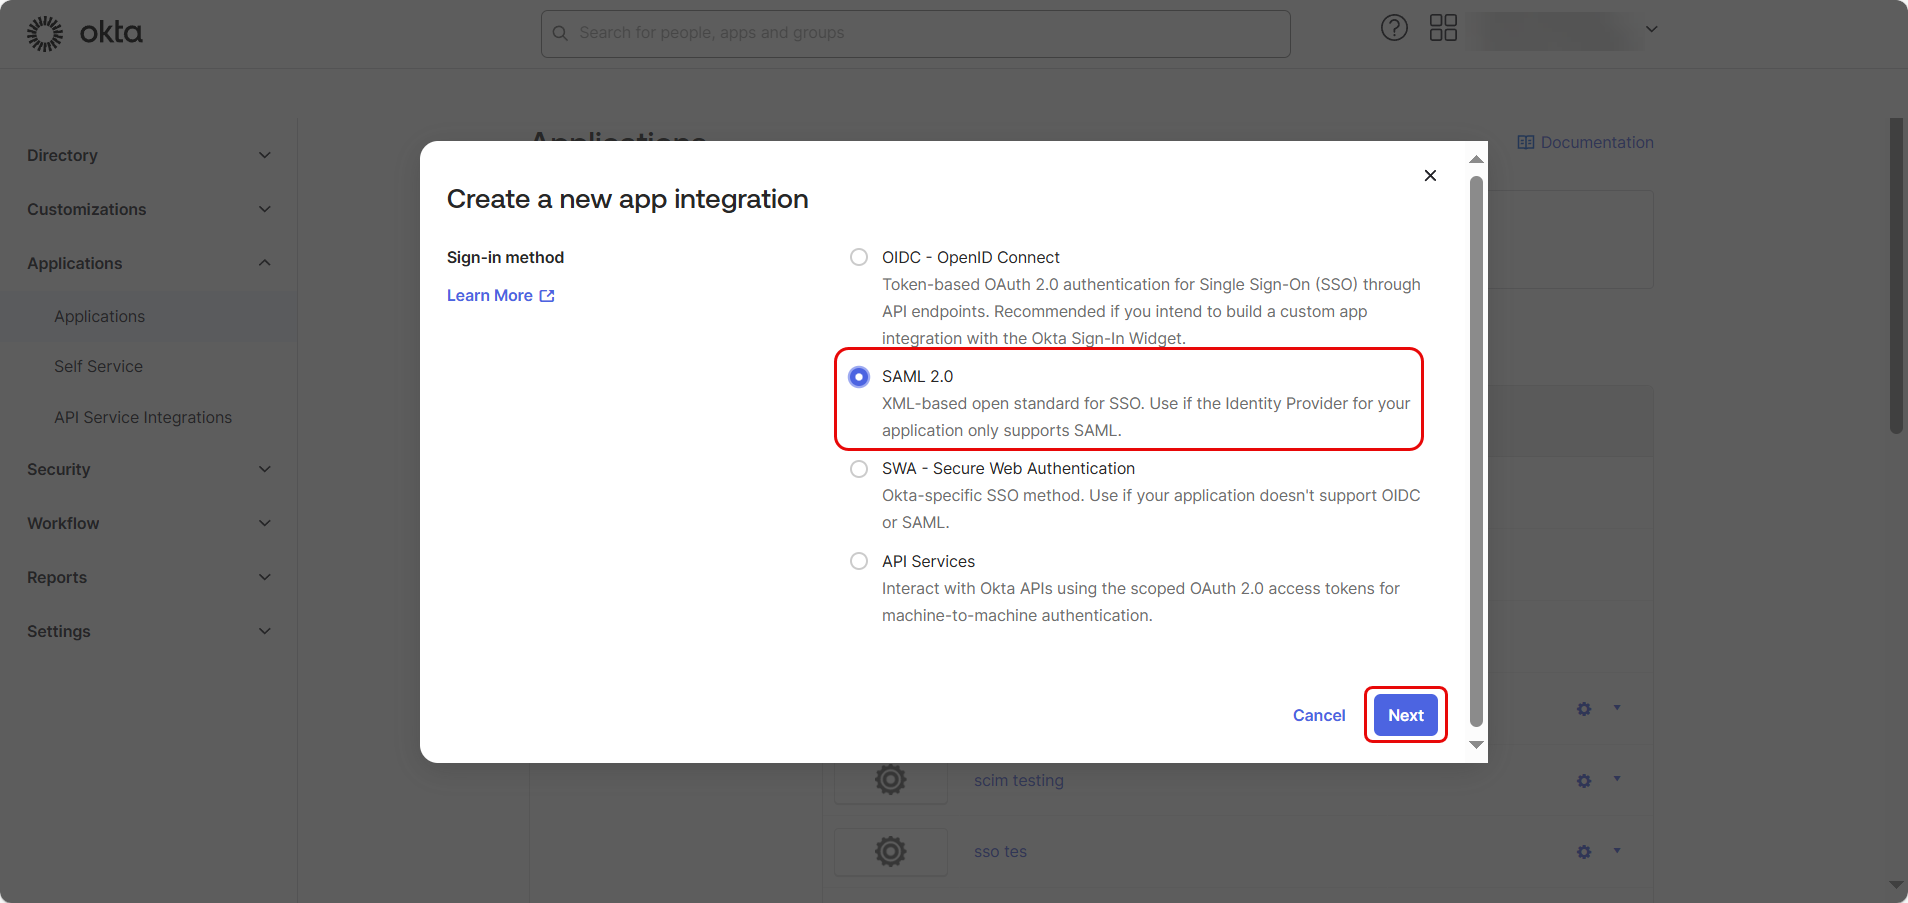
- In the "Create a new app integration" dialog, select SAML 2.0 as the Sign-in method and click Next.
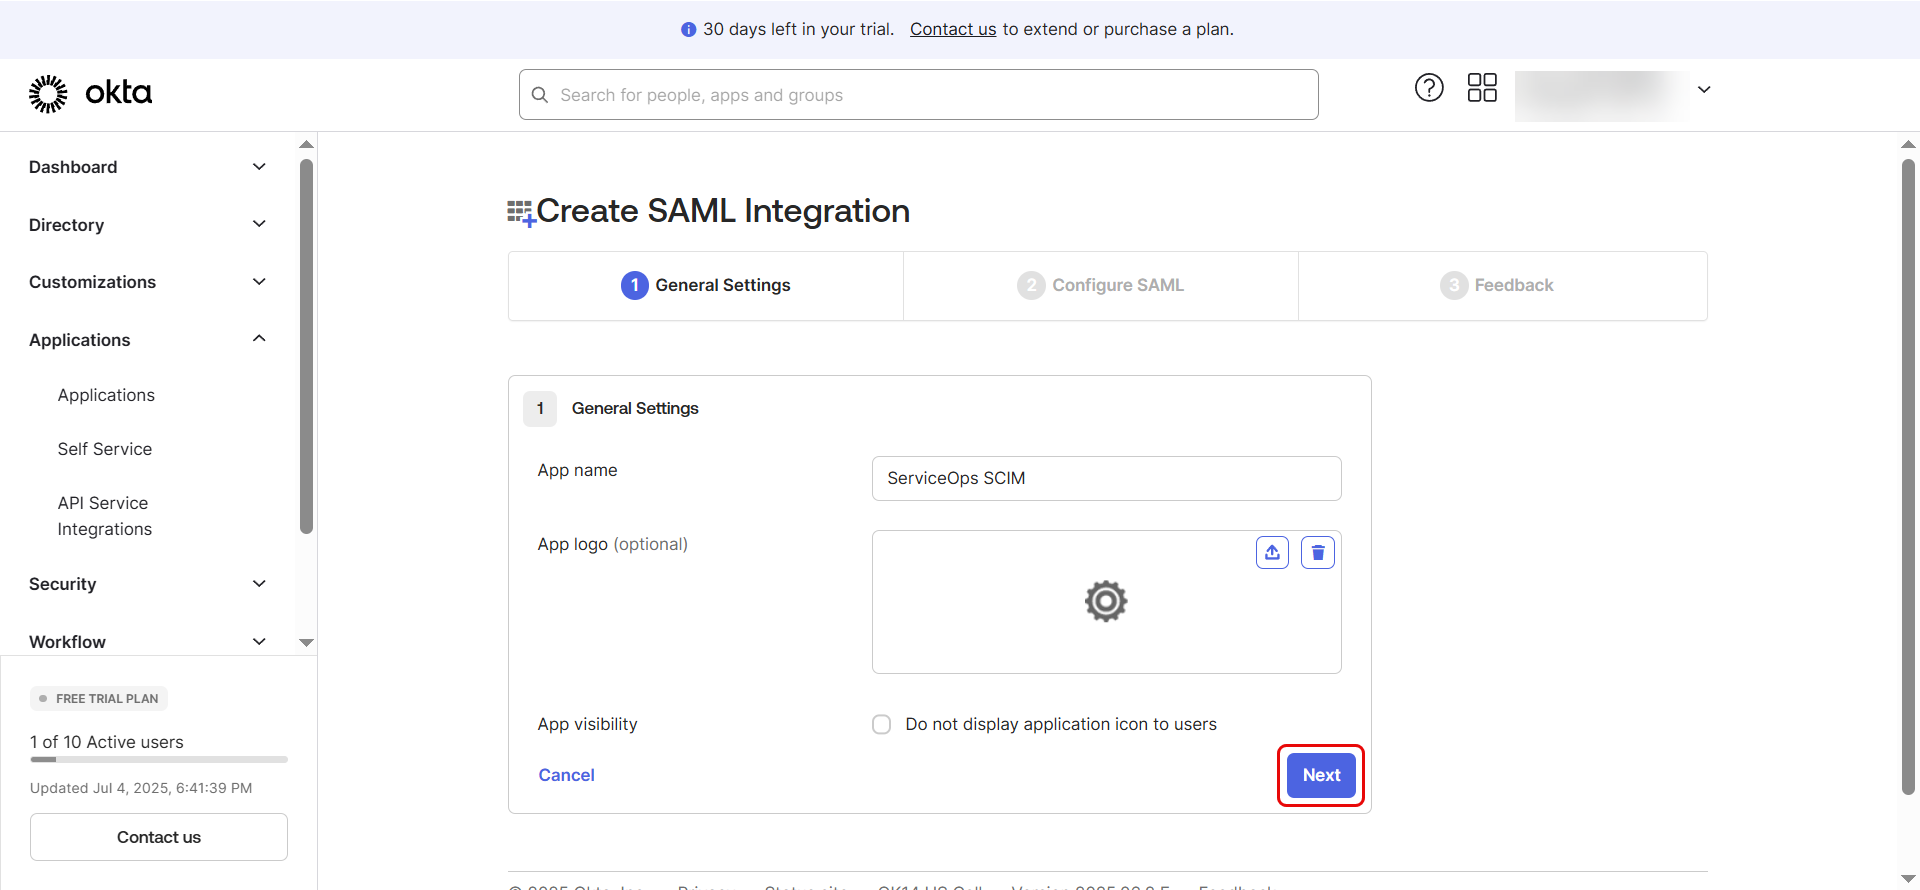
- Provide an app name (e.g.,
ServiceOps SCIM), optionally upload a logo, and click Next.
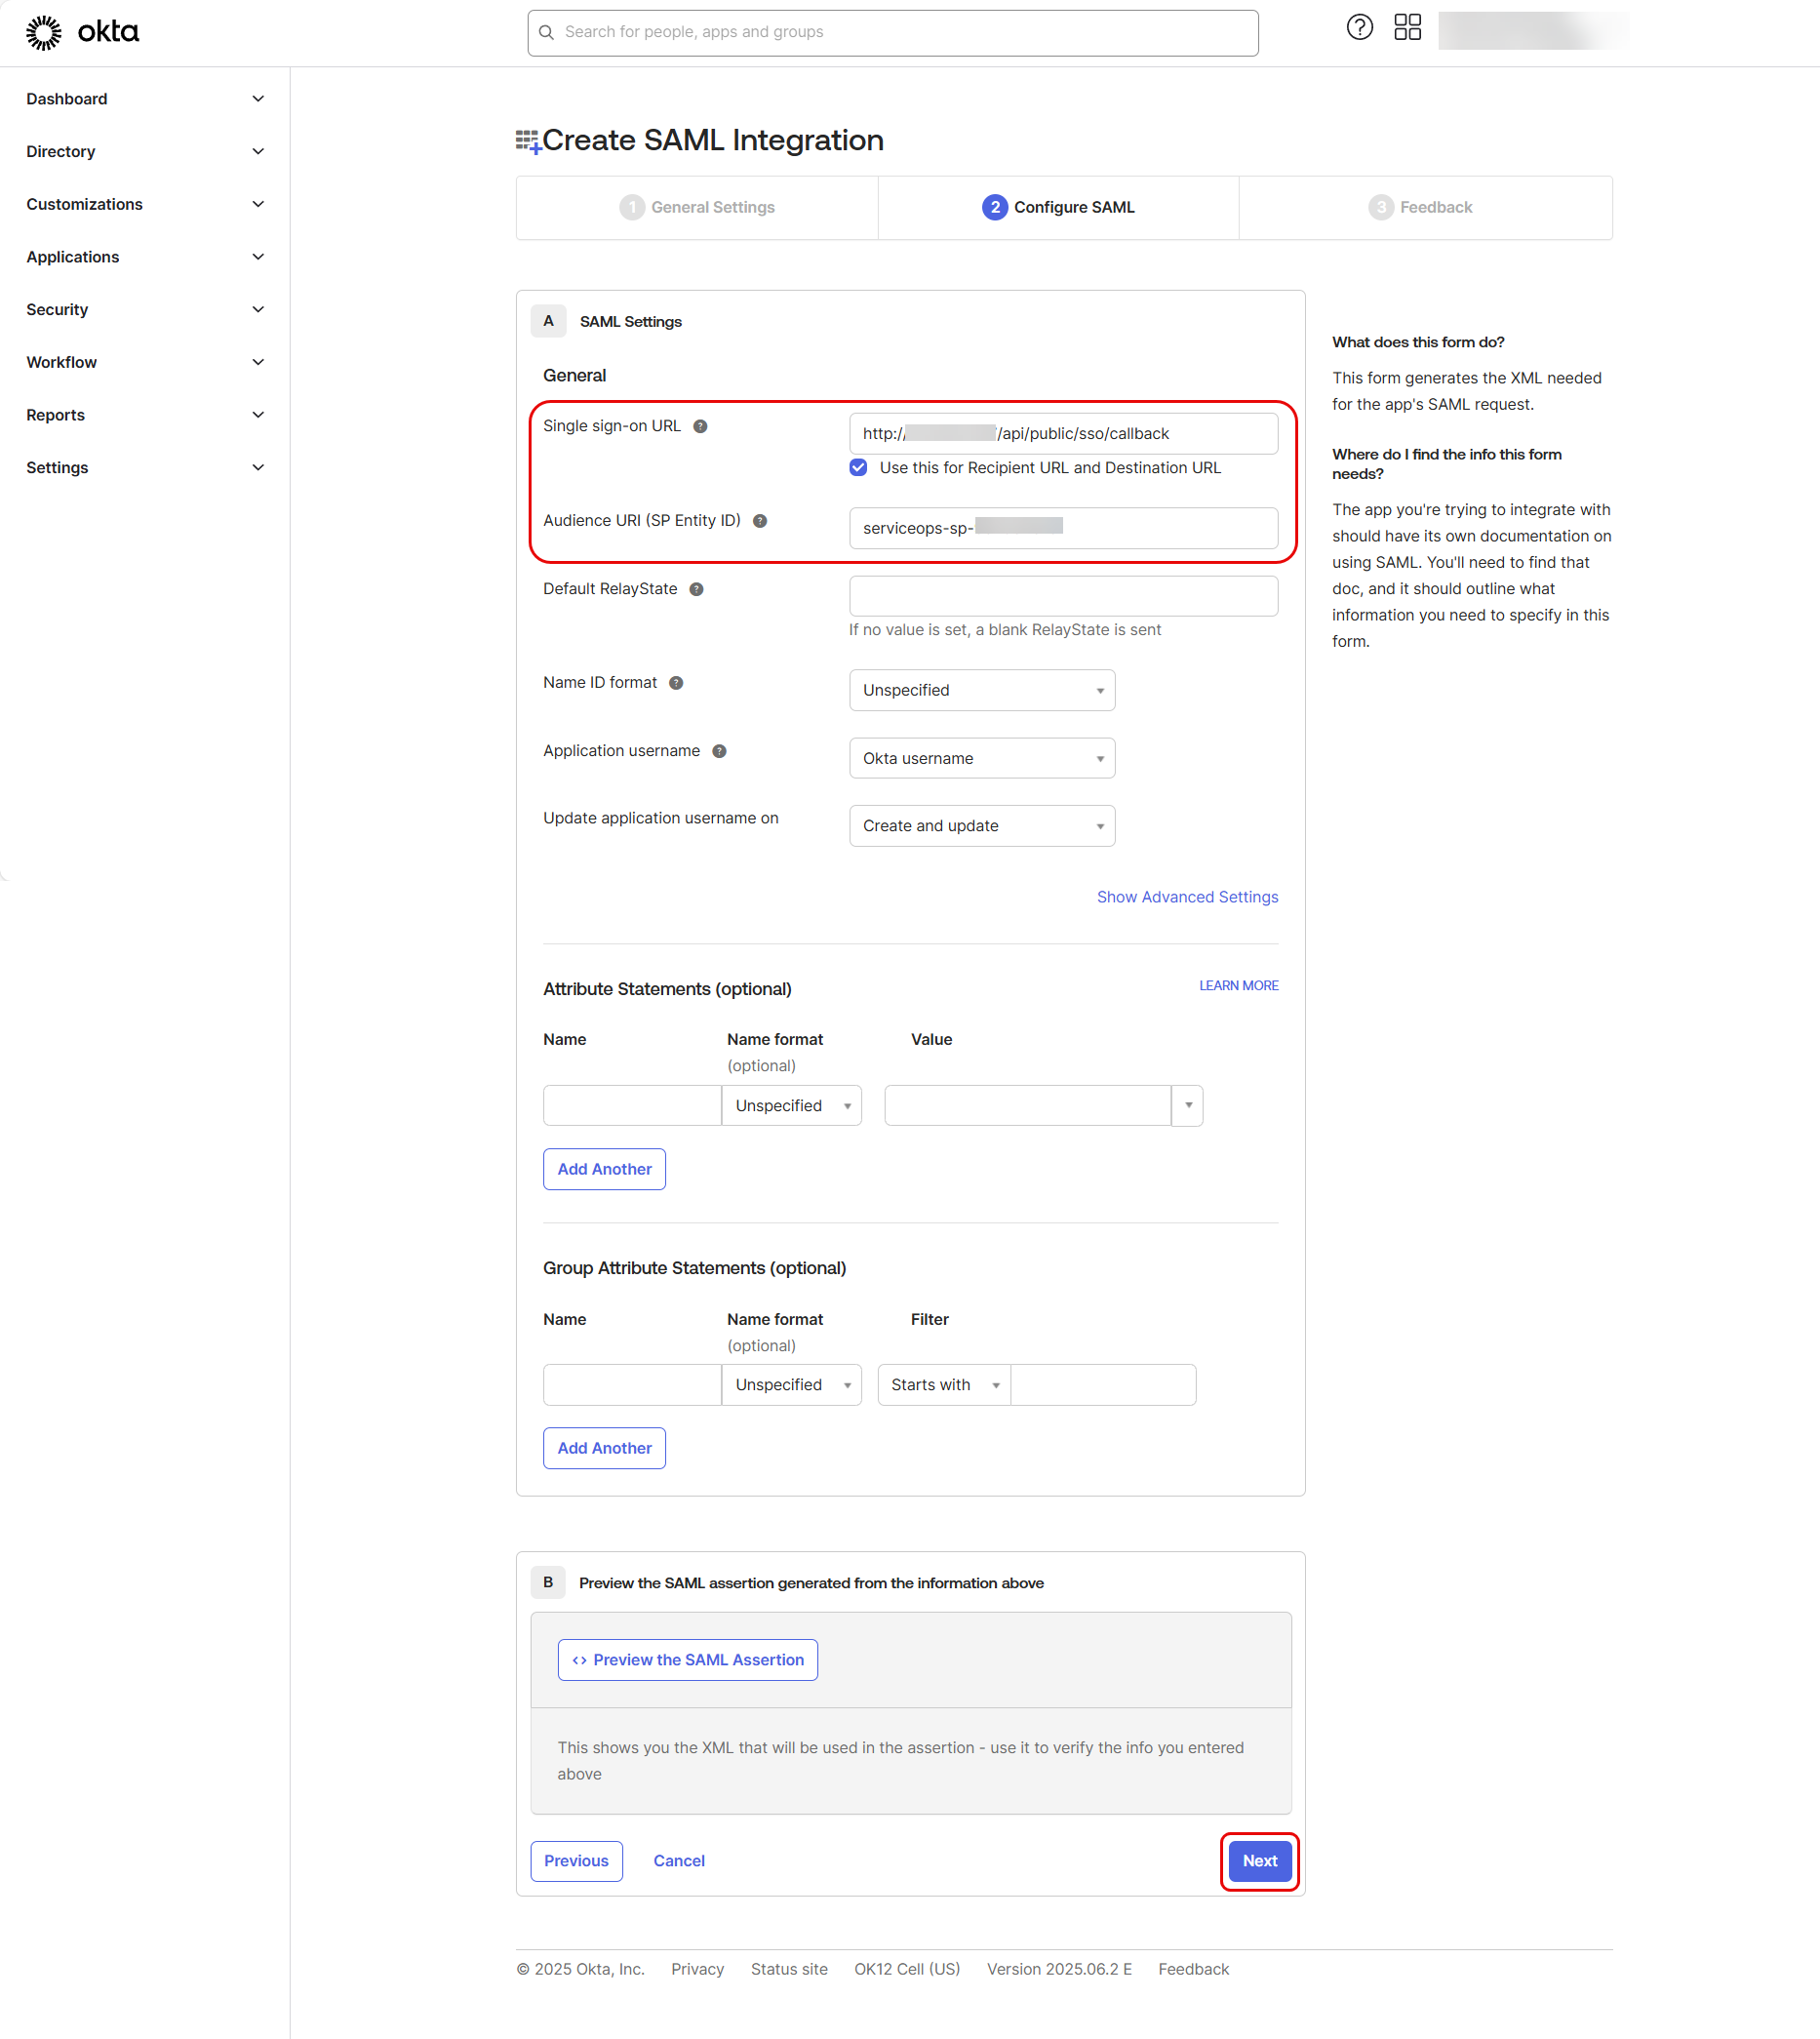
In "Configure SAML", enter the following from ServiceOps IDP details:
- Single sign on URL:
https://your-serviceops-instance/saml/acs - Audience URI (SP Entity ID):
https://your-serviceops-instance/saml/metadata
Then click Next.
- Single sign on URL:
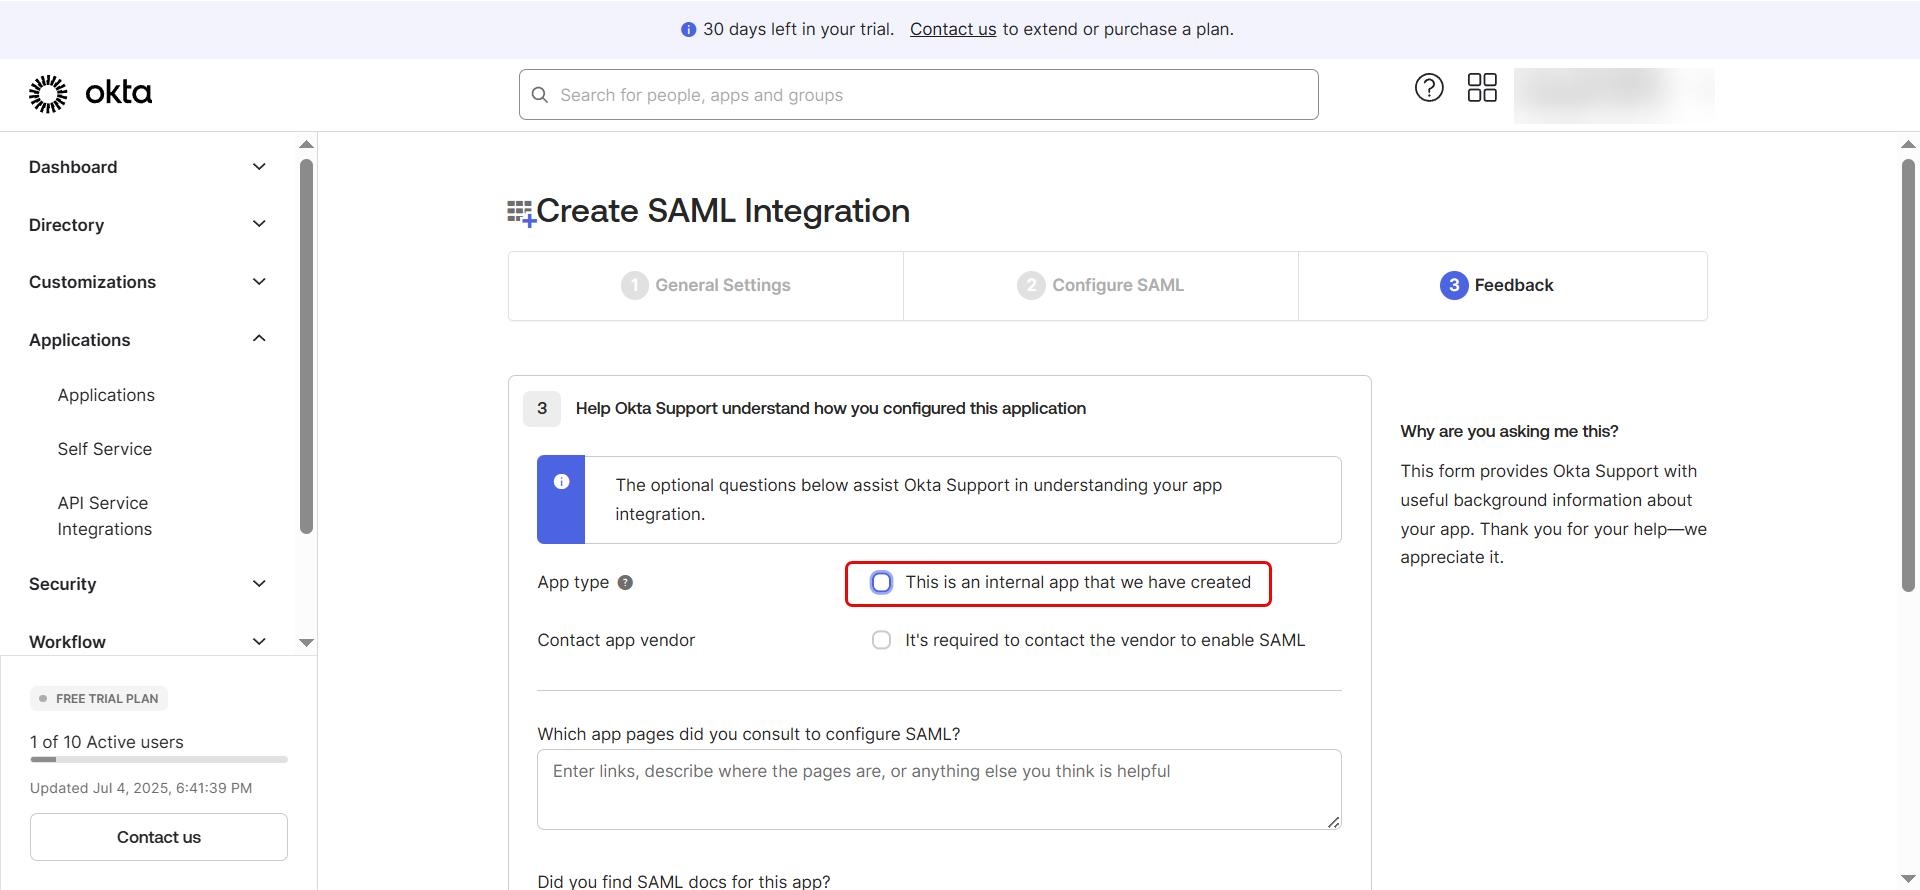
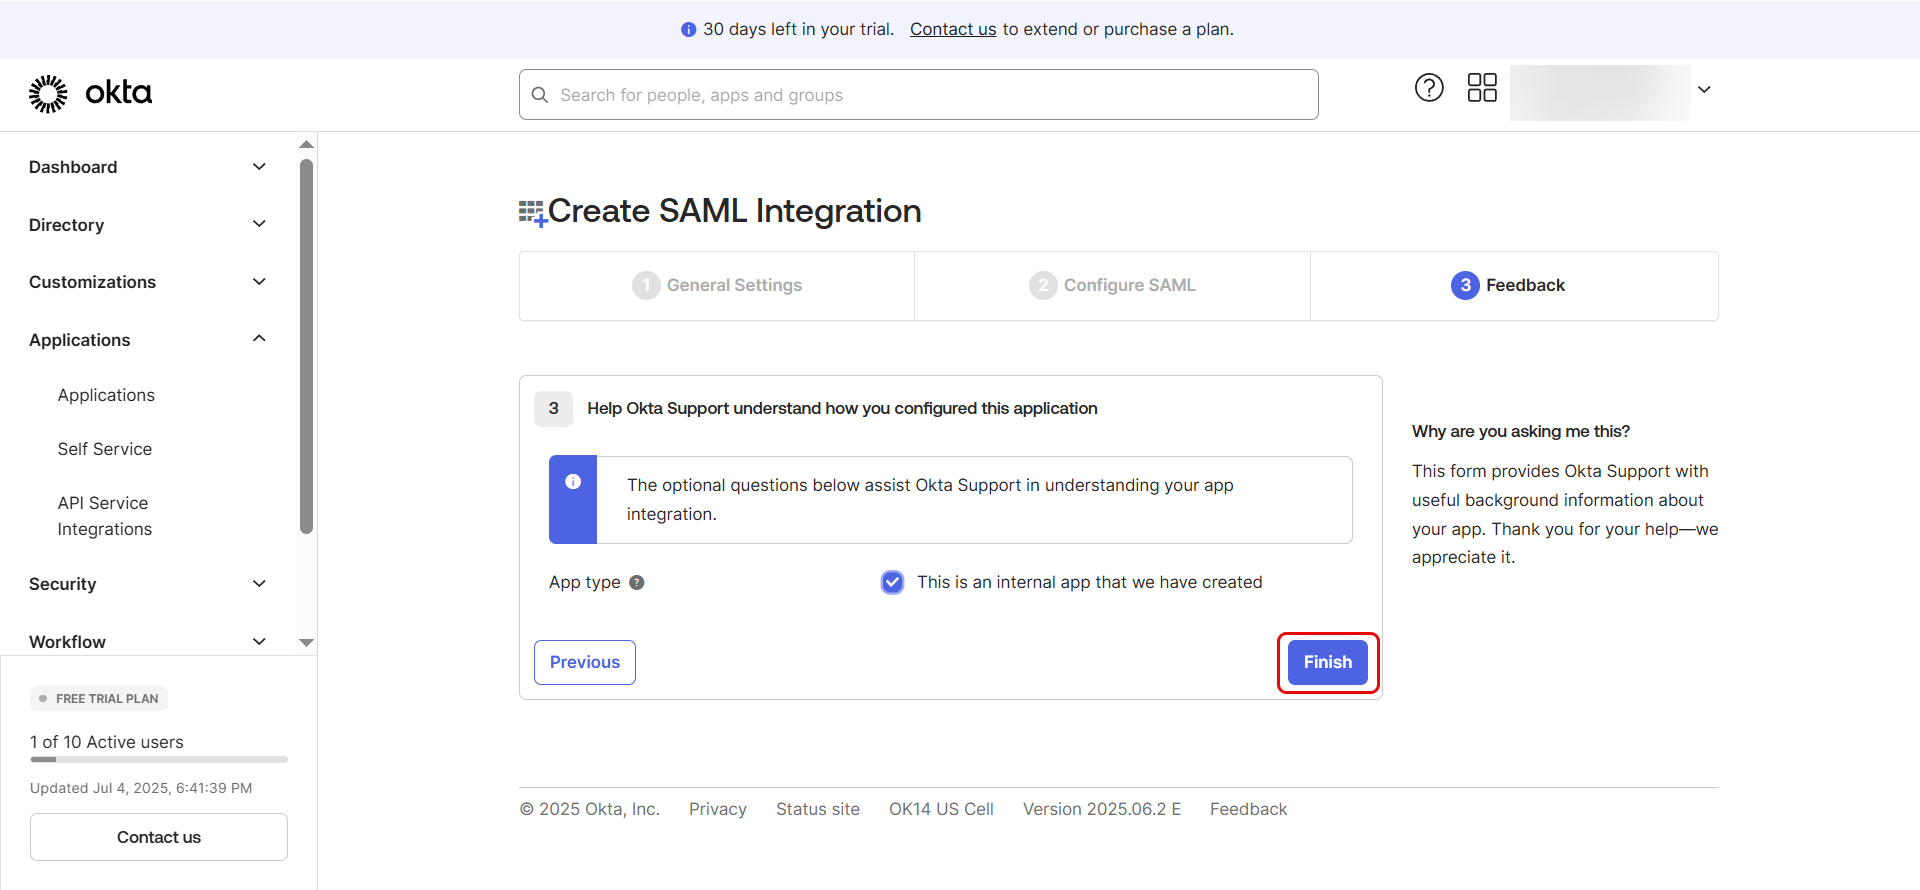
- On the final screen, select "This is an internal app that we have created" and click Finish.
Part 2: Enable and Configure SCIM Provisioning
- In the newly created app, go to the General tab and click Edit.
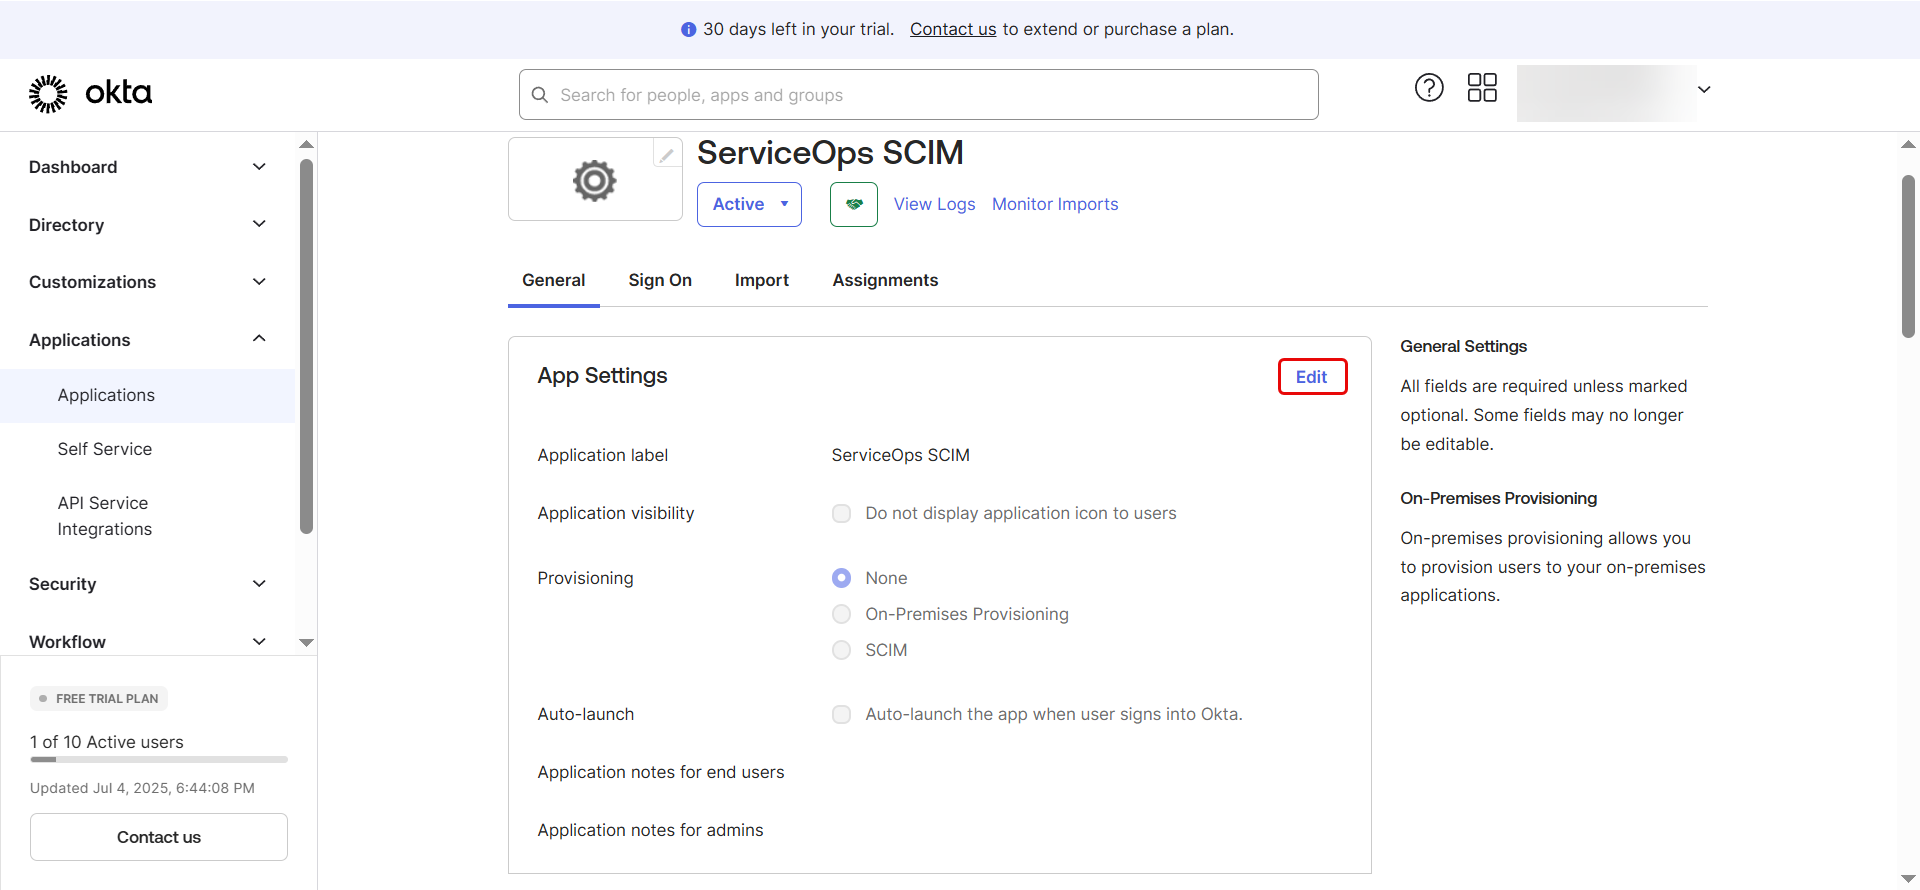
- Check Enable SCIM provisioning and click Save.
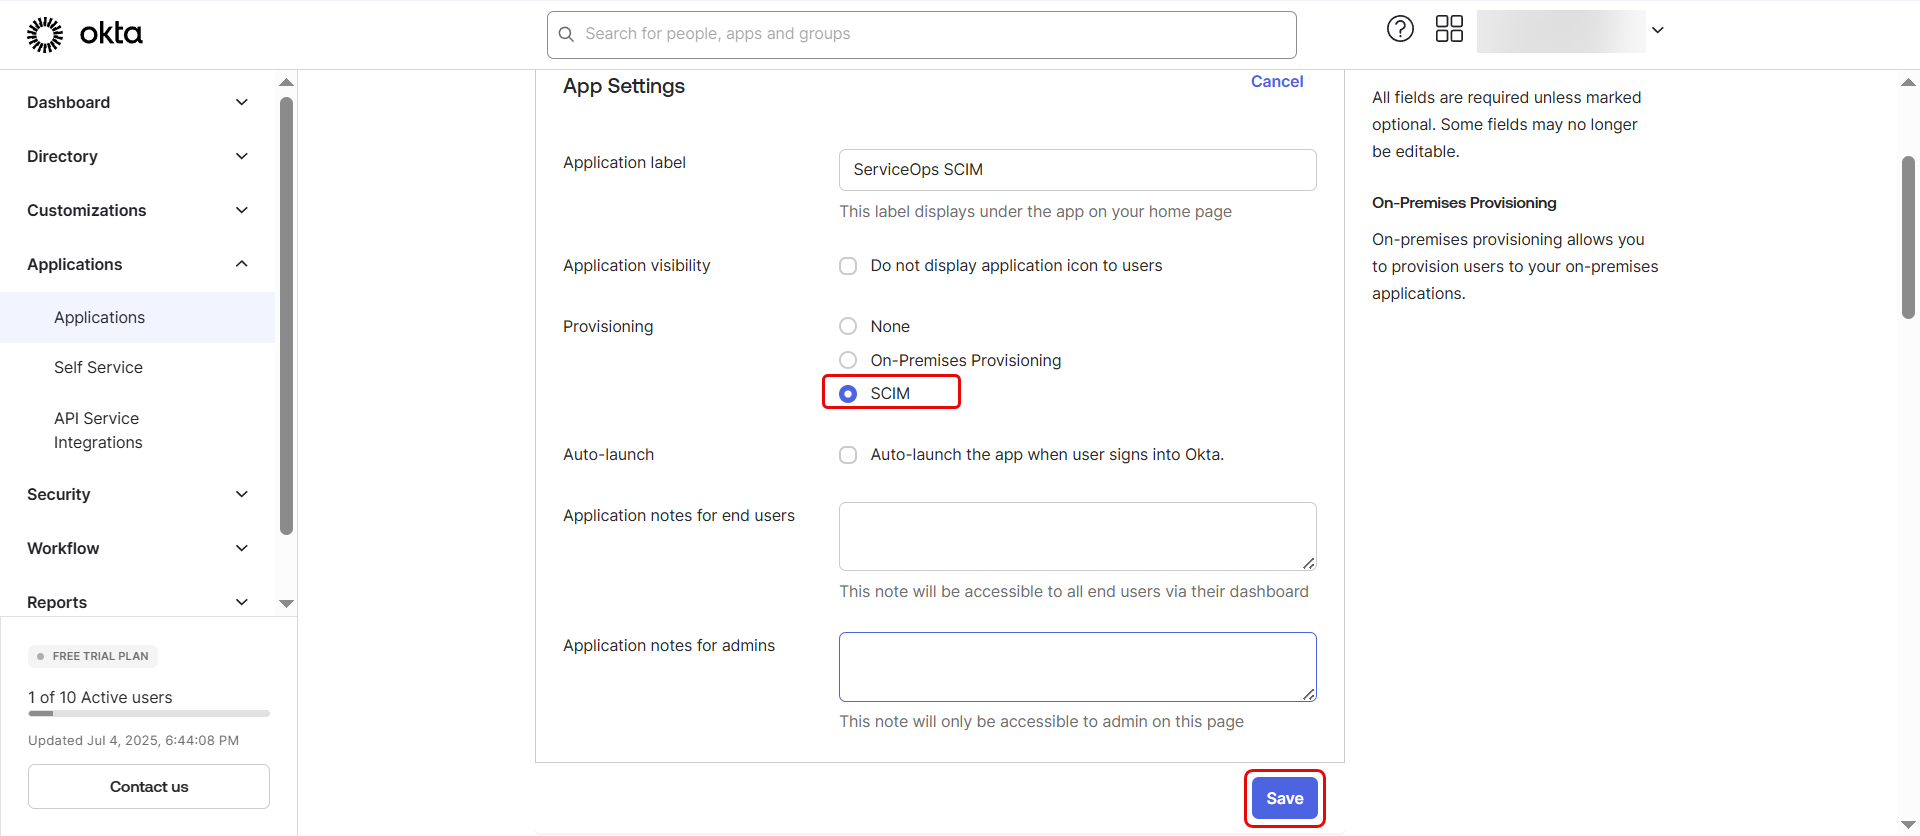
A Provisioning tab will now appear. Click on it.
Under Integration settings on the left menu, click Edit.
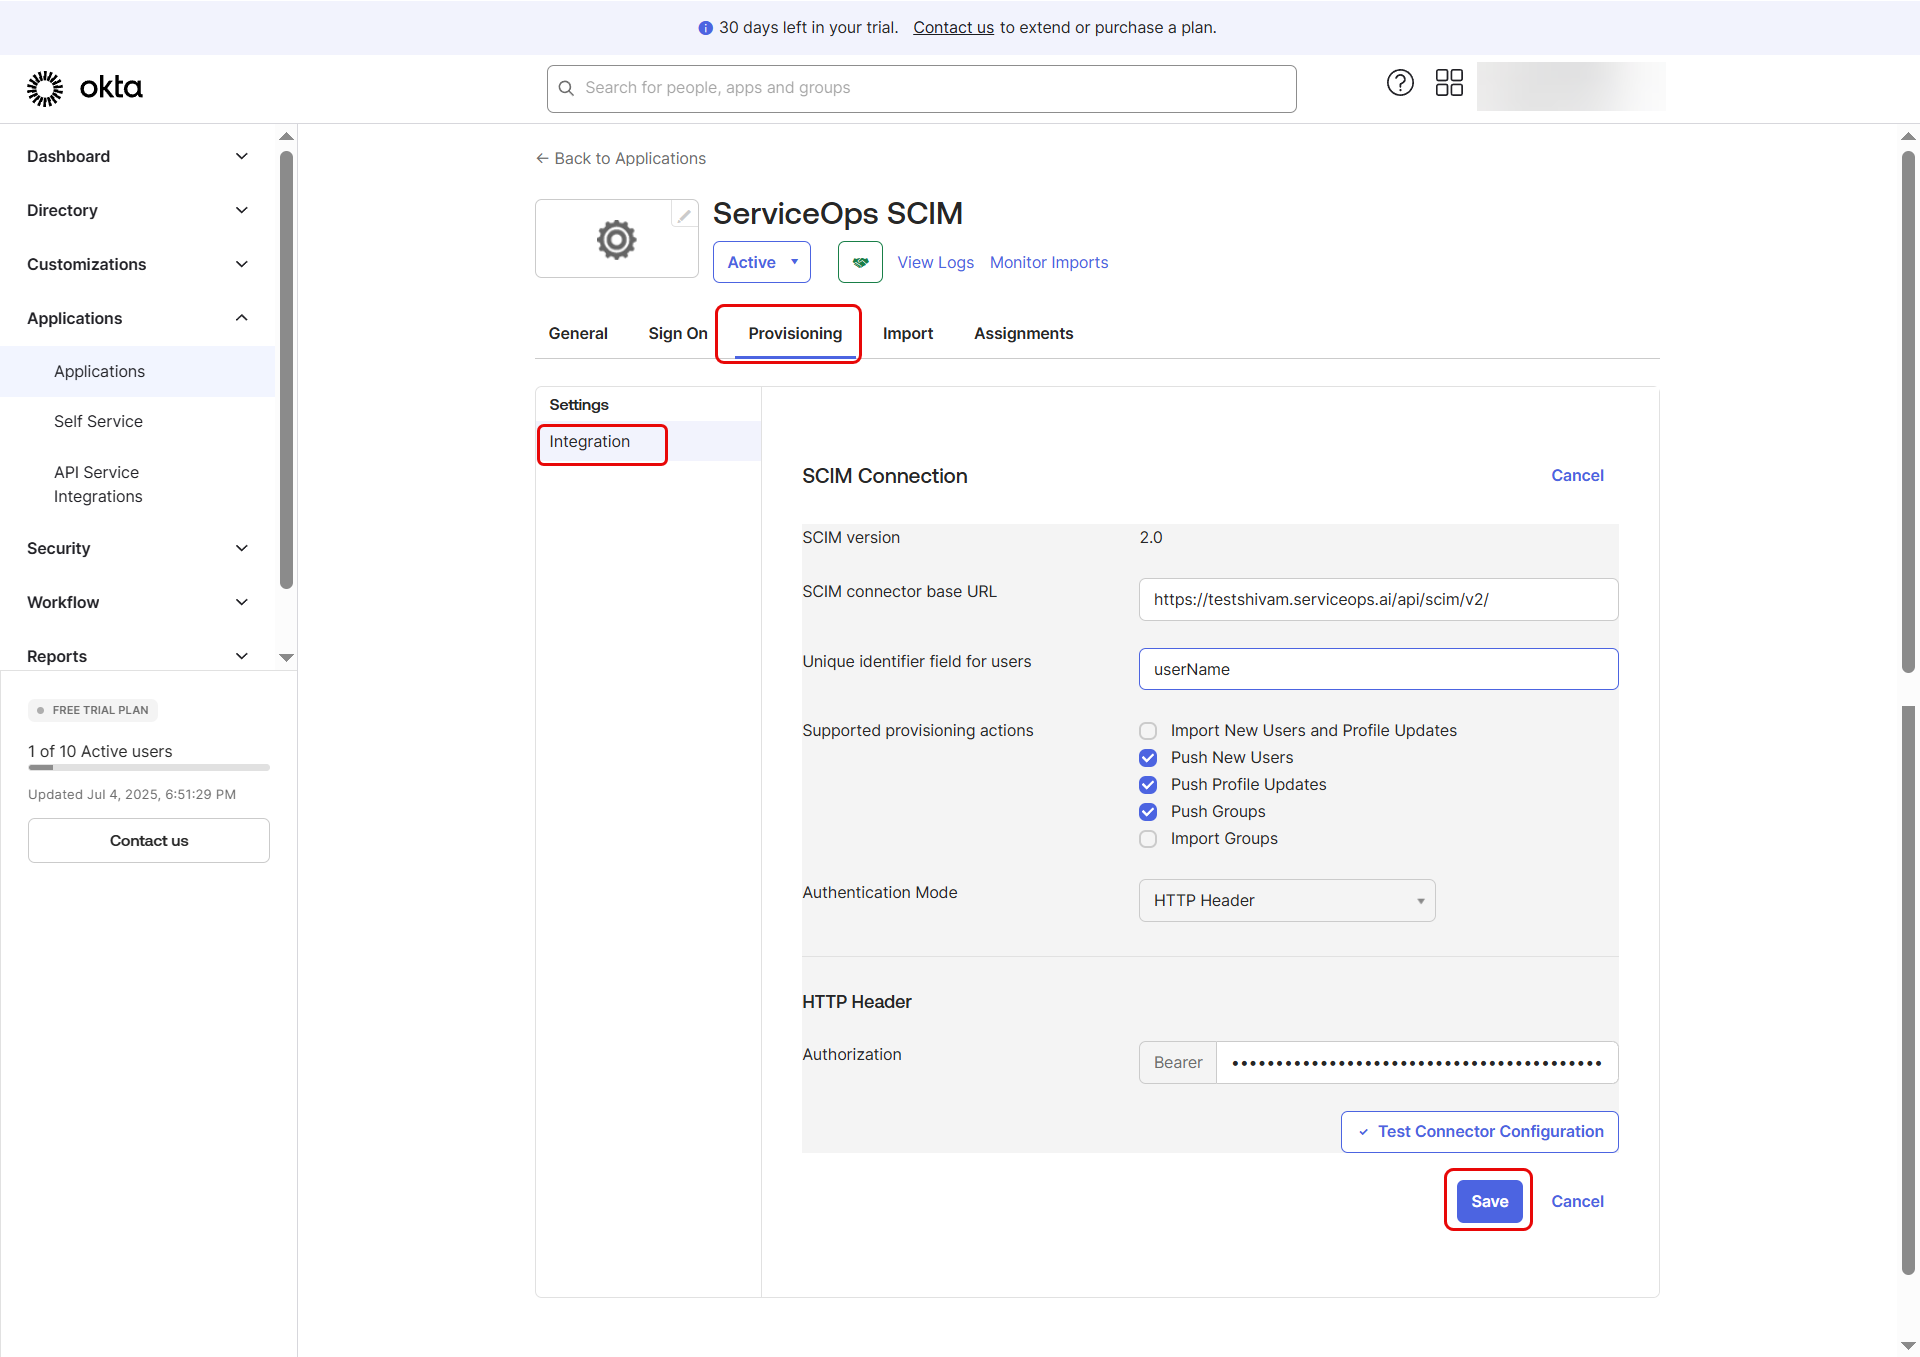
Enter your details:
- SCIM connector base URL: Paste your ServiceOps
SCIM Endpoint. - Unique identifier field for users:
userName - Supported provisioning actions: Select Push New Users, Push Profile Updates, and Push Groups.
- Authentication Mode:
HTTP Header - Authorization: Paste your
Bearer Tokenobtained from ServiceOps.
- SCIM connector base URL: Paste your ServiceOps
Click Test Connector Configuration and ensure it returns success. Then click Save. Once the connection is successfully done, only then you will be allowed to Save the configuration.

Next, above the Integration tab, To App and To Okta tabs will appear.
Part 3: Configure Provisioning To App
In the Provisioning tab, select To App from the left menu and click Edit.
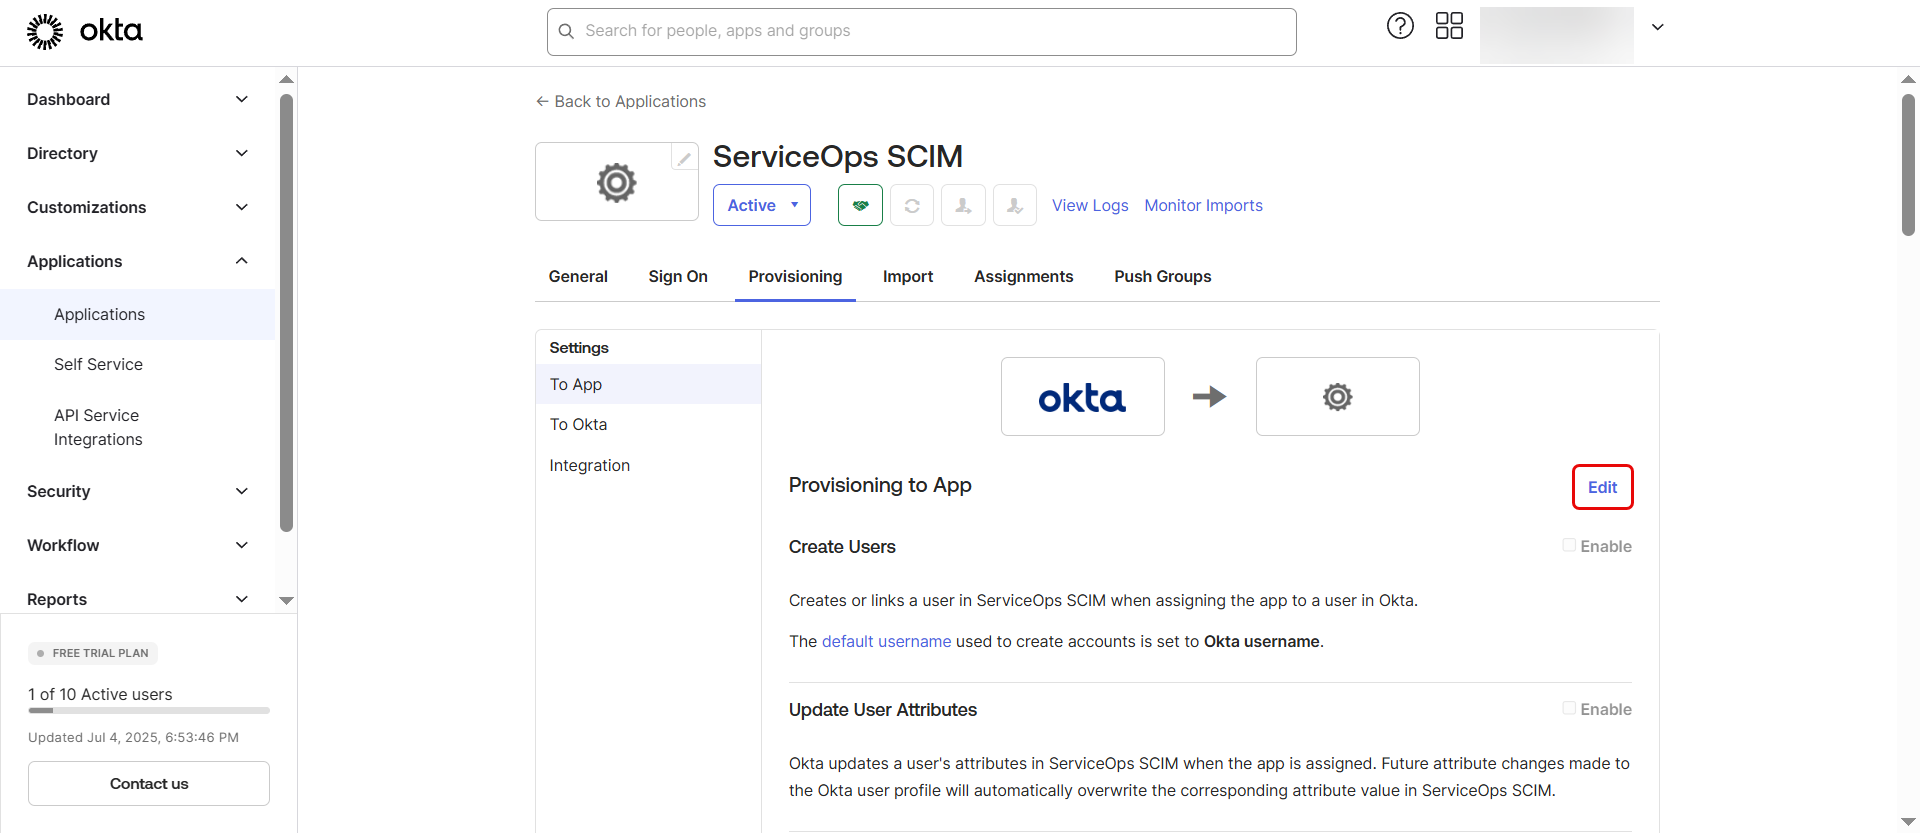
Enable the following options that you want to provision using SCIM:
- Create Users
- Update User Attributes
- Deactivate Users
Click Save.

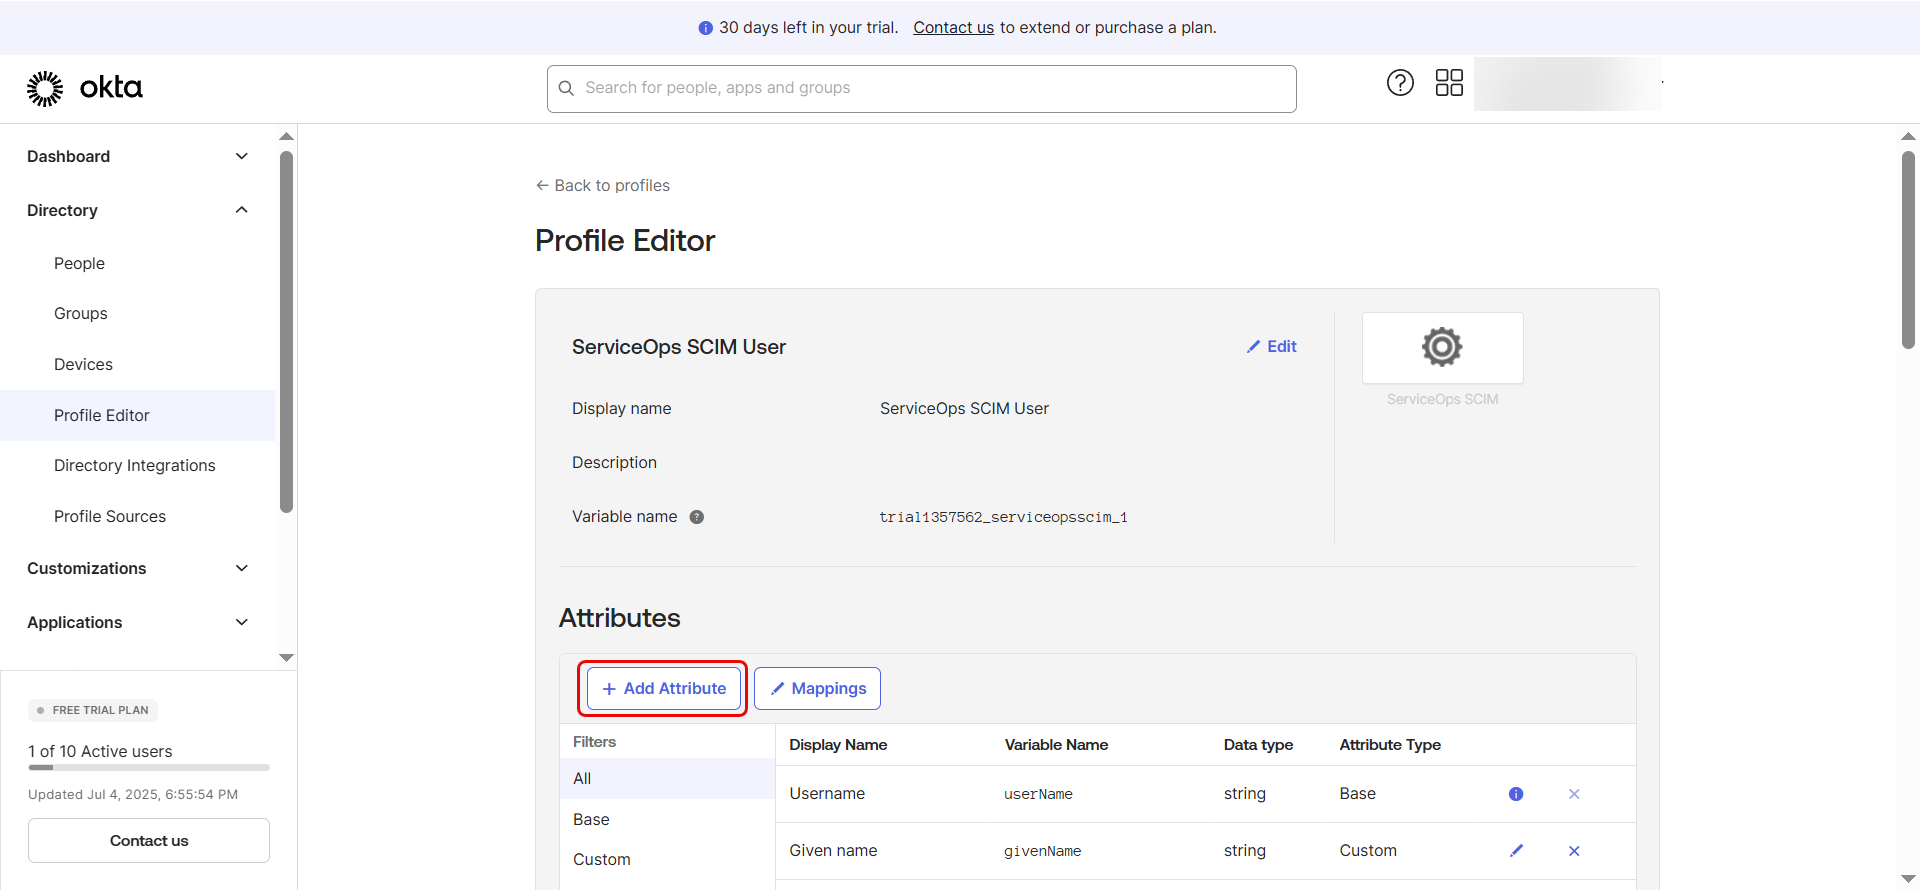
Next, scroll down and click on the Go to Profile Editor button or from the left panel select Directory > Profile Editor tab.
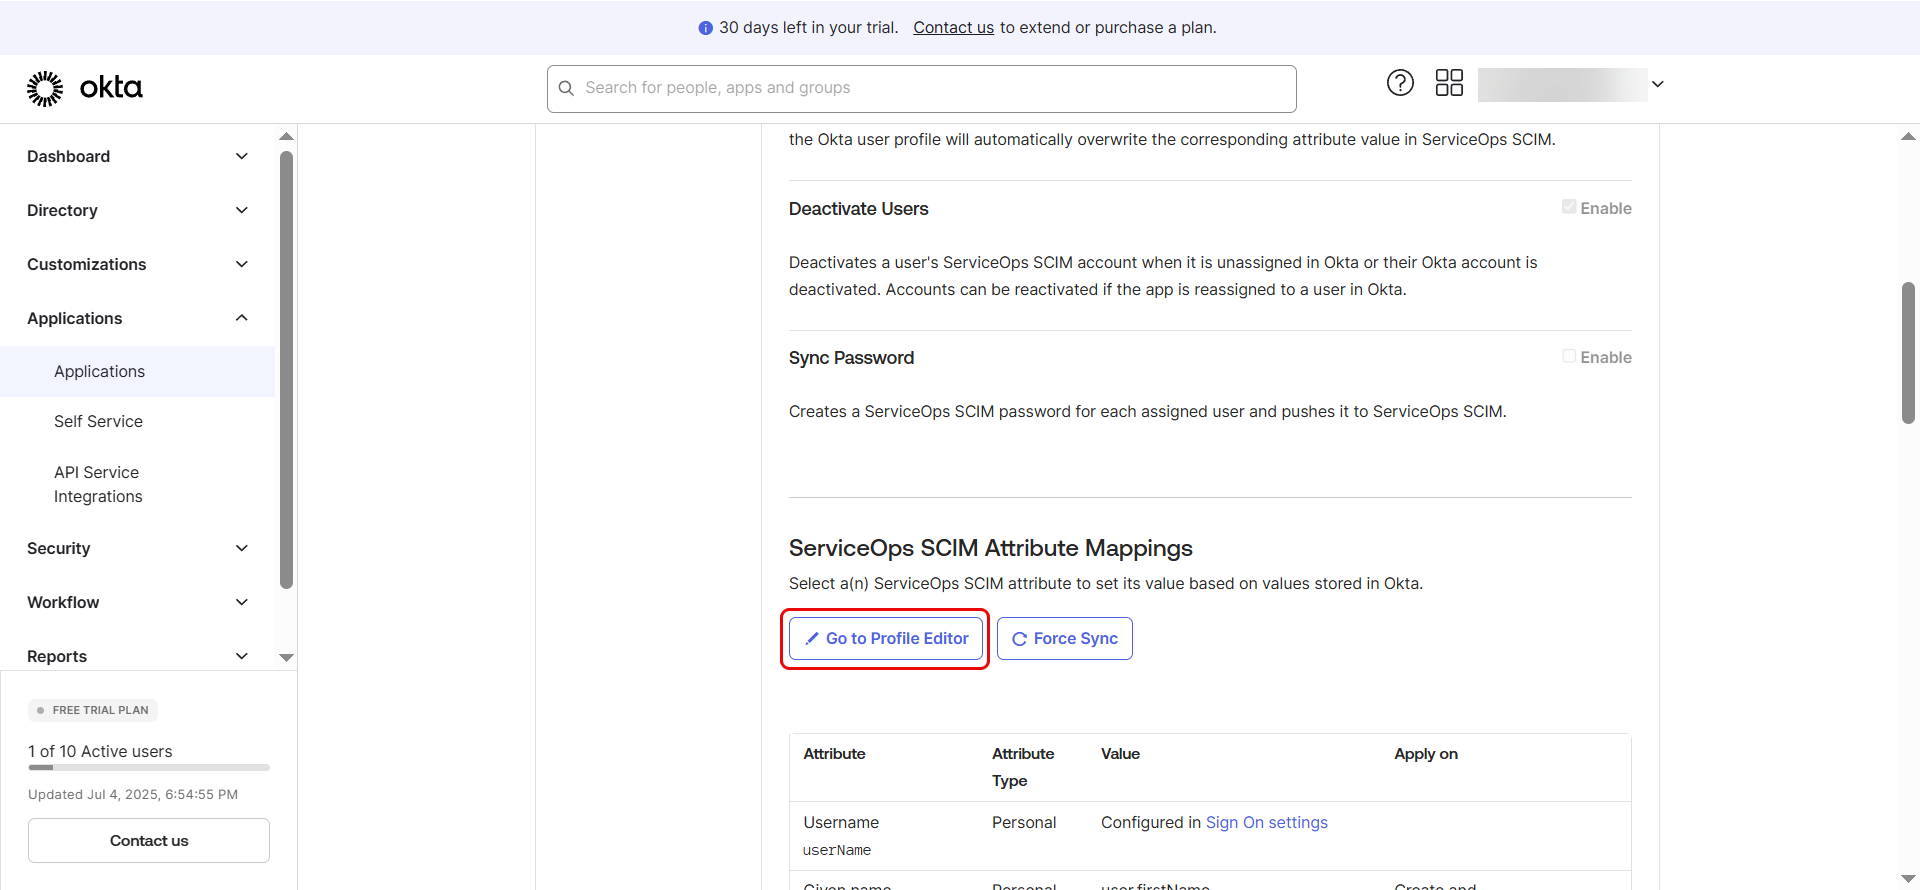
Part 4: Set Up Attribute Mappings
Scroll down to the Attribute Mappings section under Provisioning > To App.
Review or adjust mappings such as:
- userName -> userName
- givenName -> name.givenName
- familyName -> name.familyName
- primaryEmail -> emails[type eq "work"].value
Additional Steps for Mapping Manager or Custom Fields
Case 1: Mapping the Manager Field
If you wish to synchronize the Manager attribute from ServiceOps to Okta, follow these steps:
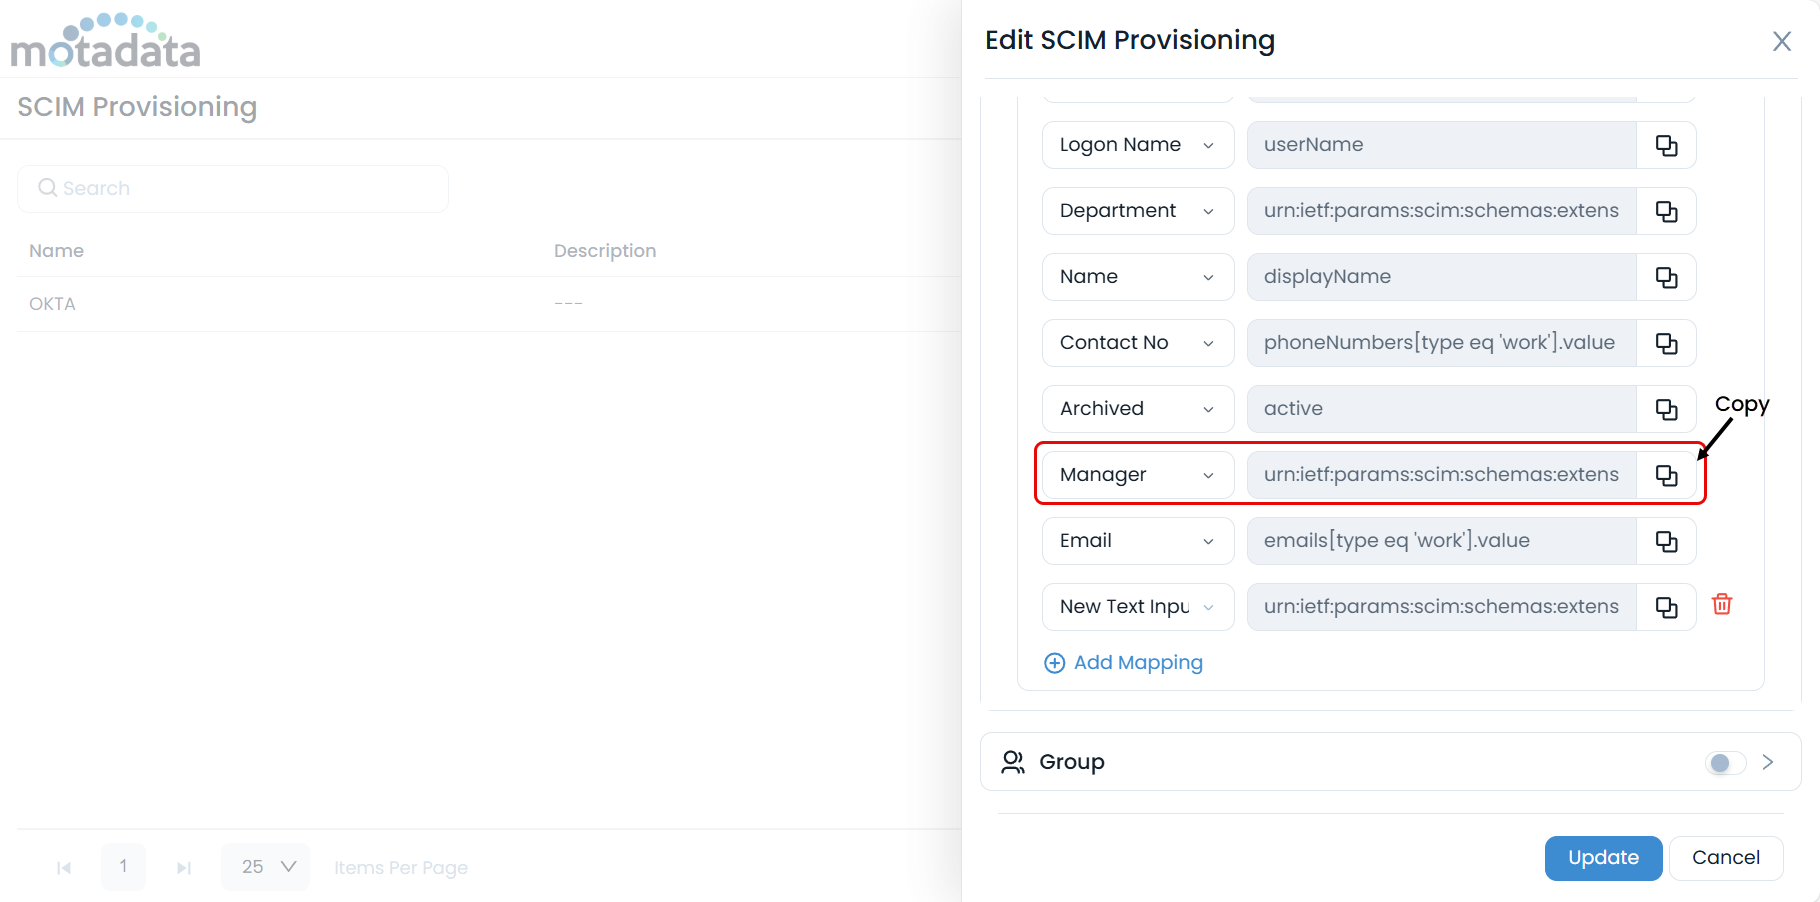
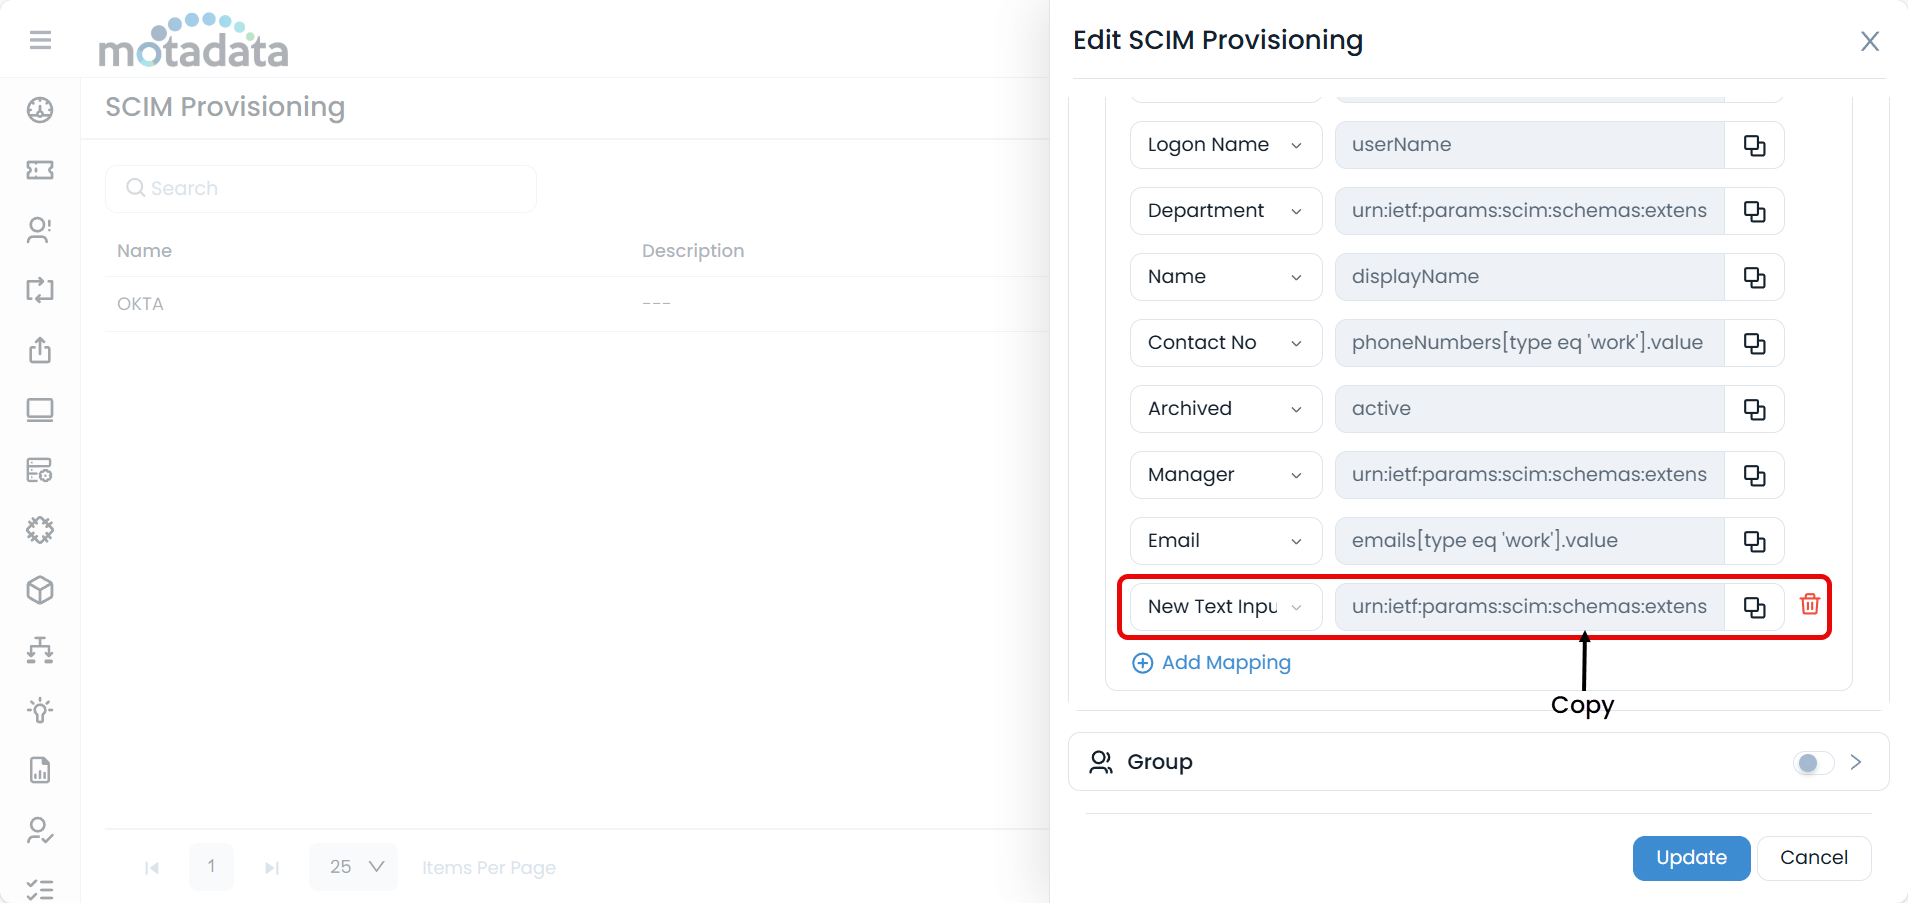
Retrieve the Manager Attribute Name from ServiceOps
In your ServiceOps SCIM configuration page, copy the attribute value designated for the Manager field.
Create a New Attribute in Okta
- Go to your Okta app’s Provisioning > To App page.
- Click "Go to Profile Editor", then click "Add Attribute".
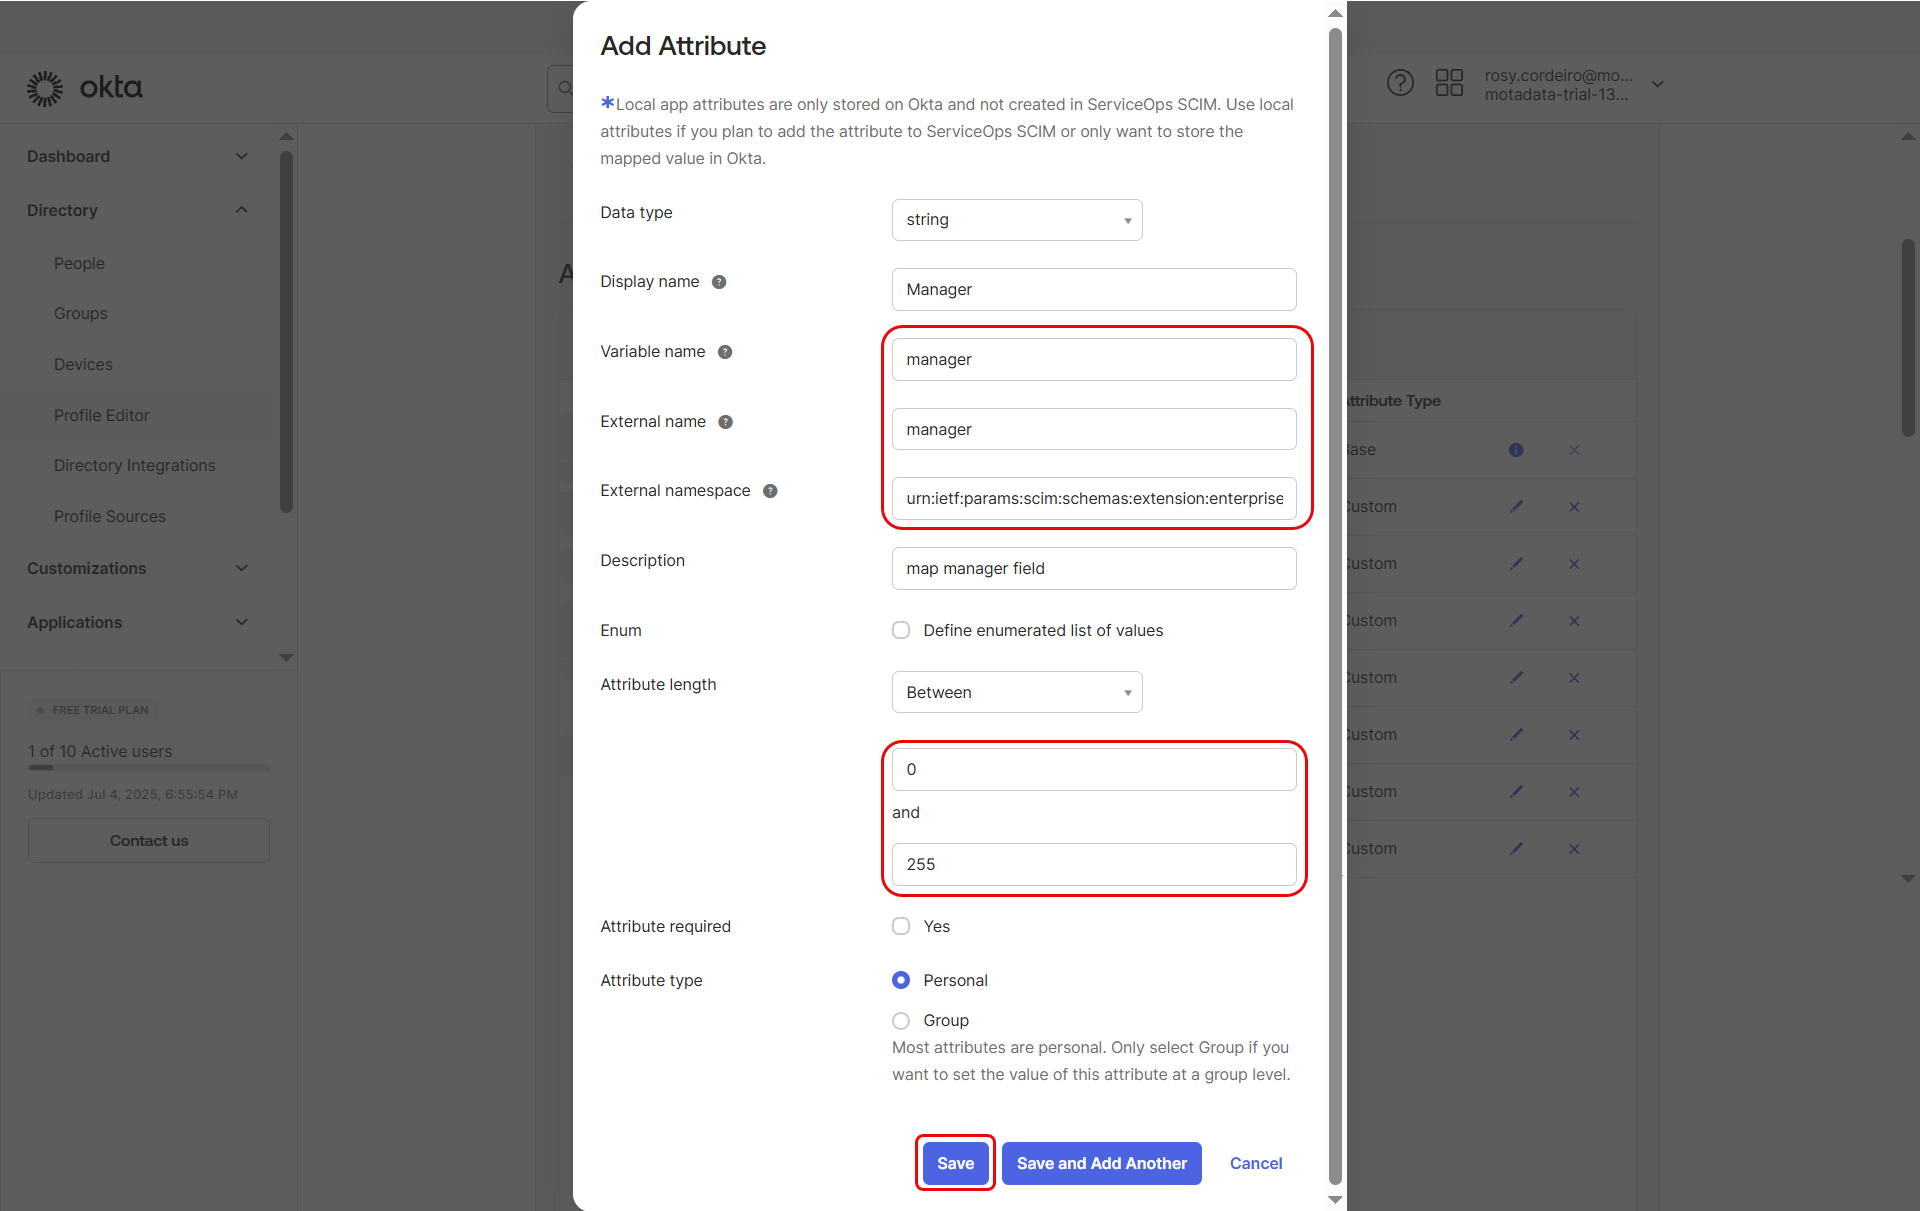
- Enter the below details:
- In the External Namespace field, paste the copied value from ServiceOps but remove the ":manager" portion, so only the external namespace remains.
- Set:
- Data type: string
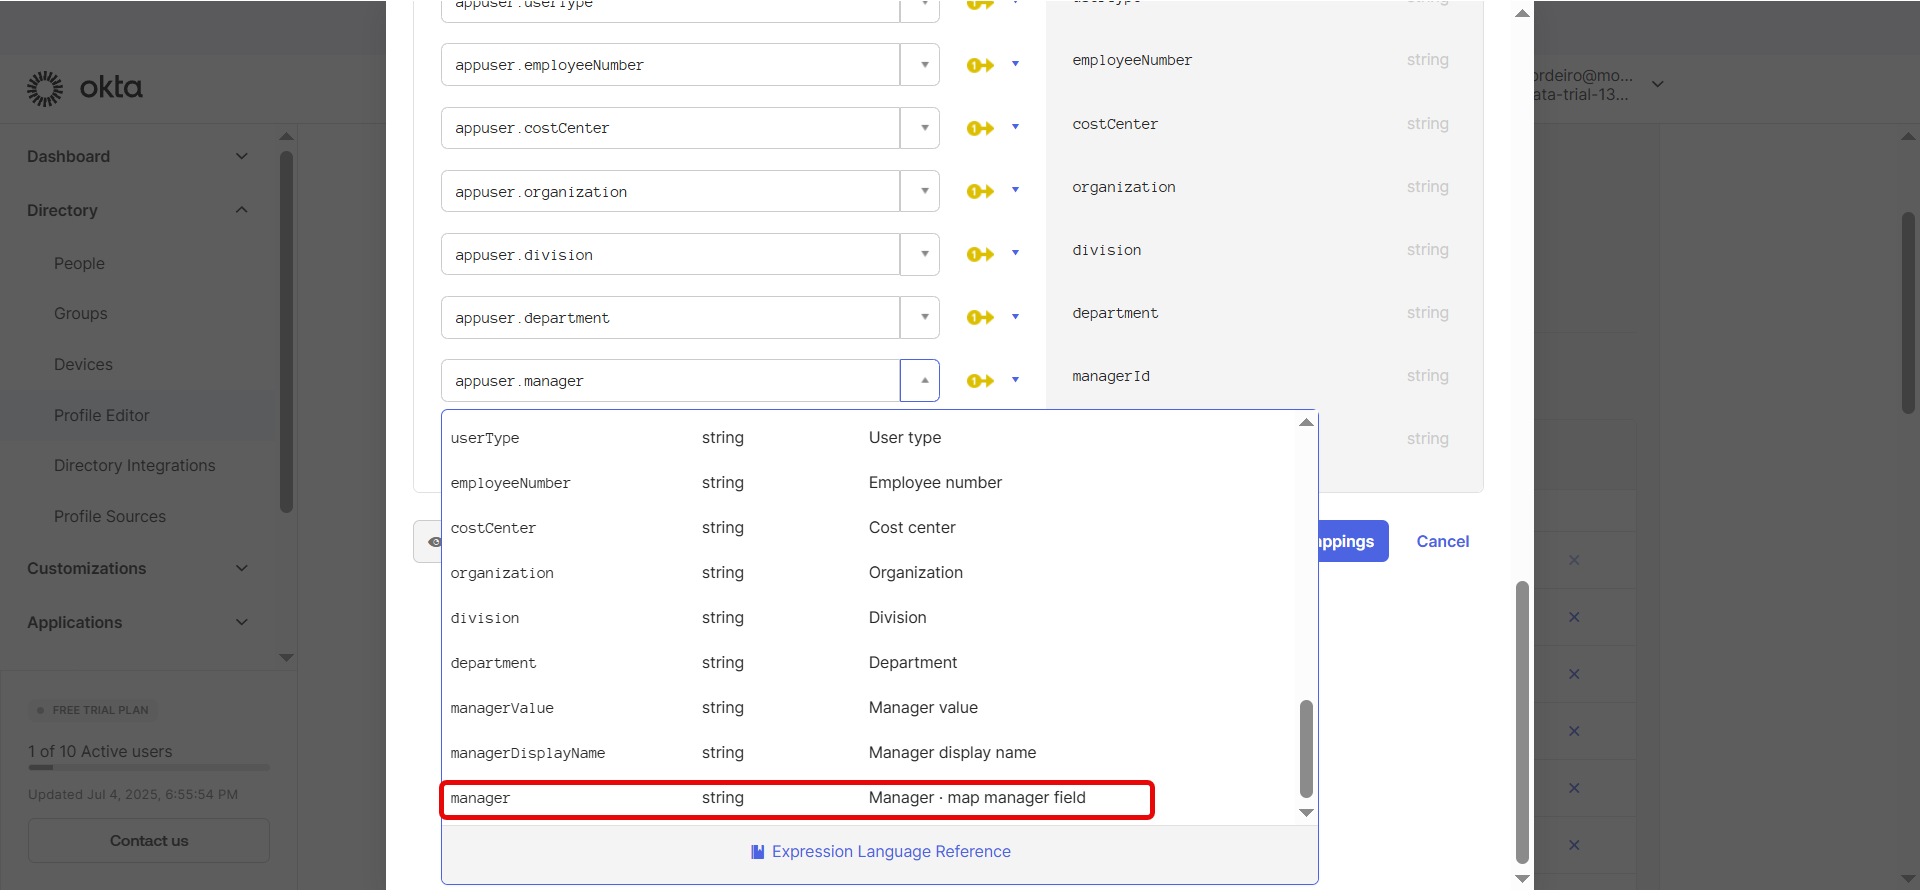
- Variable name: Copy the last part of the value i.e. manager
- External name: Copy the last part of the value i.e.manager
- Attribute length: Between 0 and 255
- Click Save Attribute.
Map the Manager Fields
- Click "Mappings".
- Under ServiceOps SCIM to Okta user, map appuser.manager field against the managerId of Okta.
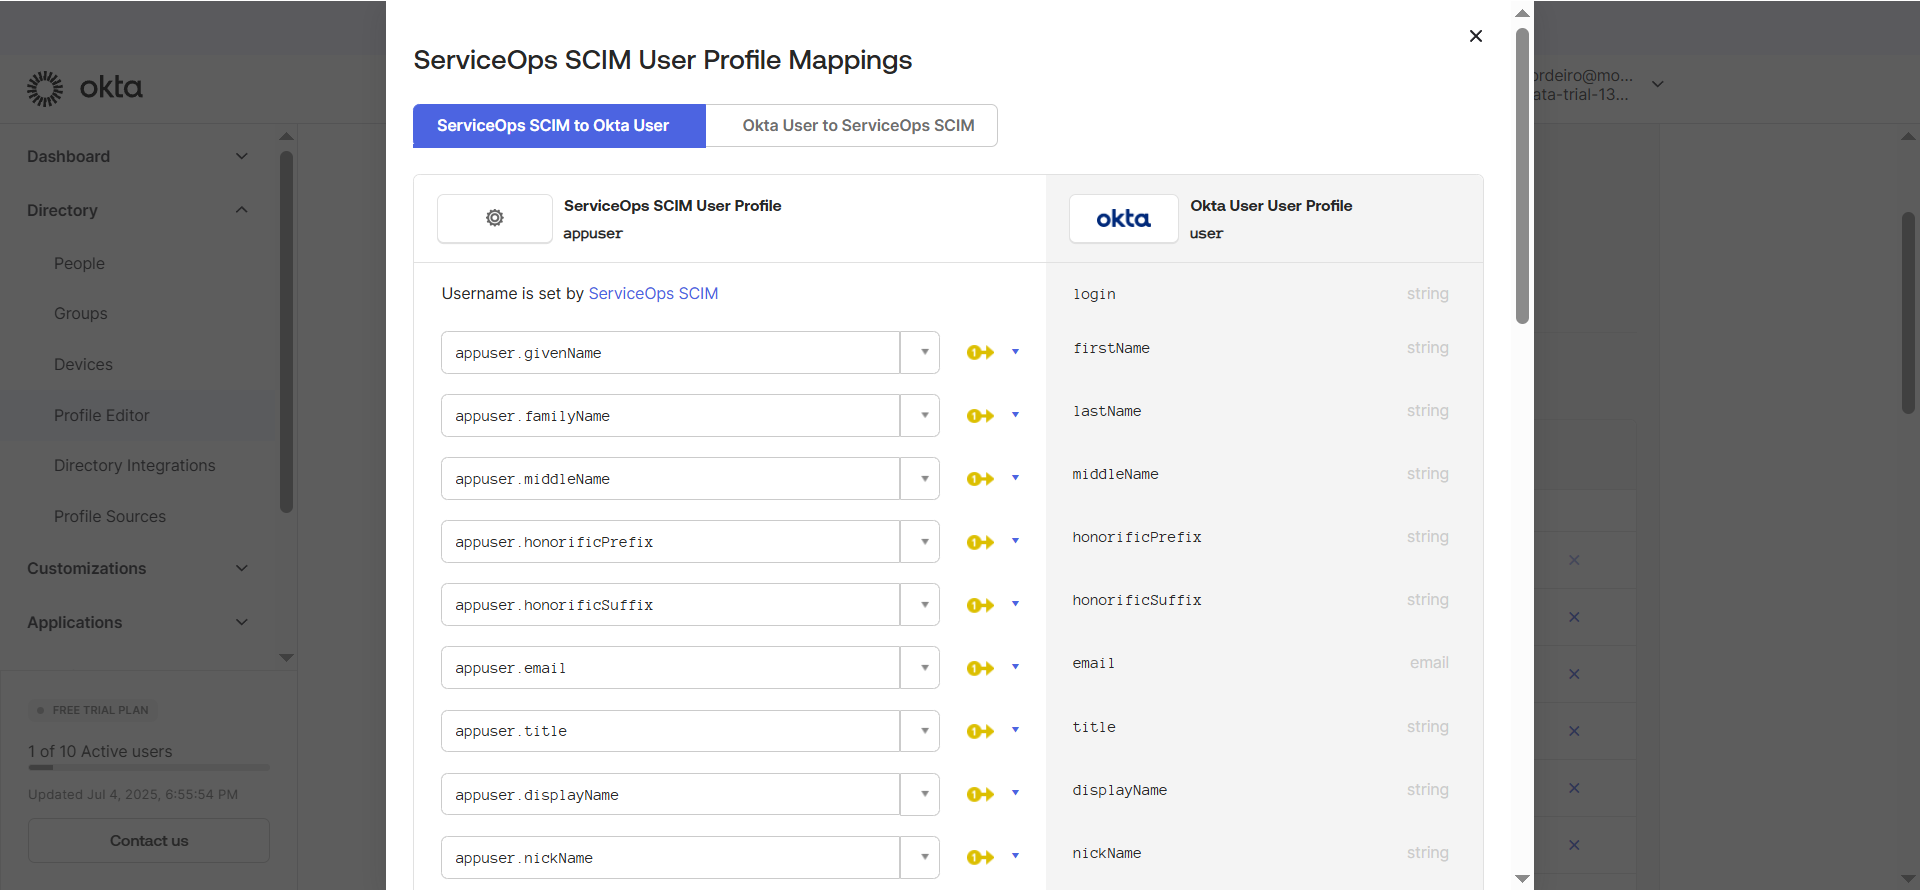
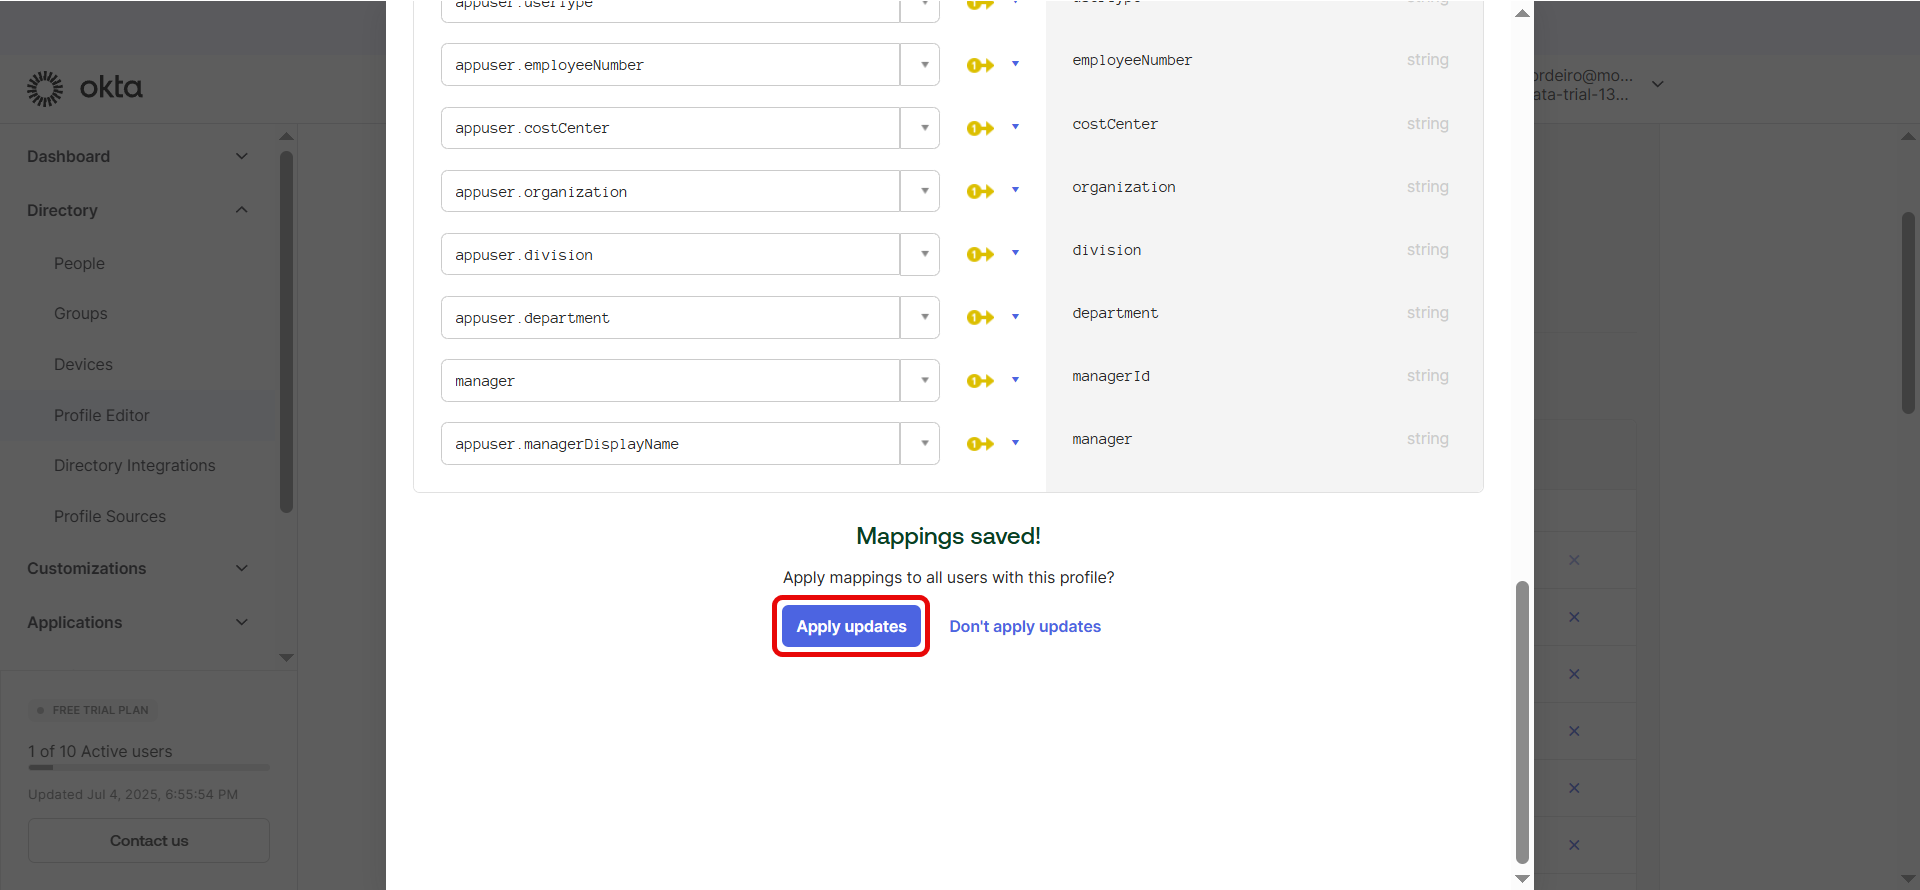
Click Save Mappings and Apply Updates.
Under Okta user to ServiceOps SCIM, set manager (ServiceOps) against user.managerId (Okta).

Once done, click Save Mappings and Apply Updates.
Case 2: Mapping Custom Fields
To map any custom field from ServiceOps:
Copy the Full Custom Field Value from ServiceOps
- From your ServiceOps SCIM configuration page, copy the complete value of the custom field.
Create the Custom Attribute in Okta
- In Okta’s Profile Editor, click "Add Attribute".
- Paste the entire copied custom field value into the External name field.
- Assign a relevant Variable name (for example, Custom_Field), keeping the External name exactly as copied.
- Set the Attribute length from 0 to 255.
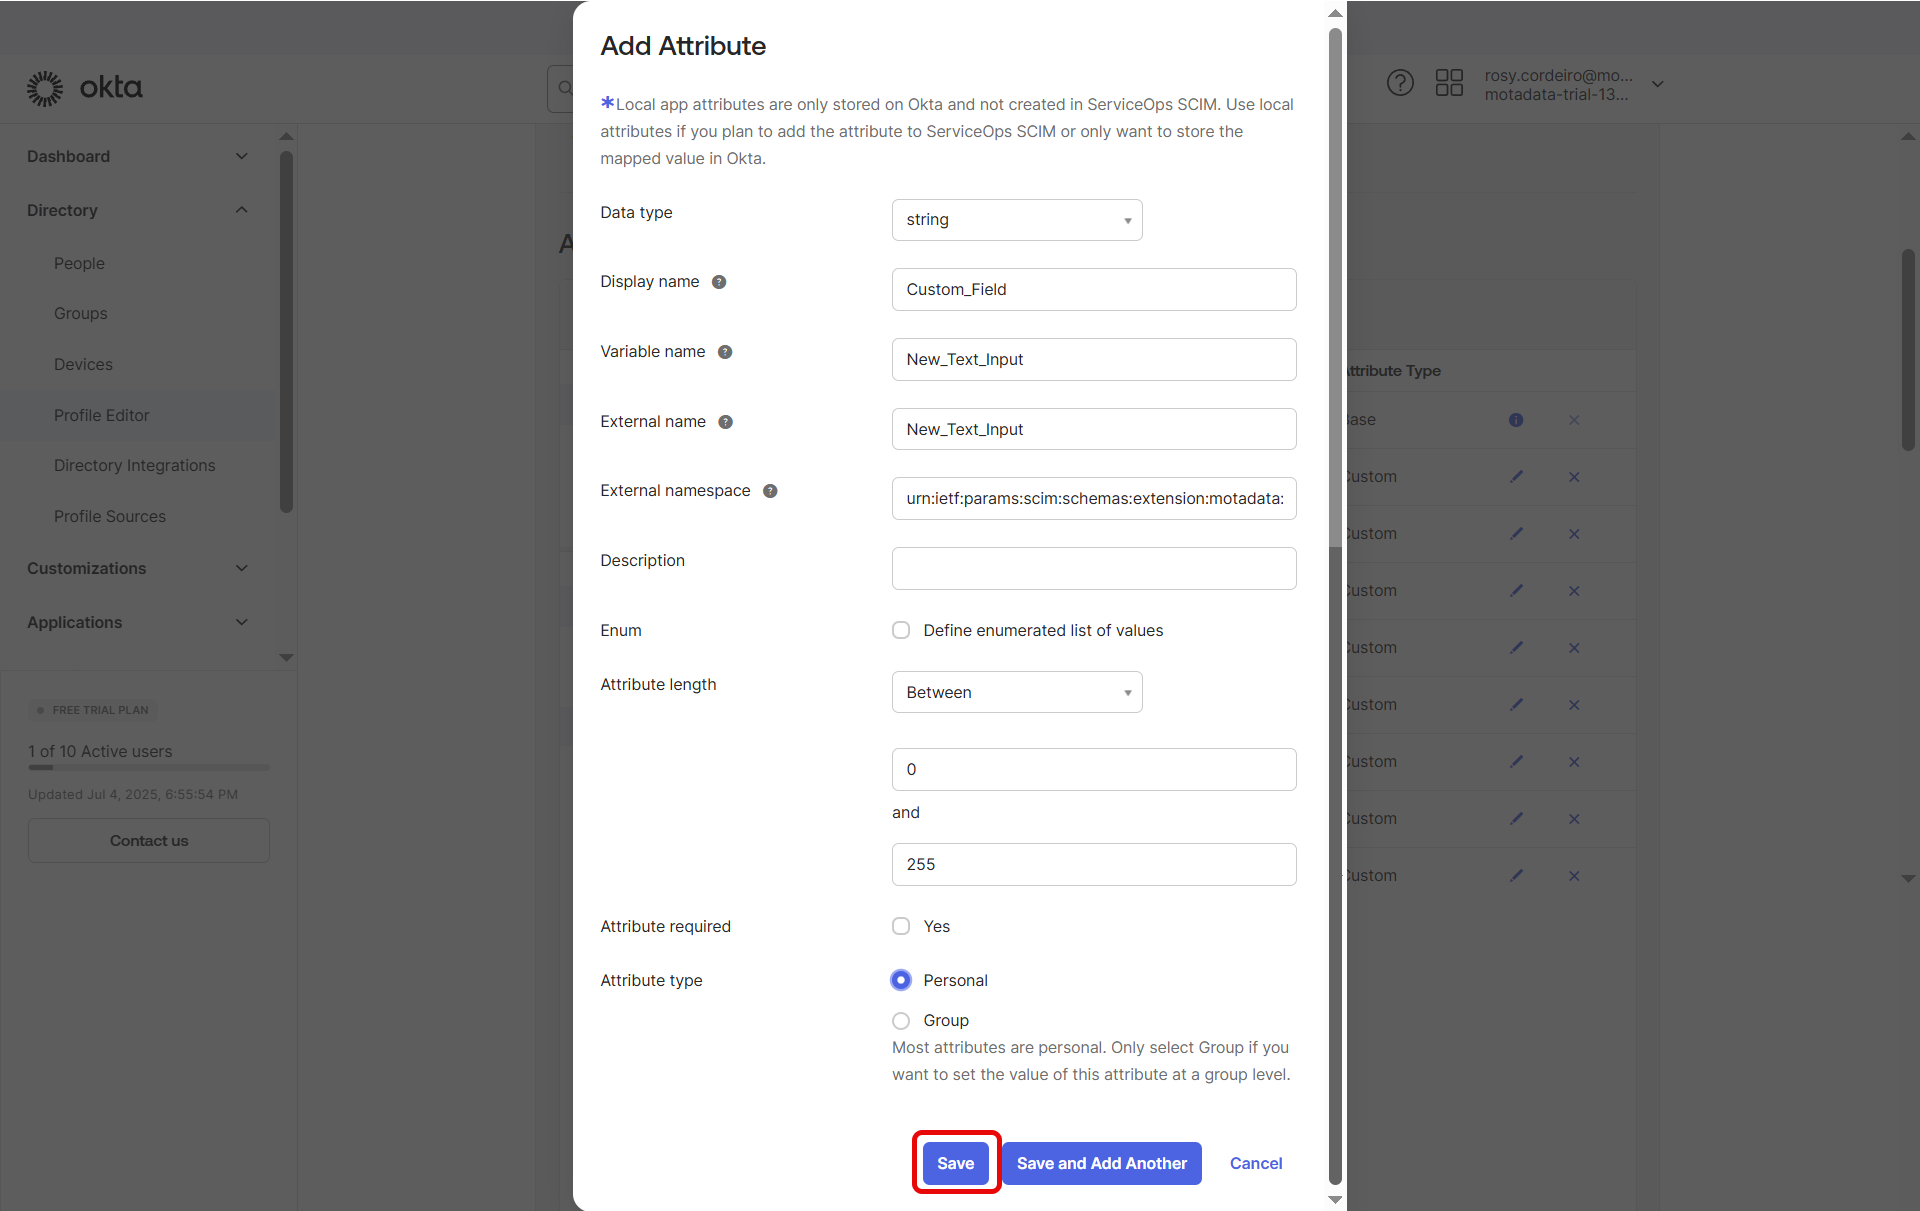
- Click Save Attribute.
Map the Custom Fields
- Go to "Mappings" same as above.
- Under ServiceOps SCIM to Okta user, link the appropriate Okta user field to your new custom field in ServiceOps.
- And also under Okta user to ServiceOps SCIM, link the attributes.
- Click Save Mappings and then Apply Updates.
Part 5: Assign Users and Groups for Provisioning
Navigate to the Assignments tab of your app.
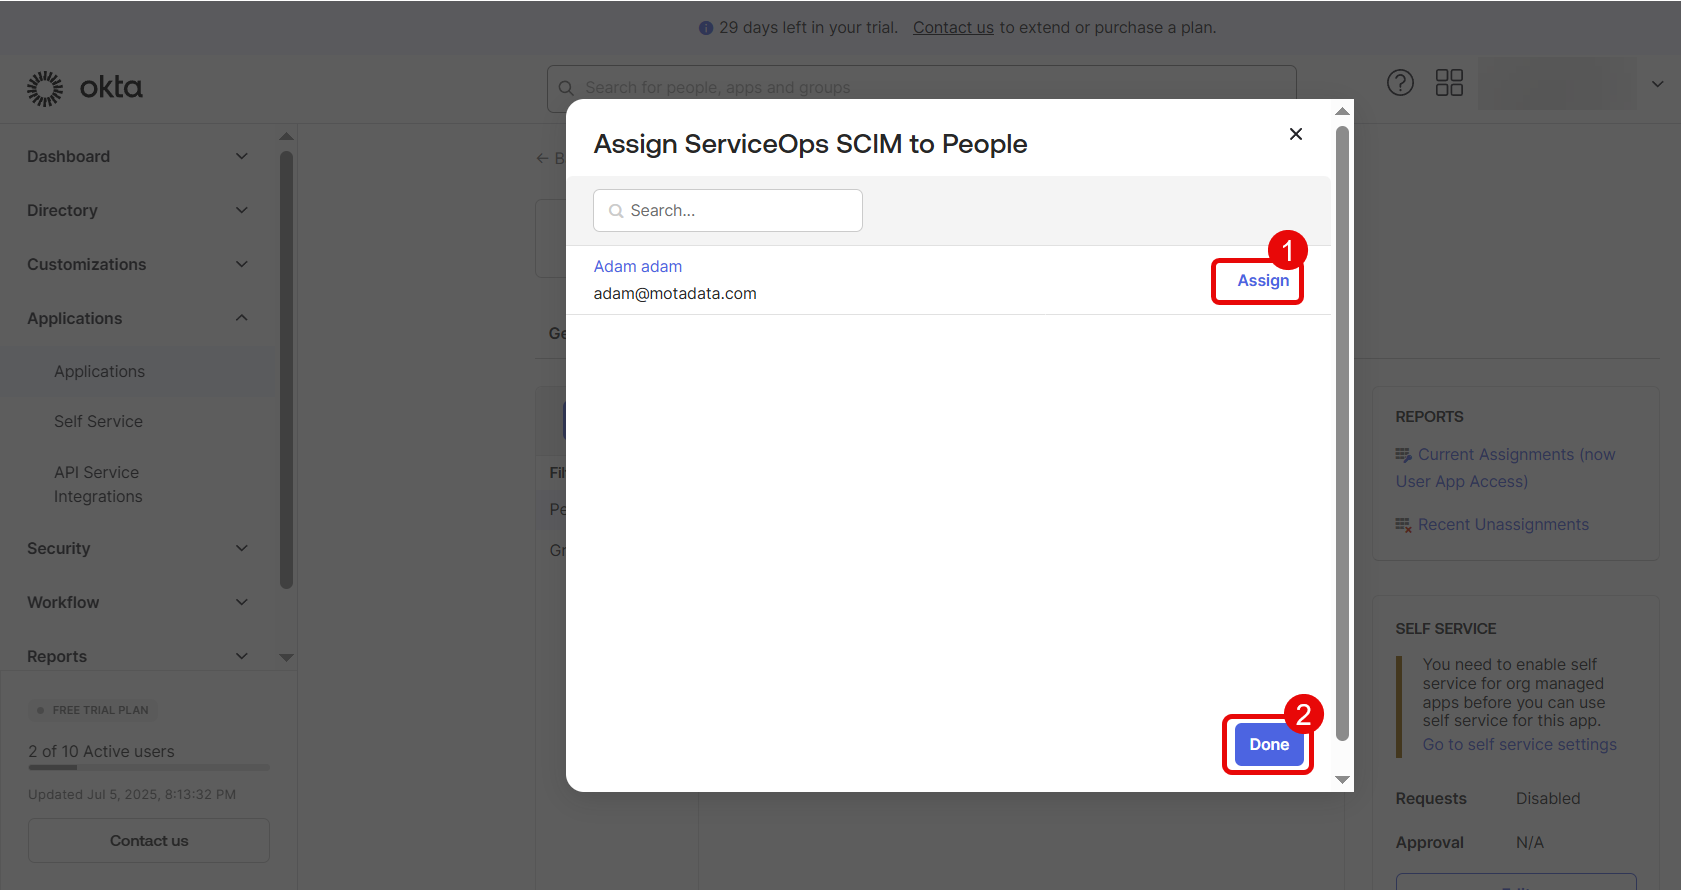
Click Assign and select Assign to People or Assign to Groups.
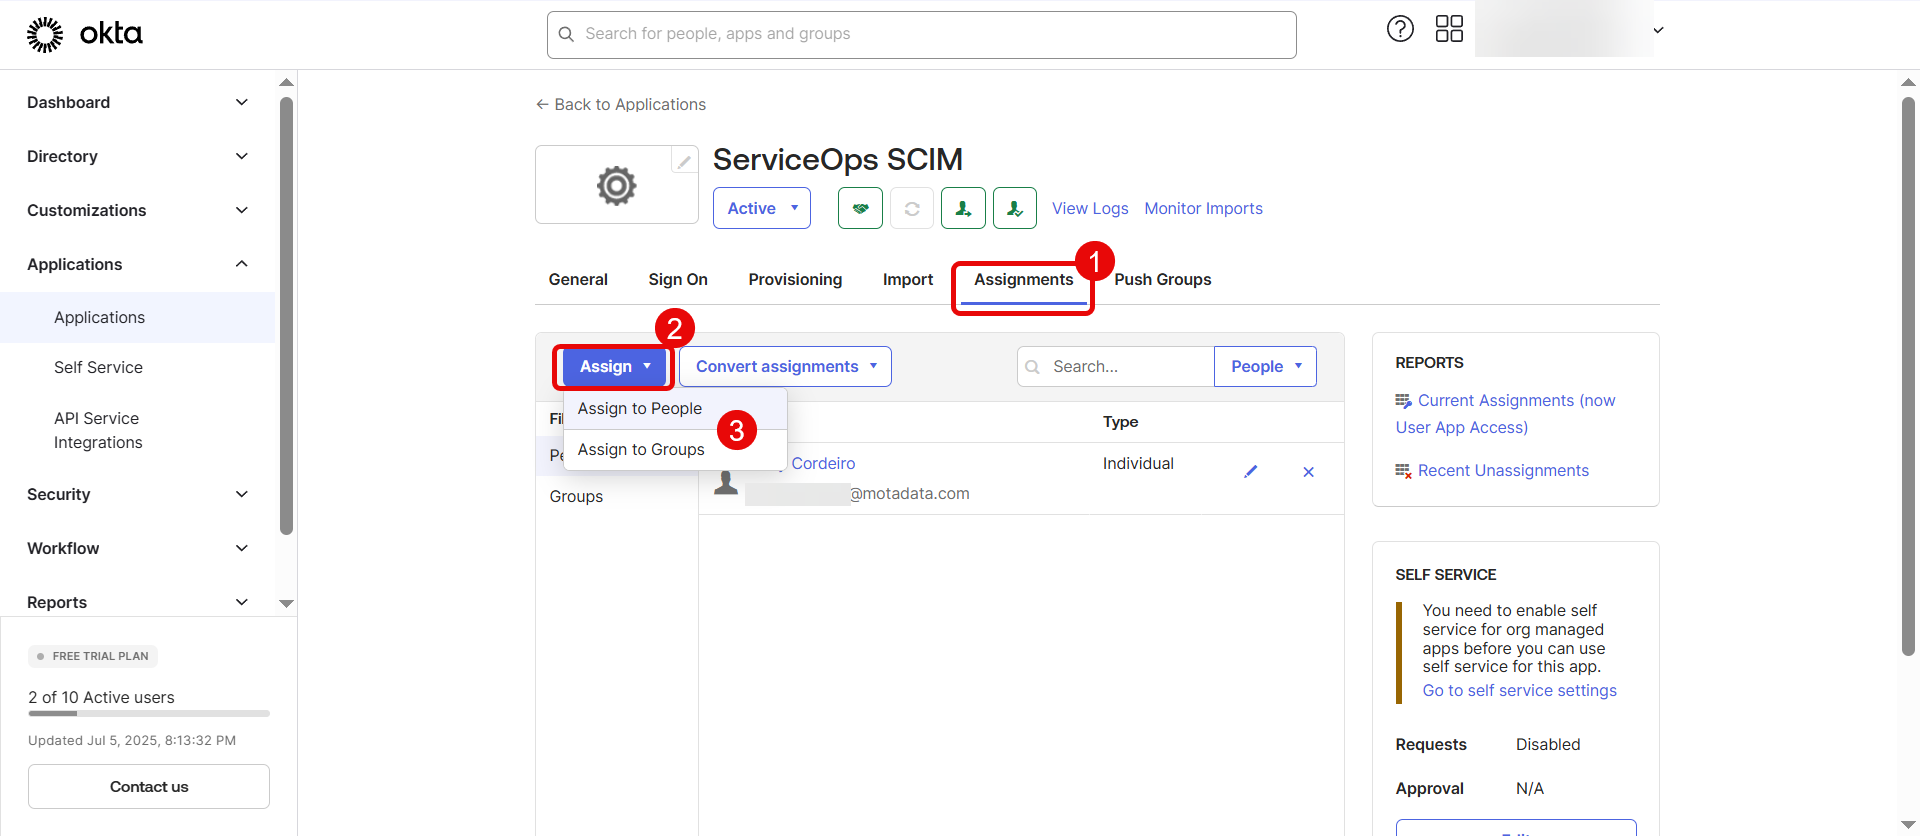
Choose users or groups to provision, then click Assign, followed by Done, and then click Save and Go Back.
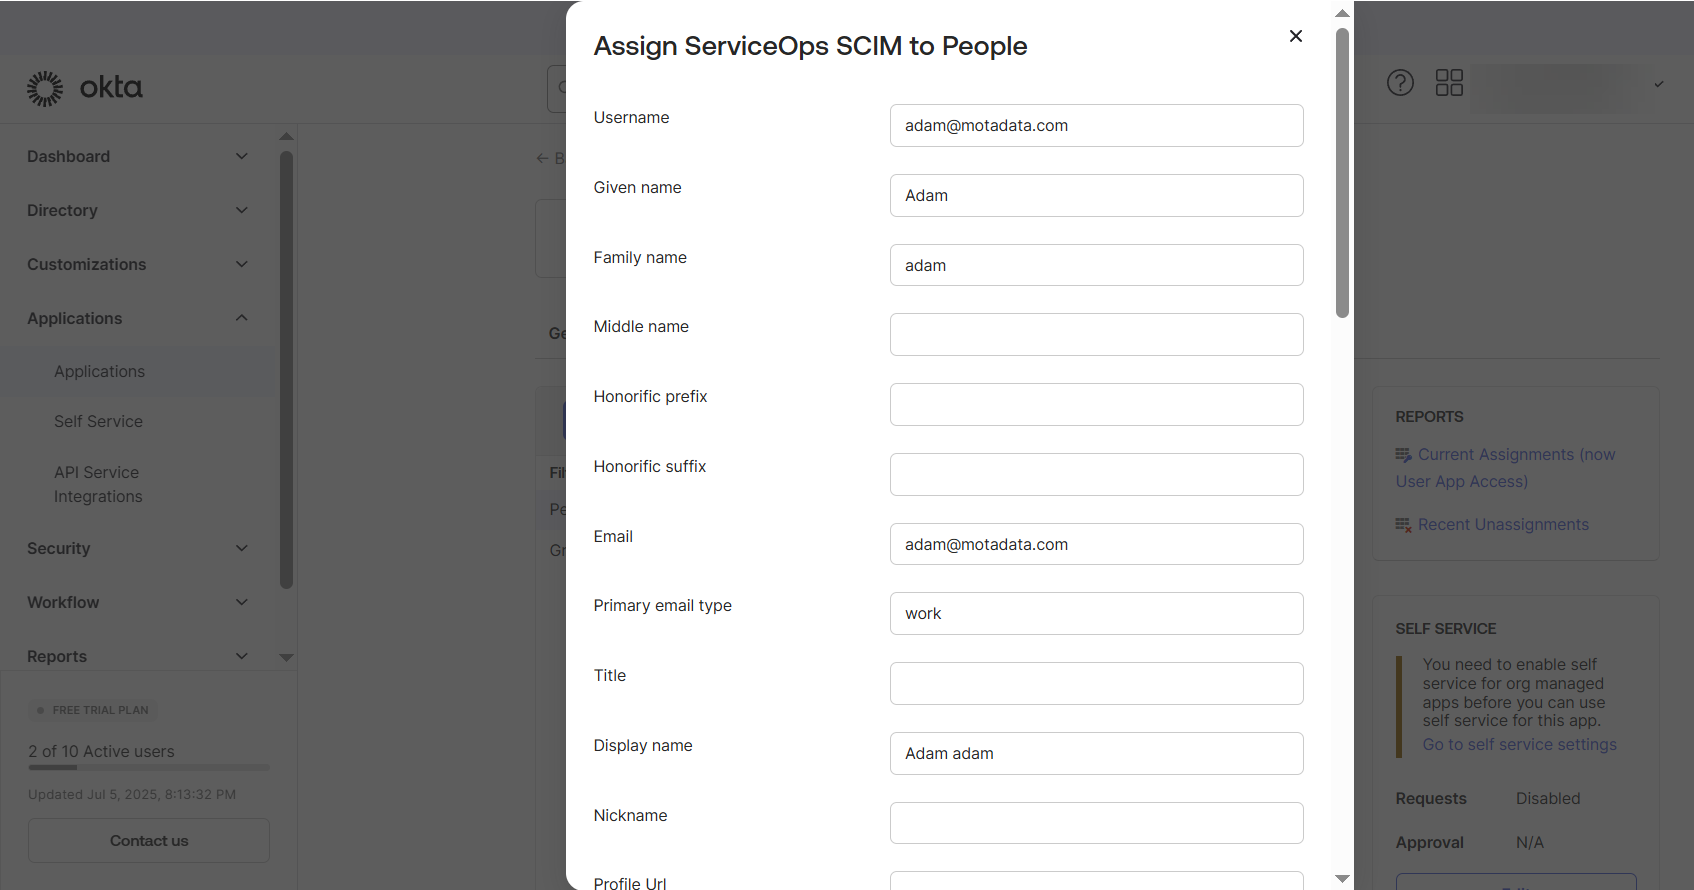
Once assigned, Okta will provision these users/groups according to your configuration.
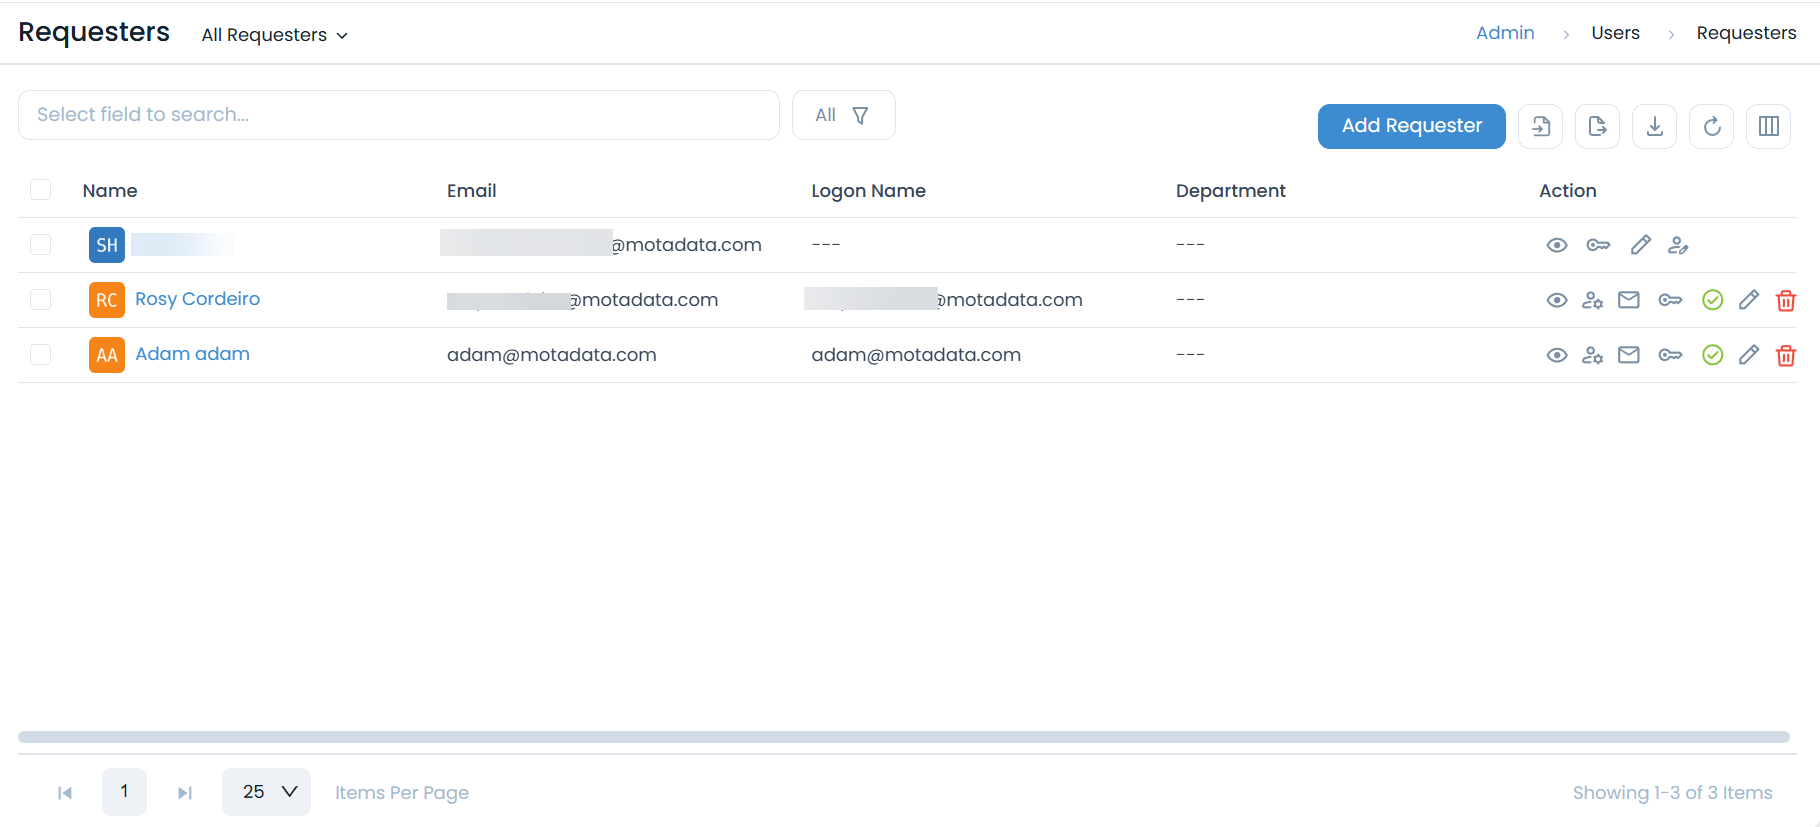
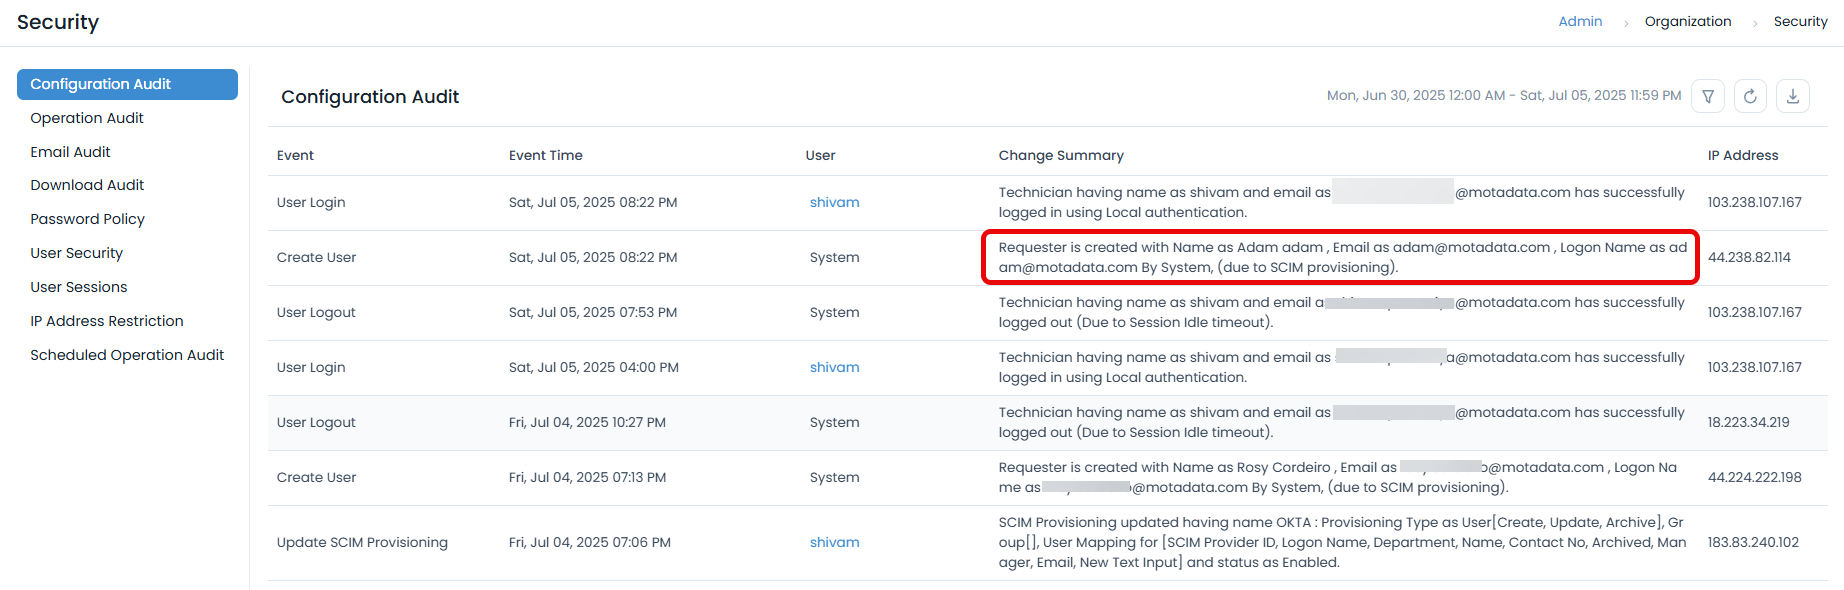
Now, log in to ServiceOps to verify that users and groups are created or updated as expected. For example, here Adam user is created through SCIM provisioning from Okta. Provisioning updates from Okta to ServiceOps via SCIM are processed almost instantaneously, ensuring near real-time user and group synchronization.
- Always verify after saving that the mappings display the correct links between Okta fields and ServiceOps fields.
- You can test the attribute provisioning by assigning a user and reviewing their profile in ServiceOps.
- If provisioning is not functioning correctly, ensure that the CRUD options (Create, Read, Update, Delete) are enabled in both your ServiceOps and IDP (Identity Provider) configurations.