SCIM Provisioning in Azure
Configuring SCIM Provisioning with Azure Active Directory
Overview
This document provides specific instructions for IT Admins on how to set up SCIM-based user provisioning in the Microsoft Azure Active Directory portal. It assumes you have already retrieved the SCIM Endpoint and Bearer Token from the ServiceOps SCIM configuration page. This guide is a practical application of the concepts described in the main SCIM Provisioning document.
Prerequisites
Before you begin, ensure you have the following:
- ServiceOps:
- A generated
SCIM EndpointURL from your ServiceOps SCIM configuration. - A valid
Bearer Token(Bearer Token) from the same configuration.
- A generated
- Azure Active Directory:
- An Azure AD Premium P1 or P2 license is required for automated provisioning.
- You must have permissions to manage Enterprise Applications in Azure.
Procedure
1. Setting up the Enterprise Application in Azure AD
First, you need to create an Enterprise Application in Azure AD to represent ServiceOps.
- Log in to the Azure portal and navigate to the Azure Active Directory portal.
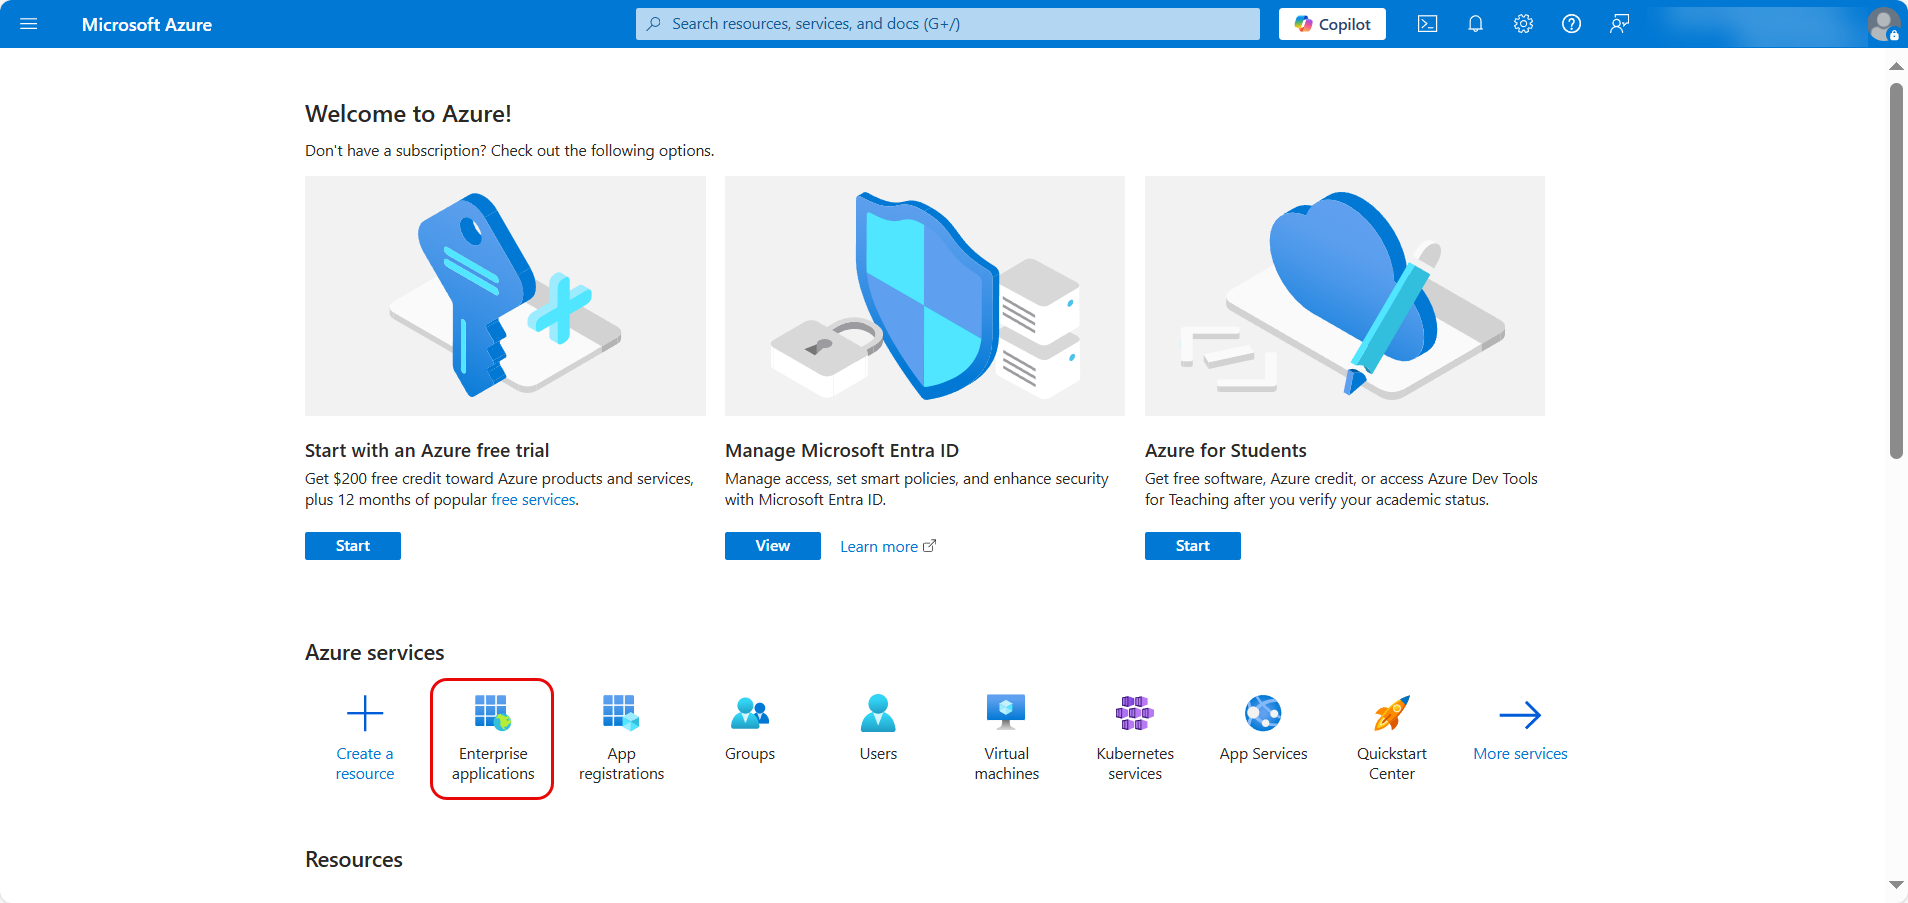
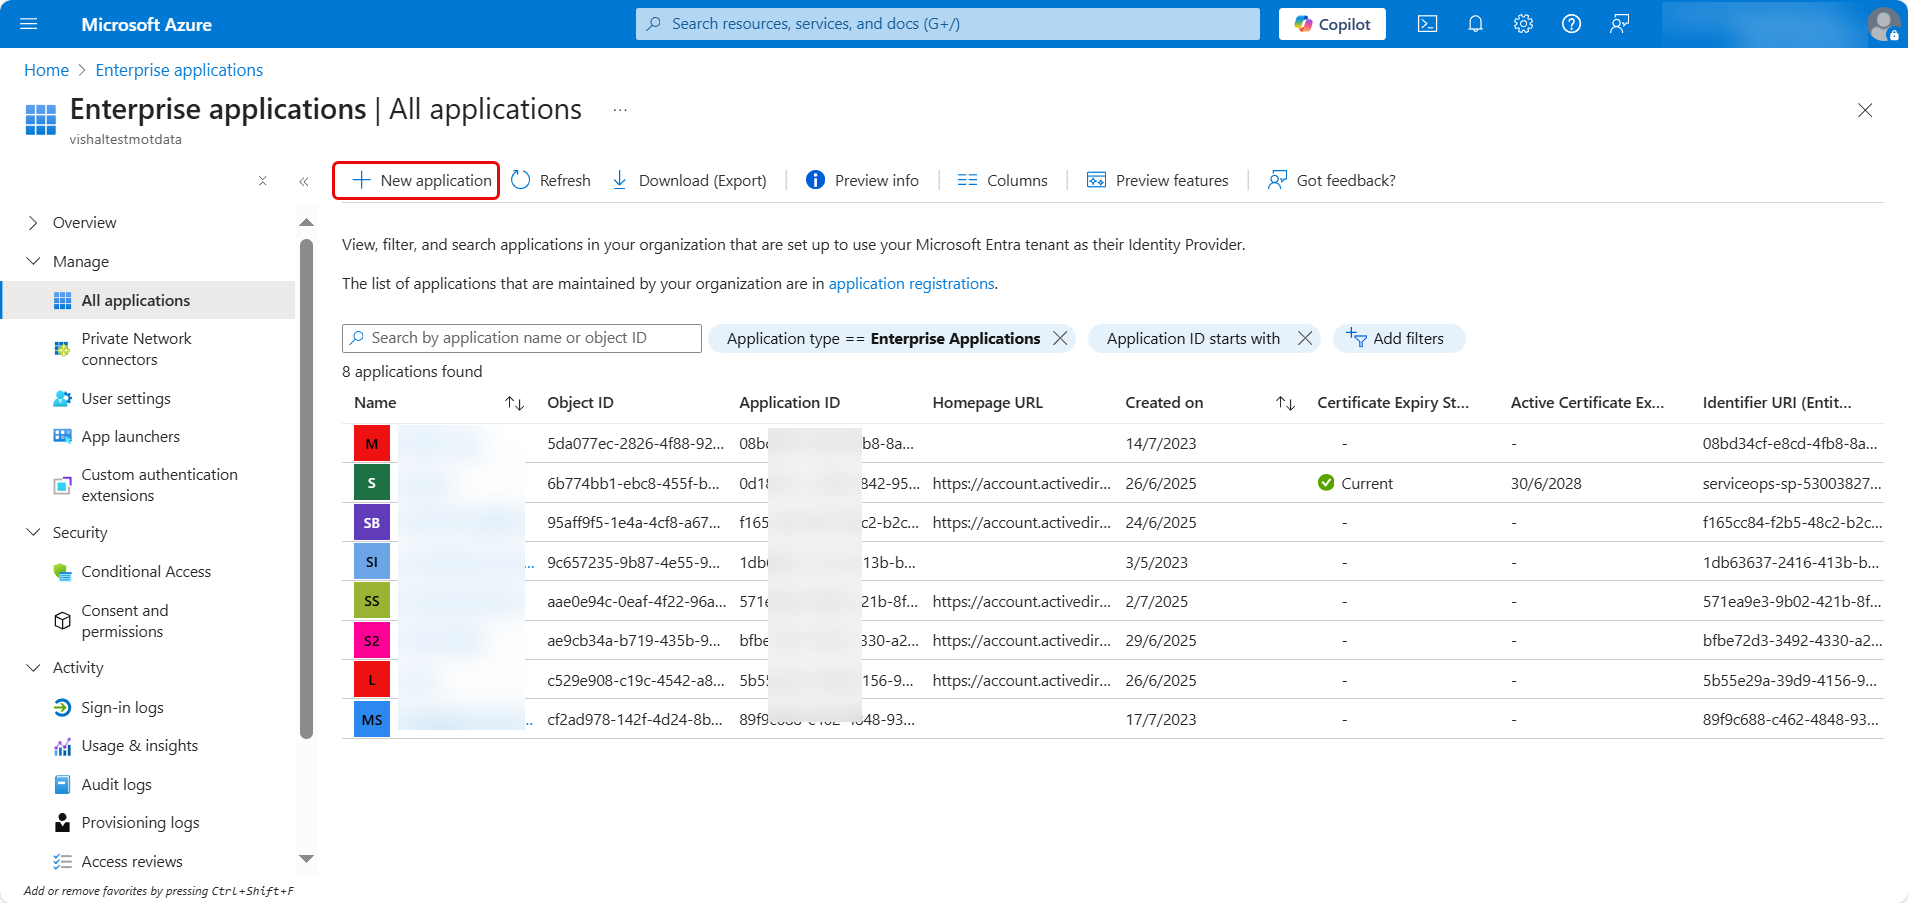
- Select Enterprise Applications and click + New application.
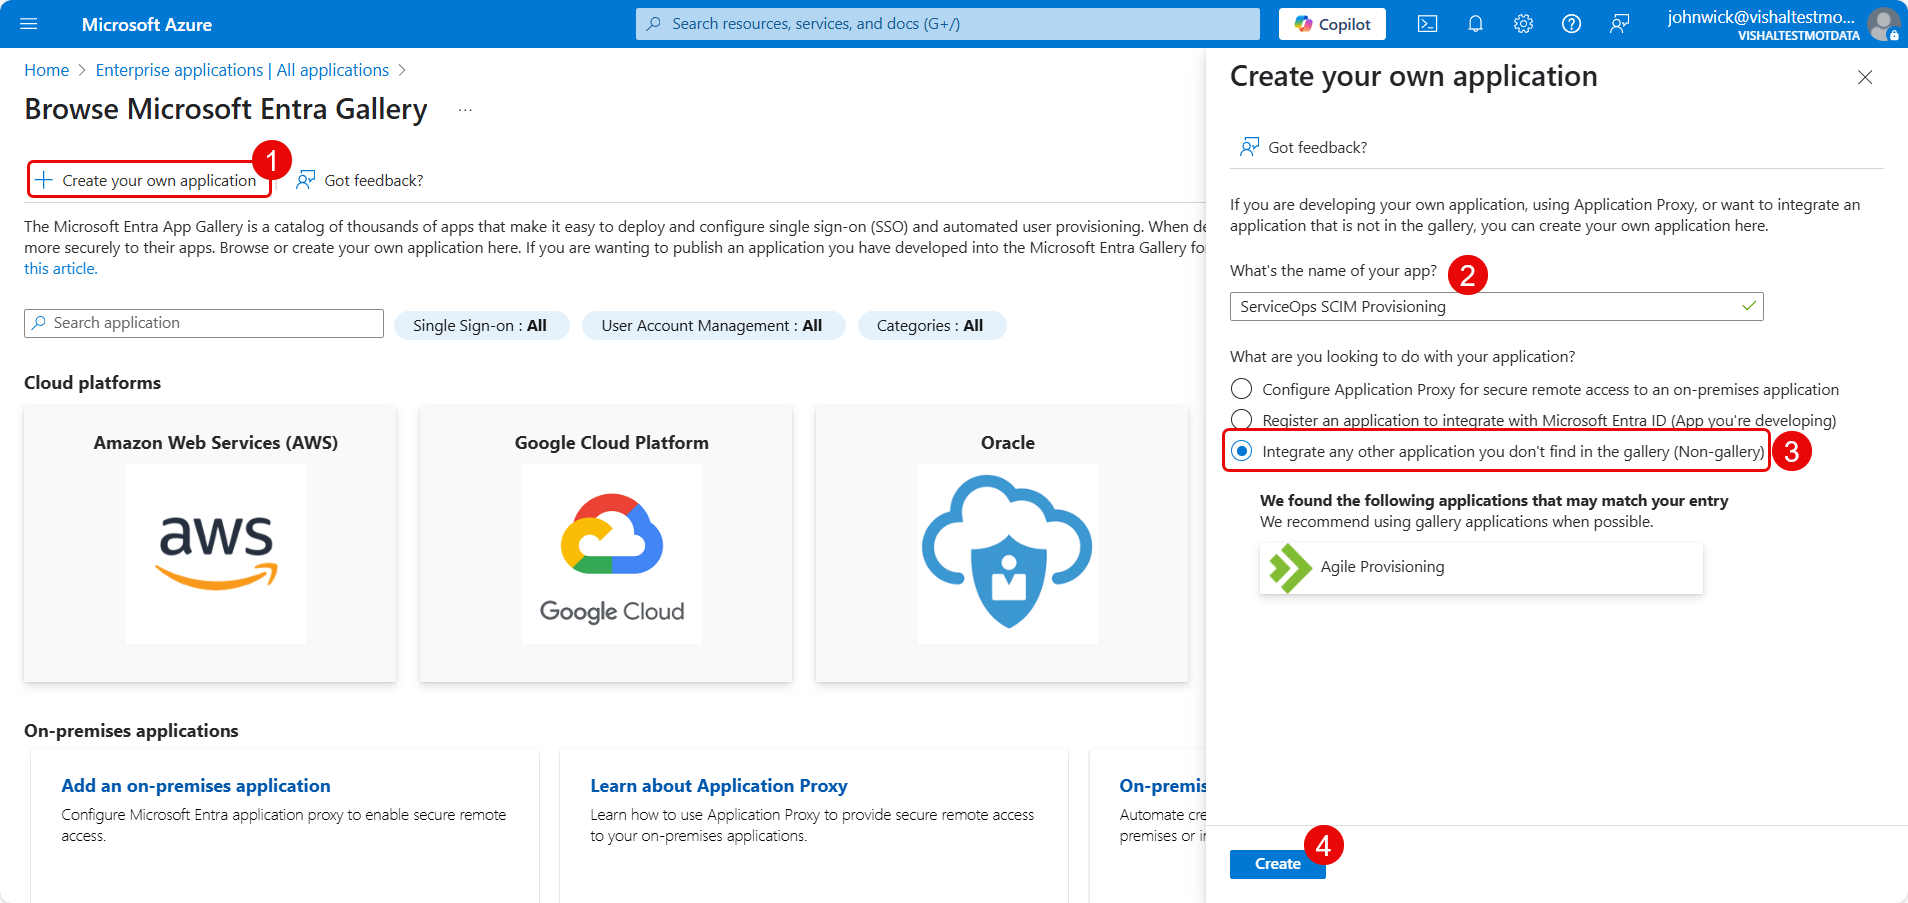
In the gallery, click Create your own application.
Here, enter the name of your application, select the option “Integrate any other application you don't find in the gallery (Non-gallery)”, and click Create.
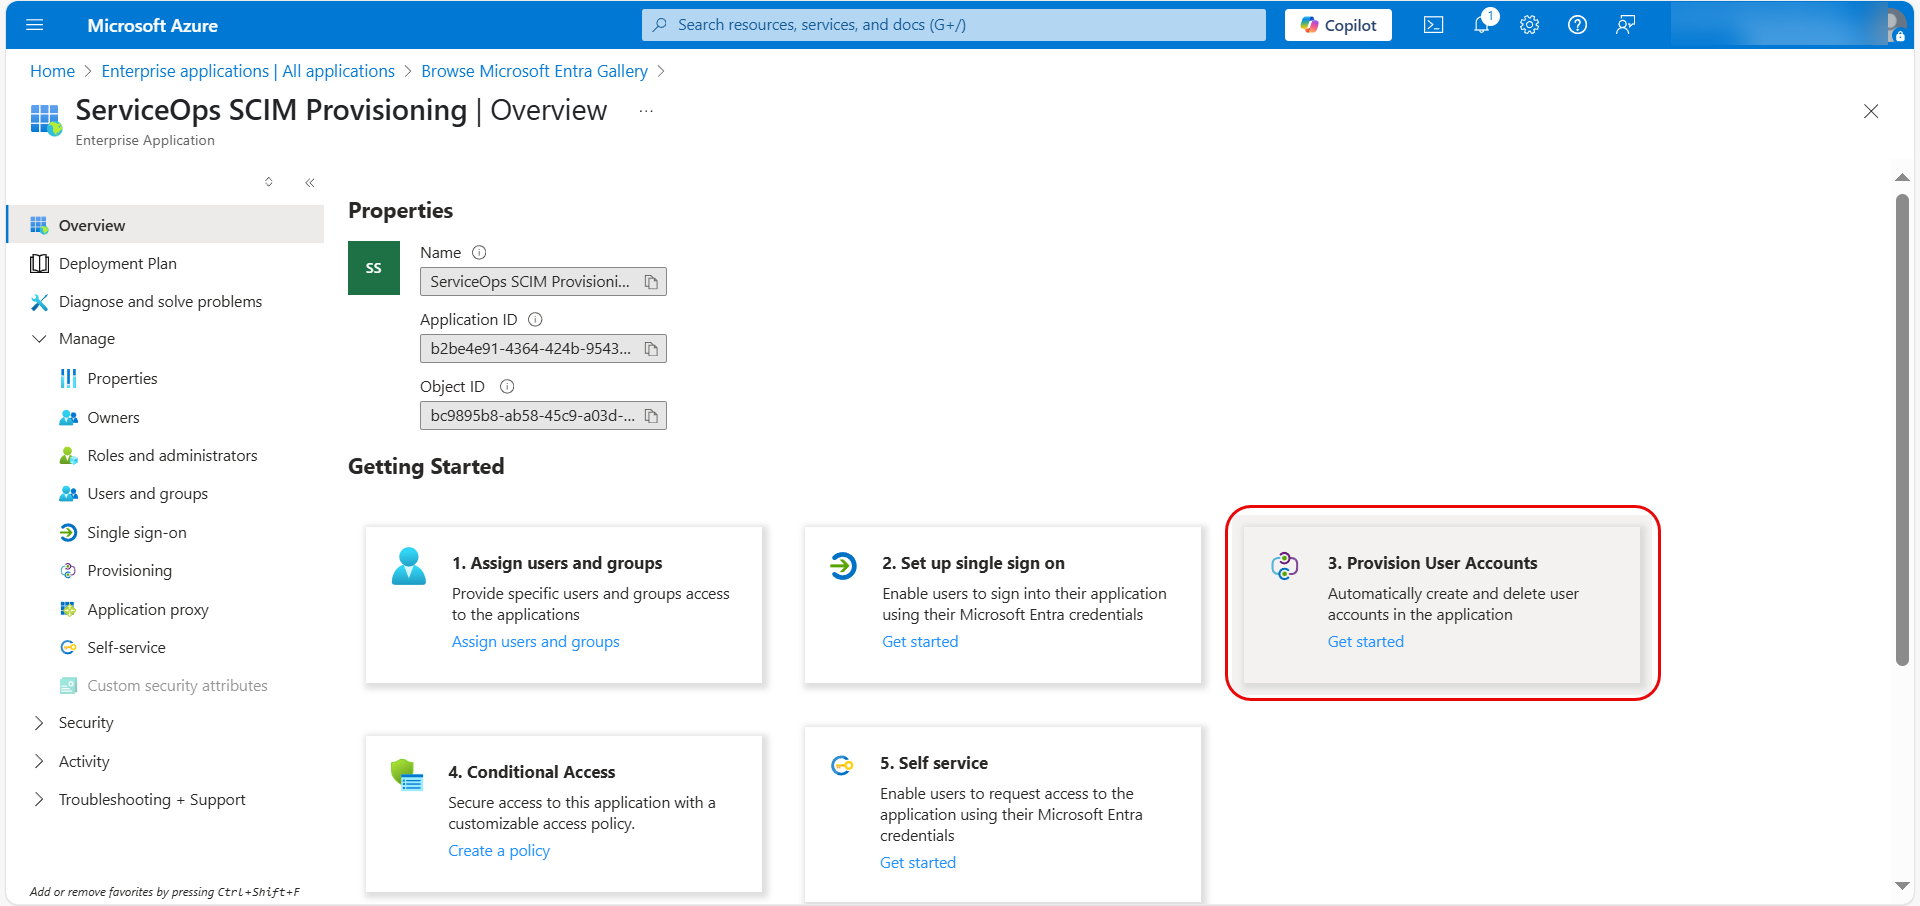
2. Enable User Provisioning
- In the application Overview, click Provision User Accounts.
- On the Get Started page, either click + New Configuration or Connect your application.

3. Configure SCIM Connection
Enter the following details on the configuration page:
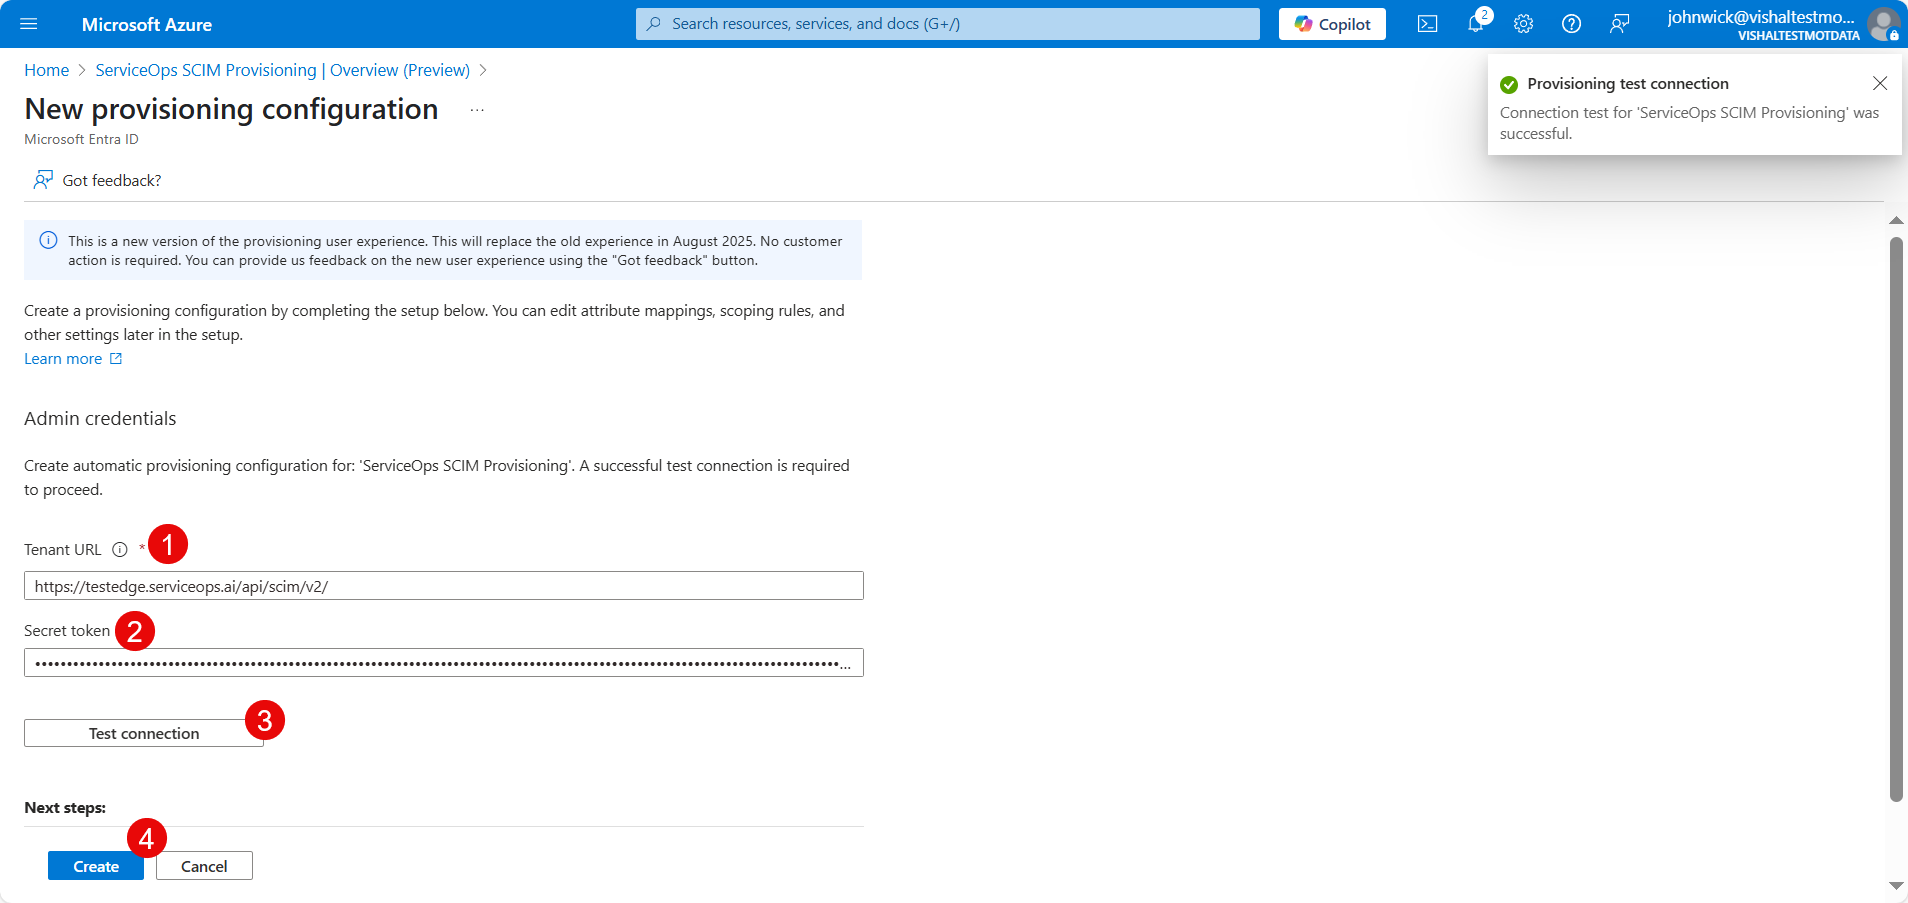
Paste the
SCIM EndpointURL you copied from ServiceOps into the Tenant URL field.Paste the
Bearer Tokenyou copied from ServiceOps into the Secret Token field.Click Test Connection. You should see a success notification confirming that Azure AD can communicate with your ServiceOps instance.
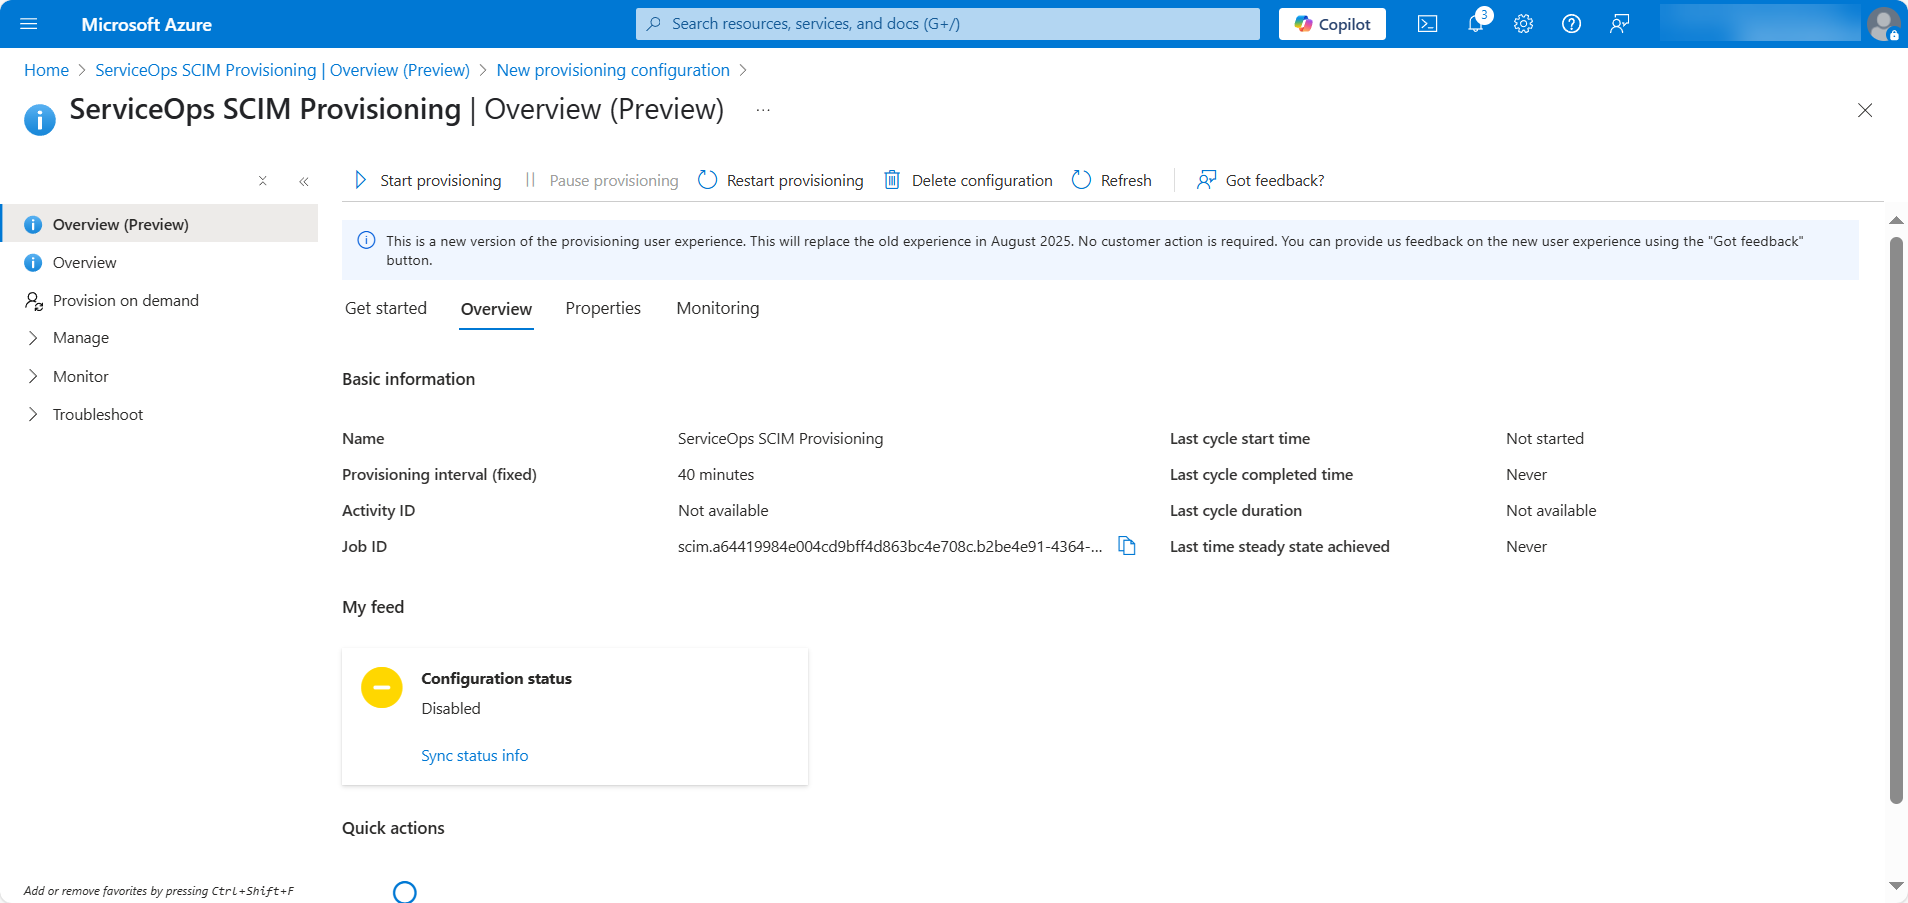
Click Save at the top of the configuration pane to save your settings. The following page appears.
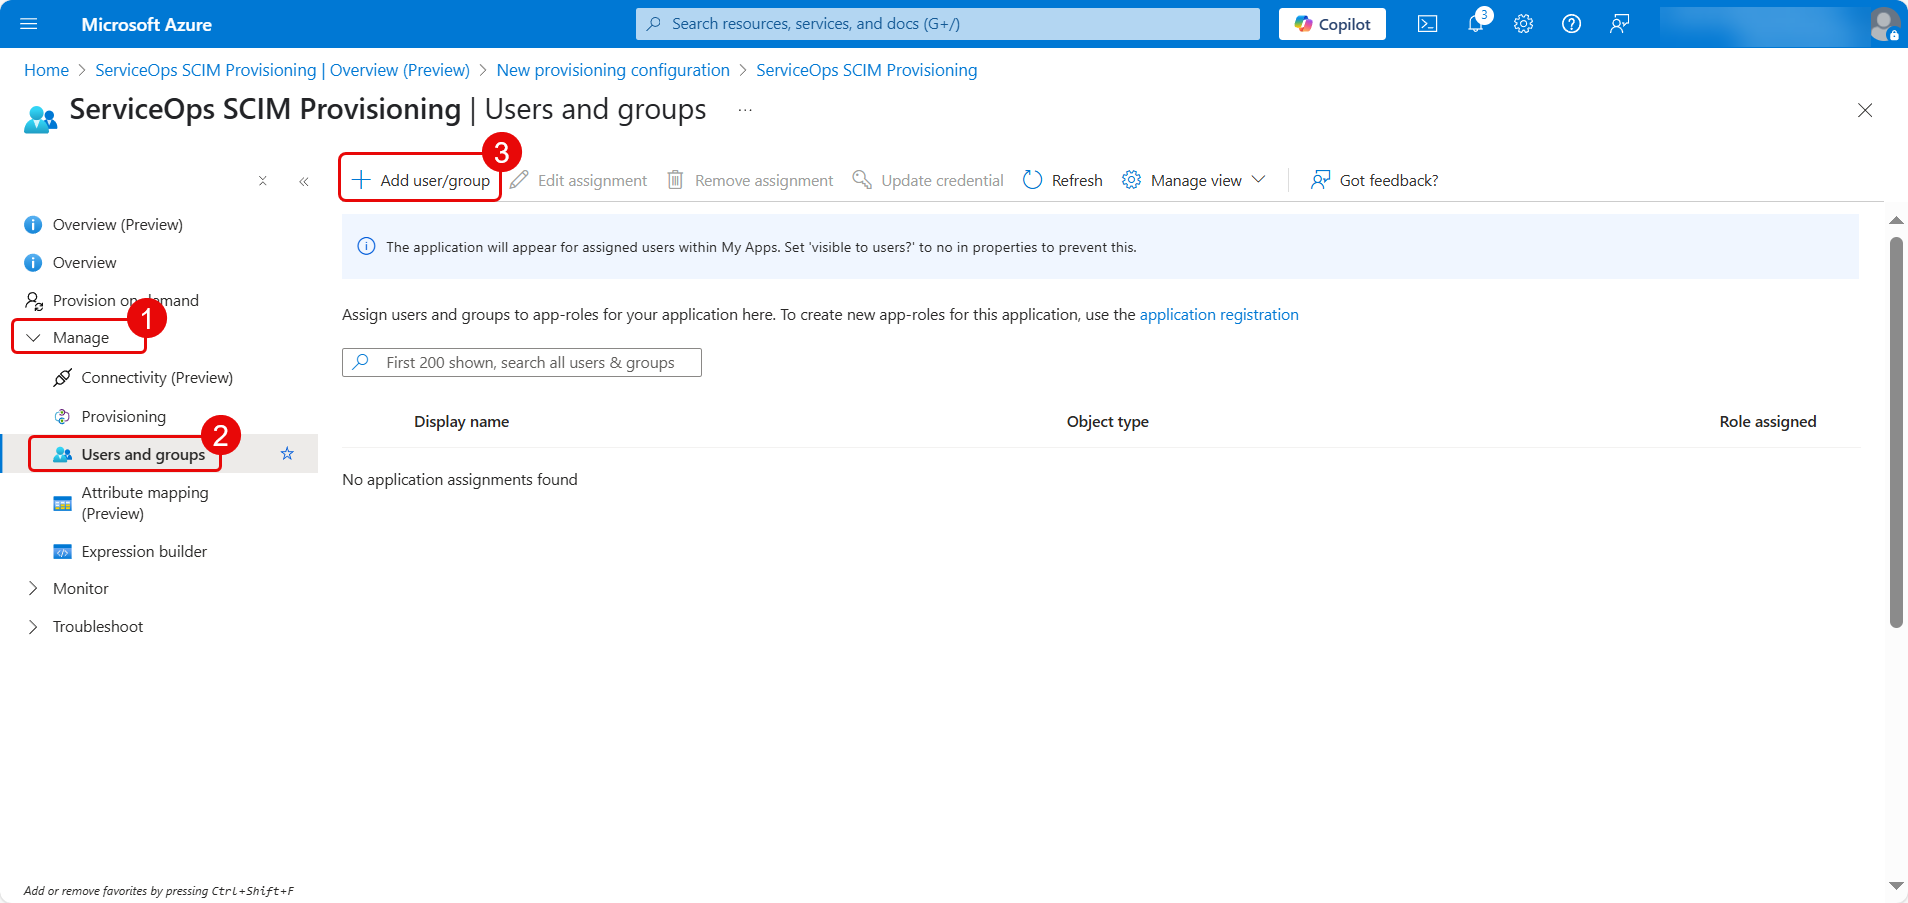
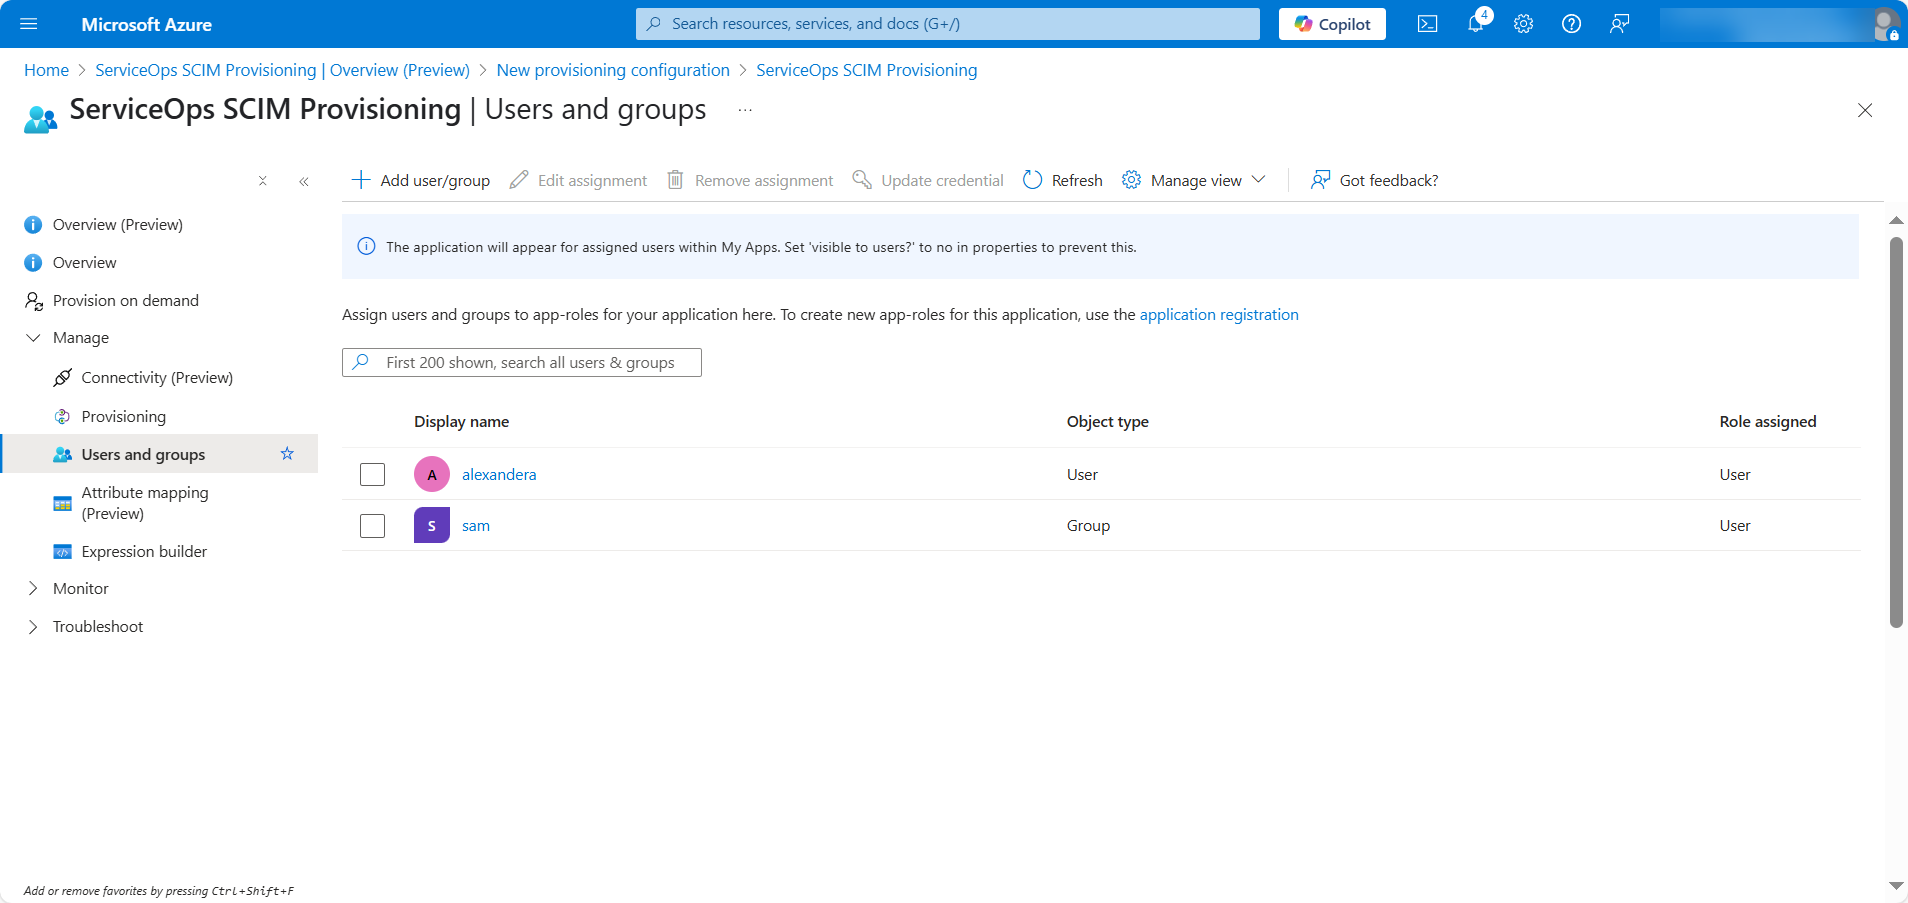
4. Assign Users and Groups
- Navigate to Manage > Users and groups and click Add user/group.
- Tenant Admin accounts are excluded from SCIM provisioning and will not be synced.
- Avoid manually modifying or deleting users or groups created through SCIM provisioning, as it may lead to data mismatches or inconsistencies.
Click the None Selected link to choose users or groups to assign.
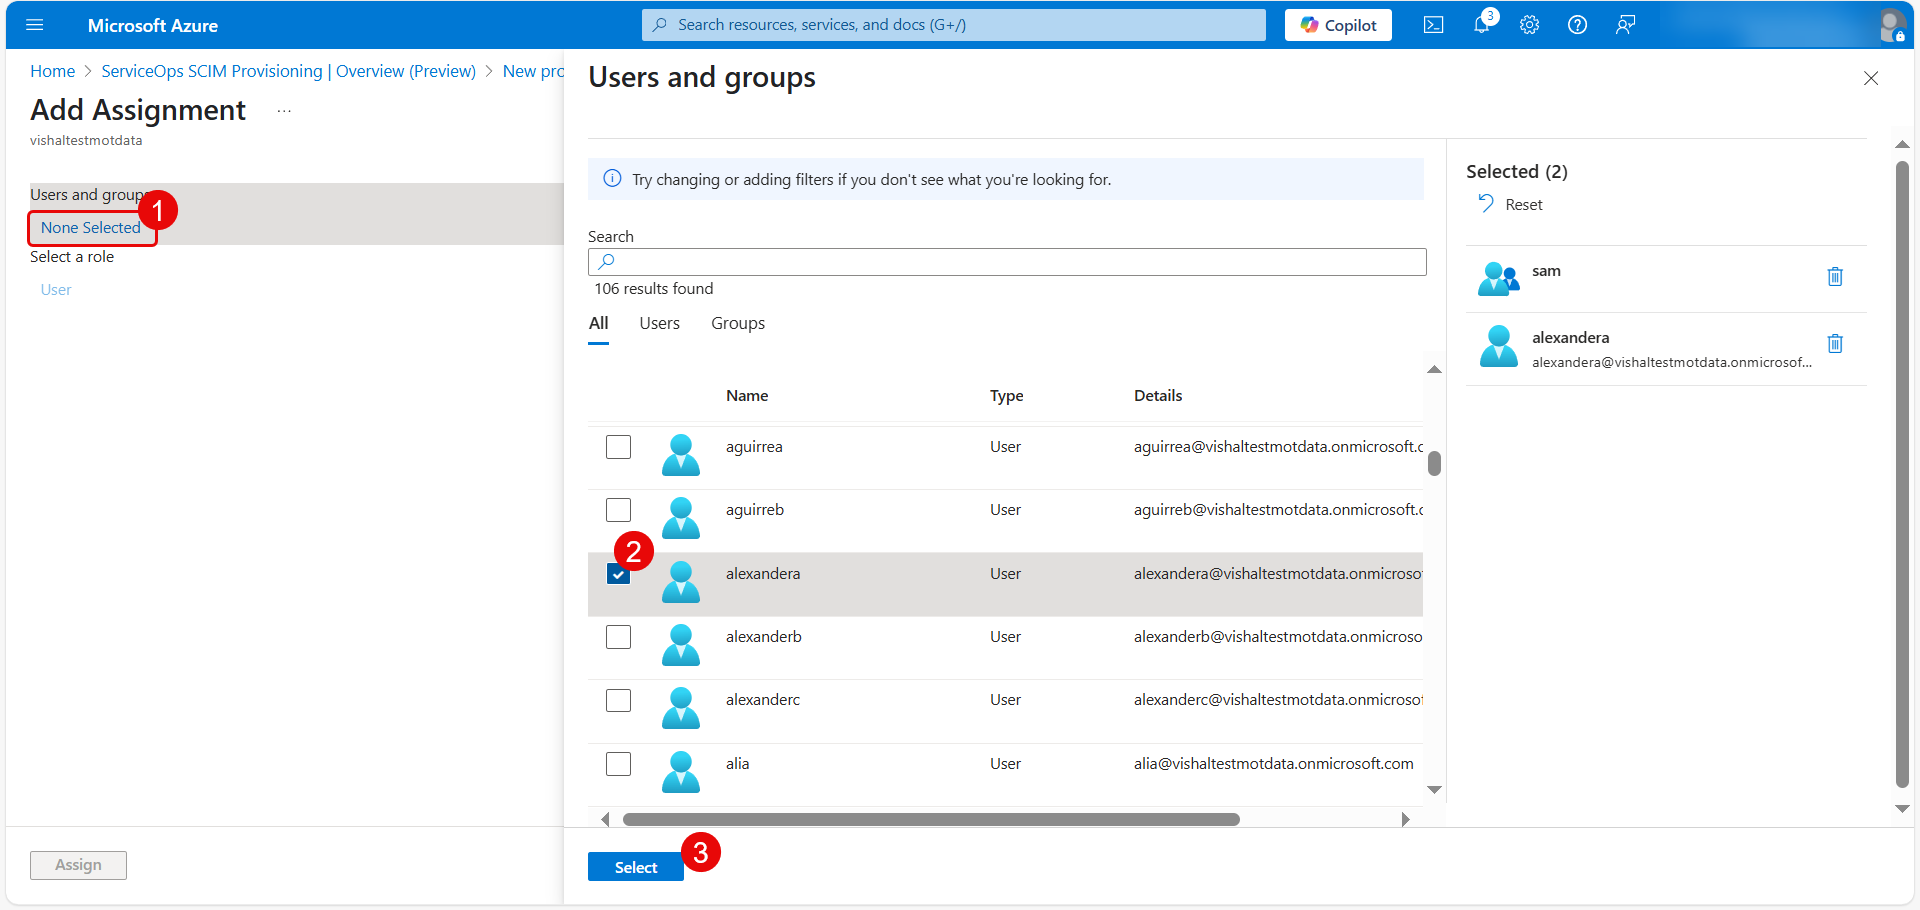
After selecting, click Assign.
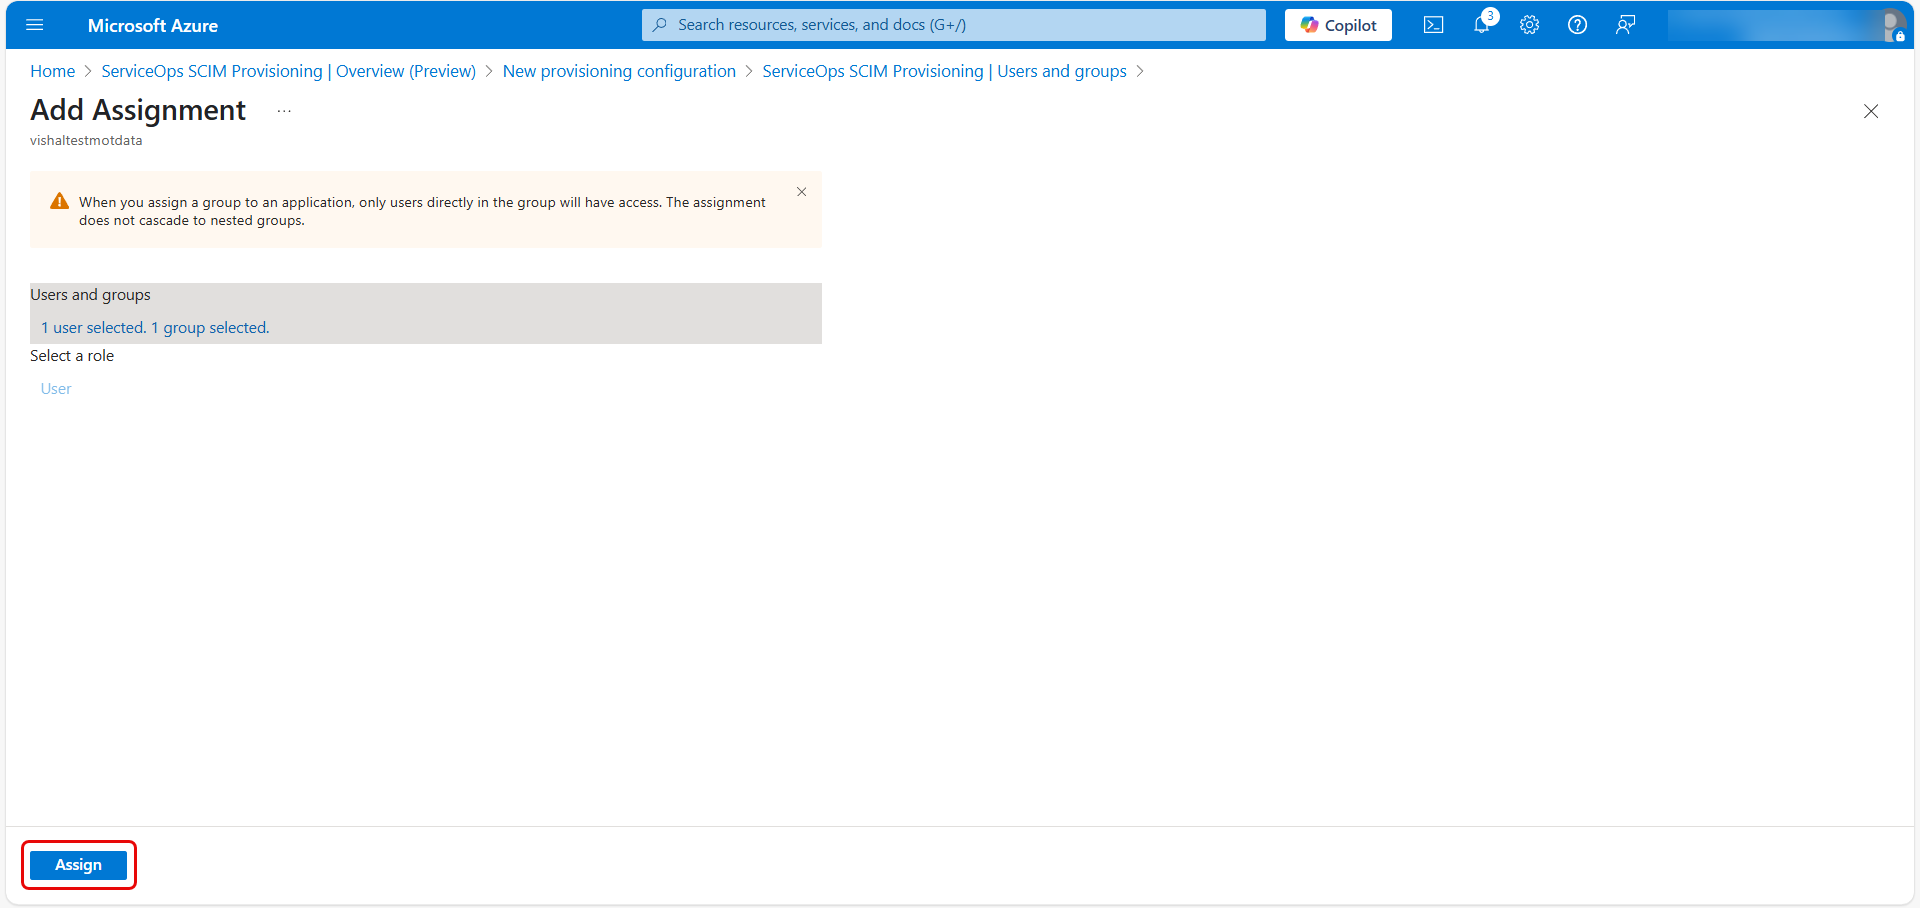
The assigned users/groups will now appear in the list.
5. Map Custom Attributes
- In the left pane, click Attribute Mapping (Preview).
Click the Edit attribute list for customappsso link.
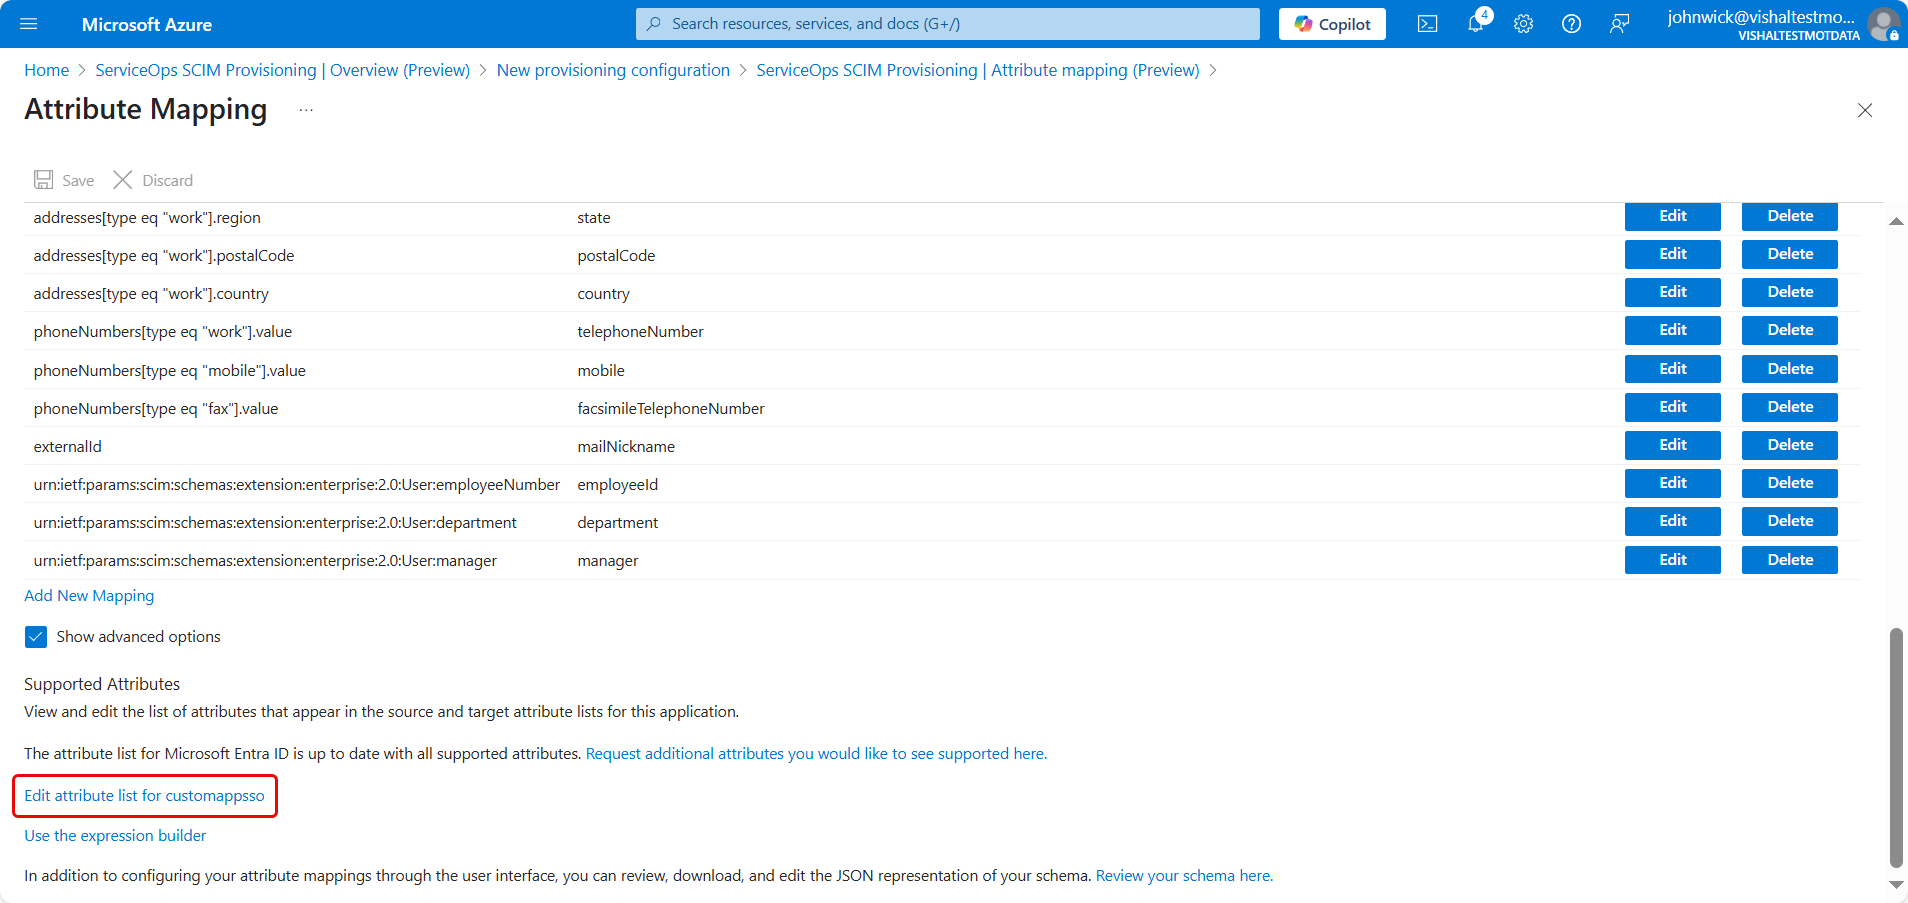
- Copy and paste the required custom field values from ServiceOps into Azure.

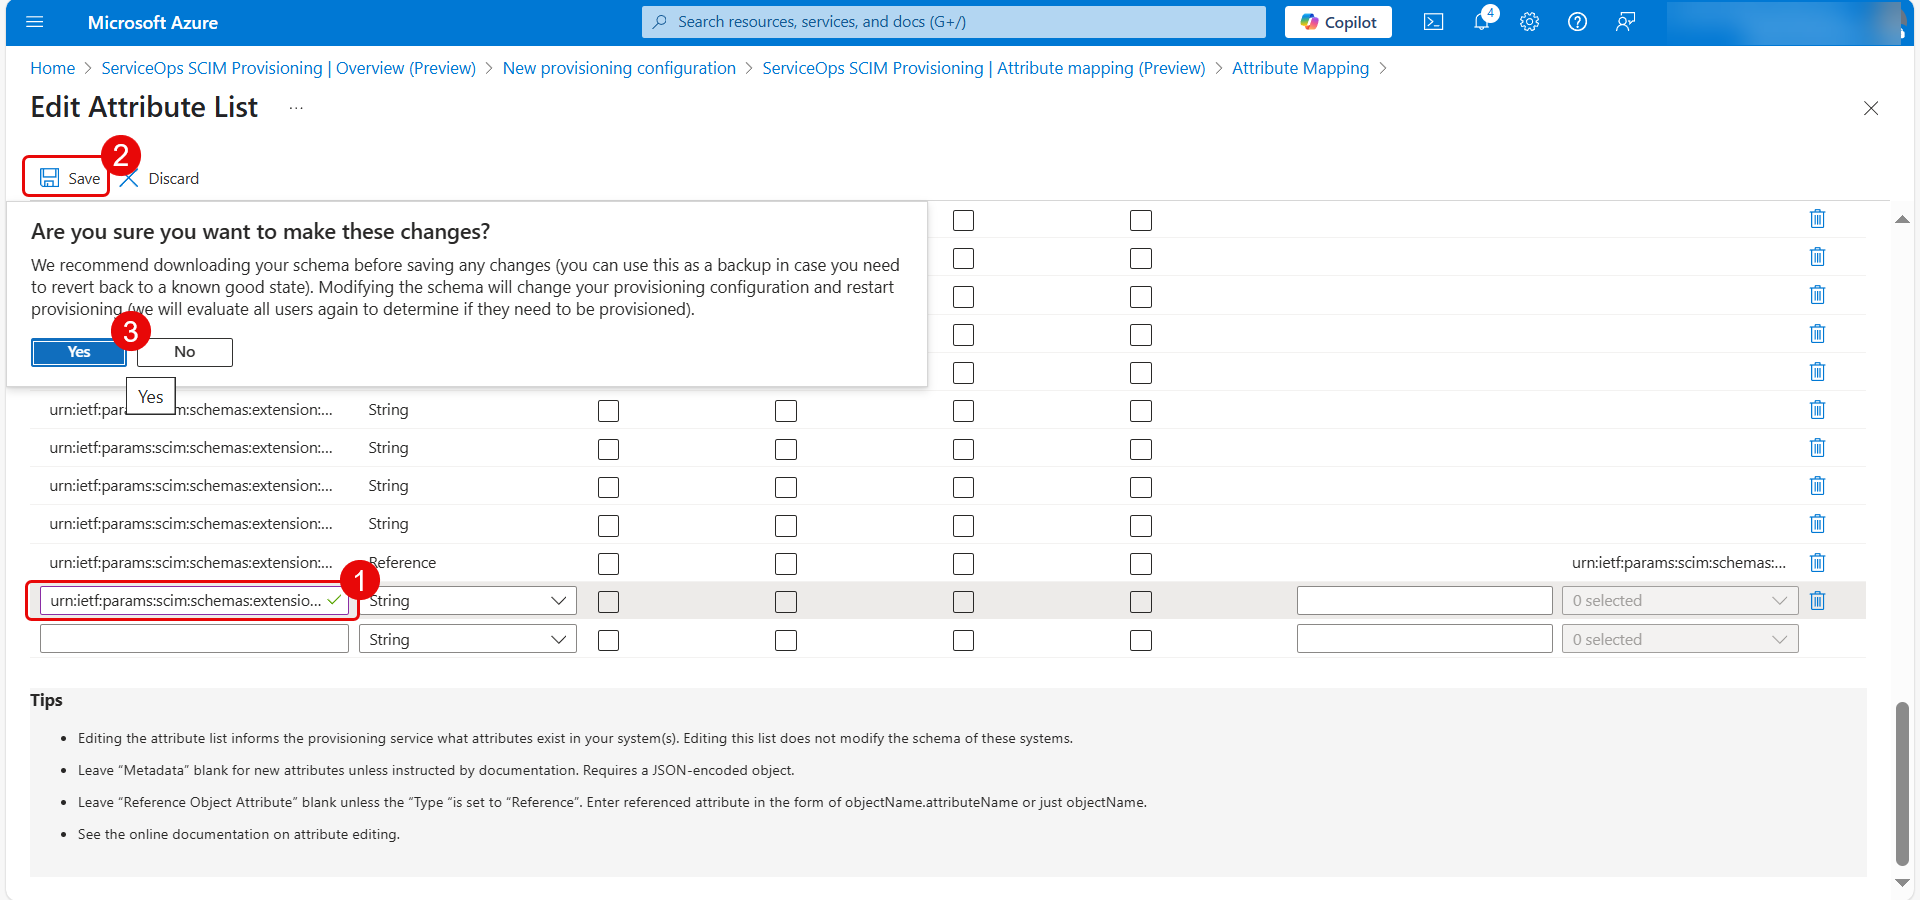
Once done, add new attribute.
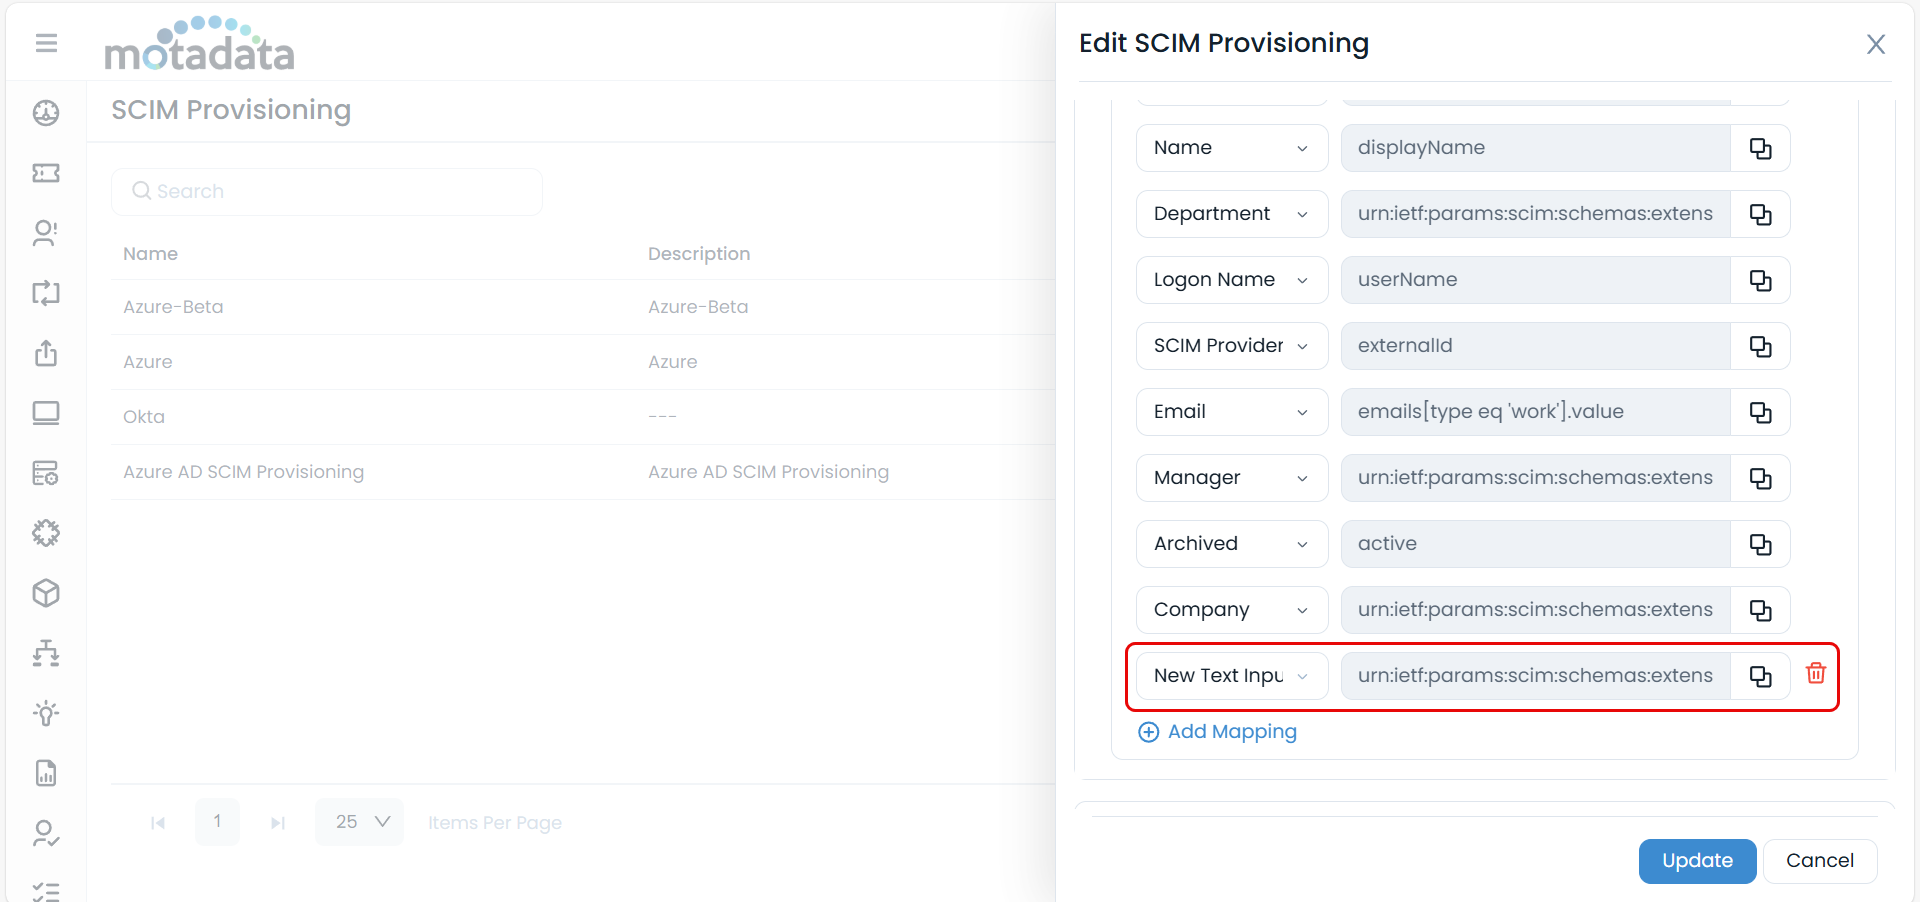
6. Add New Attribute Mappings
- Click Add New Mapping.
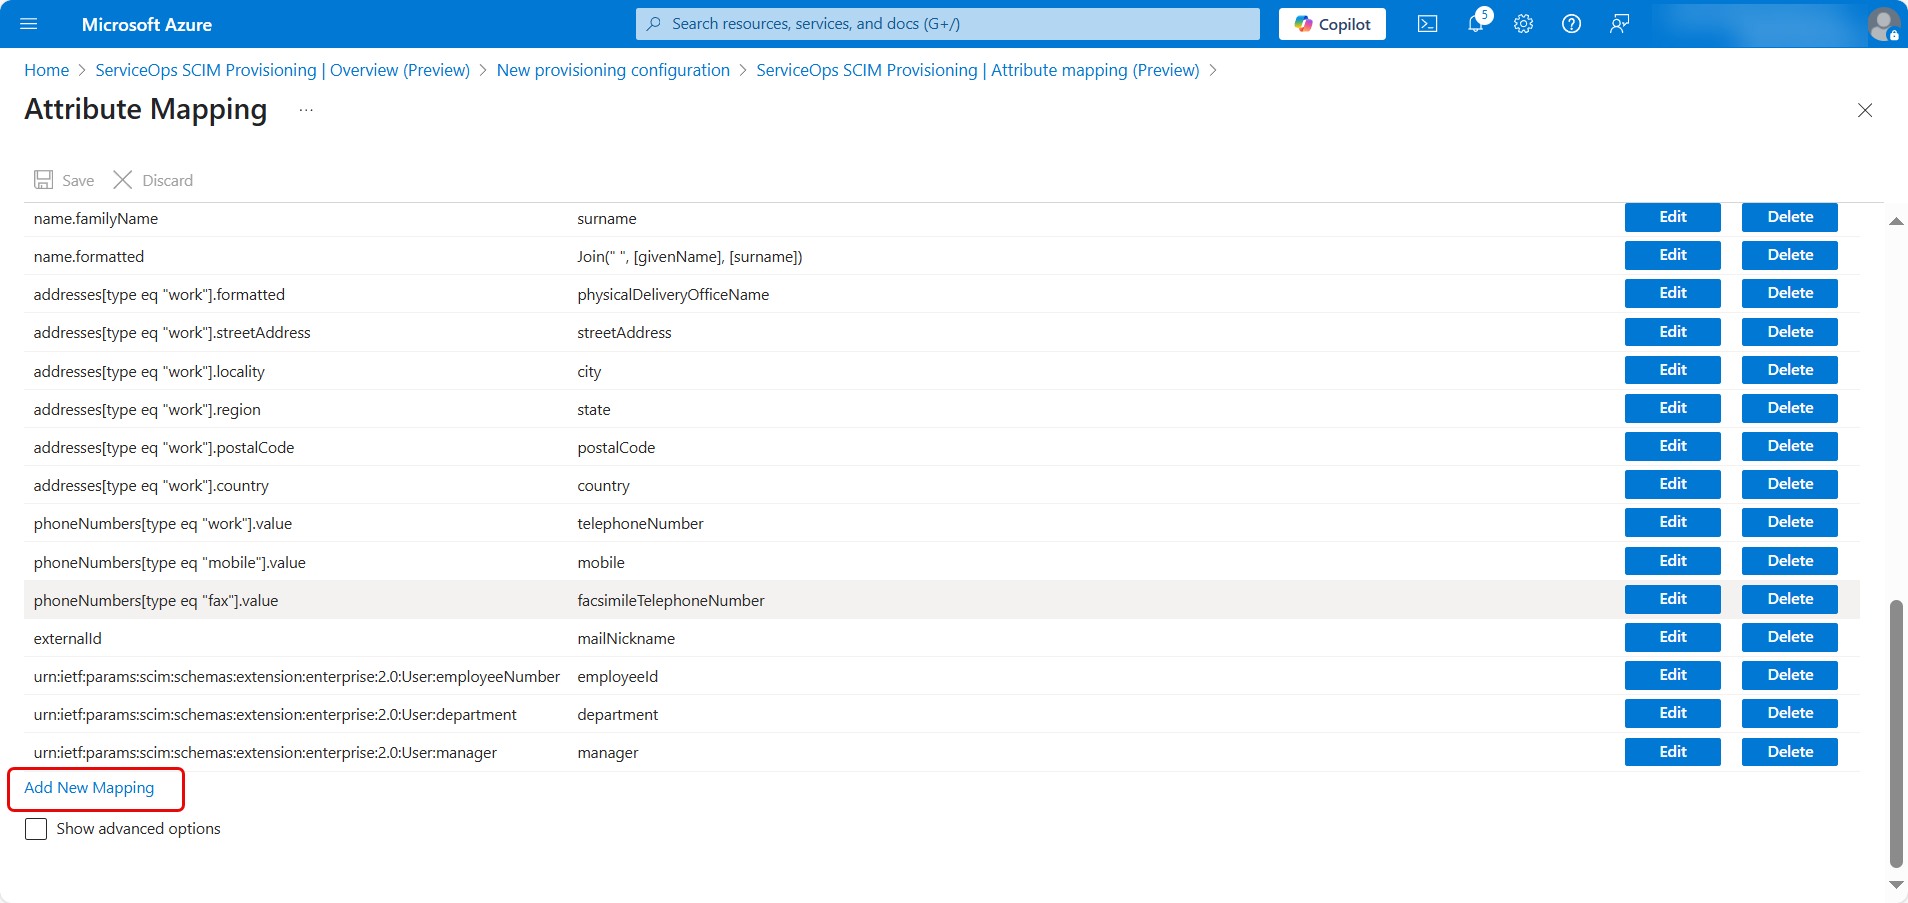
- In the dialog:
- Select the Source Attribute (Azure field) that you want to map.
- Select the Target Attribute (ServiceOps field) that you want to map.
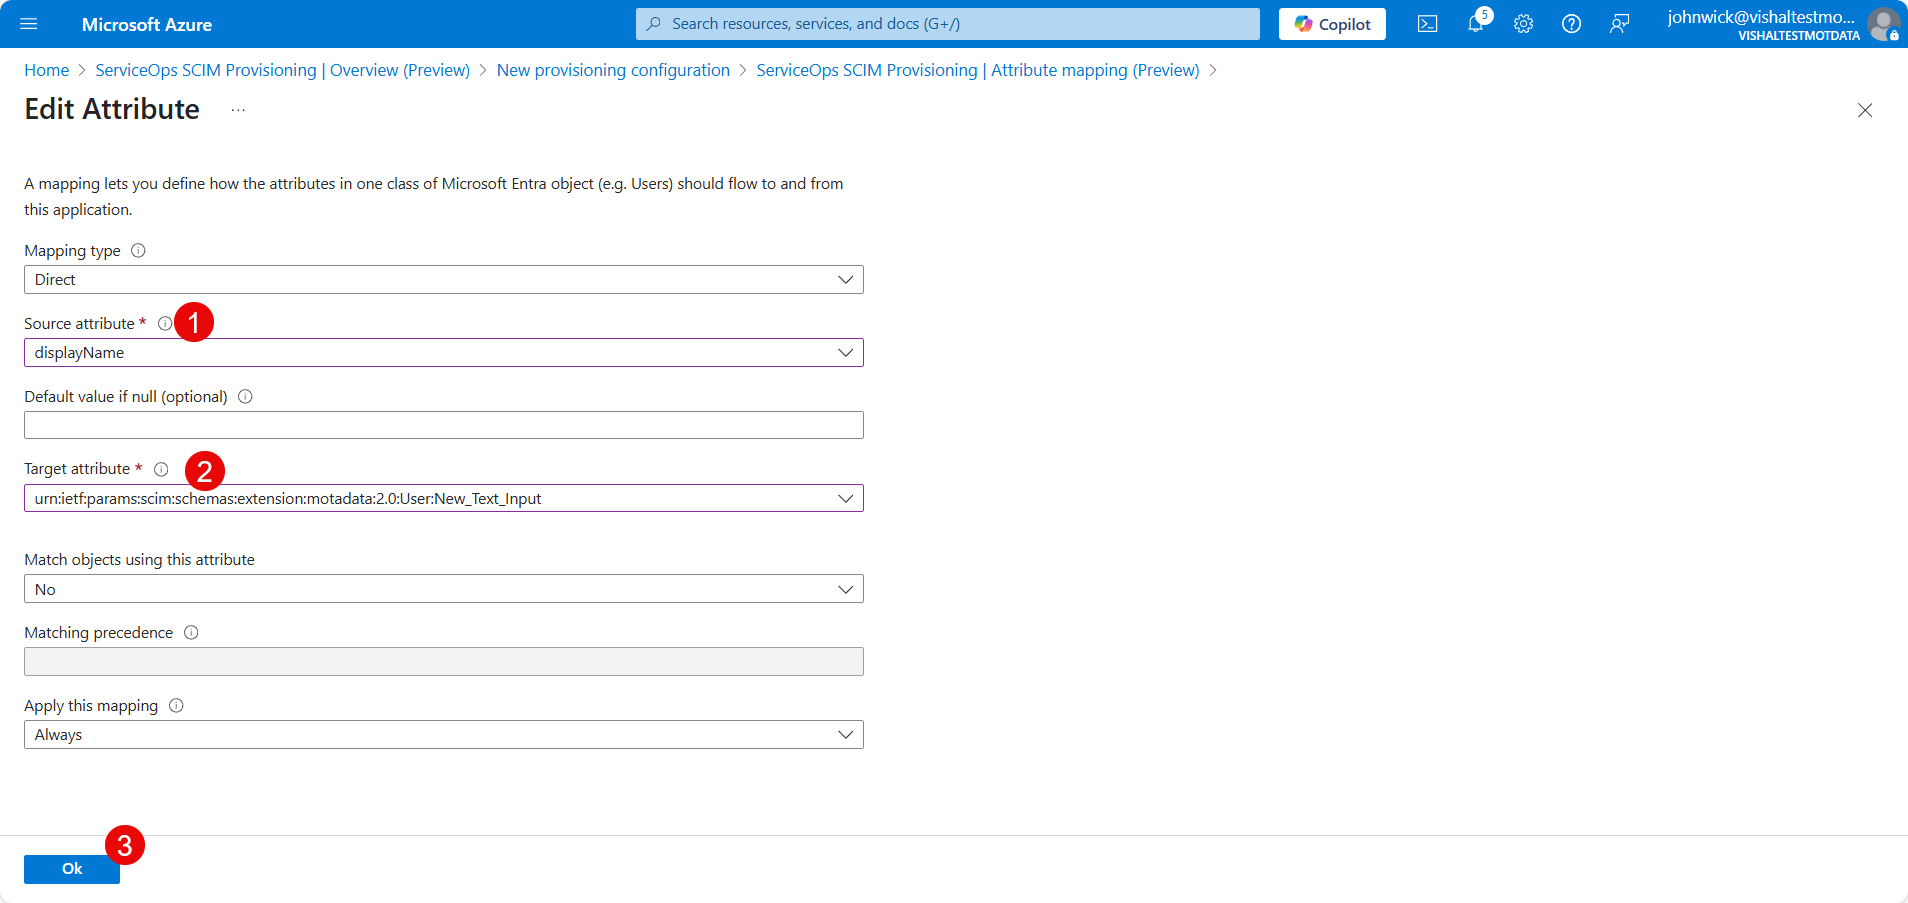
- Click OK and then Save.
7. Start Provisioning
- Navigate to the Overview (Preview) section and click Start Provisioning.
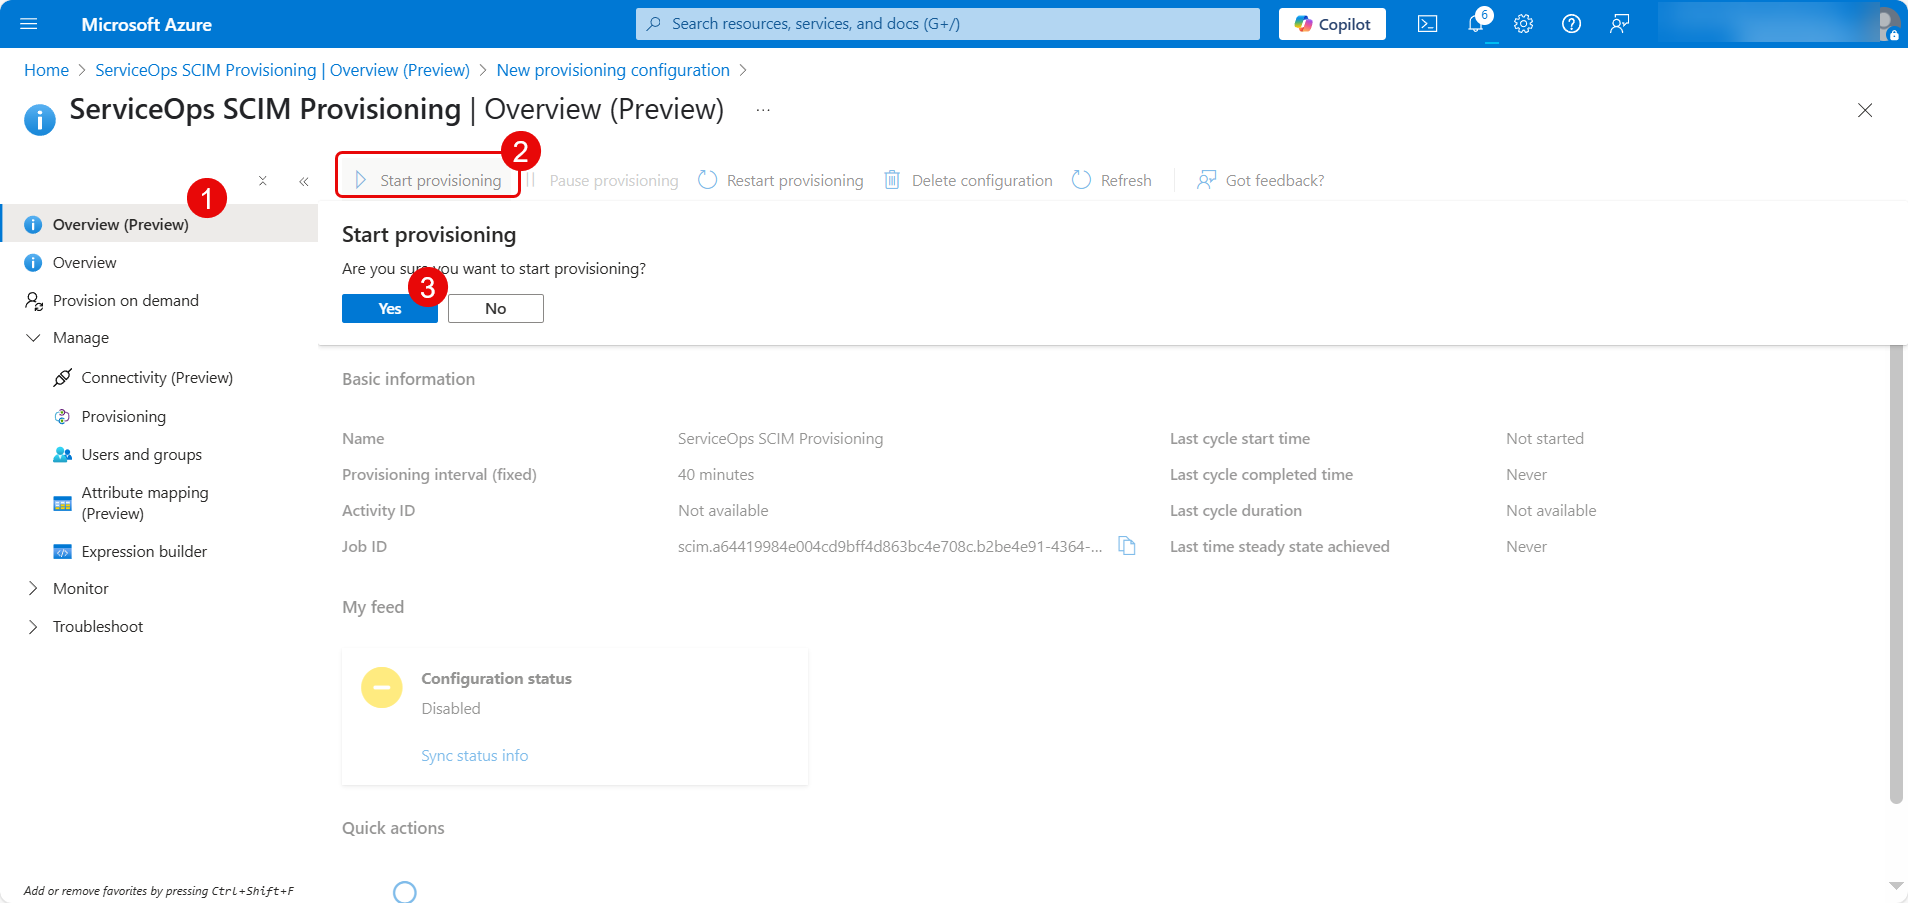
- When prompted, confirm by clicking Yes. A notification will confirm that provisioning has started.

Conclusion
SCIM provisioning is now configured, enabling automated user creation, updates, and archive between Azure AD and your ServiceOps application. This ensures streamlined identity management and reduces manual intervention.
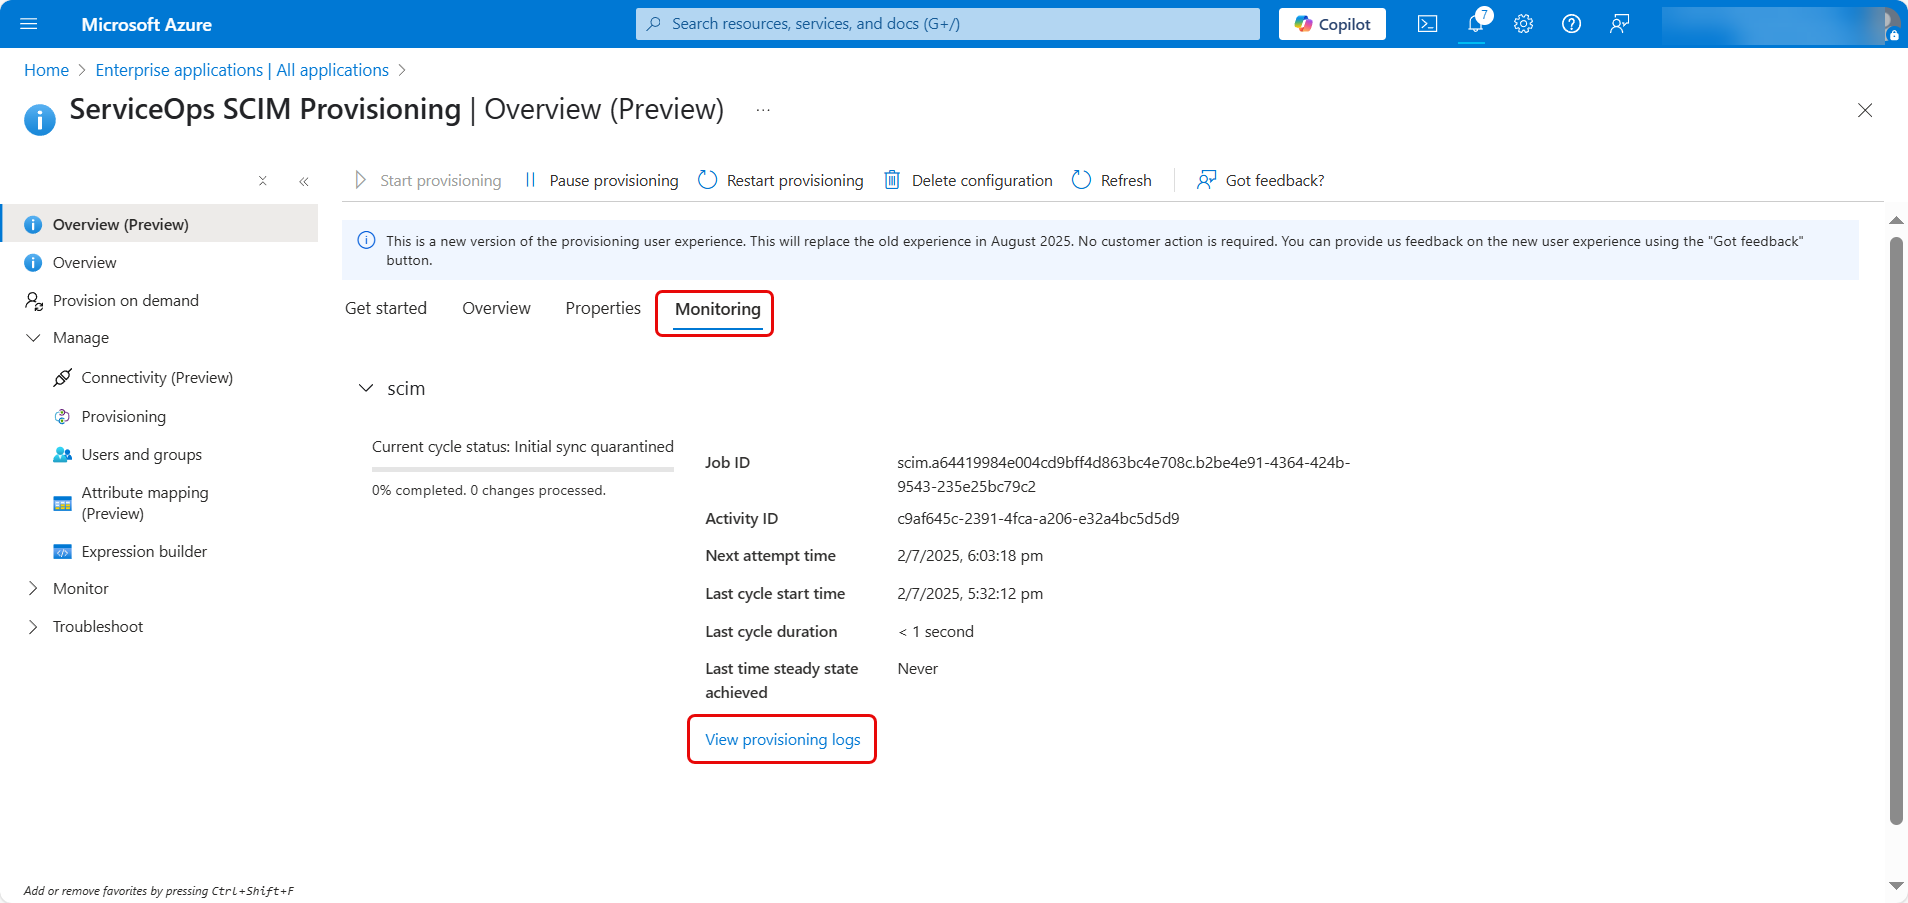
Verification and Initial Sync
After configuration, you must verify that the provisioning is working correctly.
- You can monitor the progress of the initial provisioning cycle from the Provisioning page. Azure will show the number of users and groups synced and the date of the last run.
- Click on Provisioning logs to see a detailed audit trail of all actions performed by the service. This is the best place to troubleshoot any errors.
- If your scope is set to "assigned", navigate to the Users and groups tab of your enterprise application in Azure AD and assign the users or groups you wish to provision.
- Finally, log in to ServiceOps and verify that the users and groups have been created or updated as expected in the Users and Groups sections.
Synchronization between Azure AD and ServiceOps via SCIM typically occurs every 40 minutes, reflecting Azure's default provisioning cycle.