Adding Knowledge Sources
Add articles, files, and websites to a knowledge collection so AI agents can retrieve accurate, organization-specific information during conversations.
Once a collection is created, populate it with one or more source types. Each source type is suited to different content — choose based on where your knowledge already lives.
Source Types at a Glance
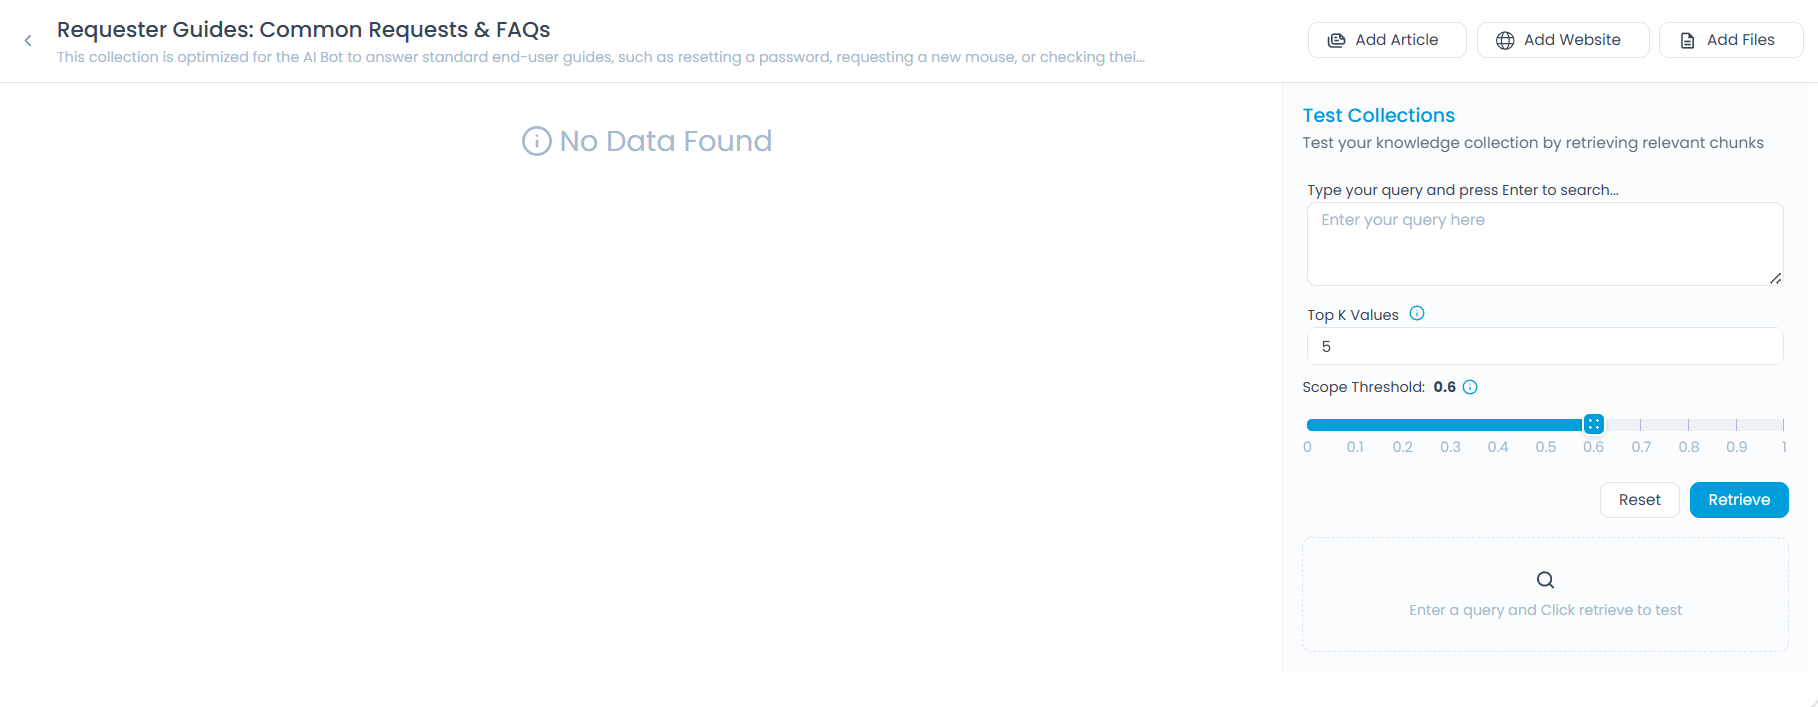
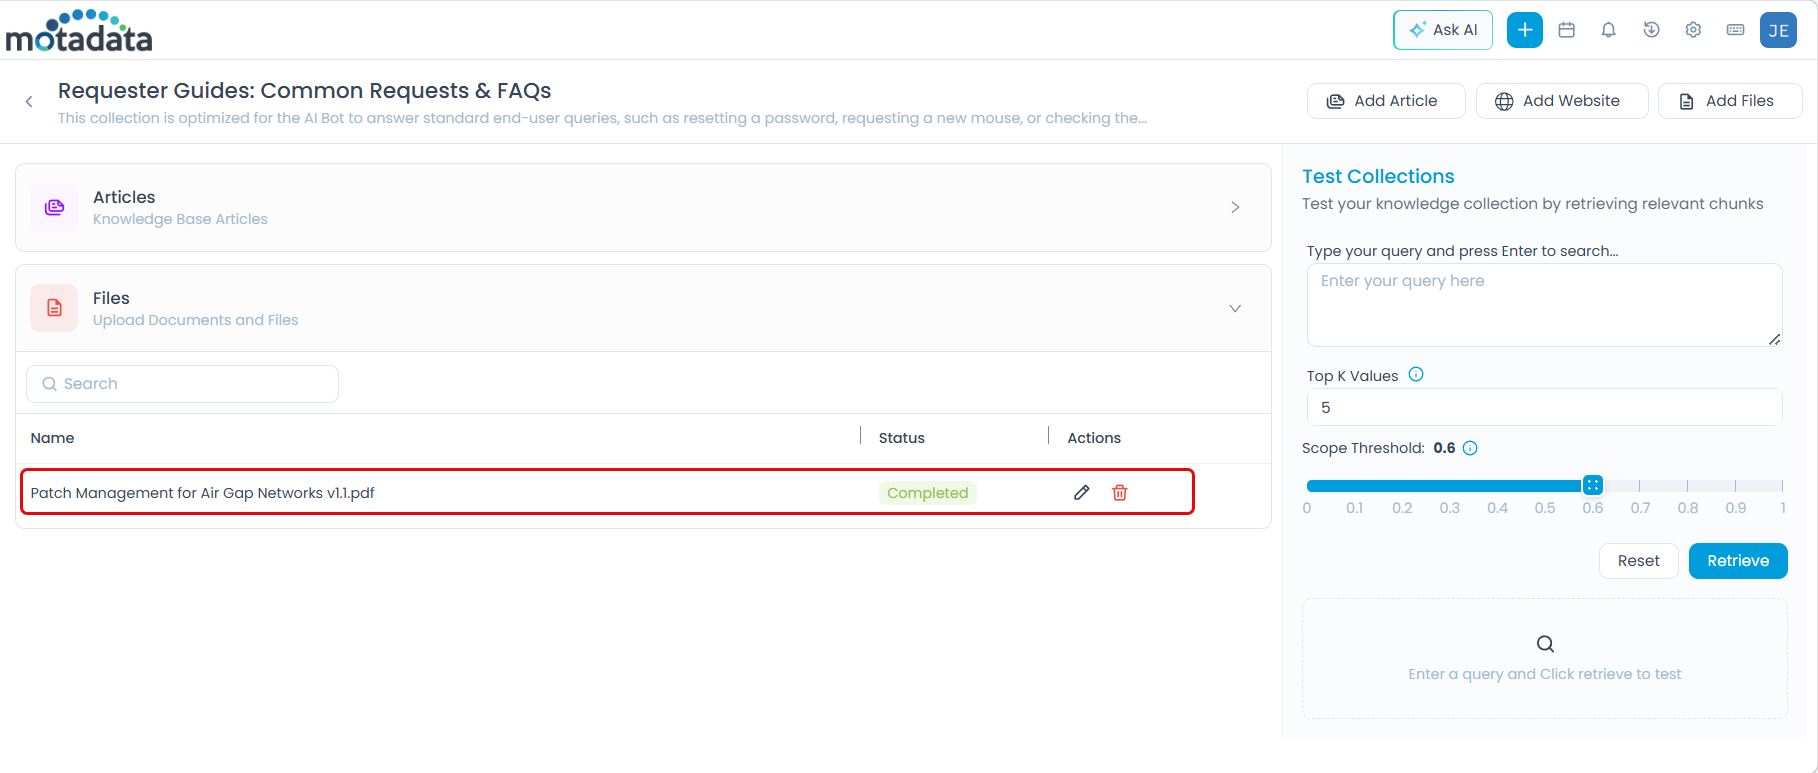
Open a knowledge collection. The header provides actions to add sources and test the collection:
| Action | Source Type | Best For |
|---|---|---|
| Add Article | Knowledge Base articles | Published content already maintained in ServiceOps KB |
| Add Files | PDF, DOCX, TXT documents | Internal documentation, manuals, or policy files |
| Add Website | Crawled web pages | External docs, public knowledge bases, or intranet sites |
| Test Collection | — | Validating retrieval after adding sources. See Testing a Collection |
Adding Articles
Articles are pulled from your existing ServiceOps Knowledge Base and stay in sync automatically.
- Only published articles are indexed — drafts are excluded.
- Archived or expired articles are automatically removed from the collection.
- Updates to KB articles sync automatically, keeping the collection current.
Click Add Article. A side drawer opens showing your KB folders and articles.
Select the articles or folders you want to include.
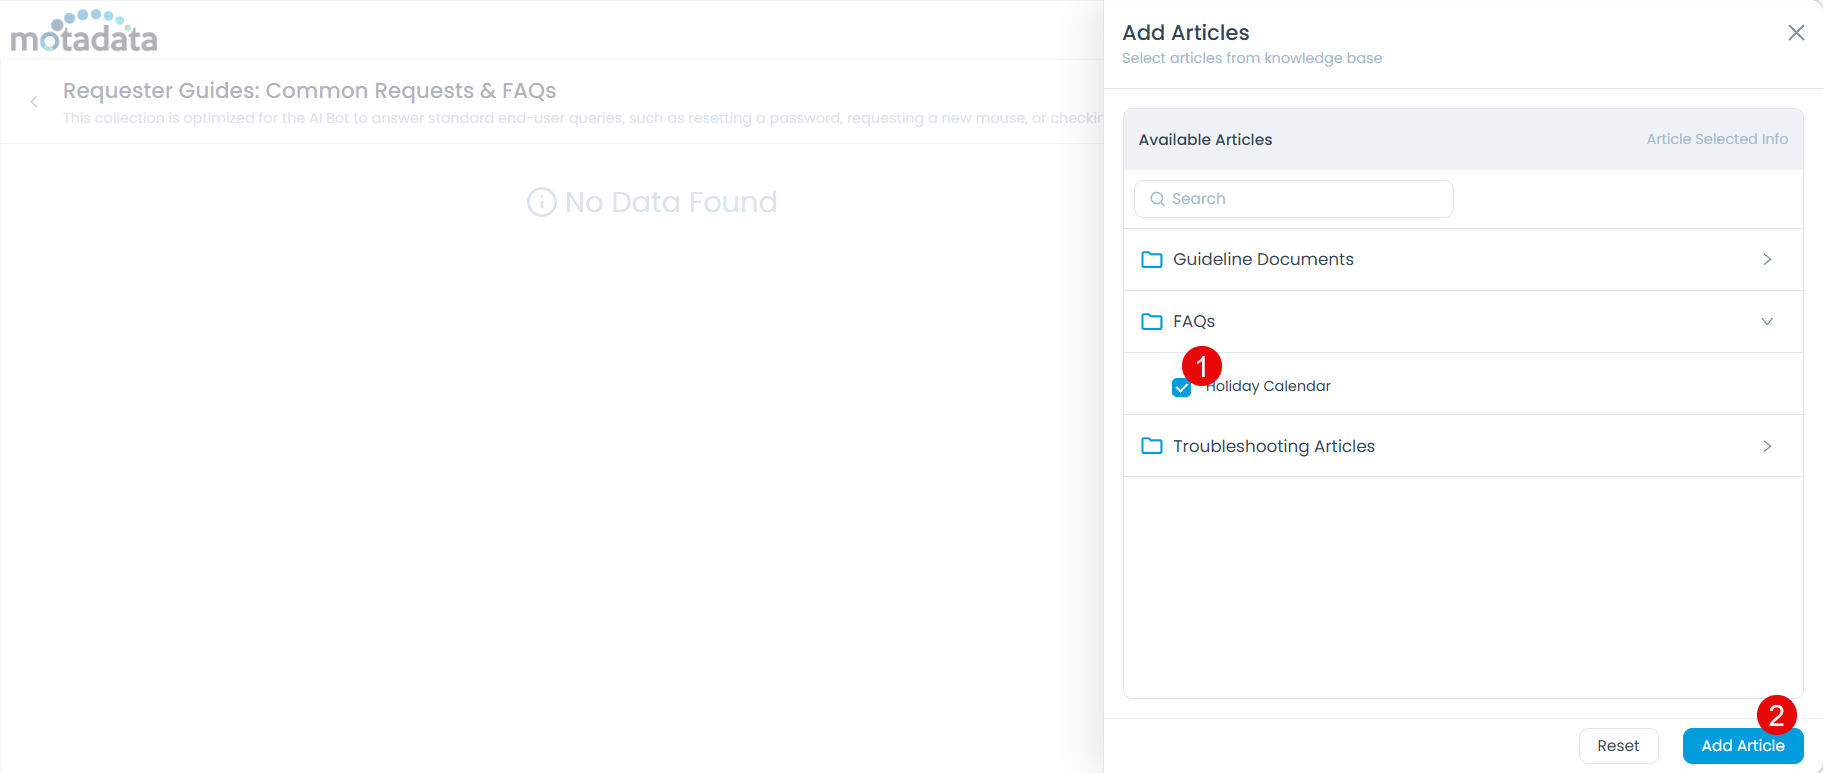
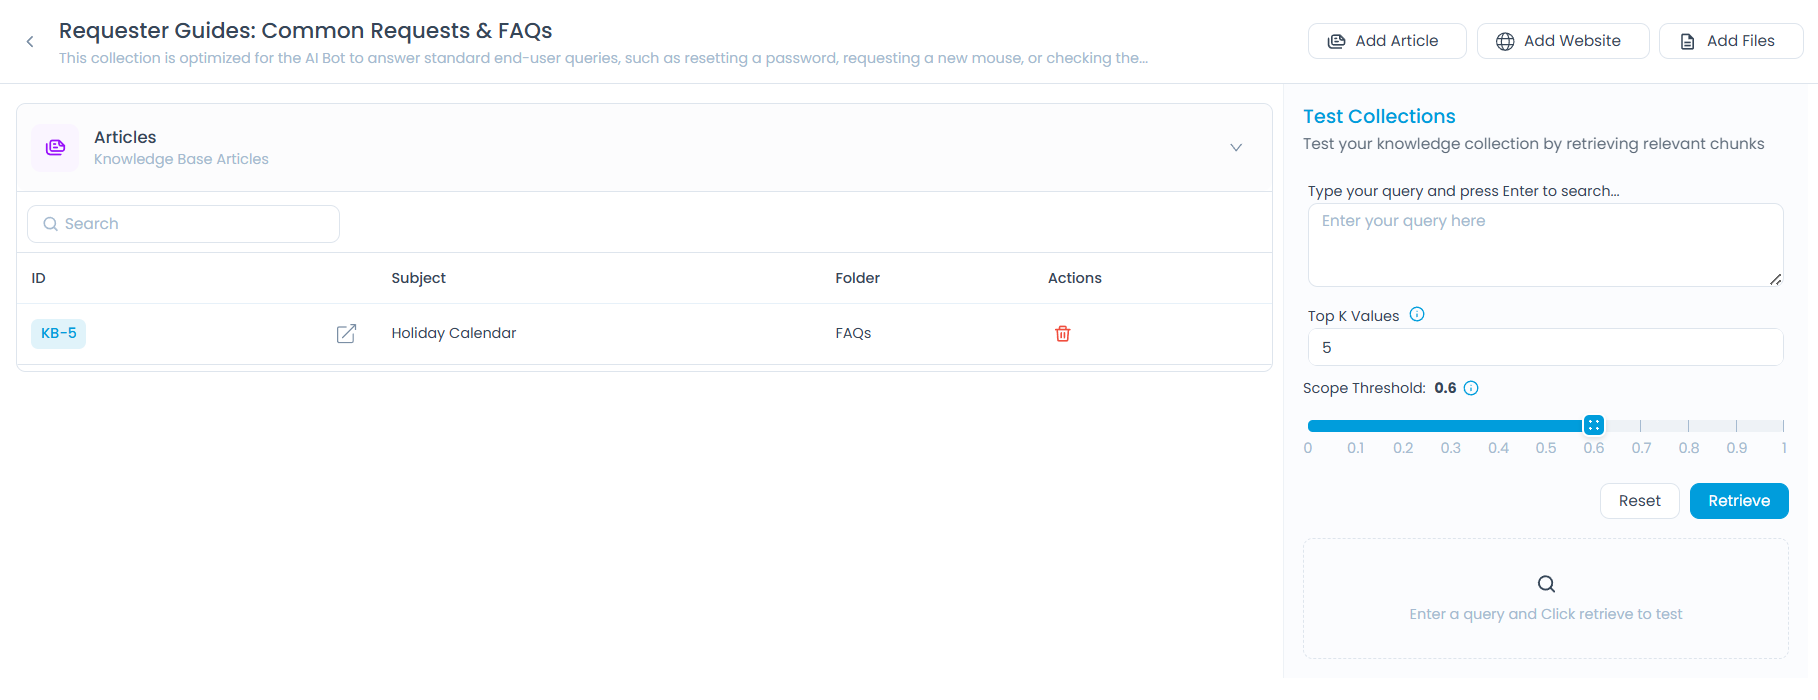
Click Add Article. The selected articles appear in the collection.
Adding Files
Upload documents directly into the collection for content that exists outside your Knowledge Base.
Supported formats: PDF, DOCX, TXT — up to 5 files per upload.
Click Add Files. The upload dialog appears.
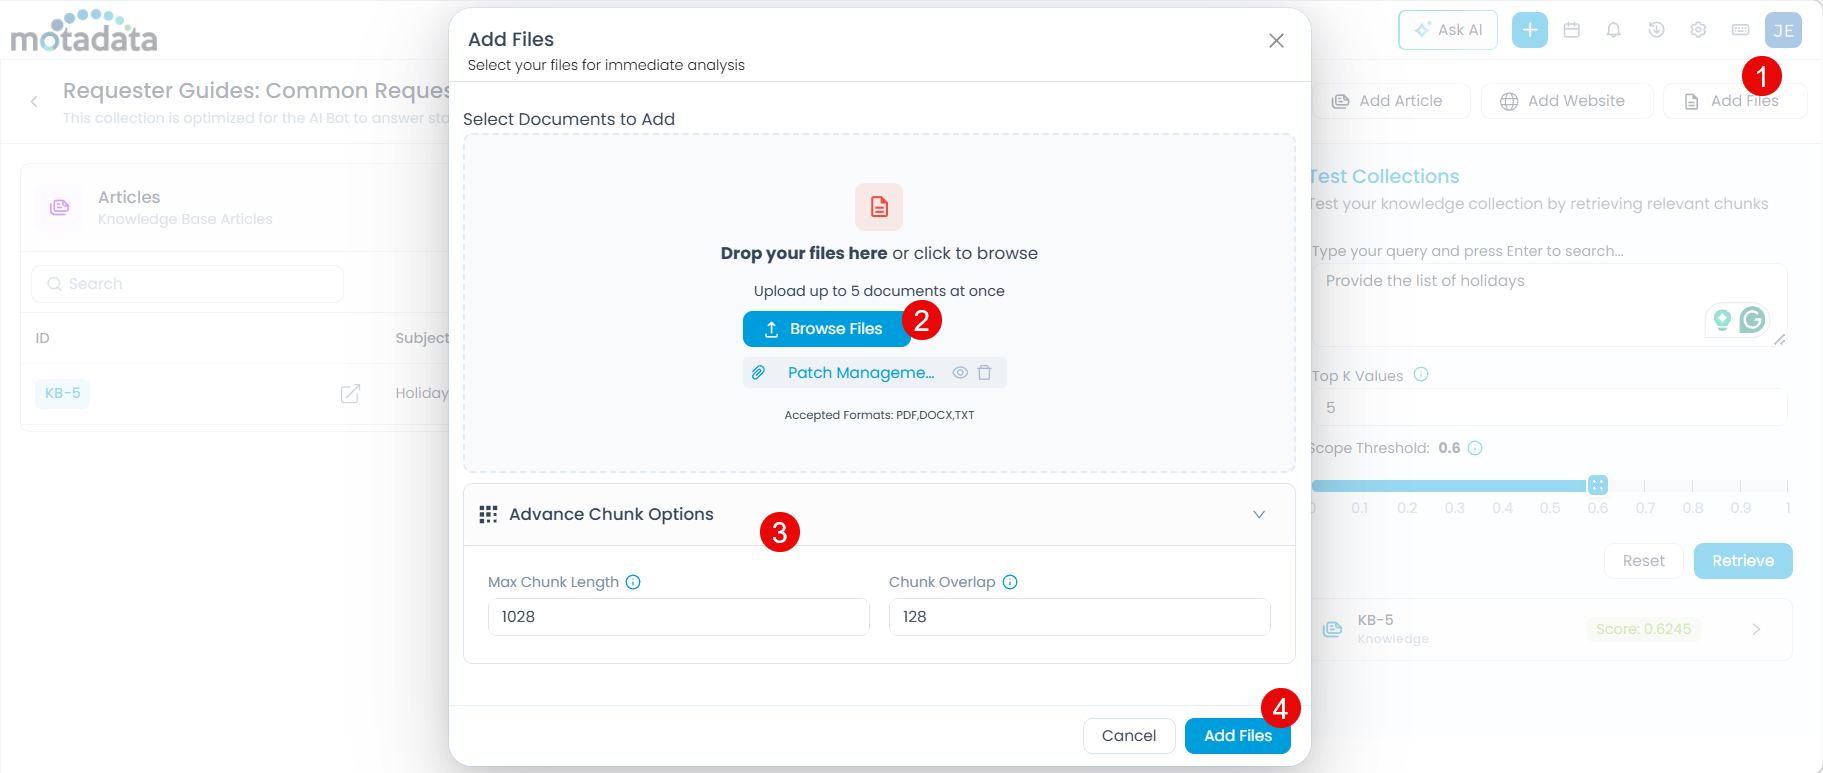
Drag and drop files onto the dialog or click Browse Files to select them.
Optionally, expand Advance Chunk Options to control how file content is split for AI processing:
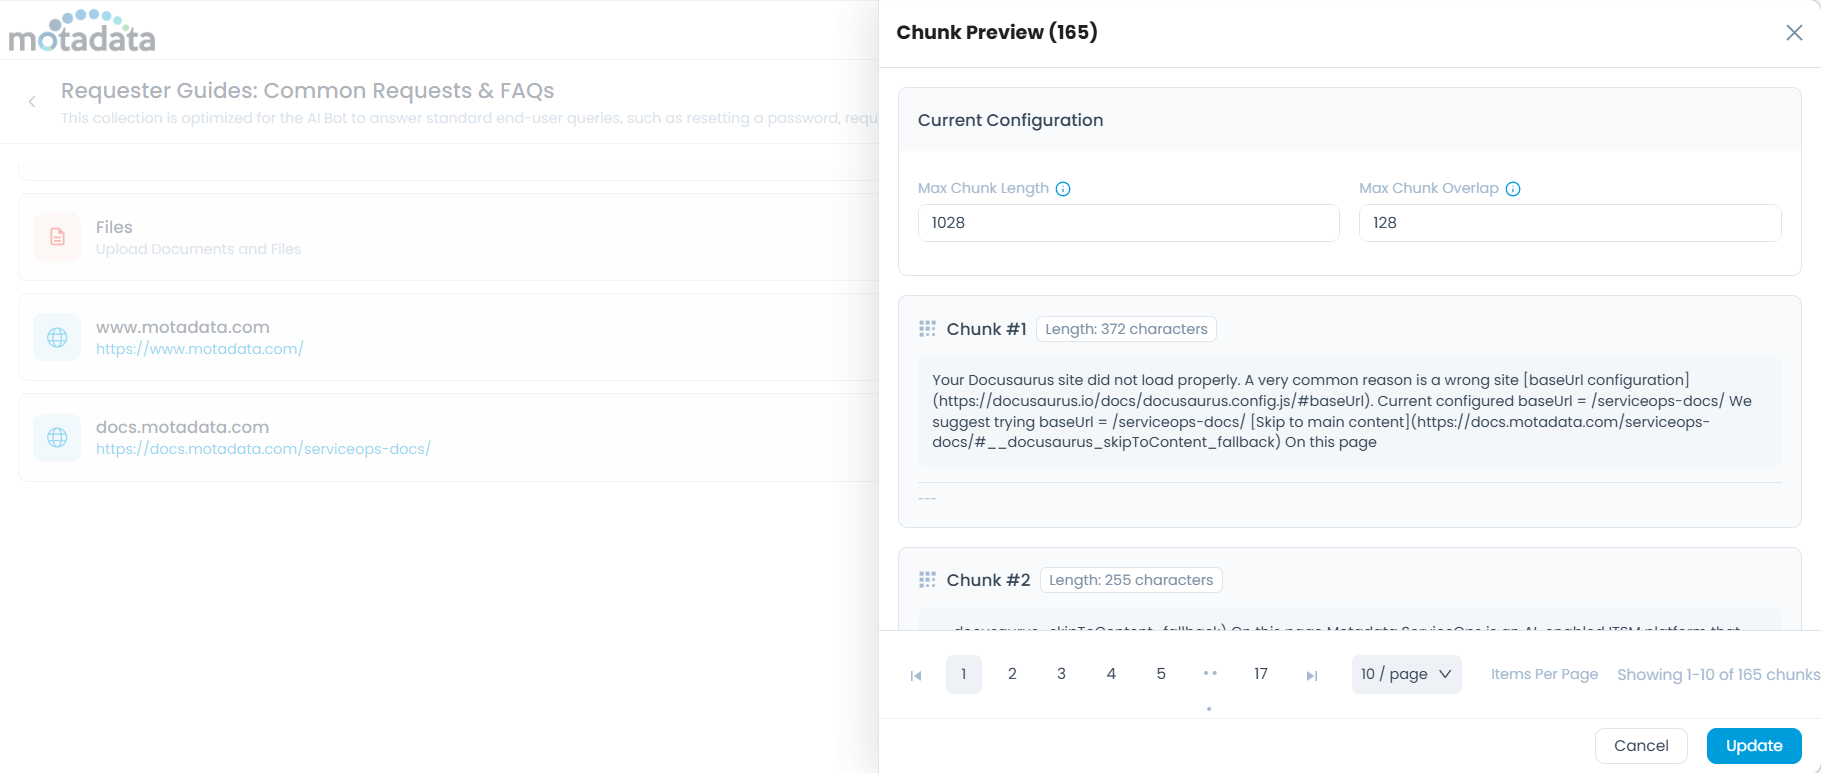
- Max Chunk Length — Maximum characters per chunk (default:
1028). Increase for dense technical content; decrease for short FAQs. - Chunk Overlap — Characters shared between consecutive chunks (default:
128). Increase if important context is being cut off at chunk boundaries.
- Max Chunk Length — Maximum characters per chunk (default:
Click Add Files. The uploaded files appear in the collection.
Adding Websites
Crawl pages from a URL and add the extracted content to the collection. Useful for documentation sites, public knowledge bases, or intranet pages.
Click Add Website. The Website Crawling dialog appears.
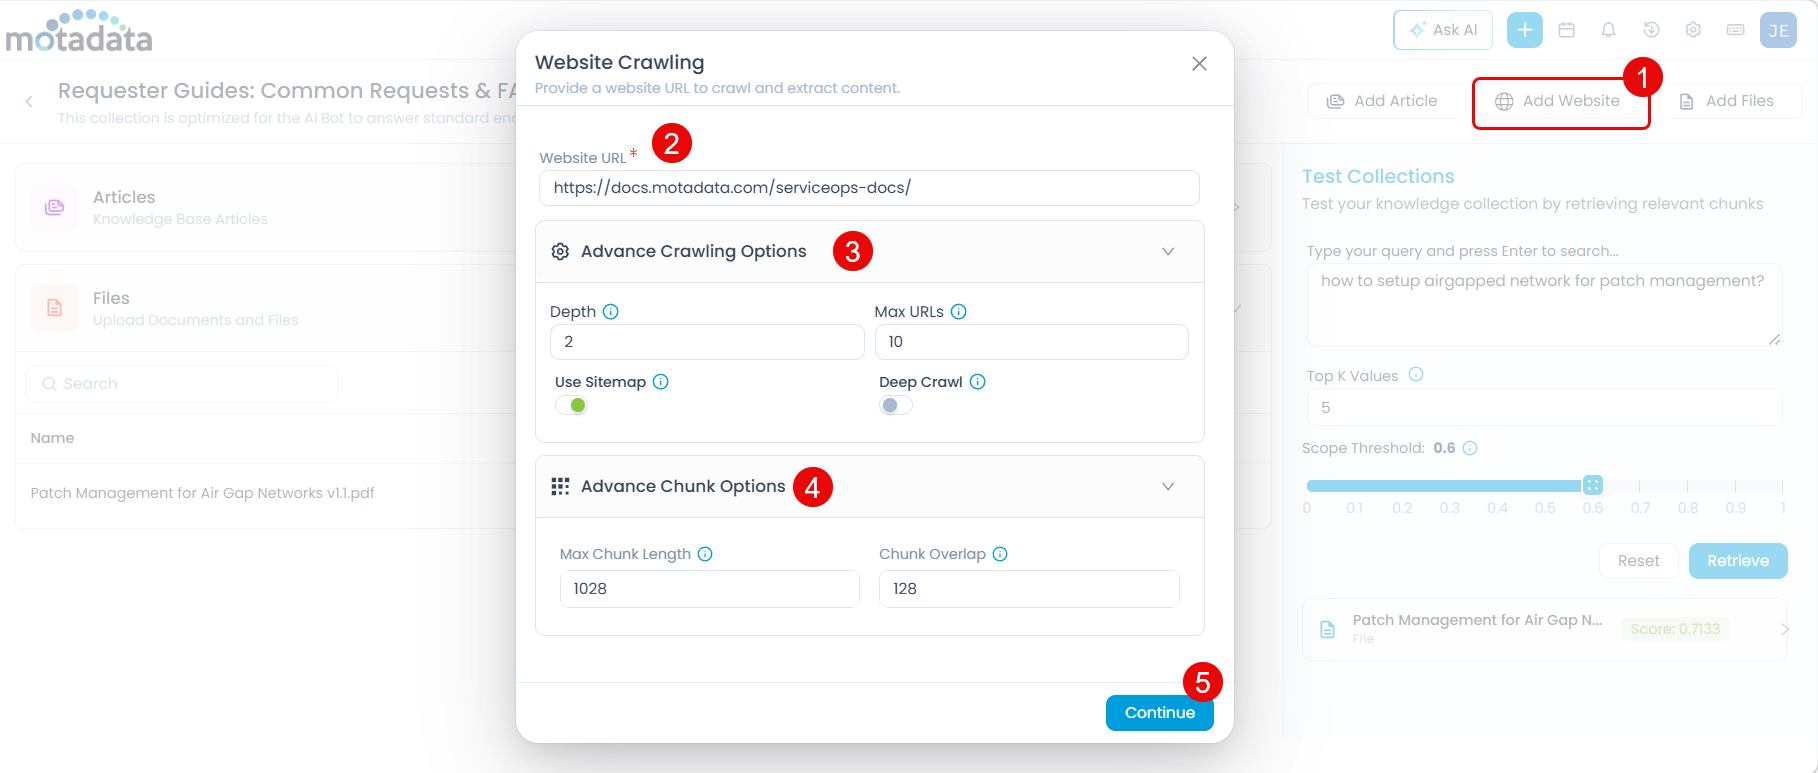
Enter the Website URL (mandatory). For example:
https://docs.motadata.com/serviceops-docs/Expand Advance Crawling Options to control how much of the site is crawled:
Option Description Default Depth How many link levels deep the crawler follows from the starting URL 2Max URLs Maximum pages to crawl 10Use Sitemap Uses the site's sitemap for faster, more complete discovery Off Deep Crawl Follows more internal links for broader coverage Off Expand Advance Chunk Options to configure how crawled content is processed:
- Max Chunk Length — Maximum characters per chunk (default:
1028). - Chunk Overlap — Characters shared between consecutive chunks (default:
128).
tipUse the same chunk settings guidance as for files: increase Max Chunk Length for long-form pages, increase Chunk Overlap if context is being lost between chunks.
- Max Chunk Length — Maximum characters per chunk (default:
Click Continue. The system begins crawling the site.
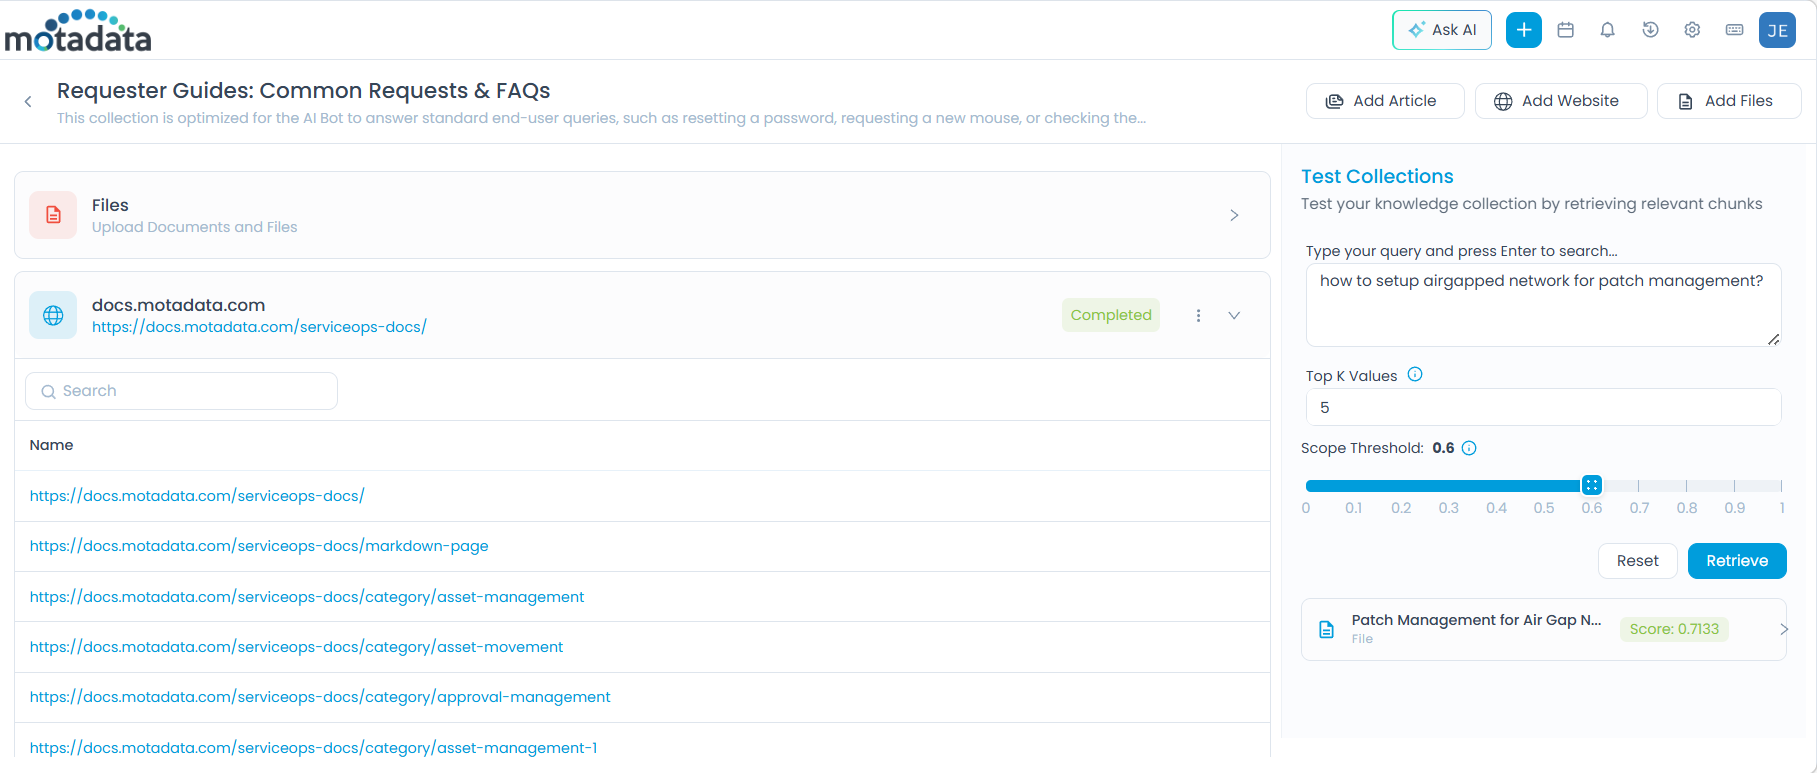
Reviewing and Selecting Crawled Pages
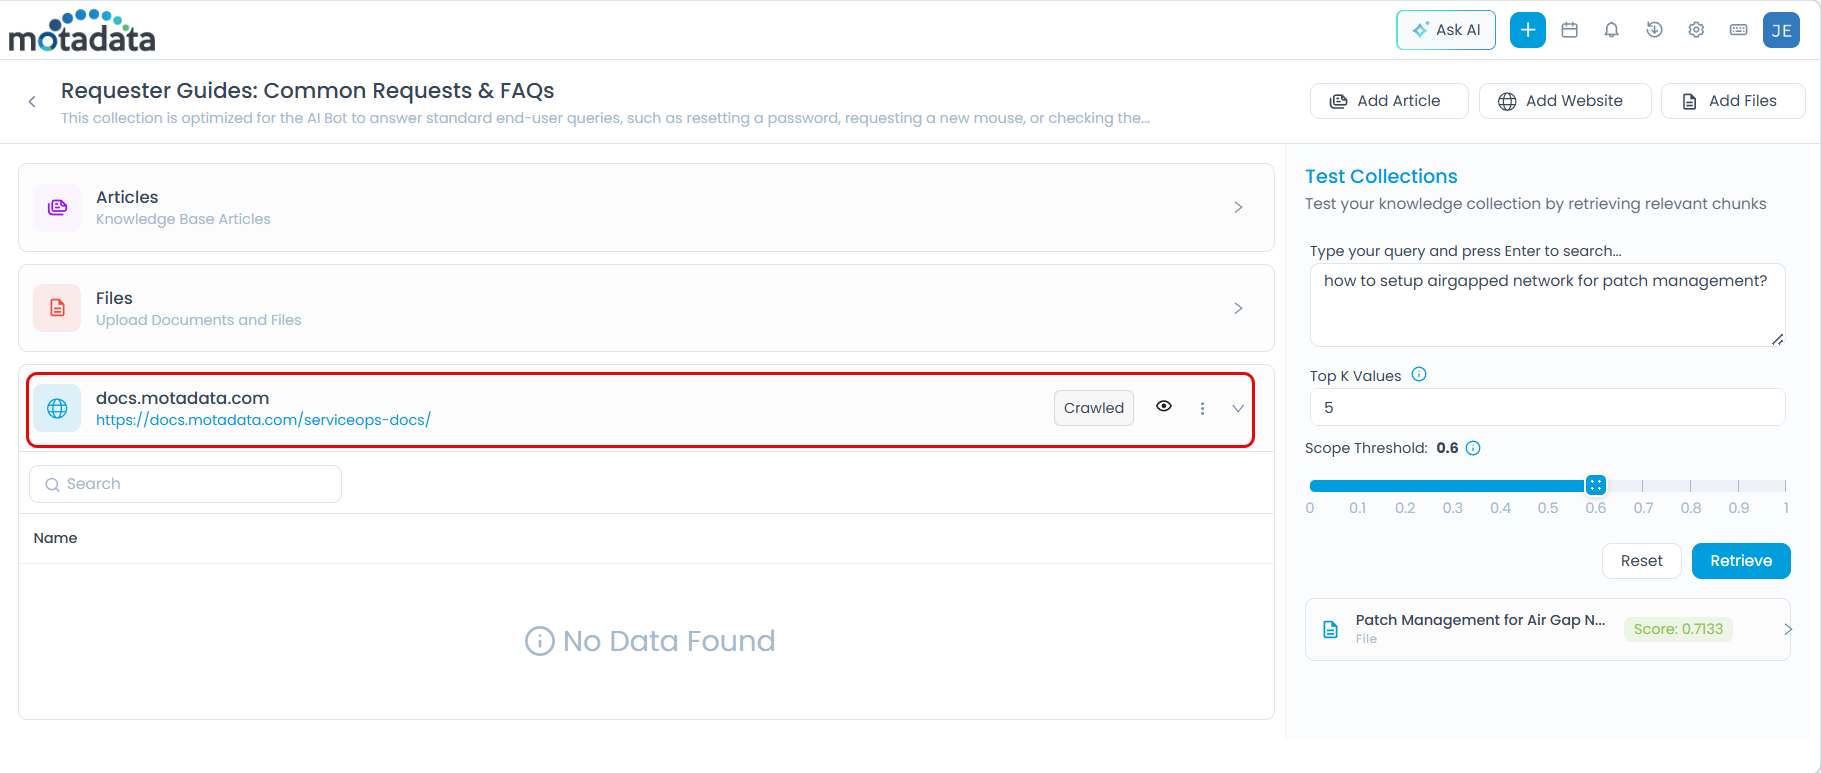
Once crawling completes, the Crawled status appears on the source entry.
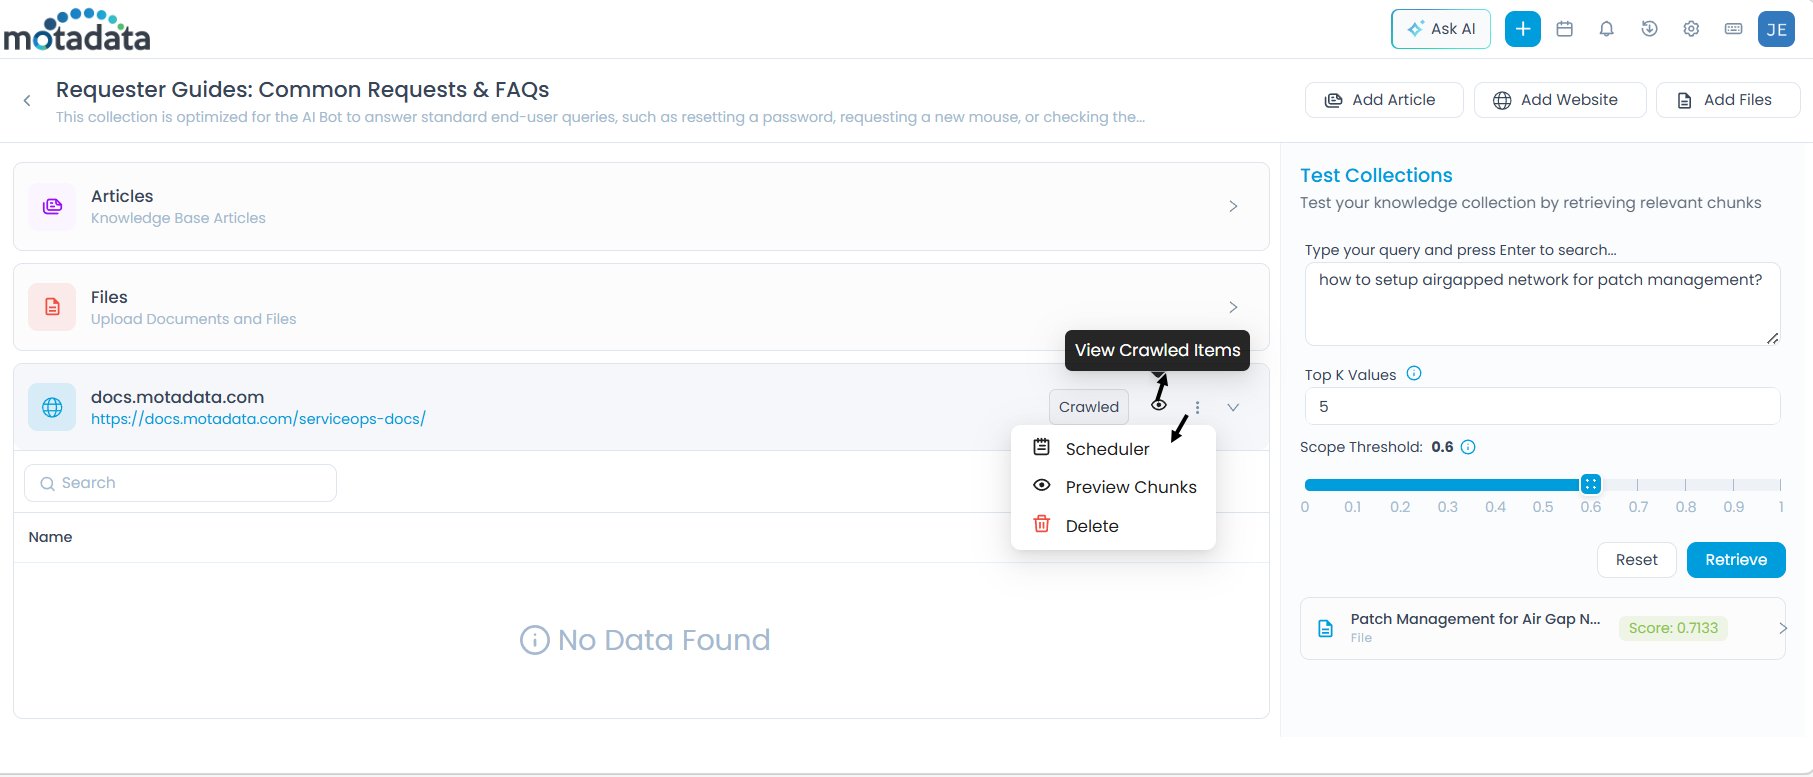
Click the eye icon (View Crawled Items) to open the Select Pages to Index dialog.
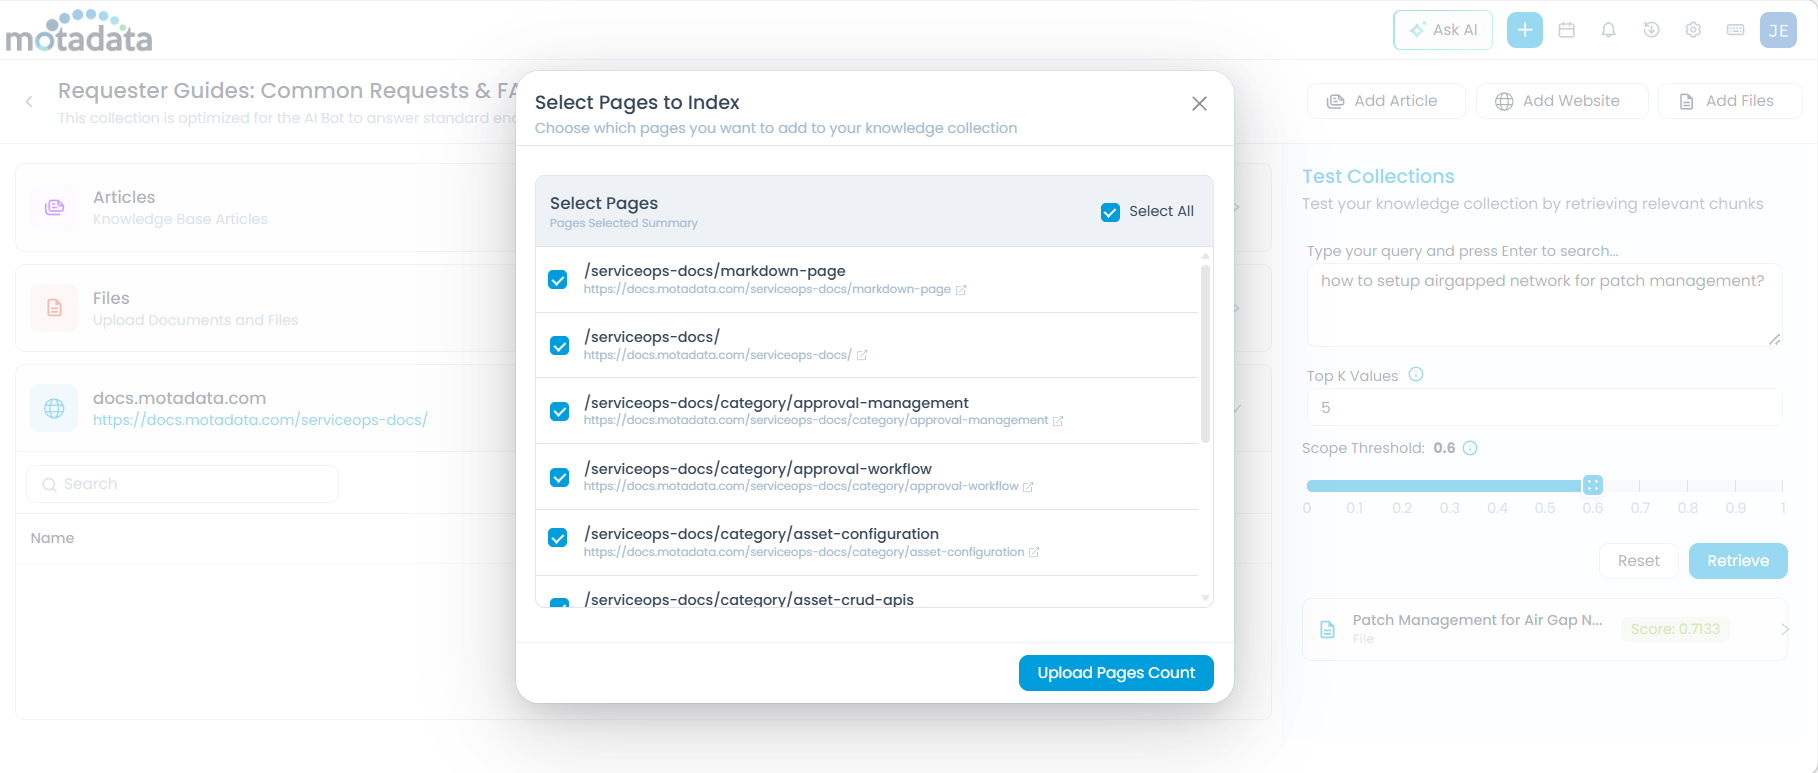
- Select individual pages by checking their boxes, or use Select All.
- Click Upload Pages Count to add the selected pages to the collection. The number of pages uploaded is displayed. Here, you can use the Search bar, to view any specific URL from the list.
Managing a Website Source
After pages are uploaded, additional options are available from the three-dot (More Options) menu on the source entry:
Configure Scheduler
Set up automatic synchronization so the collection stays current with changes on the source website.
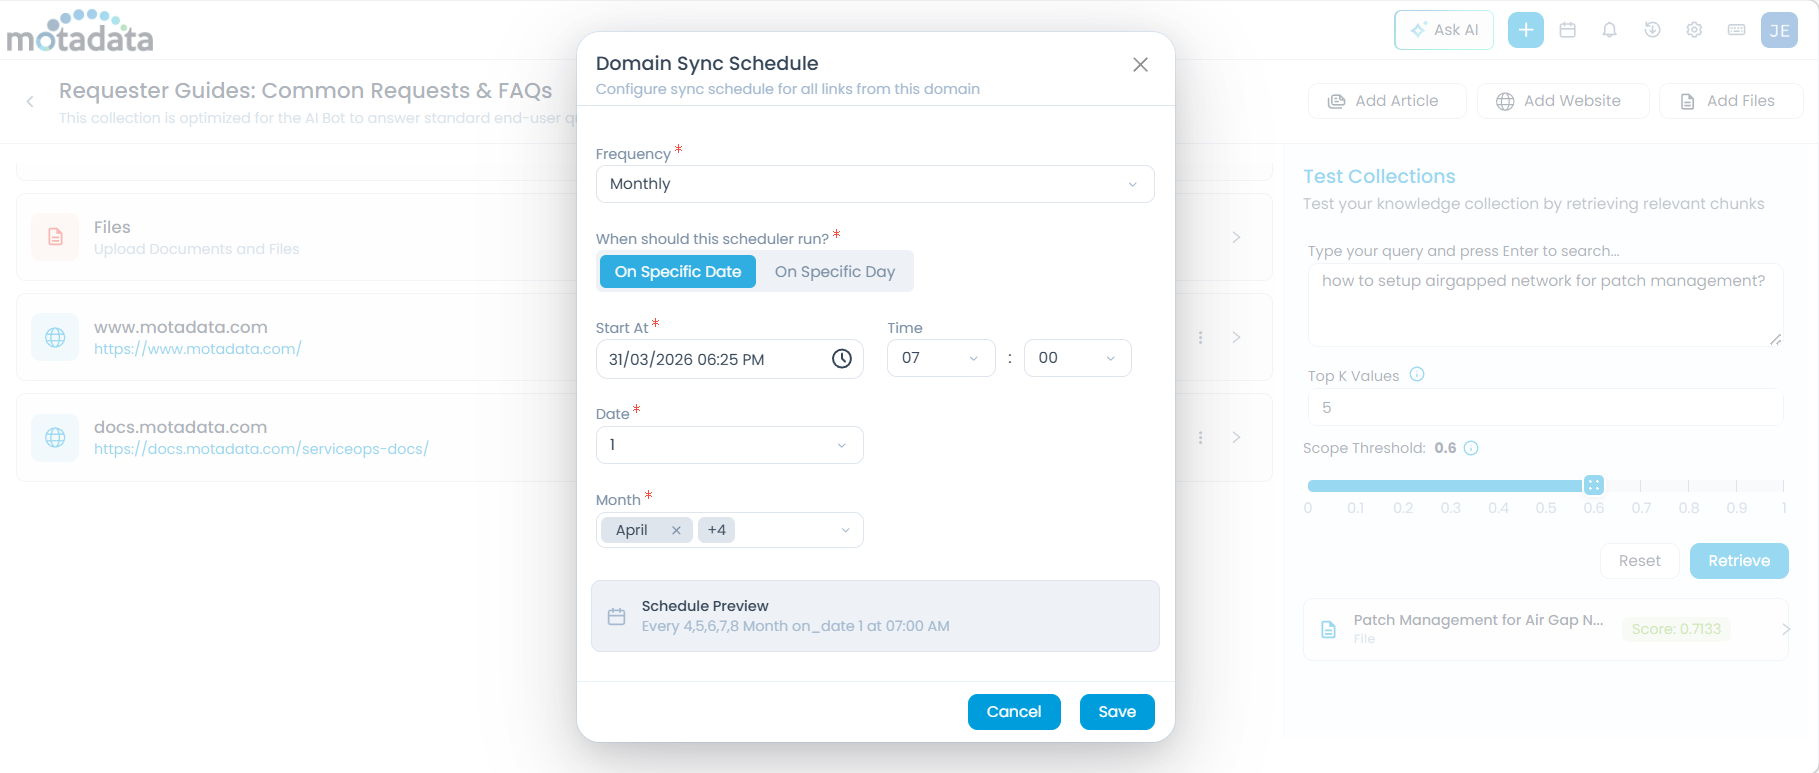
Click More Options > Scheduler. The Domain Sync Schedule dialog appears.
Configure the Frequency:
Once — Set a one-time sync by specifying a date and time in the Start At field.
Monthly — Set a recurring monthly sync. Select one of the two scheduling modes:
On Specific Date — Runs on a fixed date each month. Configure the following fields:
Field Description Start At The time of day the sync runs Time Time in HH:MM format Date The day of the month to run the sync (e.g., 15 for the 15th) Month The month(s) in which the schedule applies On Specific Day — Runs on a relative day each month (e.g., the second Tuesday). Configure the following fields:
Field Description Start At The time of day the sync runs Time Time in HH:MM format Occurrence Which occurrence of the weekday in the month — First, Second, Third, Fourth, or Last Weekday The day of the week to run (e.g., Monday, Tuesday) Month The month(s) in which the schedule applies
The Schedule Preview shows a summary of your configuration. Click Save to apply.
Sync Now
Click More Options > Sync Now to immediately pull the latest content from the website, outside of any scheduled sync.
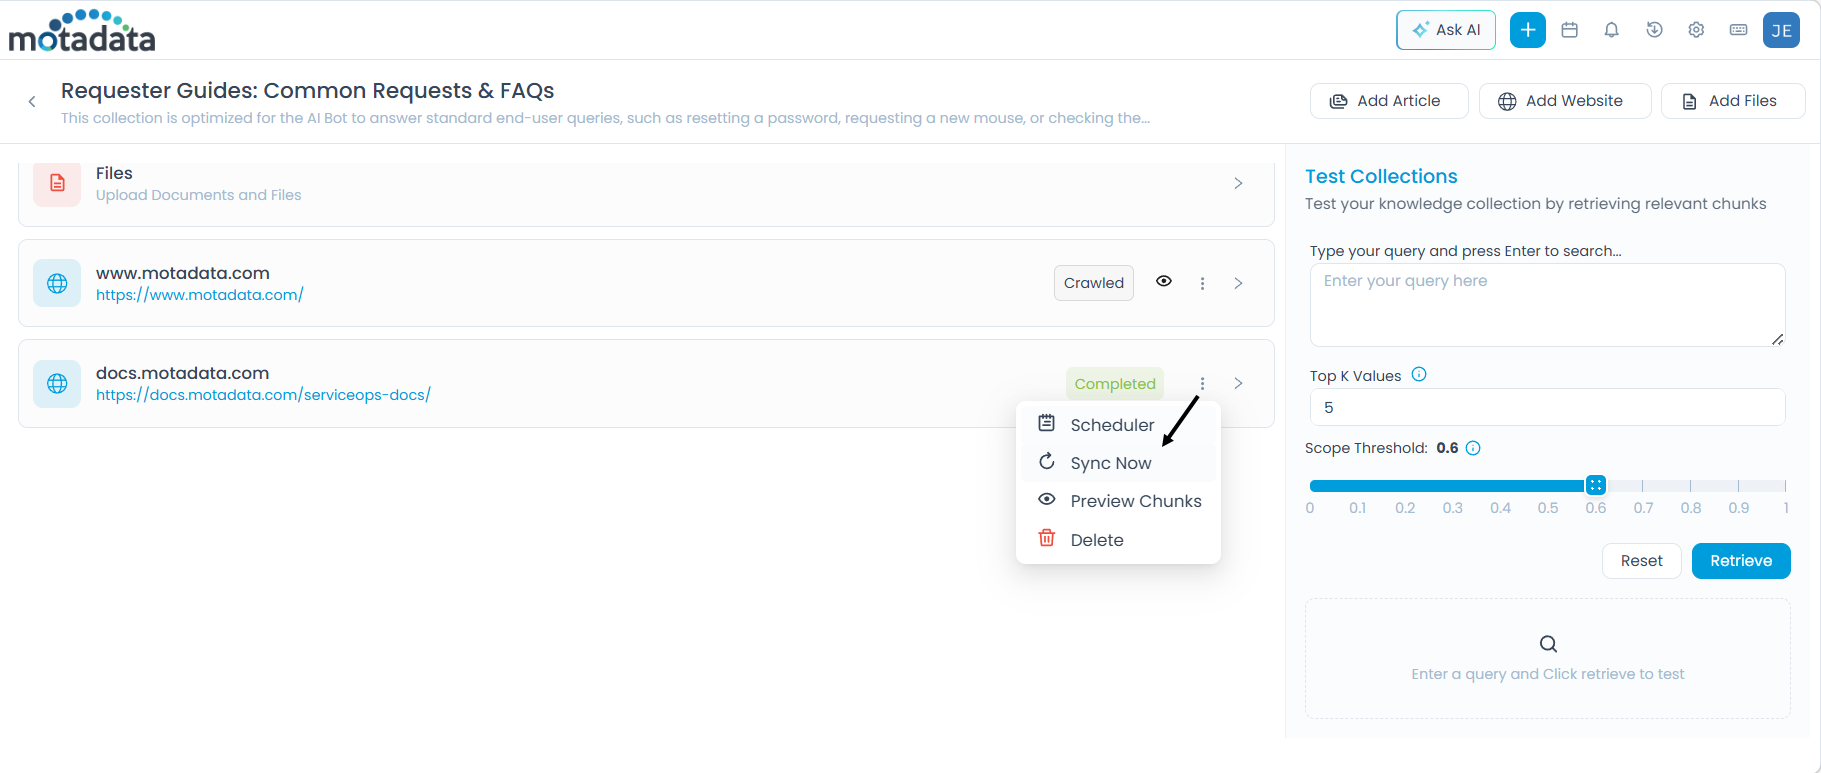
Preview Chunks
View how the crawled content has been broken into chunks for AI processing. You can adjust chunk values directly from this view and save updated settings.
Delete
Click More Options > Delete to permanently remove the website source and all its indexed content from the collection. A confirmation dialog appears — click Yes to confirm.
Next Step
After adding sources, test the collection to verify that AI retrieval returns relevant results before attaching it to an agent. See Testing a Collection.