Managing AI Agents
View and configure out-of-the-box AI agents in ServiceOps.
The Agents tab in AI Studio provides access to the pre-built AI agents available in ServiceOps. By attaching knowledge collections and enabling PII detection, administrators can tailor each agent's responses to their organization's data and security requirements — without building agents from scratch.
ServiceOps provides a fixed set of out-of-the-box (OOB) AI agents. Creating new agents or cloning existing ones is not supported. Administrators can only configure and preview the agents provided.
Agents List View
The Agents List View presents all available OOB AI agents.
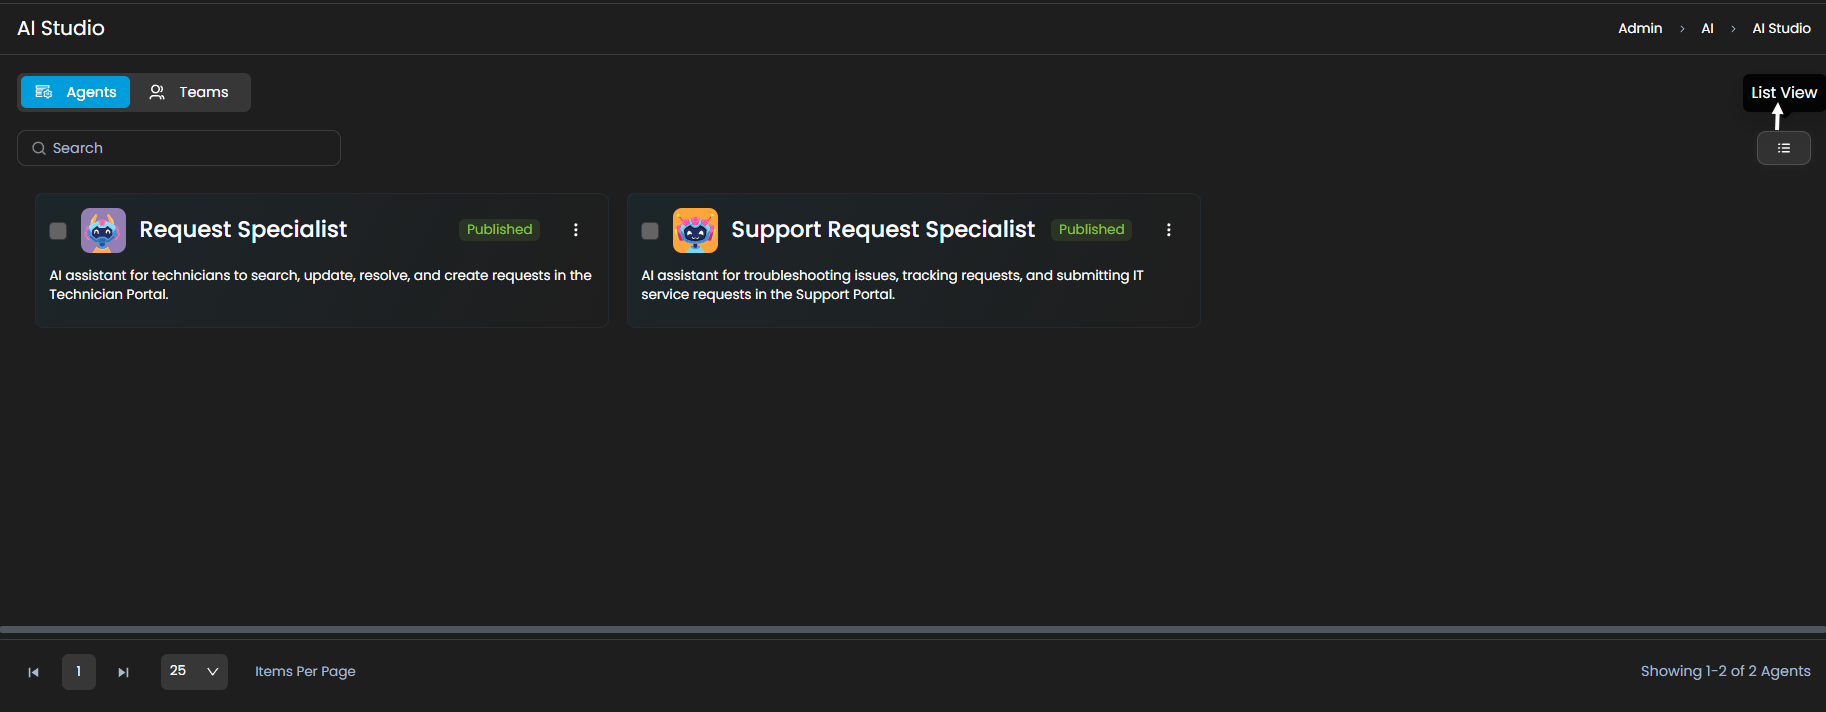
The list view provides the following options:
- Search: Use the "Search" field to search for the required agent based on keywords.
- View Toggle: Switch between Card View and List View. The default display is Card View.
- Agent Actions: Each agent entry includes a three-dot menu with two available actions:
- Edit: Open the agent configuration to attach knowledge collections or enable PII detection.
- Preview: Open the View Agent page to inspect the agent's current configuration.
Editing an AI Agent
To configure an agent, click the three-dot menu on the agent card or row and select Edit. The Edit Agent page opens.
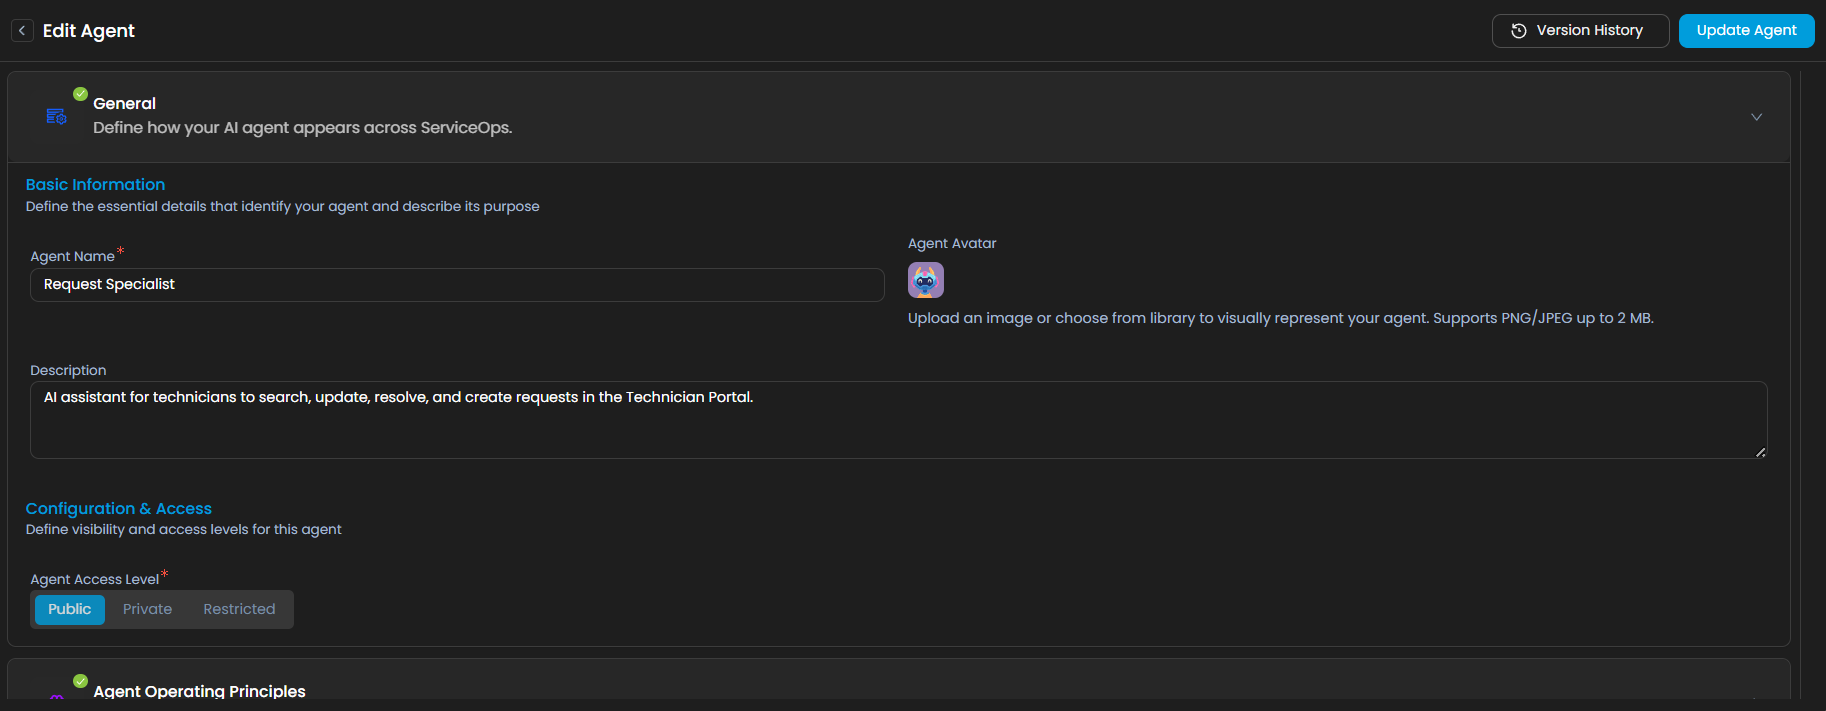
Editing is limited to two configuration areas: Knowledge & Tools and Responsible AI (PII Detection).
Knowledge & Tools
Attach knowledge collections to the agent so it can reference relevant content when generating responses.
Knowledge collections must be created before they can be attached here. See Knowledge Collections for instructions on setting them up.
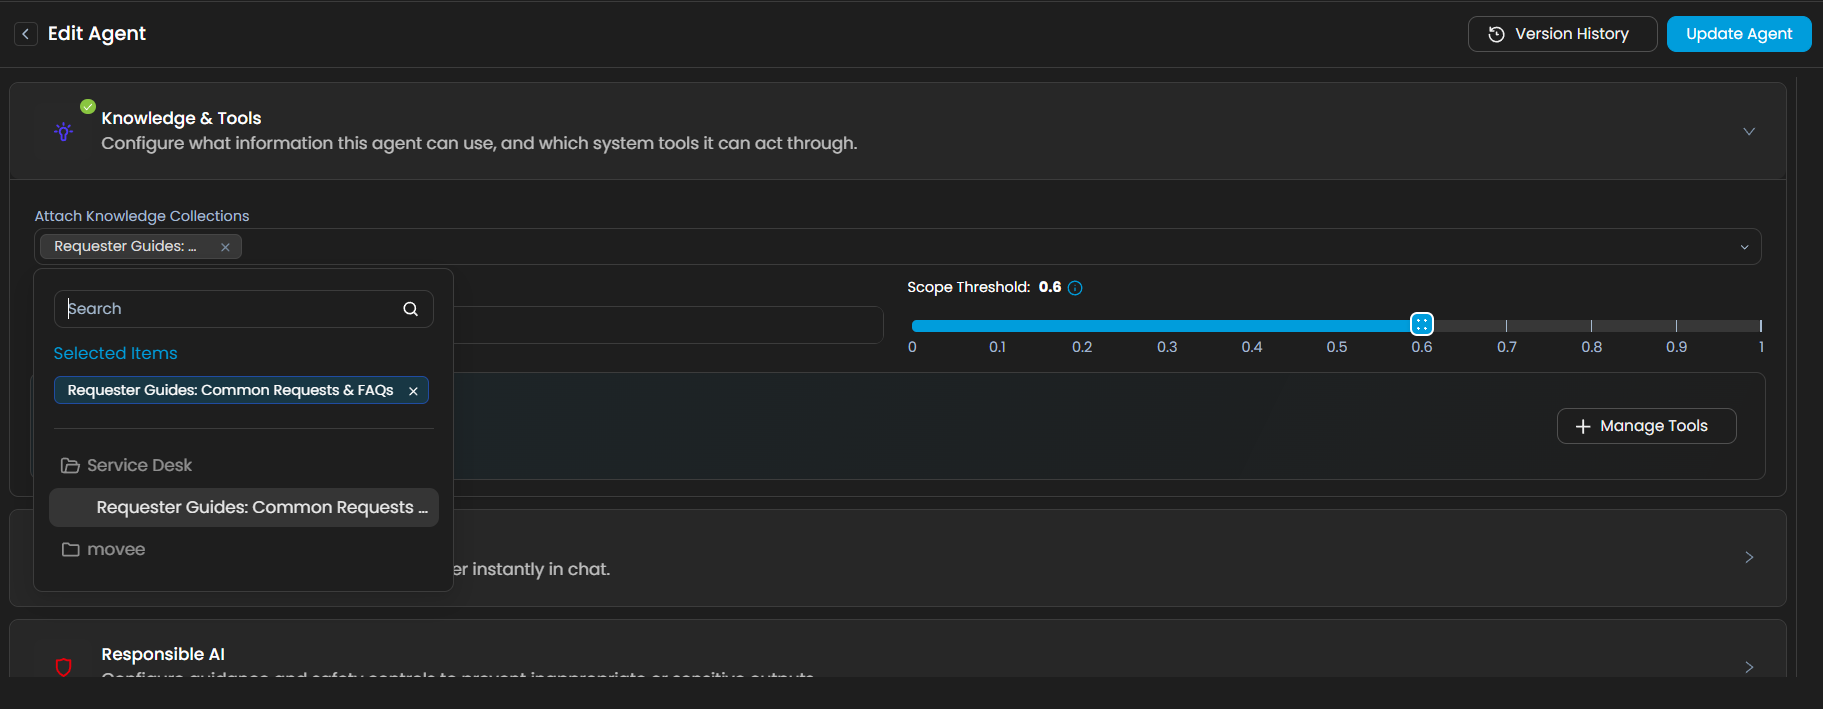
Attach Knowledge Collections: Select one or more existing knowledge collections from the dropdown to associate with the agent.
Top K Values: Set the number of most relevant articles or documents the agent retrieves from the attached collections per query.
Scope Threshold: Adjust the similarity threshold for knowledge retrieval. A higher threshold returns only closely matching content; a lower threshold broadens the match but may reduce precision.
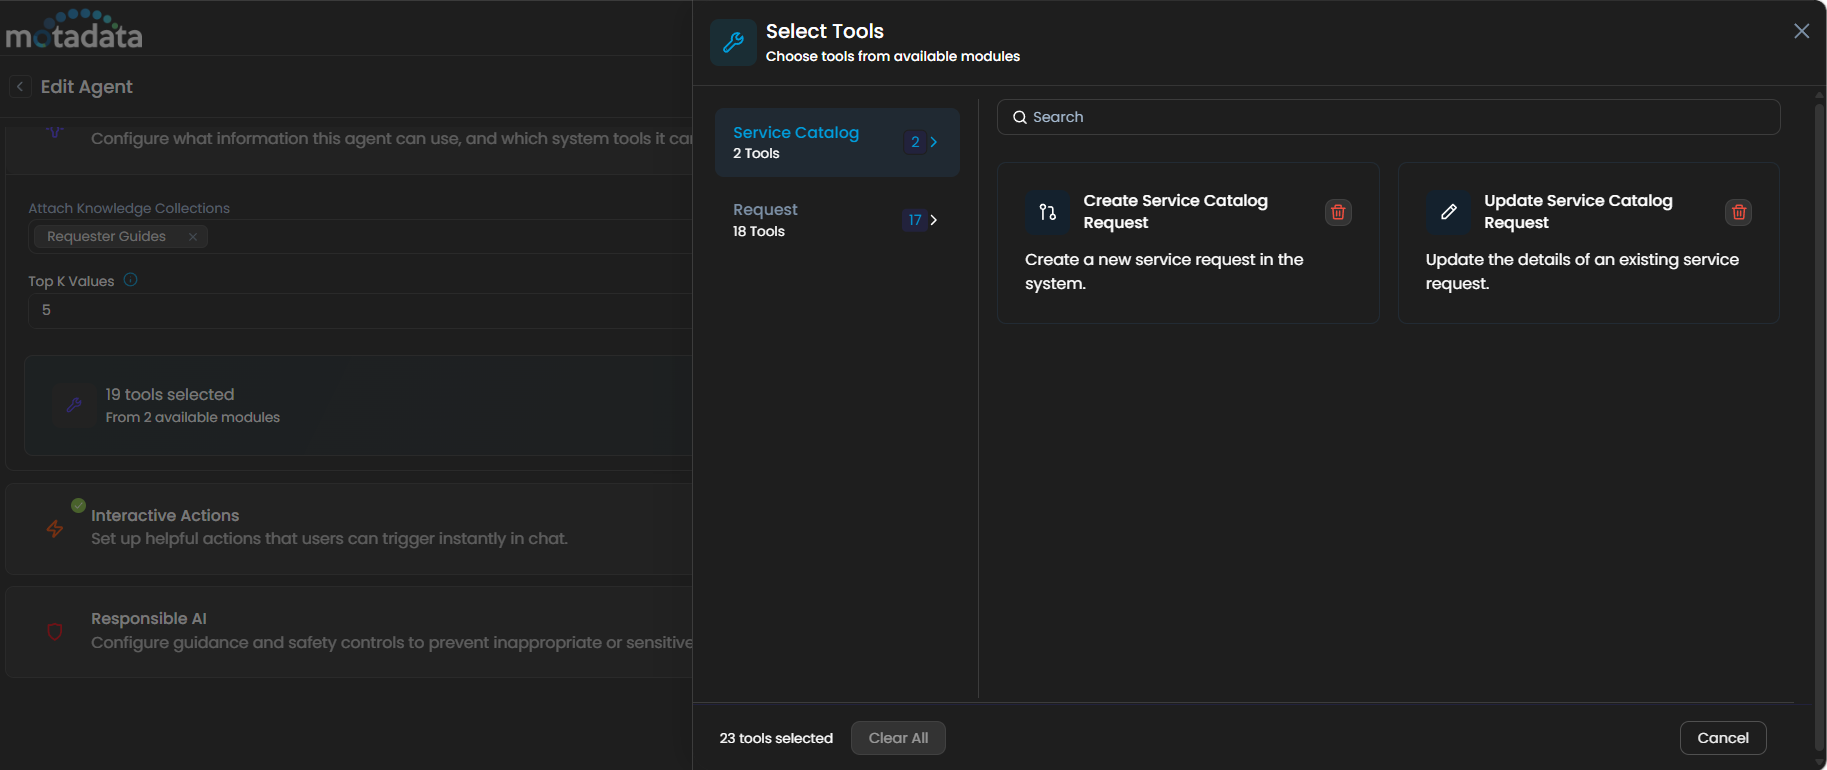
Manage Tools: Click to view the read-only list of tools available for the agent, such as modules it can interact with (e.g., Service Catalog, Request).
Responsible AI — PII Detection
Enable and configure Personally Identifiable Information (PII) detection to prevent sensitive data from being exposed or processed inappropriately.
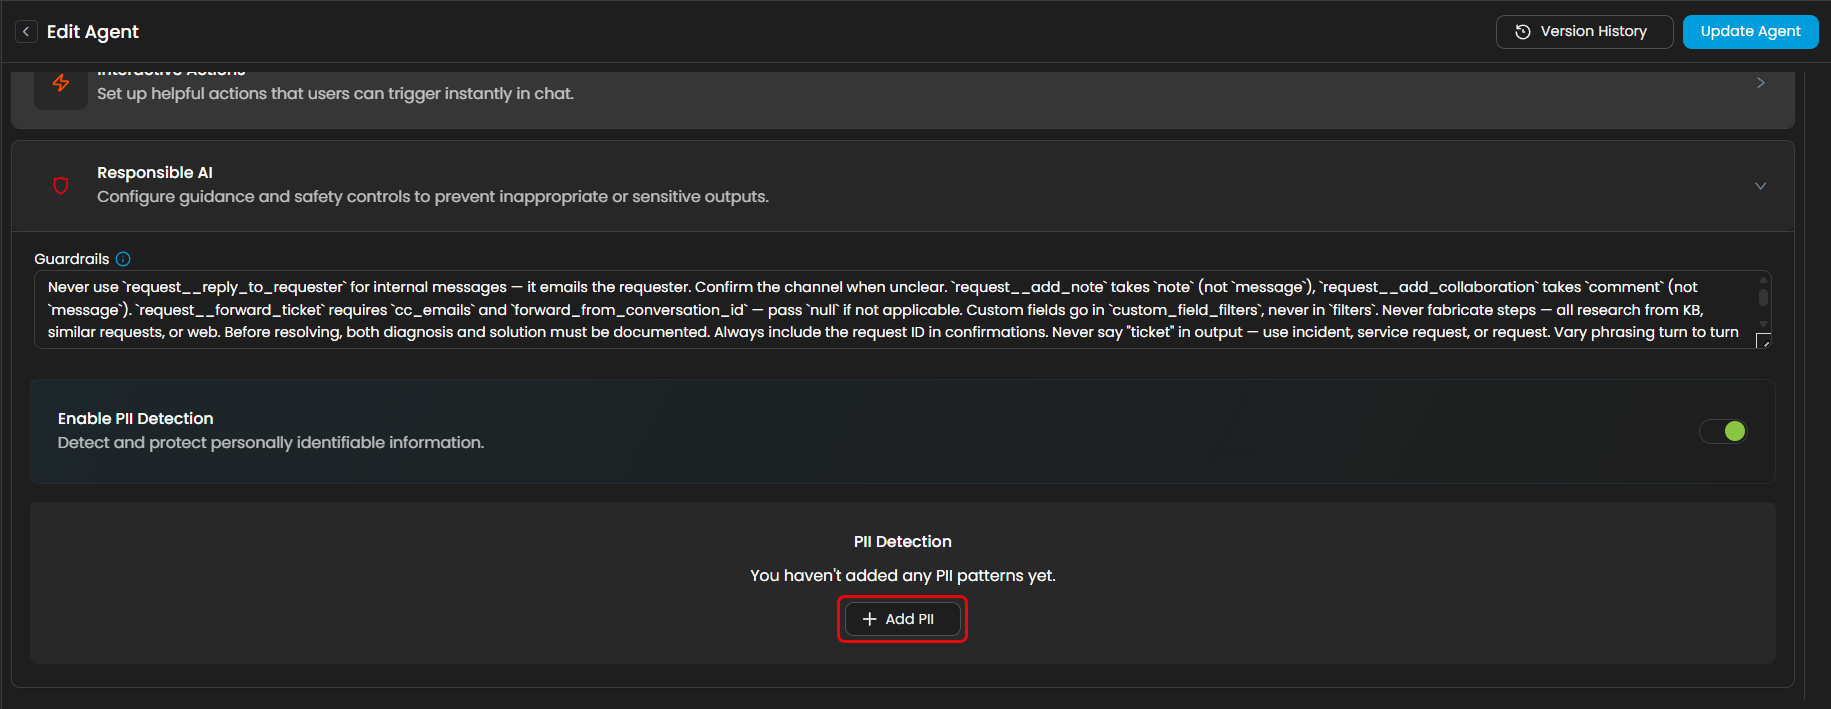
Enable PII Detection: Toggle this option to activate PII protection for the agent.
Add PII Patterns: Click
+ Add PIIto configure the patterns the agent should detect. Two types of patterns are available:Predefined: Select from a list of built-in PII patterns such as
CREDIT_CARD,EMAIL_ADDRESS,PHONE_NUMBER, etc. For each pattern, choose whether toMaskorBlockthe detected value during input processing, output processing, or both.
Advance (Custom Regex Pattern Library): Create your own PII patterns using regular expressions for data types not covered by predefined options. For each custom pattern, fill in the following fields:

Field Description Pattern Name A unique label for the pattern (e.g., Employee_ID).Pattern A valid regular expression that matches the sensitive value (e.g., \bEMP-\d{6}\bto match IDs likeEMP-123456).Description A short note describing what the pattern detects. Scope Input: scans user messages sent to the agent.
Output: scans the agent's responses. Select both to cover the full conversation.
Mode Mask: replaces detected values with a placeholder (e.g.,
[REDACTED]).Block: prevents the message from being sent or received entirely.
Click
+ Add New Patternto add another custom pattern row.
Click Save to apply the PII configuration.
Once all changes are made, click Update Team to save the configuration. Once applied, if you enter any PII content in the Ask AI input field, the AI agent will mask or block the content as per the configuration.
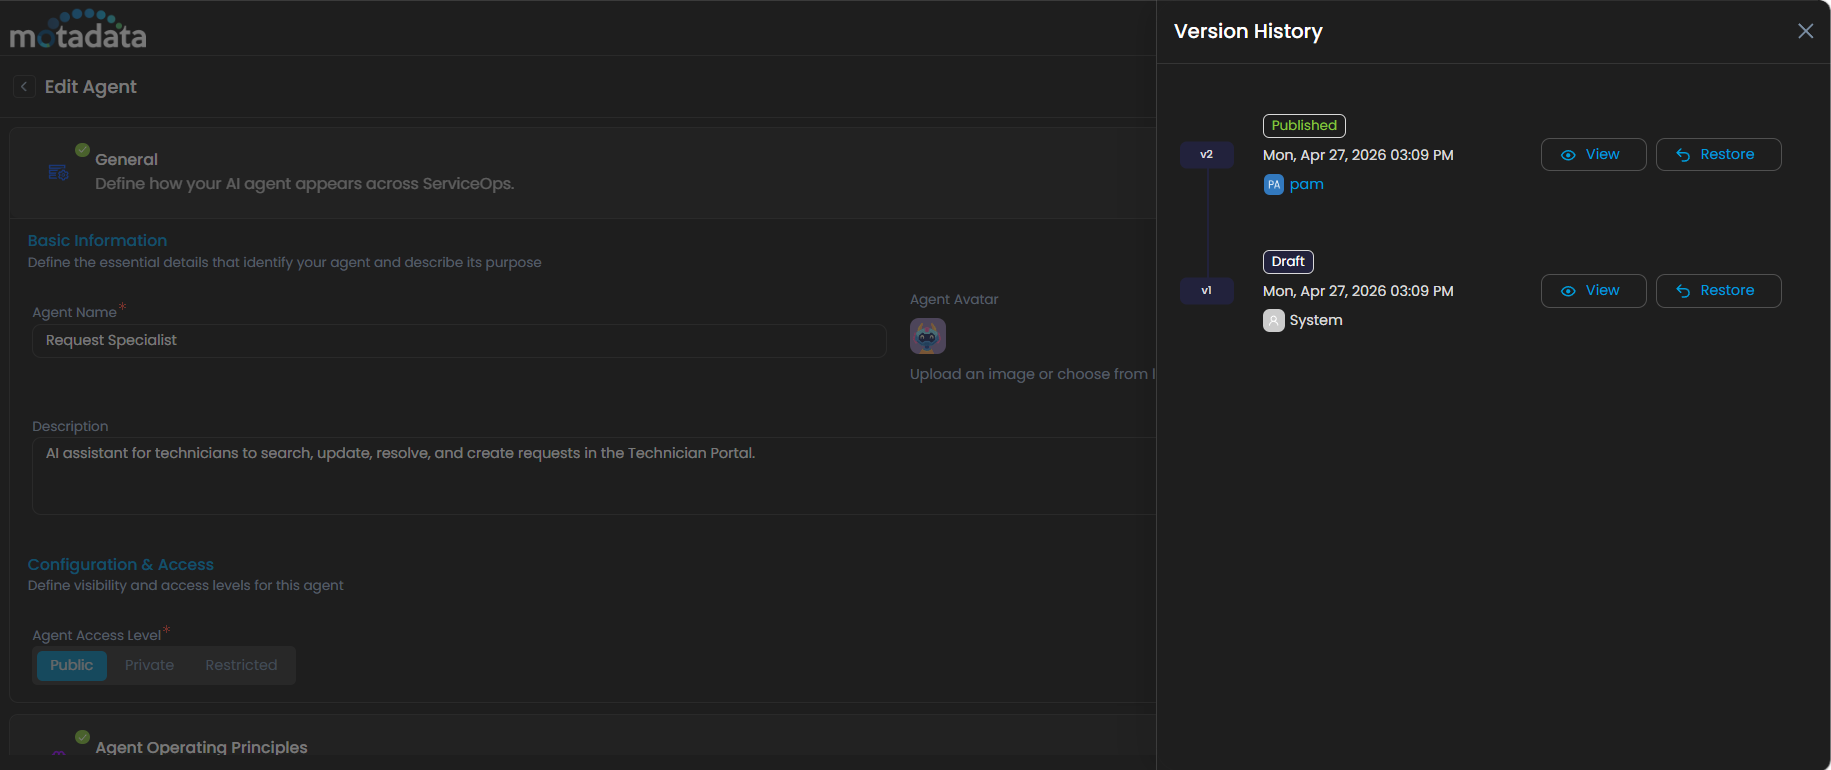
Version History
Click Version History on the Edit Agent page to view a complete record of all changes made to the agent, including the date, time, and the user who made each change. From here, you can also Restore a previous version if needed.
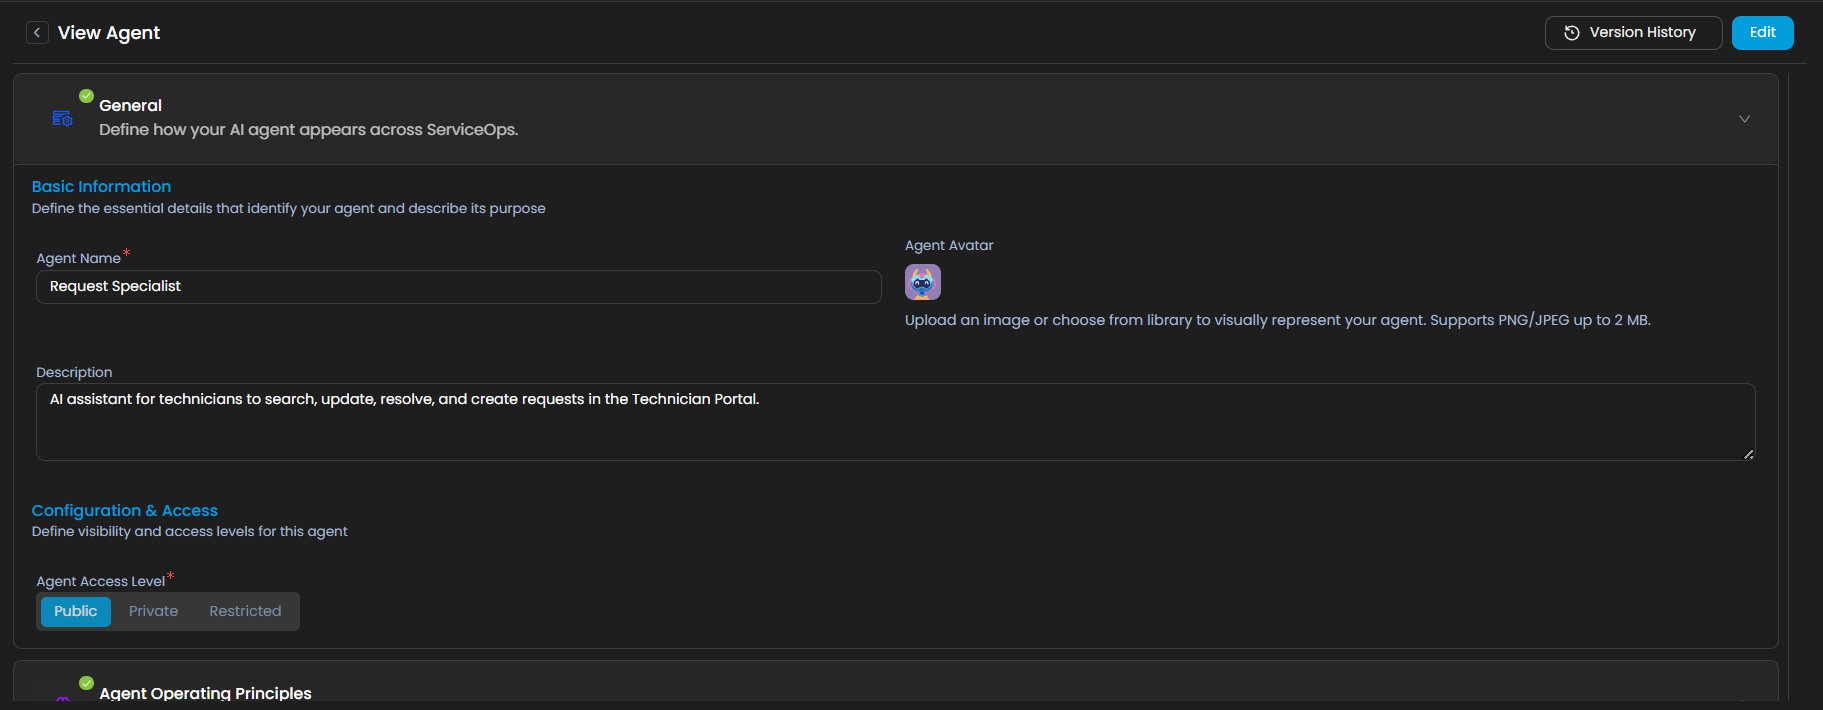
Previewing an AI Agent
To inspect an agent's current configuration without making changes, click the three-dot menu and select Preview. This opens the read-only View Agent page, which displays the agent's settings and version history. Use the available buttons on this page to navigate to Edit if changes are needed.
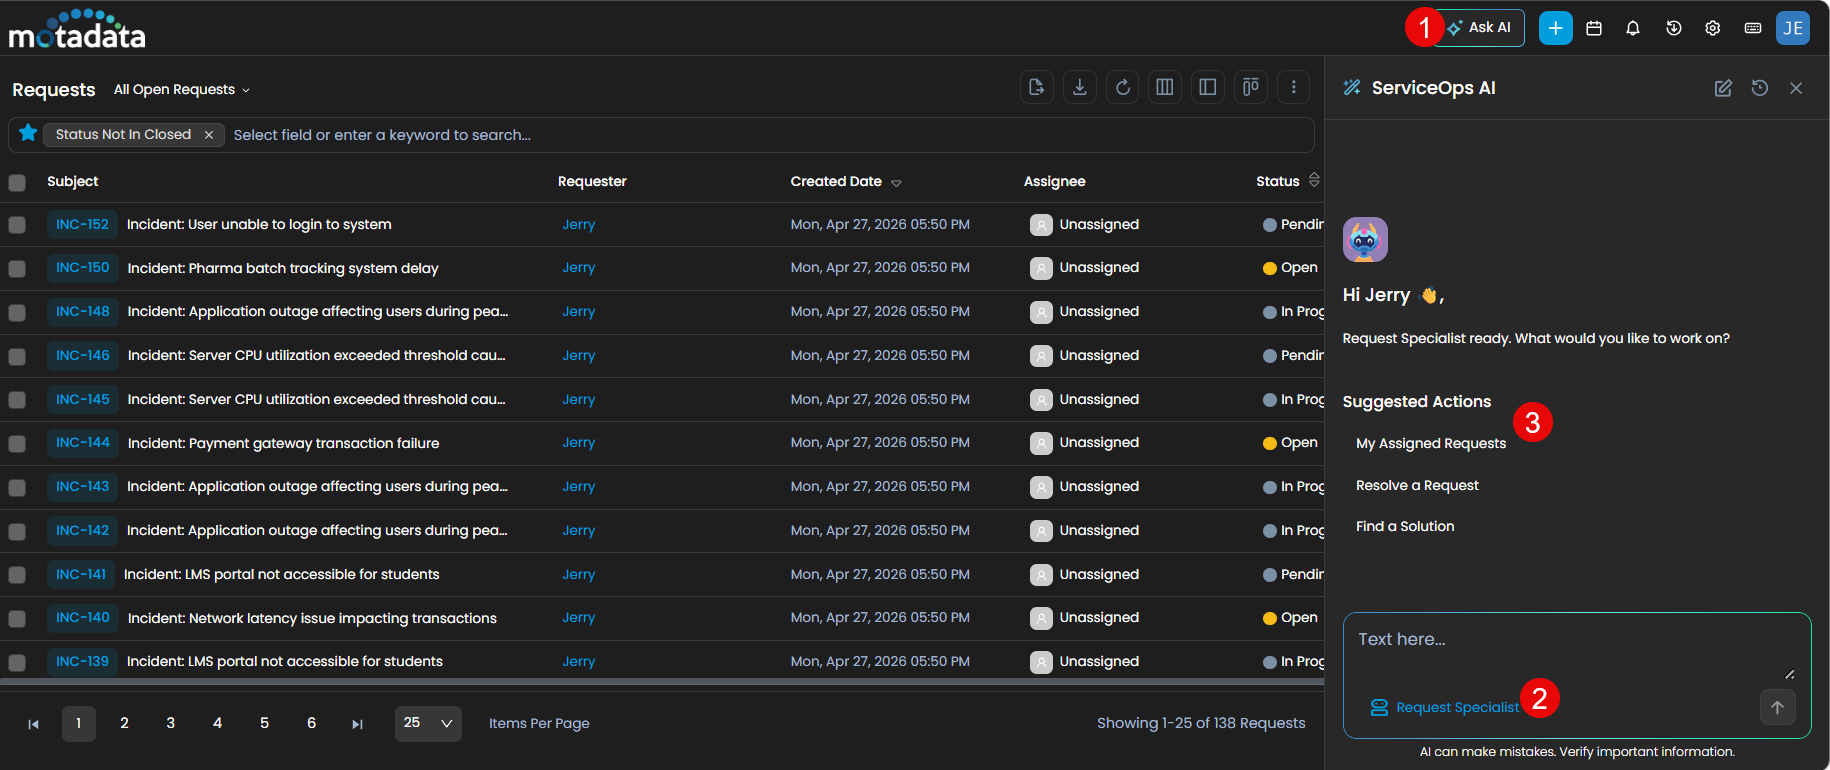
Using the Agent in the Portal
Once an agent is configured, end users and technicians can interact with it directly from the portal using the Ask AI feature.
To start a conversation with an agent:
- Open the portal and click Ask AI to launch the AI chat interface.
- From the agent selector, choose the required AI agent.
- Type your query or select a suggested action to begin the interaction. The agent responds based on its configured knowledge collections, tools, and responsible AI policies.
If the agent does not appear in the selector, verify that it has been published and that the user has the appropriate access permissions.