Request Categories
Categories enable you to bring the similar requests under a single group. This helps the technicians in filtering out the required requests easily and quickly from a huge list. The system provides the below categories by default:
- Software
- Hardware
- Network
- HR
- Other
To view the Request Category page, navigate to Admin > Request Management > Request Categories > Request tab.
Here, you have the below options. All these options are common in Request, Problem, Change, and Release tabs.
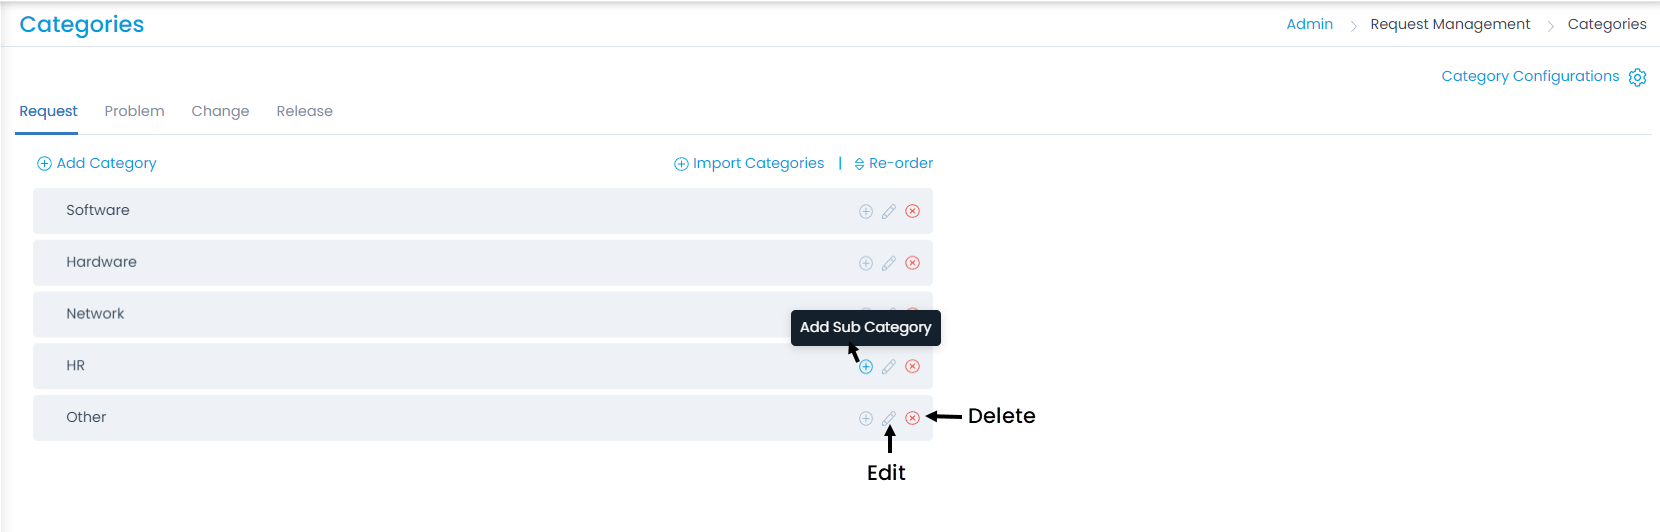
- Add Category: You can add a category.
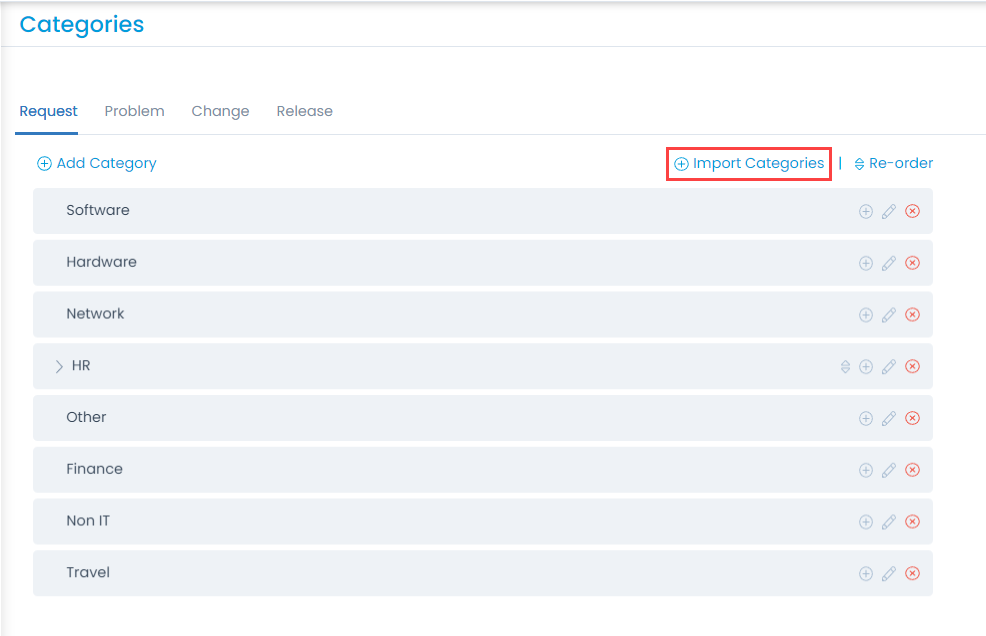
- Import Categories: You can import a list of categories in bulk.
- Re-Order: You can re-arrange the order of the category in the list using drag and drop. You can also re-order the sub categories.
- Category Configurations: You can configure the settings for request creation.
- Add Sub Category: You can add a sub-category.
- Edit: You can edit the category name.
- Delete: You can delete the category if not required. A confirmation message appears. Click Yes to continue or Cancel to stop the process.
Add Category
To add a category, follow the below steps:
- Click the Add Category link and a popup appears.

- Enter the Name of the Category. A maximum of 150 characters is allowed.
- Enter the Category Prefix. You can also use placeholders to add the date in the prefix. The default prefix for the Incident Request is INC. It can contain 5-24 characters and supports all the characters including dot(.), hyphen (-), and forward slash (/).
- Add Company wise Prefix if required. Here, you need to select the Company and then add a prefix to it. You can also use a placeholder in it. It is available only if Managed Services Provider feature is enabled.
- Click Save. Similarly, you can add problem, change, and release categories as well.
The changes made in the prefix will be applicable to the new request tickets, not the existing ones.
Add Sub Category
To add a sub category, follow the below steps:
- Click the Add Sub Category icon next to the required category and a popup appears.
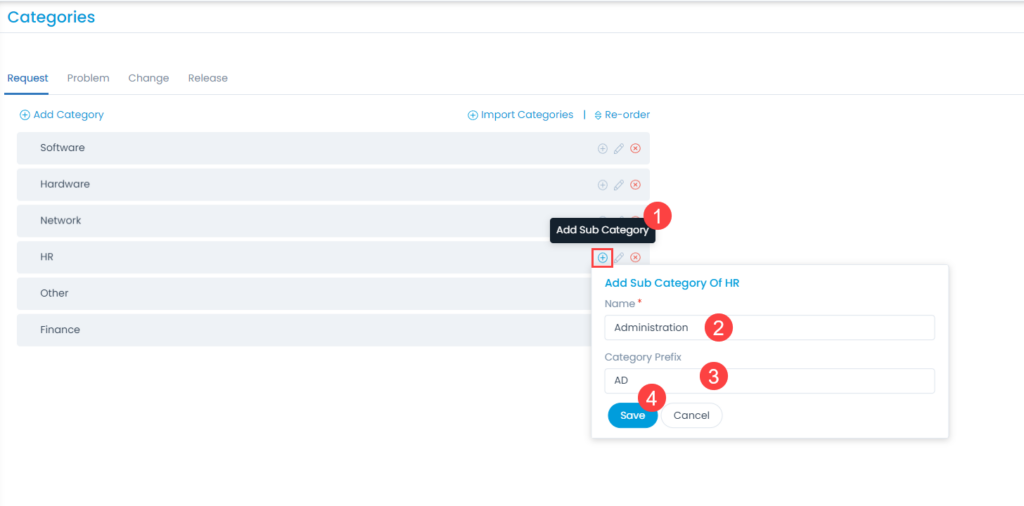
- Enter the Name of the Sub Category.
- Enter the Category Prefix.
- Click Save. Similarly, you can add problem, change, and release sub categories as well.
Import Categories
This option allows you to import the categories of Request, Problem, Change, and Release modules in bulk. To do so,
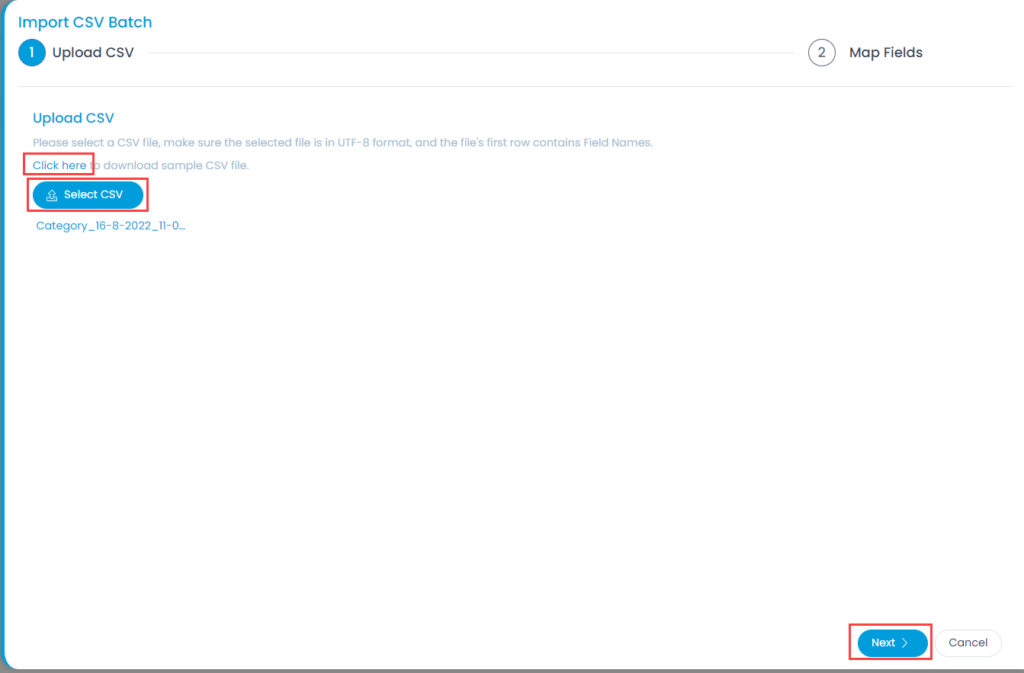
- Click the Import Categories link. The Request Category Batches page appears.
- Click the Import CSV Batch button.
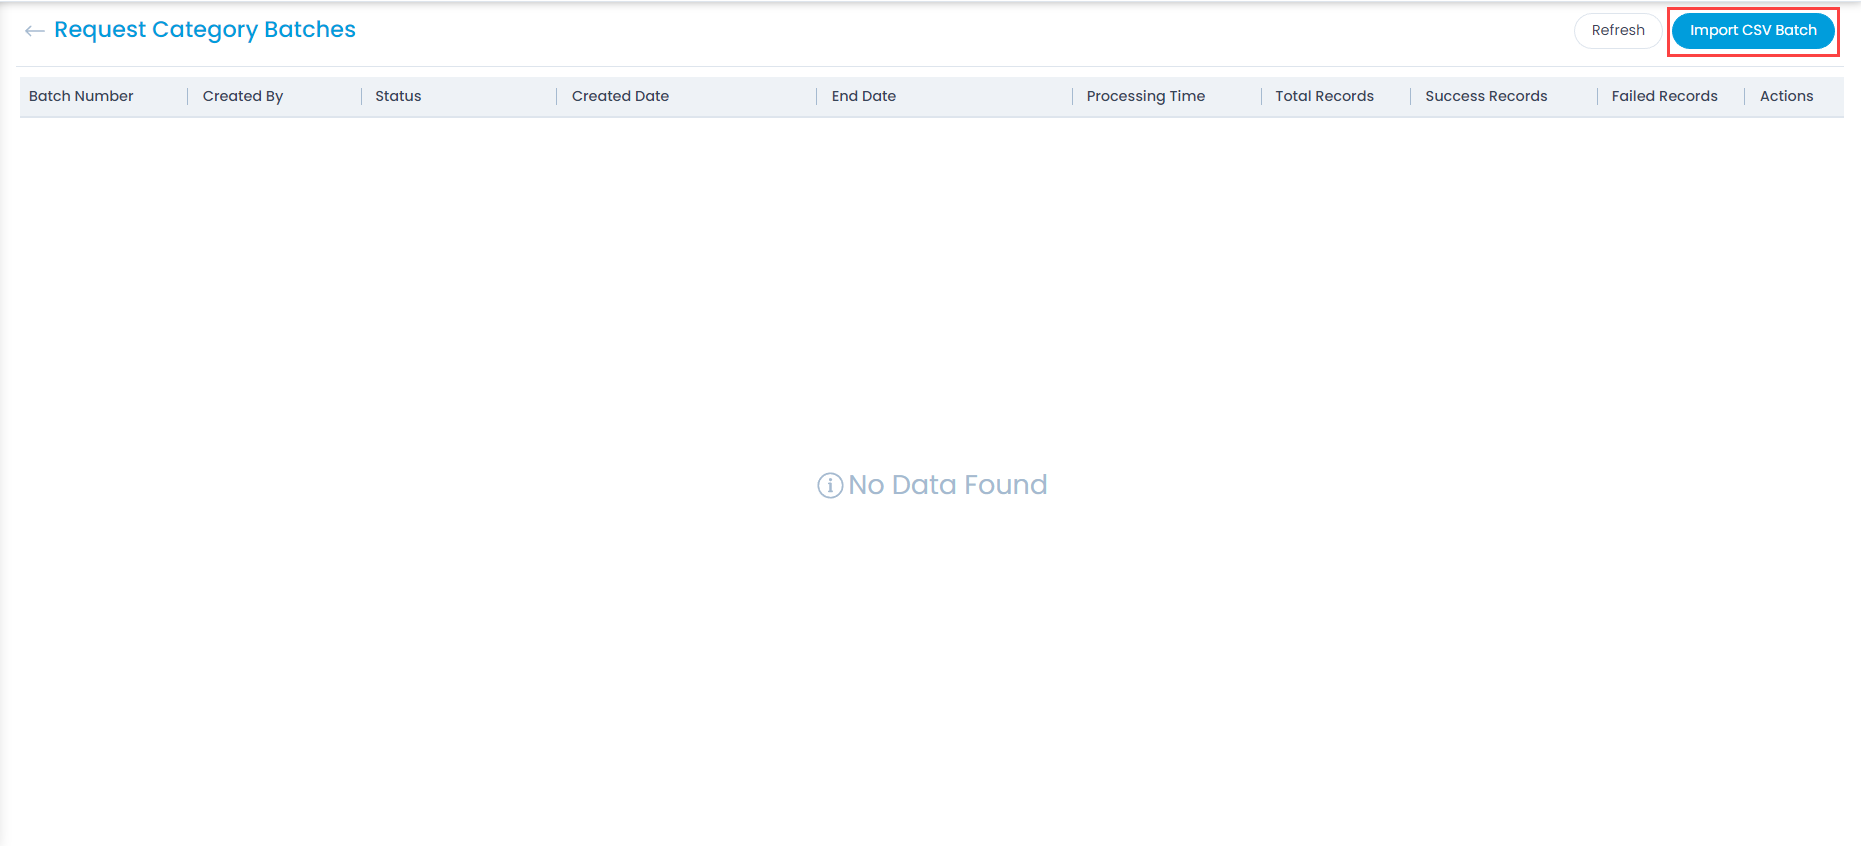
- Select the .csv file if you already have it filled with the respective fields. If not, select the new .csv file using Click Here and fill the respective details. Once the file is uploaded, click Next.
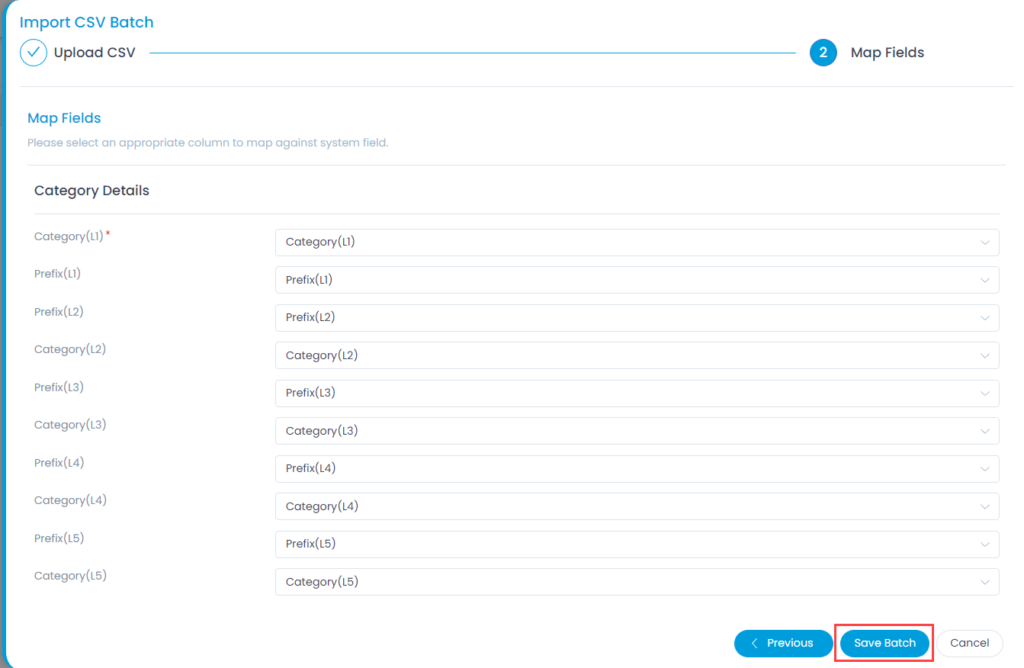
- Map the fields as per the requirement. By default it is mapped, only in case of removal/change of some parameters mapping is necessary, and click Save Batch.
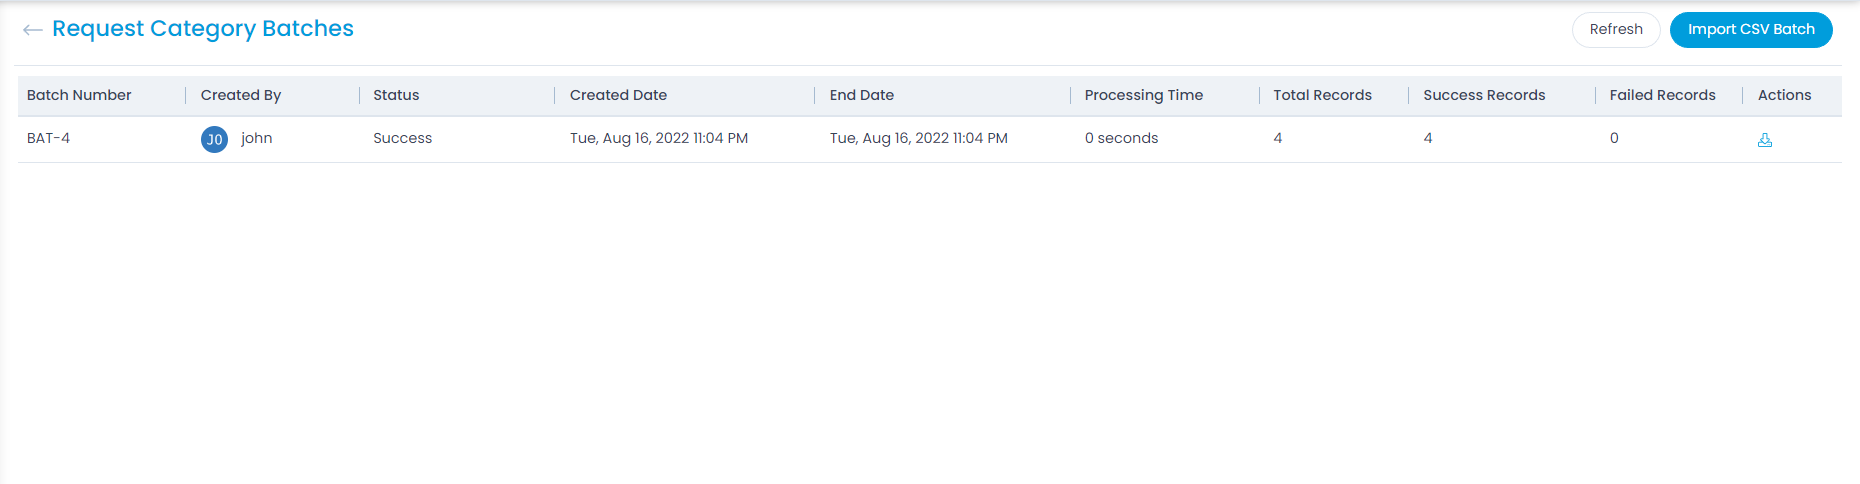
- The Request Category Batches page appears. It displays the status of the import along with the details like processing time, total records, success records, failed records, etc. as shown below. Once successful, the imported categories will appear in the category list page.
Category Configurations
These are the flags which when enabled helps in the creation of Request, Problem, Change, and Release tickets at the Leaf Node level only. Along with this, you have the following options:
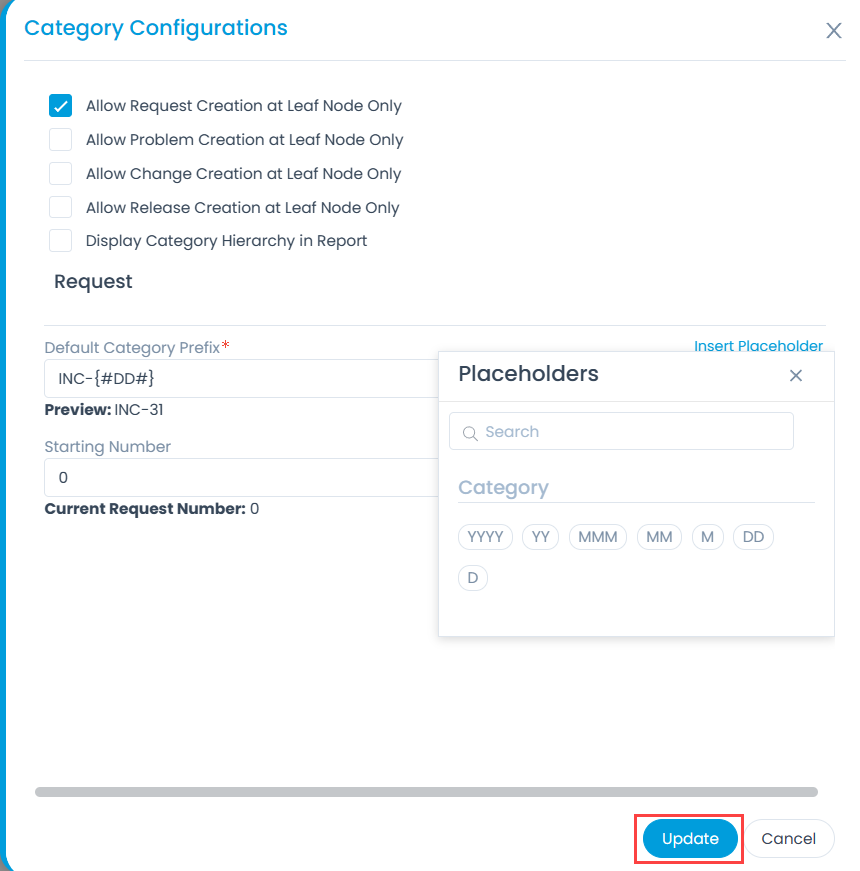
- Enable the flag for displaying the Hierarchy of Category in the Report.
Request
- Set the Default Category Prefix for requests. Also you can add placeholders to add the date in the prefix. You can check the prefix format from the preview available below the fields.
- Set the Starting Number of the request. You can set the number based on the Current Request Number available below the field. The starting number should be greater than the current request number.