Feedback Form
The feedback form is used to collect reviews about the service from the users. This helps the organization to understand, evaluate, and improve their services accordingly.
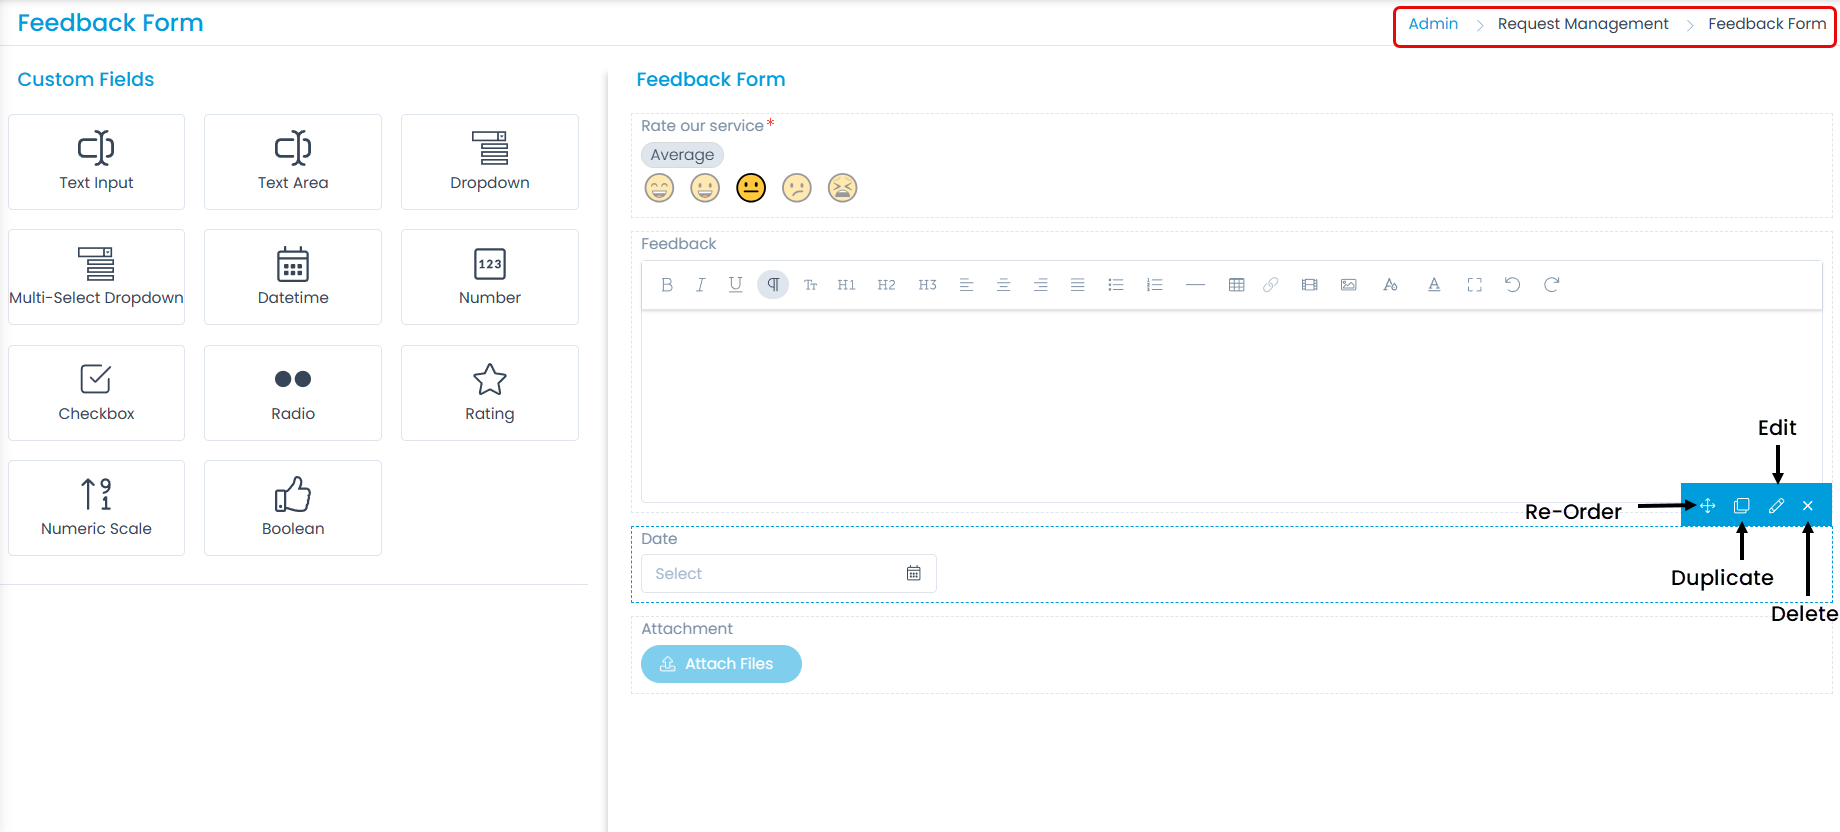
To view the Feedback Form page, navigate to Admin > Request Management > Feedback Form.
The page displays two types of fields:
- Default Fields: These are the primary fields that come with the fresh installation. They can be edited but not deleted.
- Custom Fields: These are the additional fields added from the pallet. They can be re-ordered, duplicated, edited, and deleted.
Here, you can customize the form using the below options:
- Field Pallet: You can drag and drop the fields from the pallet to add into the form. Each field has different configurations. Configure the parameters according to your requirement. For more details on the field parameters, refer to the link Request Form.
- Re-Order: You can drag and drop the fields to change the order of the form. This option is available for both: default and custom fields.
- Duplicate: You can create duplicate fields from the custom fields. This option is available only for custom fields.
- Edit: You can edit the fields, make them mandatory, or change their characteristics. For default fields, some of the options are restricted.
- Remove: You can delete the custom fields and not the default ones.
Example Scenario: For example, most of the Feedback Forms require a numeric scale. This is the scale by which a user has to rate the service in the scale of 1 to 10. The product services are improvised based on these types of feedback.
Numeric Scale
To add the Numeric Scale custom field, drag and drop it on the form in the right-hand side, and a popup appears.
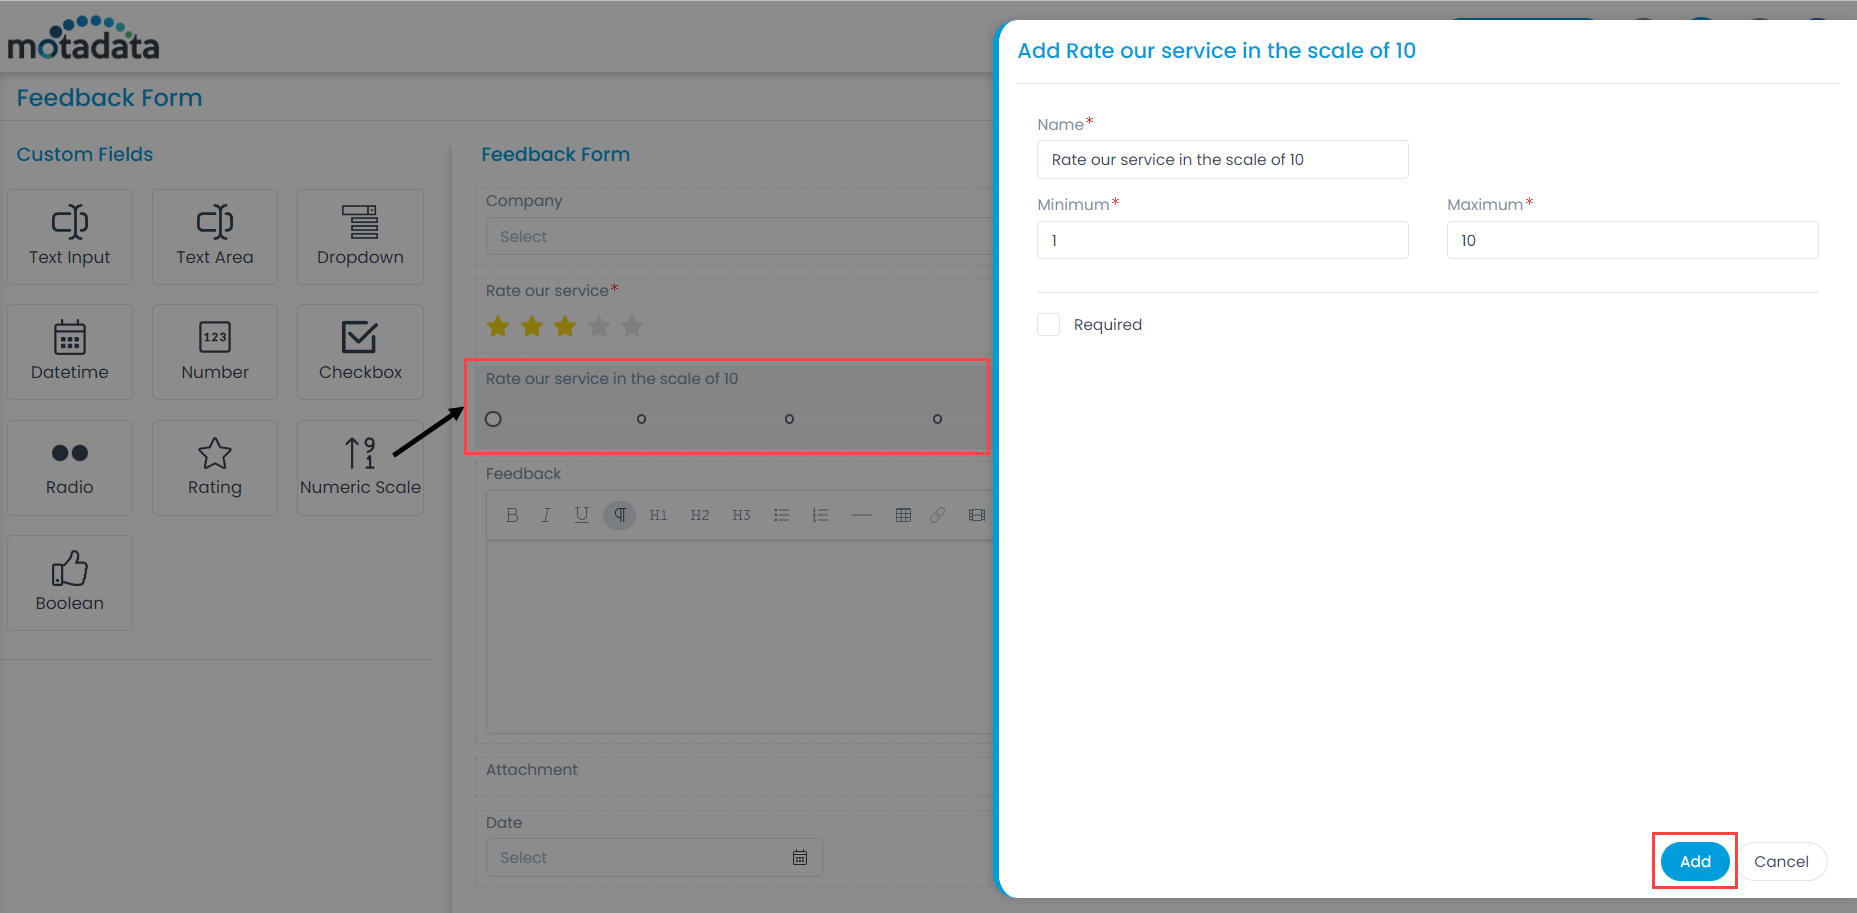
Enter the following details:
- Name: Enter the name of the field.
- Minimum Enter the minimum scale of the feedback.
- Maximum: Enter the maximum scale of the feedback.
- Required: Enable to make the field mandatory.
Once done, click Add. You can then re-arrange its location, create a duplicate field, edit, or delete it if required. Similarly, you can add other custom fields.
Rating
Add this field when a rating is required from the user. The details are:
- Name: Enter the name of the field.
- Rate Options Select the number of stars or emojis that you want to display in the feedback form to ask for rating. You can select from 1 to 10. For example, If 5 is selected, 5 stars or emojis will appear in the feedback form, and the user is required to provide the rating accordingly.
- Default Value: Enter the default value to appear on the form.
- Type: Select the type of rating as either a Star or Emoji (Smiley). Based on the value set for "Rate Options", configure the stars or emojis. You can select the desired emoji by clicking on it and a popup will appear. Once selected, provide a description for each star/emoji. You can add star or emoji by clicking on the Add Emoji/Add Star link.
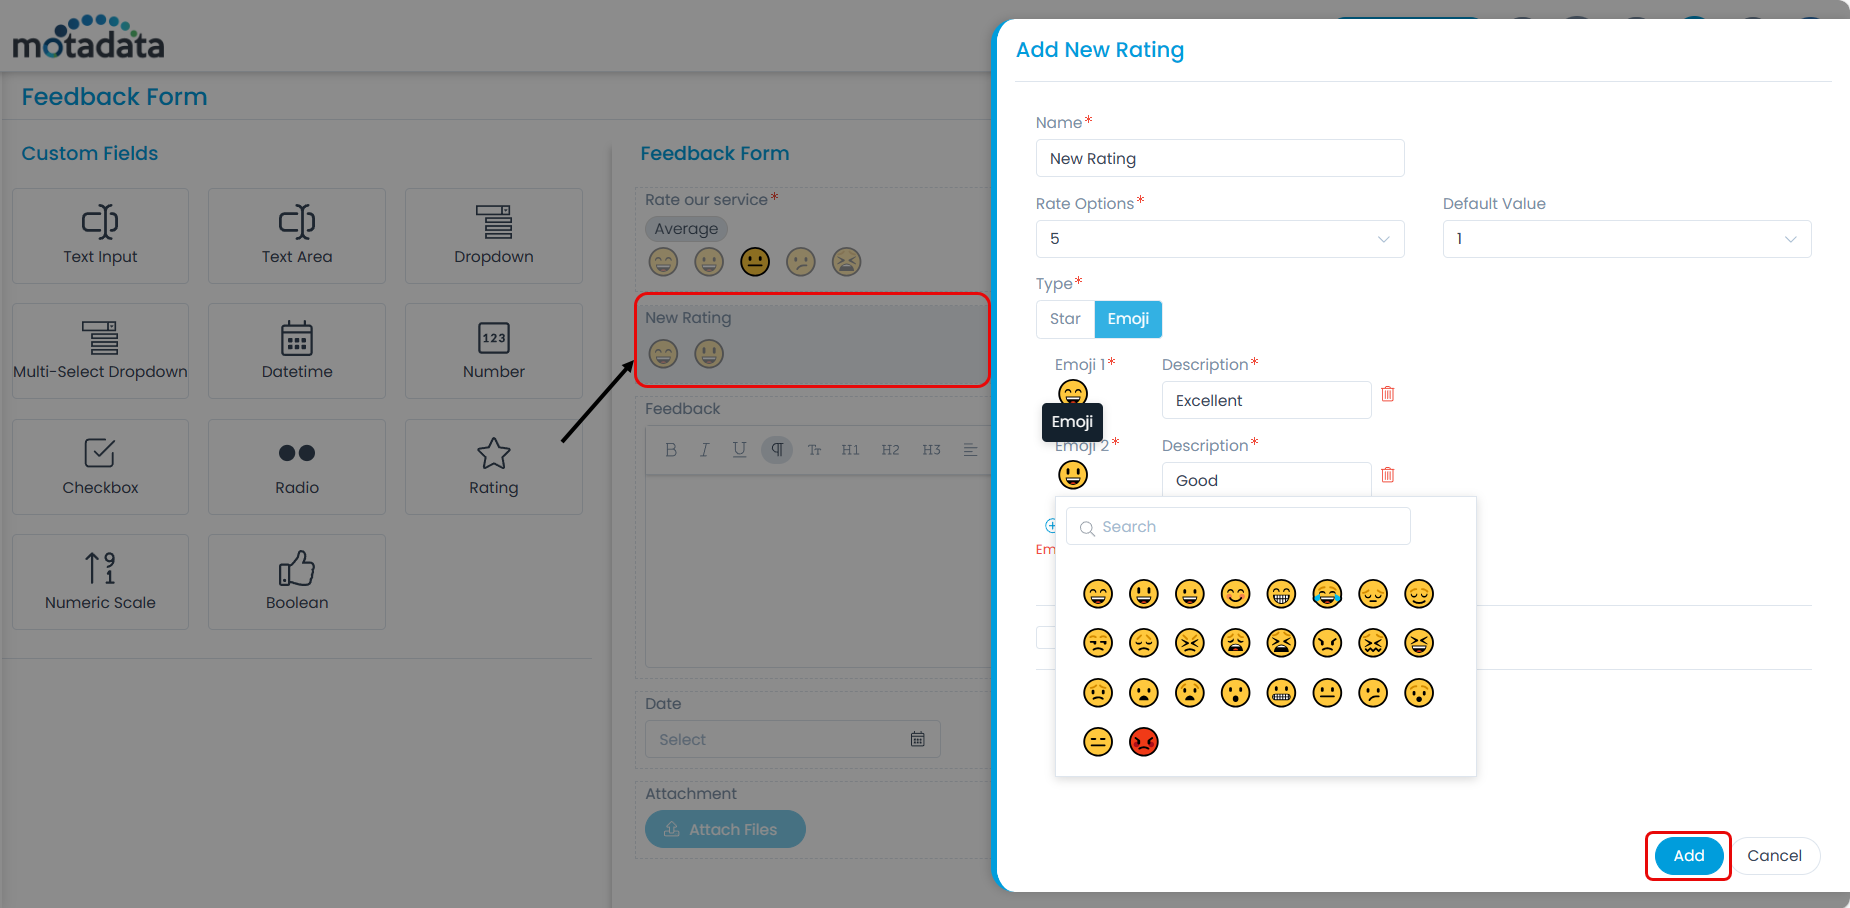
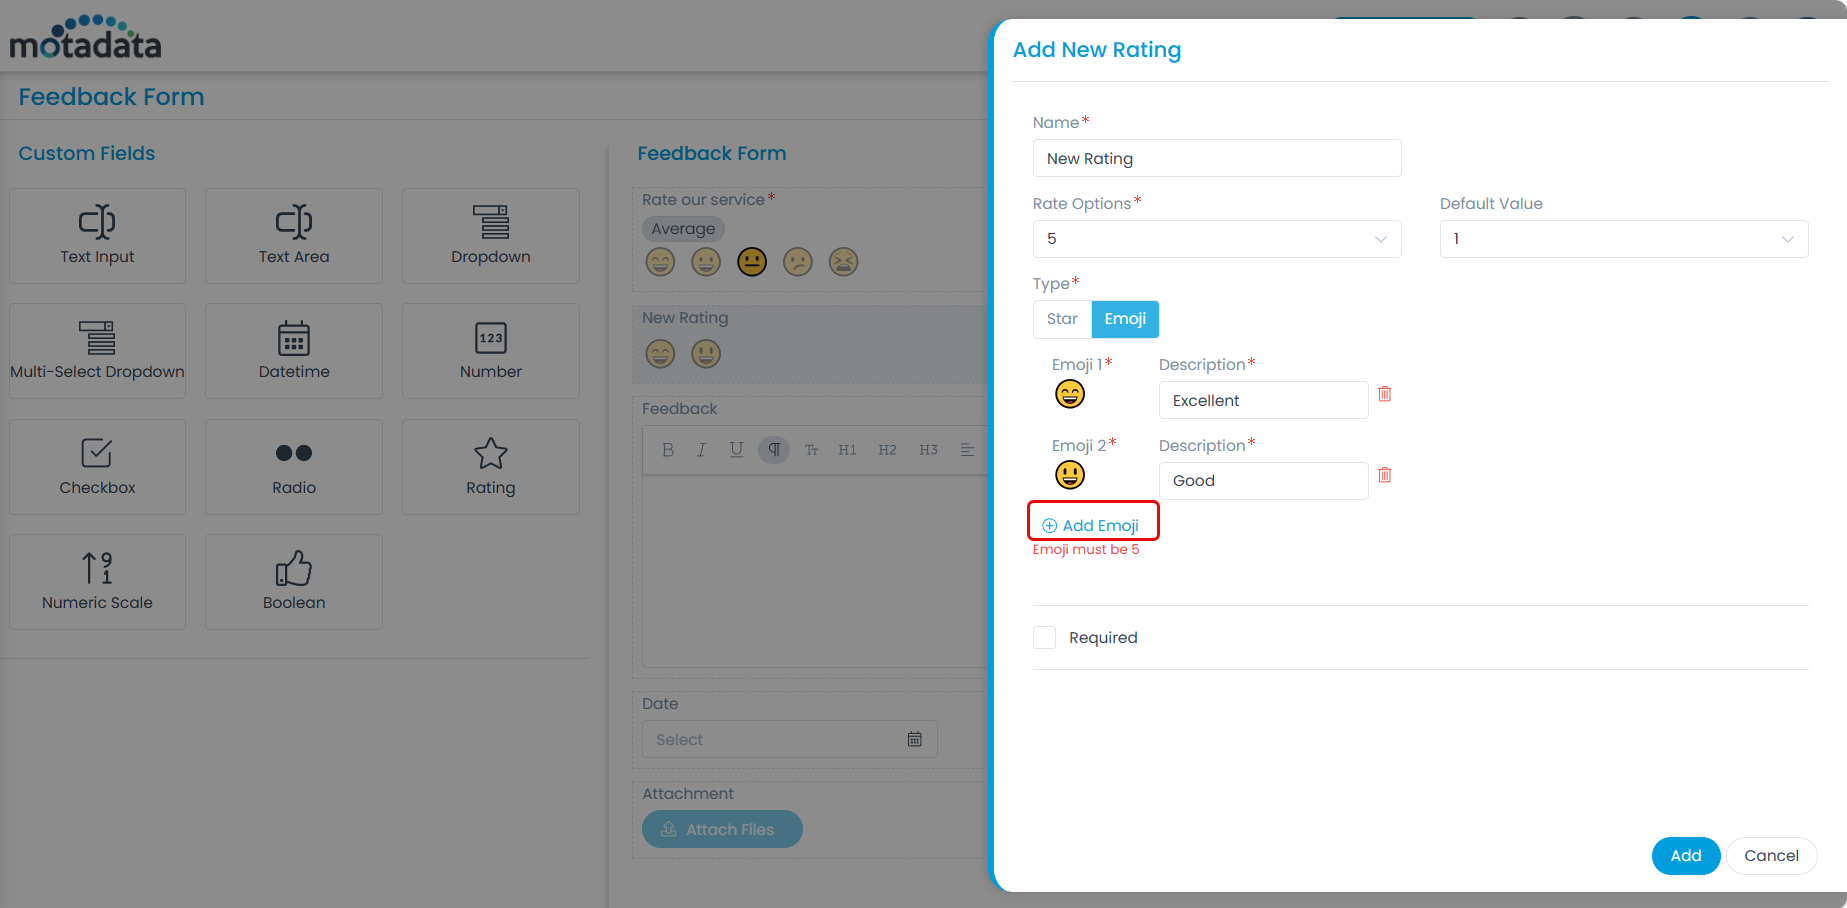
On migration, the default configuration in the Rating field value will be 1 with a blank description.
- Required: Enable to make the field mandatory.
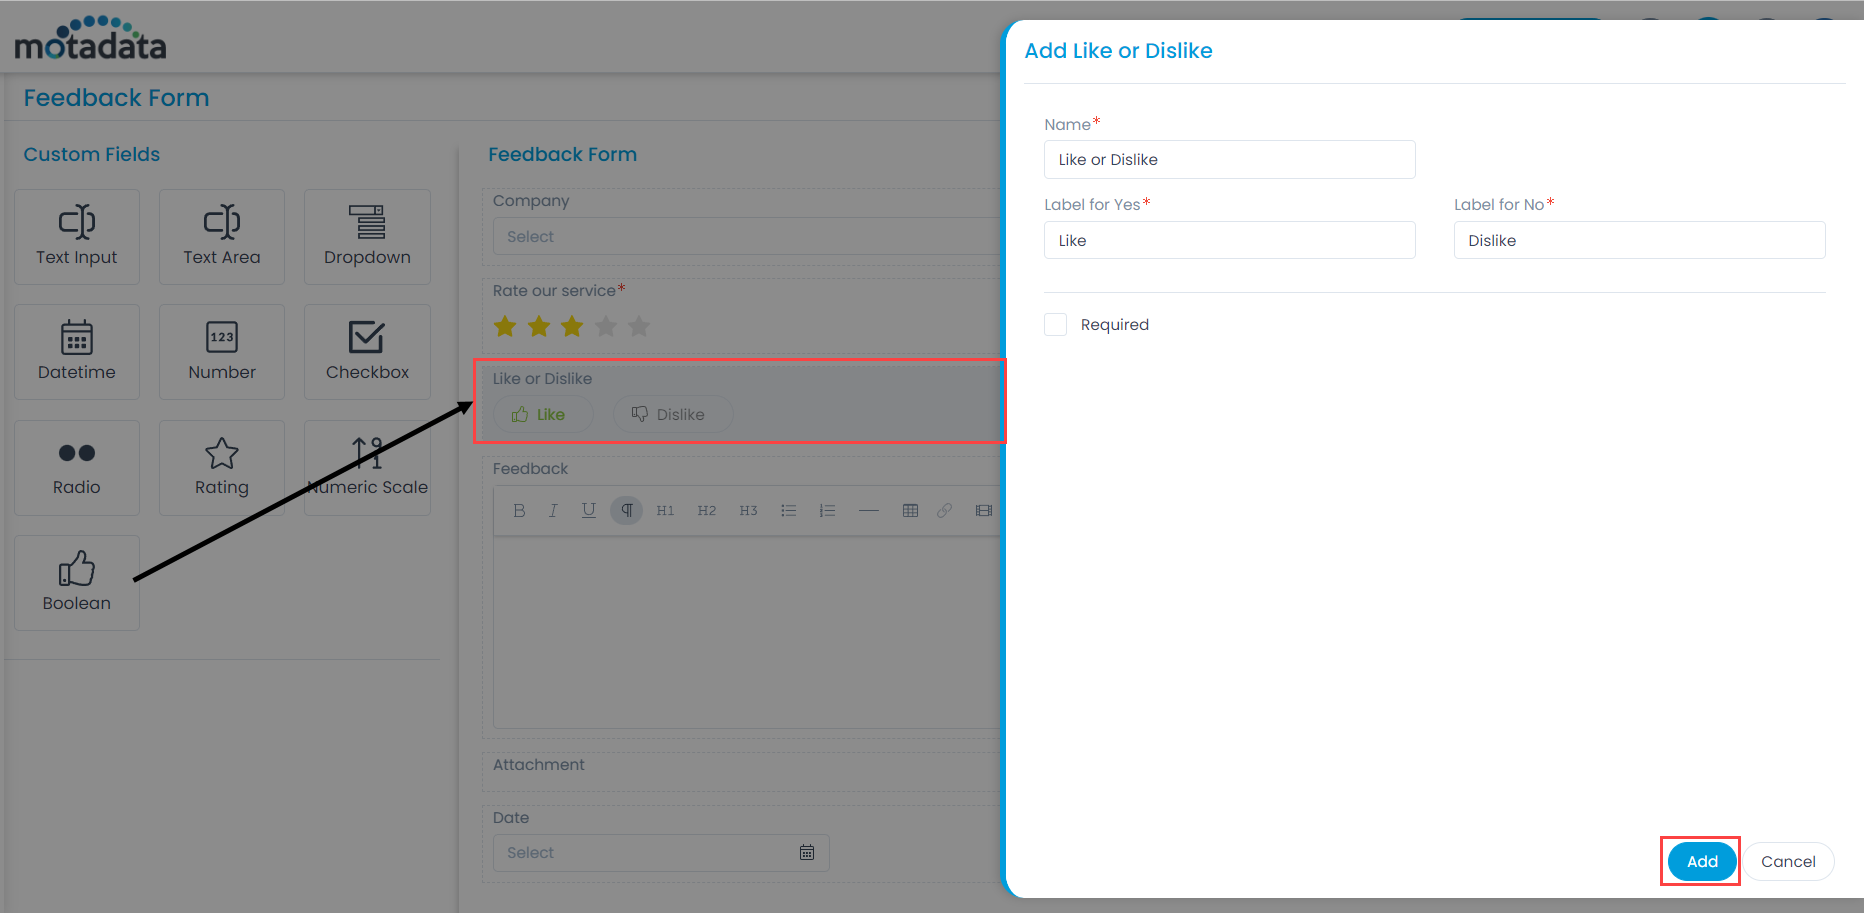
Boolean
Add this field when yes or no type of feedback is required from the user. The details are:
- Name: Enter the name of the field.
- Label for Yes: Enter the label for yes. For example: Like
- Label for No: Enter the label for no. For example: Dislike
- Required: Enable to make the field mandatory.