Create Approval Workflow
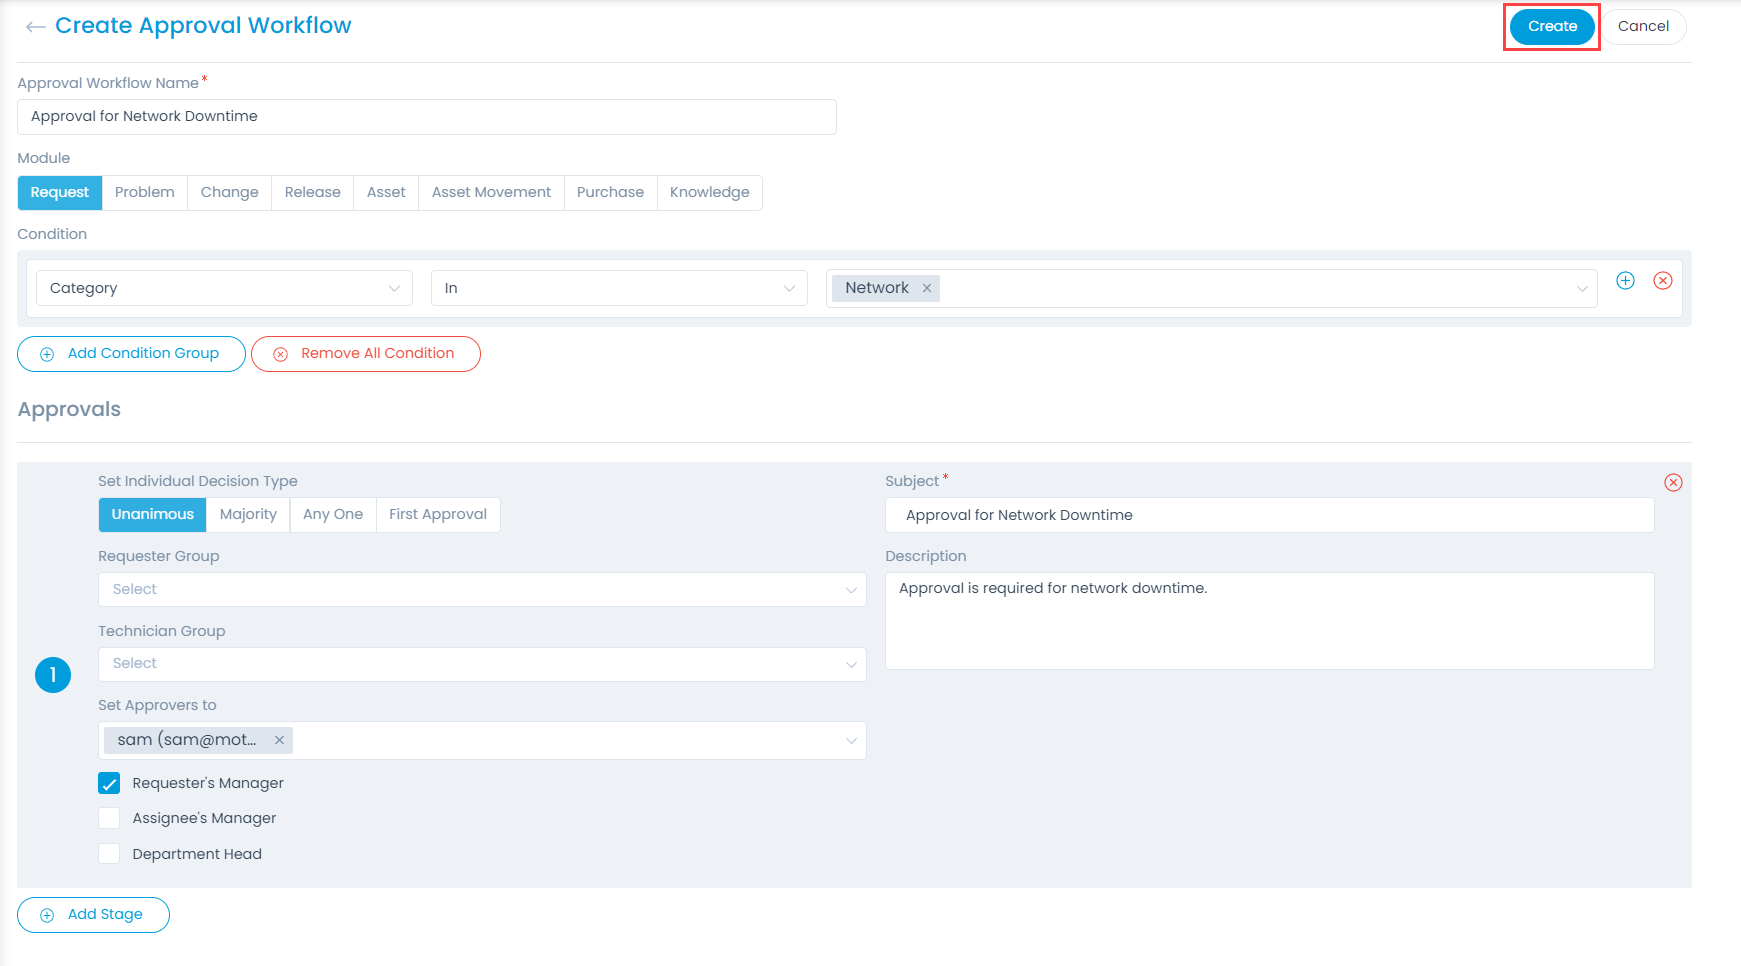
The page helps you to create an approval workflow using which the requests can be sent for approval to the concerned approvers automatically.
To create an approval workflow, click the Create Approval Workflow button on the top-right corner of the page.


Enter the following details:
- Approval Workflow Name: Enter the name of the workflow.
- Module: Select the module on which the workflow should function.
- Condition Condition statements are compared against the ticket parameters for a workflow to qualify. By default some condition parameters are available for use. You can also add new parameters in the condition list by adding custom fields in the form of the respective modules. For example: Request Form, Change Form, Problem Form, etc.

A condition has 3 sections. A condition parameter, an operator, and a value. In the parameter you select the field that is under evaluation. The operator decides how the field will be evaluated. The value of the field is matched with the value of the condition. Also, you can join 2 condition statements using AND/OR operators.
Approvals
An approver is the person who Approves or Rejects the request. The approver can be a specific person, a member of a group, or any one in the organization.

| Parameter | Description |
|---|---|
| Set Individual Decision Type | This indicates the way you want to evaluate the approval. The options are: - Unanimous: If selected, the request should be approved from ALL the approvers. - Majority: If selected, more than 50% approvals are required. - Anyone: If selected, even a single approval is sufficient. This is useful when there are more than 1 approvers. - First Approval: If selected, the first approval received (Approved or Reject) will be considered and the rest will be ignored. For example: If 3 approvers are set and if the first approval received is Approved, then this is considered. The approvals from the rest of the approvers will be Ignored, though rejection is received later from other approvers. |
| Requester Group | Select the requester group if they are responsible to approve something in the ticket. For example: If a technician wants a remote access, anybody in the requester group can approve the request. |
| Technician Group | Select the technician group if all the people should or can approve something in the ticket. For example: If you need access to a specific website, anybody in the IT team can approve the request. |
| Set Approvers To | Select the specific persons (technicians and requesters) if they are responsible to approve something. You can select more than one approver. |
| Requester's Manager | Enable if you need an approval from the requester's manager. |
| Assignee's Manager | Enable if you need an approval from the assignee's manager. |
| Department Head | Enable if you need an approval from the department's head. |
| Subject | Enter the subject of the approval request. It appears on the details page of the ticket, logs, emails, etc. |
| Description | Enter the description that helps the approvers to get a detailed information about the request so they can make an informed decision. |
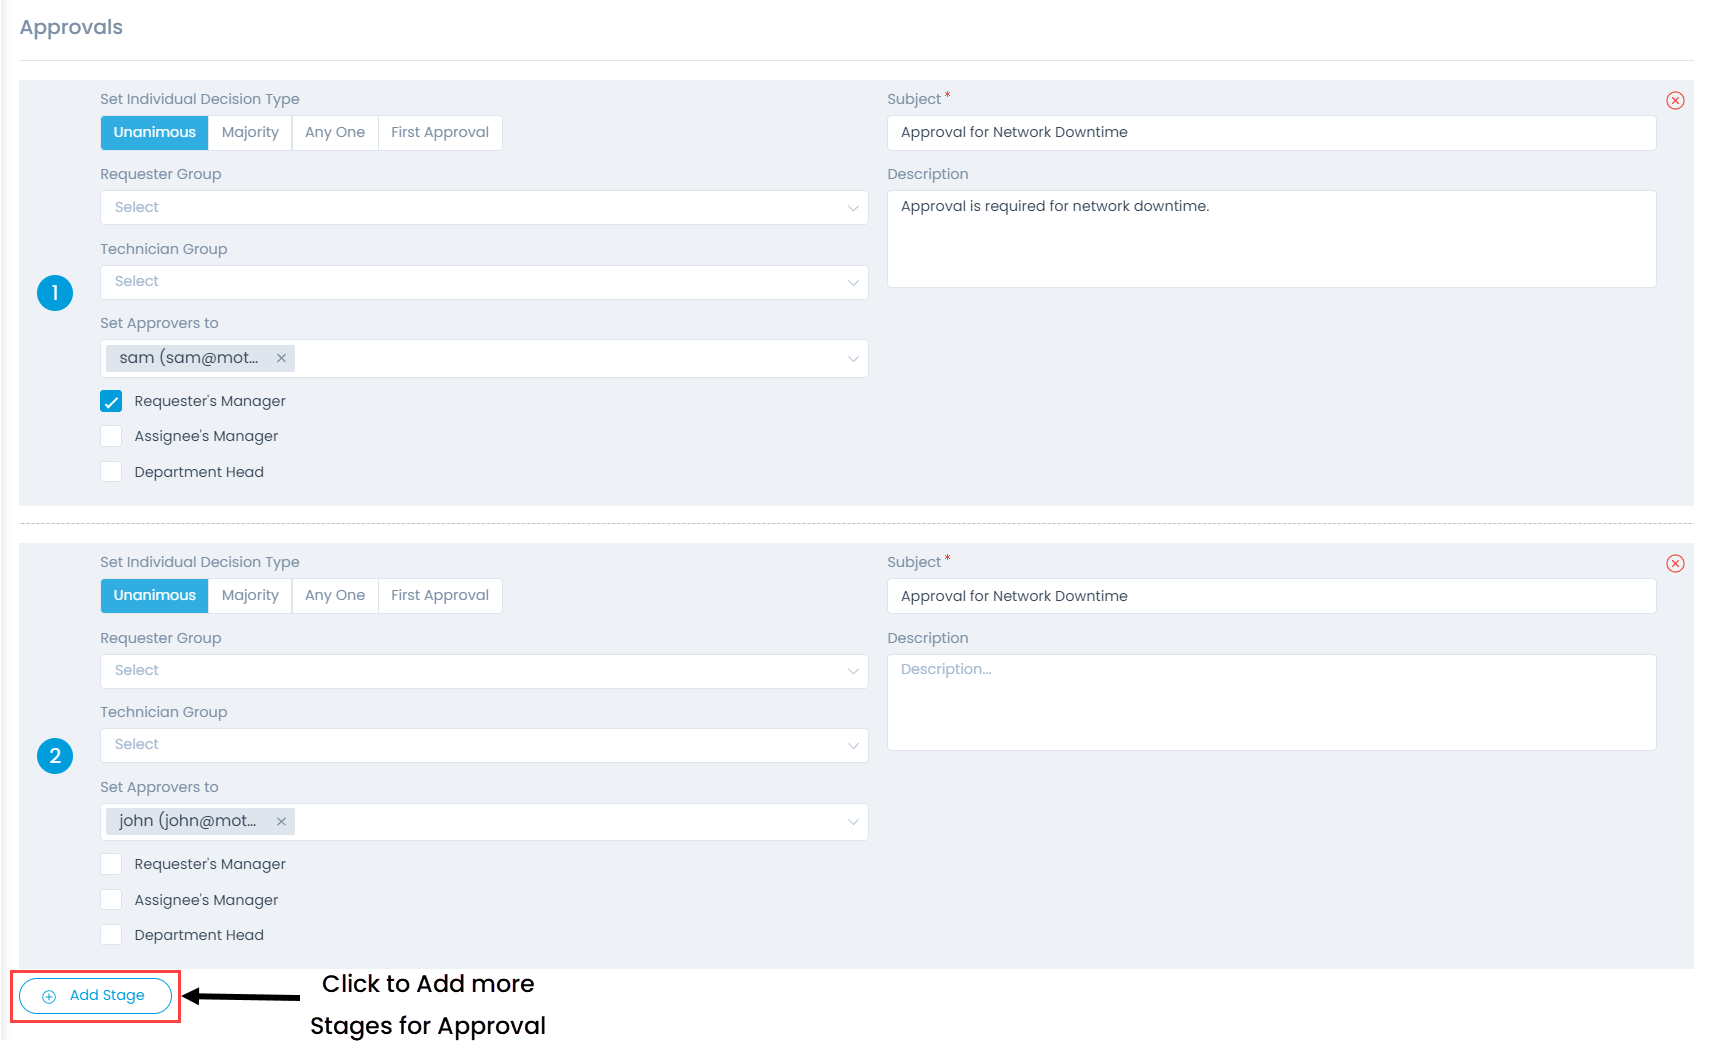
| Add Stage | Click to add a new stage (level) for approval. If clicked, configure the next level of approval for the tickets. You can add a maximum of 10 stages. |
Adding Approval Stages
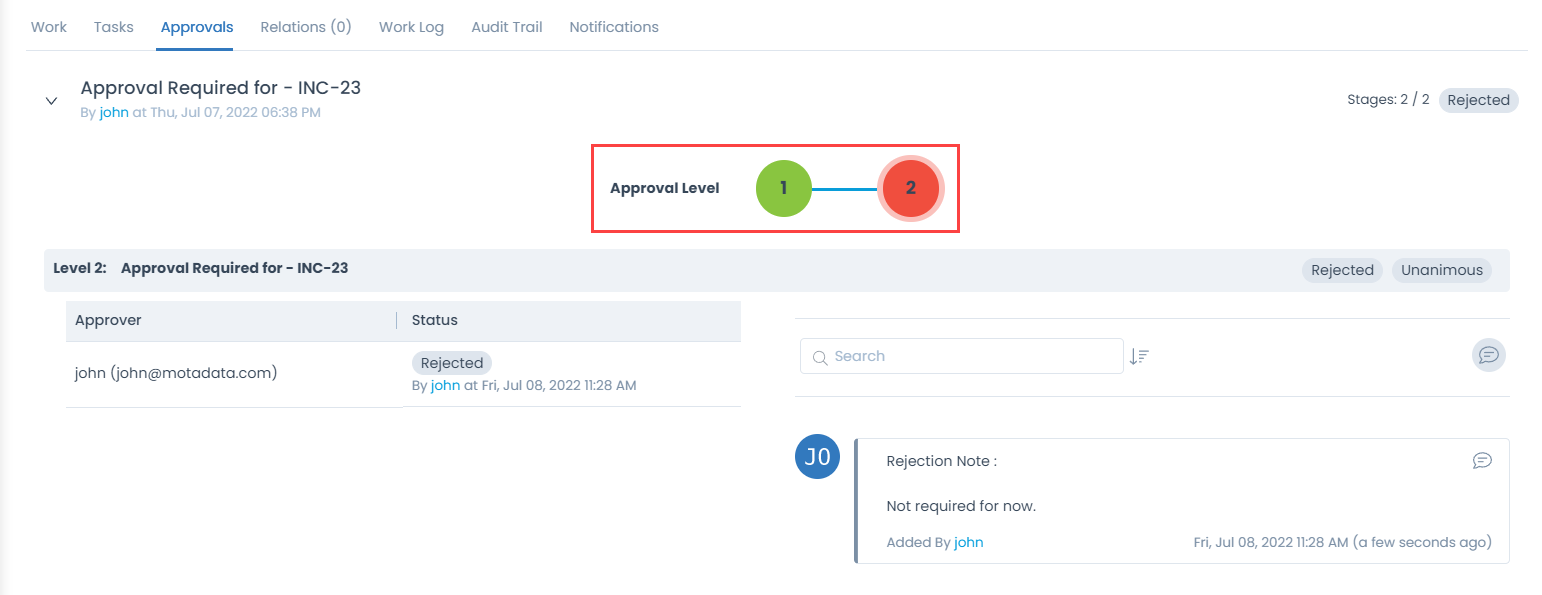
Adding an approval stage means someone else has to approve a request after the previous is approved. In the ticket, the stages are visible with numbers in the Approvals tab as shown below.
