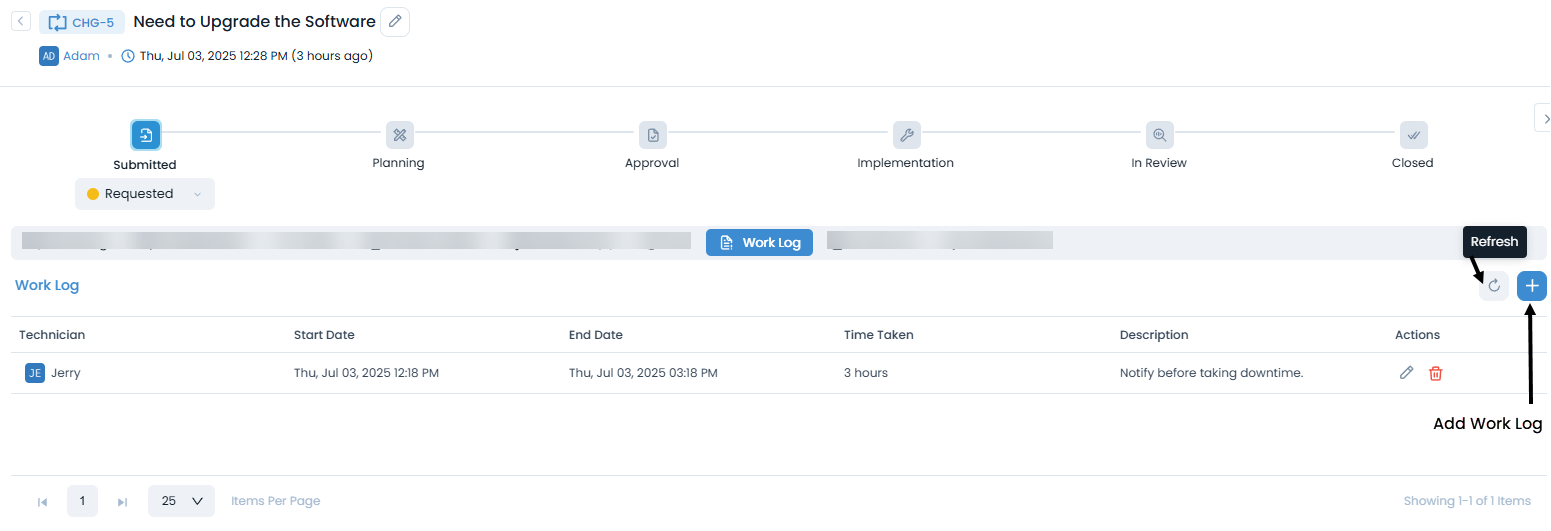
Adding Work Log
The Work Log tab allows the analysts to record the activities they performed (along with the time frame).
note
This tab can be disabled using the Change Form Rule. If disabled, you can only view the existing work log and not create. The option to add a work log will be hidden.
Here, you can perform the following operations:
- Add a Work Log
- View the Work Log list
- Edit Work Log
- Delete Work Log
Adding a Work Log
To add a Work Log:
- Click the Add Work Log button. A popup appears.

- Enter all the details as shown below.
- Technician: Select the technician for whom the work is to be logged.
- Enable Timer (red clock): Select the option to log time. The options are:
- Manual: To add the log time manually, select the Start Date and End Date. The Time Taken field displays the duration of work as per the selected start date and end date.
- Timer: Enable the timer to add a work log based on it. Once enabled, the clock icon will turn green. If enabled, the Start Date, End Date, and Time Taken fields will get hidden and the clock icon will appear. With Timer, the Work Log will be calculated based on the start and current time. Once the Timer is started, it will appear on the list page. You can click the Stop icon to stop the Timer or pause it if required. Also, its audit entry will appear in the Audit Trail tab.
- Description: Enter the description of work done.
- Once done, click Add, and the created Work Log appears in the list.