Managing Projects
Access, create, and manage projects to collaborate effectively with your team and track project progress through the Support Portal.
Project Management in ServiceOps helps you take part in projects, check progress, and complete your assigned work. Based on your role—such as a project member, owner, or stakeholder—you can use the Support Portal to view project details, track milestones, and manage tasks. What you can see and do in a project depends on the access given to you by your administrator.
What is a Project?
A project in ServiceOps is a temporary collaboration designed to achieve a common goal through planned activities. These projects offer several key benefits, including better visibility into progress and team activities, improved adherence to deadlines, accelerated business growth by completing projects on time, and reduced risks associated with delays.
Projects in ServiceOps are characterized by:
- Clear milestones and deliverables
- Defined member roles and responsibilities
- Structured task management
- Location-based isolation for multi-site organizations
- Comprehensive tracking and reporting
Access and Viewing Projects
To access the Project Management module, you need:
- An active Project Management license.
- A project role assigned by your administrator.
- Membership in at least one project.
Once you have the necessary permissions, you'll see the Projects module in your Support Portal navigation. The projects list displays all projects where you are a member.

The projects list provides the following features:
Project Filters: Use the dropdown to view
All Open Projects,My Open Projects, or other predefined views.Search Bar: Enter keywords or select fields to quickly find specific projects.
Create New Project: Click the
+button to initiate the creation of a new project.Export: Download the projects list in CSV or Excel format for reporting or offline review.

- Click the Export button.
- Select the format (CSV or Excel) and fields that you want to export. If you select Excel, you can also enable the Password Protected option to secure the file. If enabled enter the Attachment Password. If not provided, the common password set from Edit User Profile page will be used.
- Once done click Export, the projects list file will be exported via email.
Refresh: Update the list to ensure you're viewing the latest project data.
Column Selection: Customize which columns are displayed in the list to focus on relevant information.
Bulk Actions: Use the checkboxes to select multiple projects for potential bulk actions like update and archive.
Grid: The grid displays the projects list with the columns you have selected.
View Details: Click on the project name (e.g.,
PRJ-1) to open the full project details page.Open in New Tab: Click the external link icon next to a project name to open its details in a new browser tab.
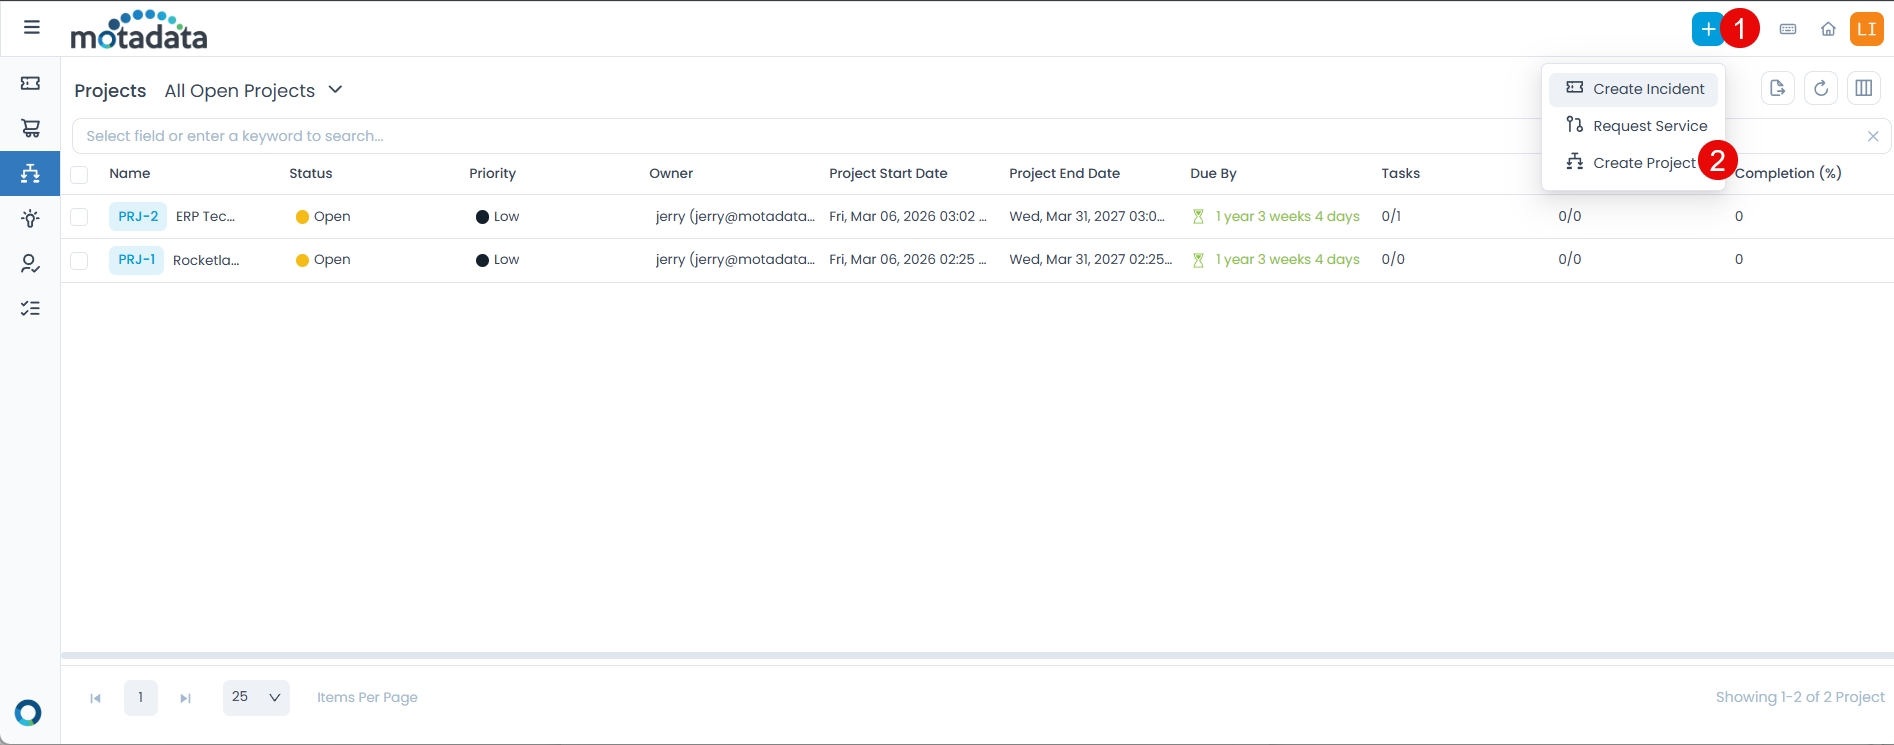
Creating Projects
To create new projects, follow the below steps:
Click the + button in the header.
Select Create Project from the dropdown menu.

- Fill in the required project details:
| Field | Description | Required |
|---|---|---|
| Name | Enter a descriptive name for the project | Yes |
| Description | Provide a detailed description of the project goals and scope | Yes |
| Project Start Date | Select when the project will begin | Yes |
| Project End Date | Select the expected completion date | Yes |
| Priority | Choose the priority level (Low, Medium, High, Urgent) | Yes |
| Project Type | Select the project category (Infrastructure, Maintenance, Business) | Yes |
| Project Risk | Assess the risk level (default: Low) | Yes |
| Owner | Select the project owner from available users | Yes |
| Location | Choose the project location if applicable | No |
| Vendor | Select the vendor from the dropdown list if applicable | No |
| Tags | Add relevant tags to help categorize and find similar projects | No |
| Attachment | Upload relevant files, documents, or reference materials | No |
- Click Create to submit the project. Once created, you'll receive an email confirmation. Projects are assigned a unique identifier starting with "PRJ" (e.g., PRJ-1, PRJ-2).
Project Management
Project Details
When you open a project, you'll see comprehensive information and management options:
- Project Information
- Available Actions
The project details page displays key information about the project:
| Information | Description |
|---|---|
| Status | Current project status (Open, In Planning, Implementation, Closed) |
| Priority | Project priority level |
| Project Type | Category of the project |
| Project Owner | Person responsible for the project |
| Milestones | Number of milestones in the project |
| Tasks | Number of tasks in the project |
| Completion | Overall project completion percentage |
| Tags | Tags assigned to the project. |
Project Management
- Edit Project: Modify project details and information. To modify project information:
Click the Edit icon next to the project name.
Update the required fields in the popup.
Click Update to save changes. You can also update field values in the Other Info section.
Edit PermissionsYour ability to edit project details depends on your assigned project role and permissions.
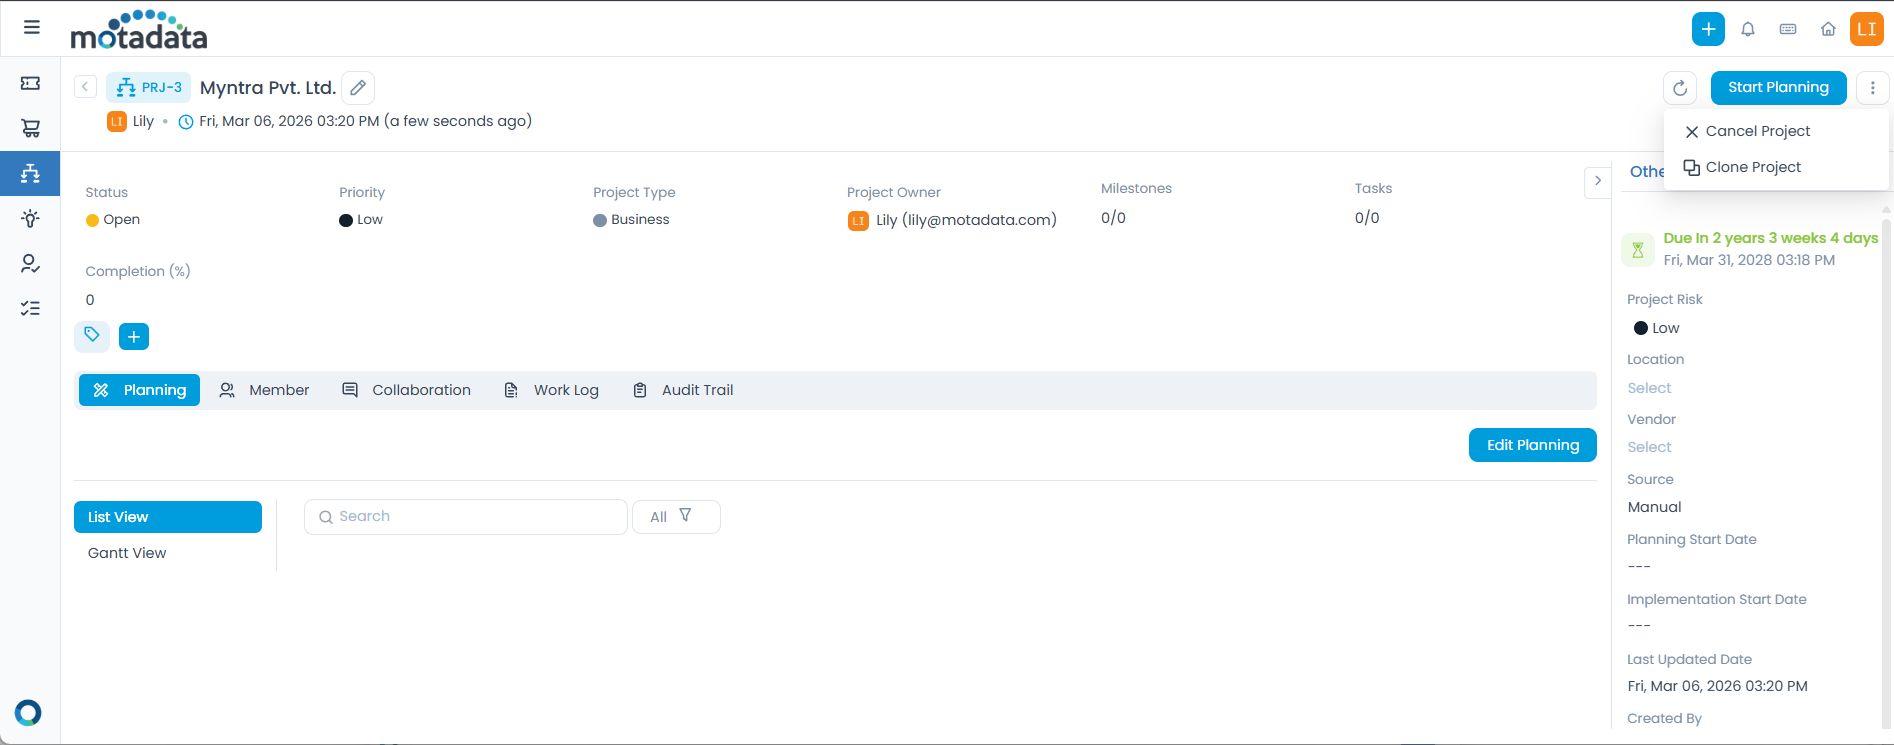
- Start Planning: Begin the project planning phase
- Cancel Project: Terminate the project if necessary
- Clone Project: Create a copy of the project for similar initiatives

Team Collaboration: For detailed information on managing project members, collaboration, and work logs, refer to the Team Collaboration section.
Project Tracking
- View Planning: Access project schedule and task details
- Audit Trail: See complete history of project activities
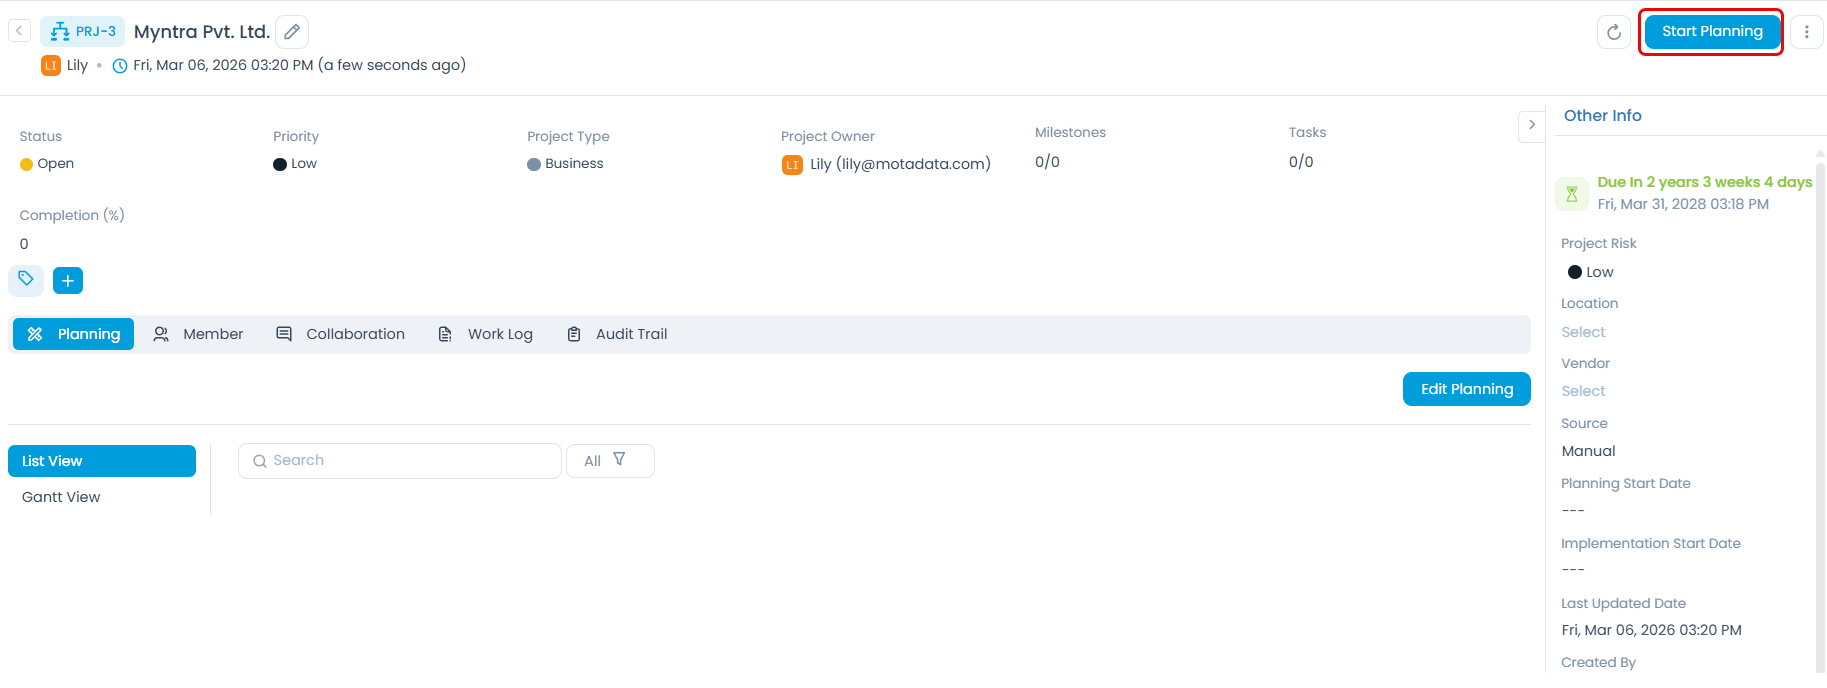
Starting Planning
Once a project is created, you can begin the planning phase:
Open the project details page.
Click Start Planning to begin the planning process.
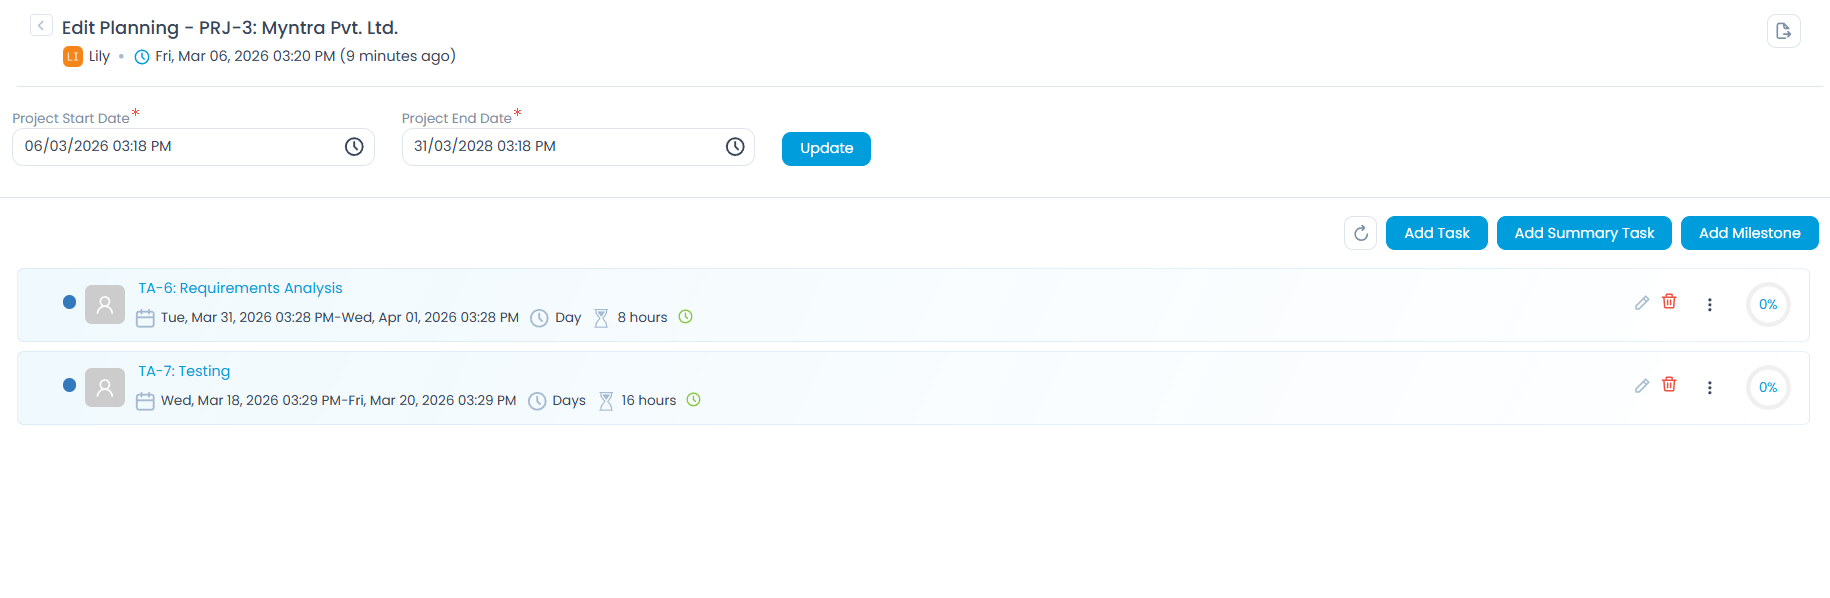
Use the planning tools to:
- Define project tasks and subtasks.
- Set milestones and deadlines.
- Assign team members to specific tasks.
- Create project schedules.
Before starting planning, a project owner must be assigned. Only assigned members can participate in project planning.
Viewing Planning
To view project planning details:
Open the project details page.
Click on the Planning tab.
Review tasks, milestones, and project schedule.
Track progress and completion status.
Team Collaboration
- Managing Project Members
- Collaboration and Communication
You can add team members to your projects and assign them specific roles. This ensures clear responsibilities and efficient collaboration.
- Navigate to the project details page and click on the Member tab to access the specific project you wish to manage.

- Click the Add Member button to open the Add Member dialog.
- Select the members you want to add to the project and click Add.
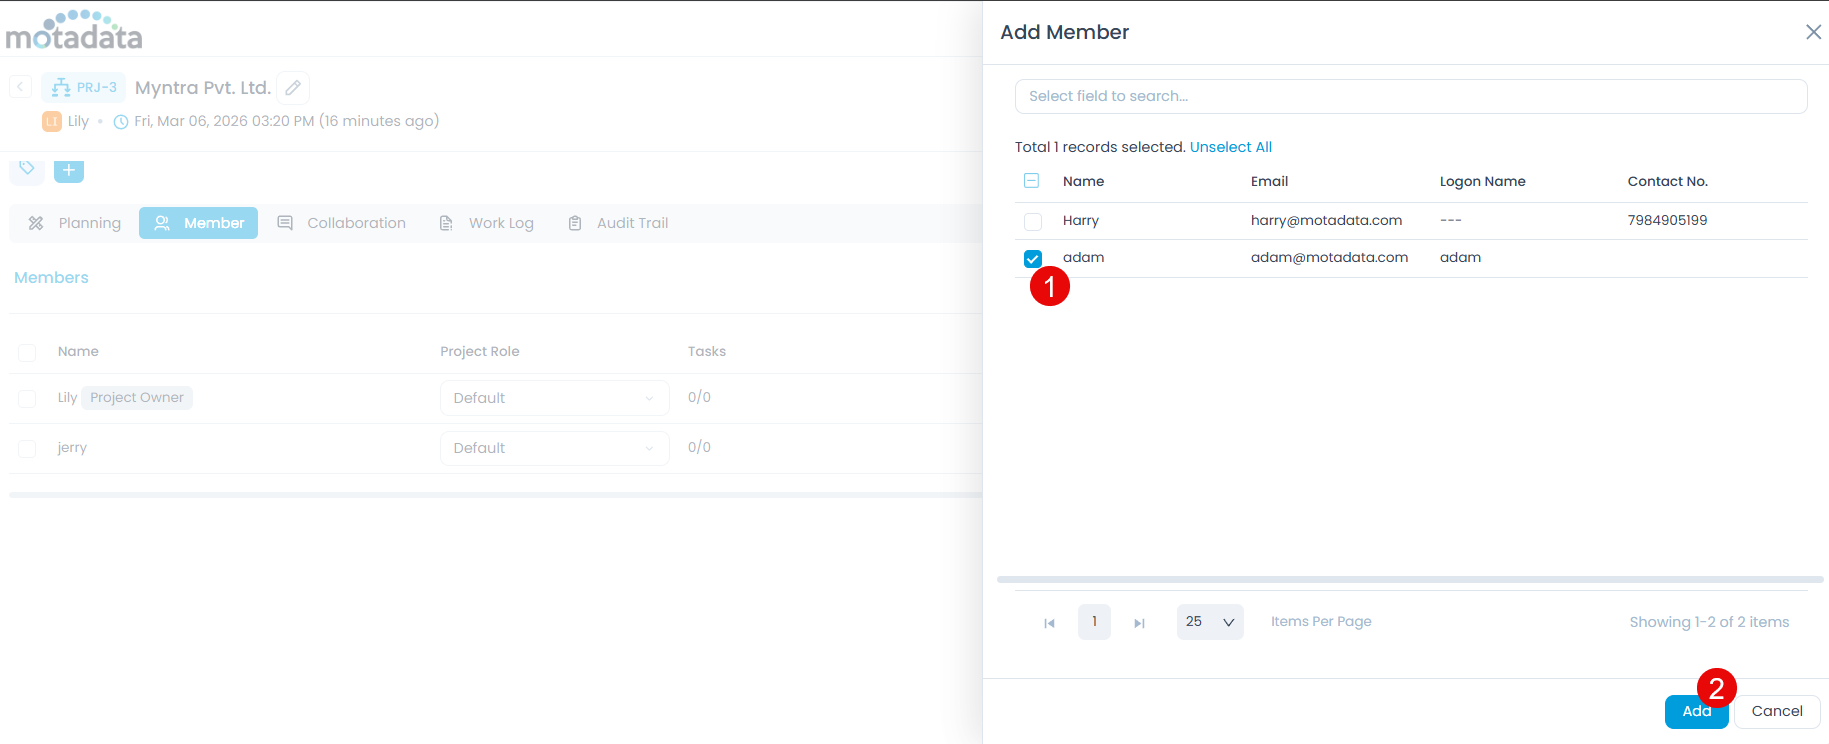
- The members will now appear in the project member list. Assign the project role to the members from the dropdown list.
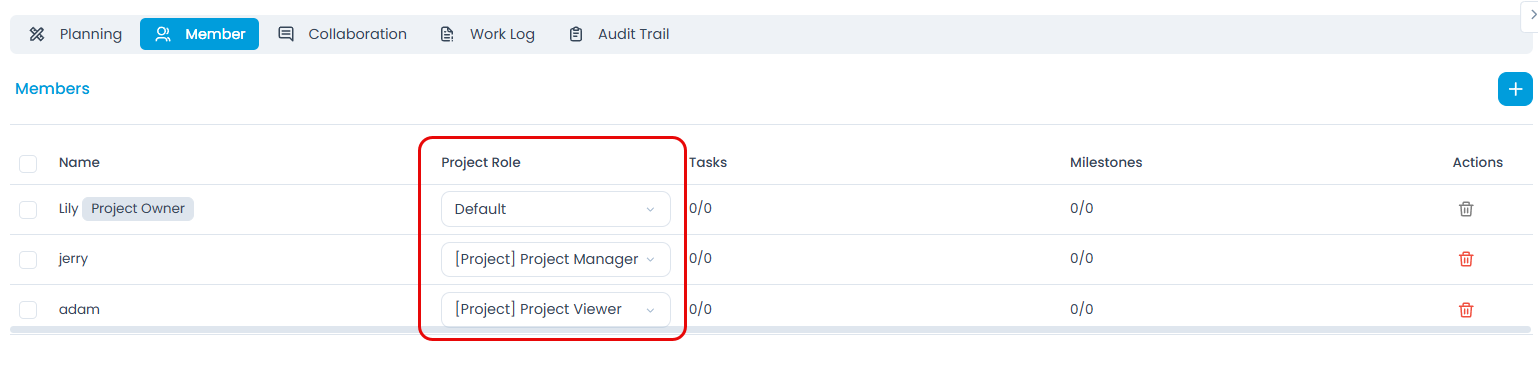
The project role determines what actions a member can perform within a project. Ensure roles are assigned appropriately based on member responsibilities.
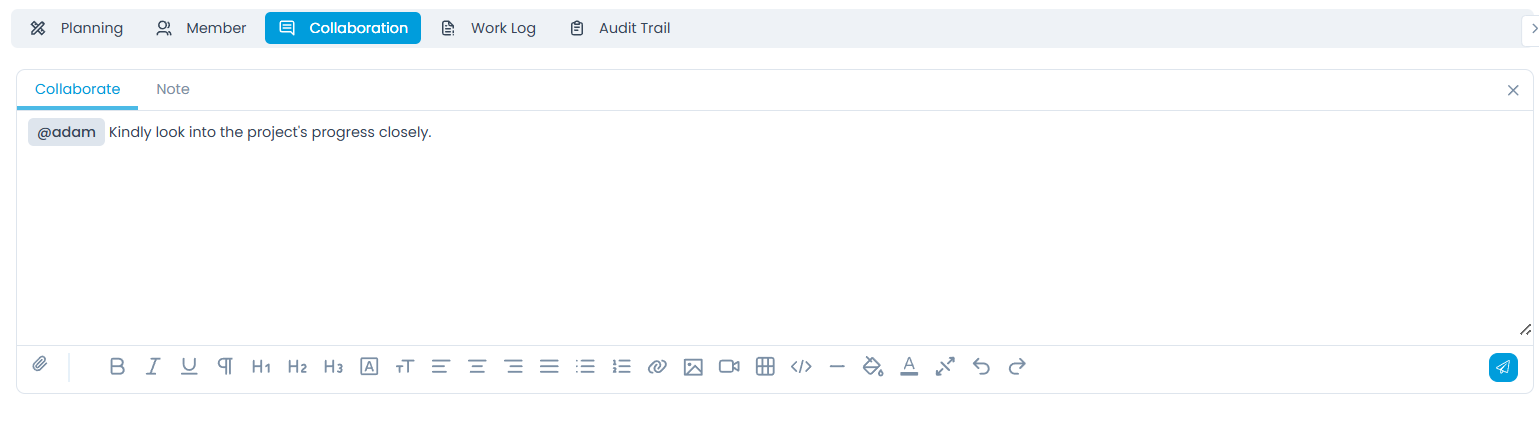
The collaboration features help teams stay connected:
Add Notes: Share important information with the team.
Collaboration Messages: Communicate updates and progress.
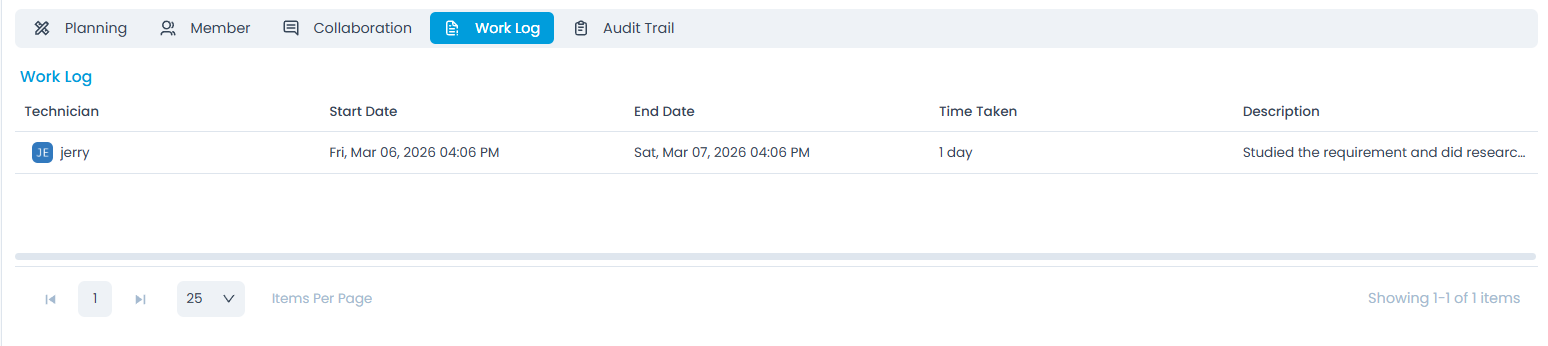
Work Log: Track time and activities spent on project tasks.
Best Practices
- Creating Effective Projects
- Project Collaboration
- Project Tracking
- Clear Objectives: Define specific, measurable project goals
- Realistic Timelines: Set achievable start and end dates
- Proper Categorization: Use appropriate project types and priorities
- Team Assignment: Include all necessary team members early
- Regular Updates: Keep team members informed of progress
- Clear Communication: Use collaboration features for important updates
- Documentation: Attach relevant files and reference materials
- Role Clarity: Ensure team members understand their responsibilities
- **Monitor Progress**: Regularly check project completion status from the project list and details page.
- **Update Tasks**: Keep task status current as work progresses.
- **Milestone Tracking**: Celebrate and track milestone achievements.
- **Timeline Management**: Ensure projects stay on schedule.
- **Export Project Data**: Download project data in CSV or Excel format for reporting or offline review.
Troubleshooting
Common Issues
| Problem | Solution |
|---|---|
| Project Not Visible | Contact administrator to ensure you're added as project member |
| Cannot Edit Project | Check project role permissions with administrator |
| Planning Not Available | Ensure project owner is assigned and you have planning permissions |
| Mobile Access Issues | Verify mobile app permissions and project membership |
Getting Help
If you encounter issues with project management:
- Check Permissions: Verify your project role and access levels.
- Contact Administrator: Reach out to your system administrator for role changes or access issues.
- Review Documentation: Check other sections of this user guide for related information or troubleshooting steps.
- Submit Support Request: If self-help options are exhausted, create a service request for technical assistance.