Request List View
The Request List View page displays all the available Requests in the system. It is the central hub for a Technician, where you can find a Request and act upon it.
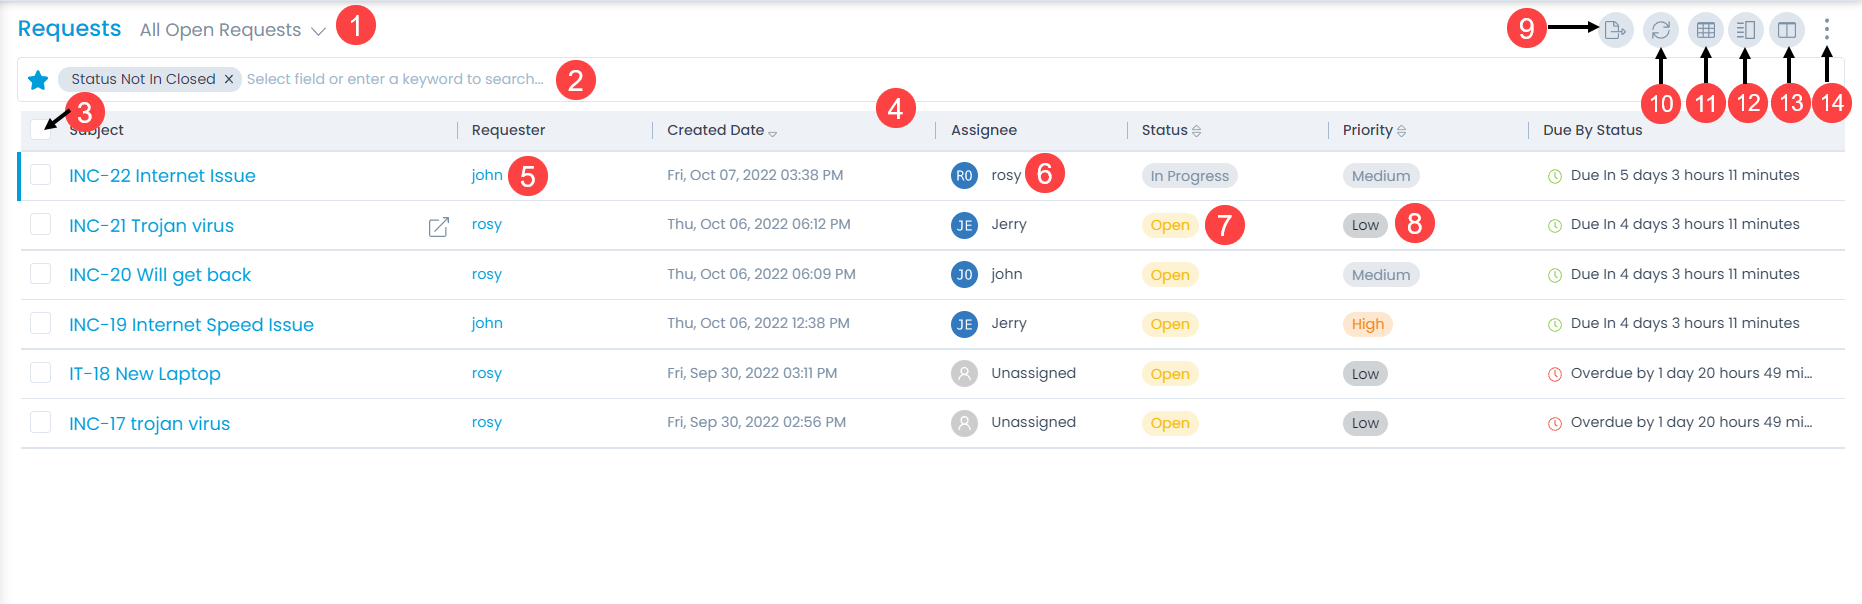
Here, you can do the following:
- Filter: You can filter the requests by clicking the desired option. For example: "If All Open Requests" is selected, the grid displays all the requests with open status.
- Search: You can look for specific requests by searching them. The search is a faceted search and allows you to search with specific criteria. The filter option uses predefined criteria and segregates the list accordingly. You can find more details in the search section.
- Bulk Operations: You can select multiple requests and take the required action.
- Grid: Displays all the requests in the grid.
- View Requester Details: You can view the details of the requester like profile, recent requests, and assets.

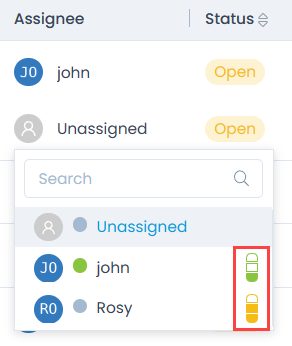
- Change Assignee: You can change the assignee from the Assignee column by clicking on the assignee's name and selecting the desired technician. The assignee with the Green icon indicates the assignee is Online while Grey indicates Offline. You can also know the load of a particular user based on the color of the load indicator (bar) as shown below. The color indicates the following:
- Green - Low
- Yellow - Medium
- Red - High
- Change Status: You can change the status of the request by clicking on it and selecting the required option. The options are: Open, In Progress, Pending, Resolved, and Closed. The default value is Open.
- Change Priority: You can change the priority of the request by clicking on it and selecting the required option. The options are: Low, Medium, High, and Urgent. The default value is Low.
- Export: You can export the requests list in CSV and Excel format.
- Refresh: You can refresh the request list. This is useful when multiple people are working on the request and the contents are updated frequently.
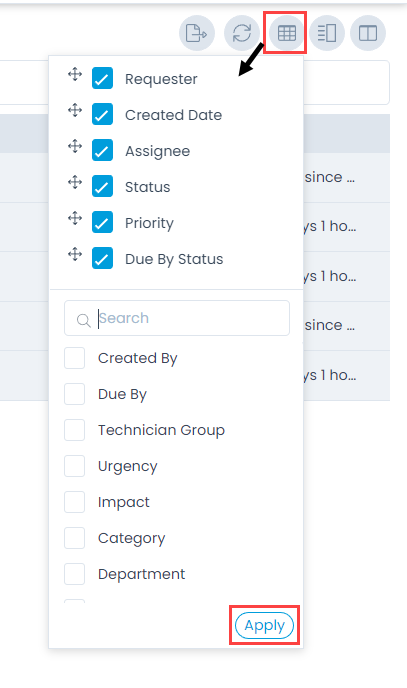
- Column Selection: You can select the columns to be displayed in the grid table.
- Split View: You can see the requests in a split format.
- Kanban View: You can view the request list in Kanban view.
- More Options: You can click and select any of the below options:
- Import Incident: You can import a list of incident Requests in bulk.
- Import Service Request: You can import a list of service requests in bulk based on the selected Service Catalog.
Column Selection
The column selection icon allows you to personalize the columns of the list page. When you change the columns of the list page, the changes do not affect other people.
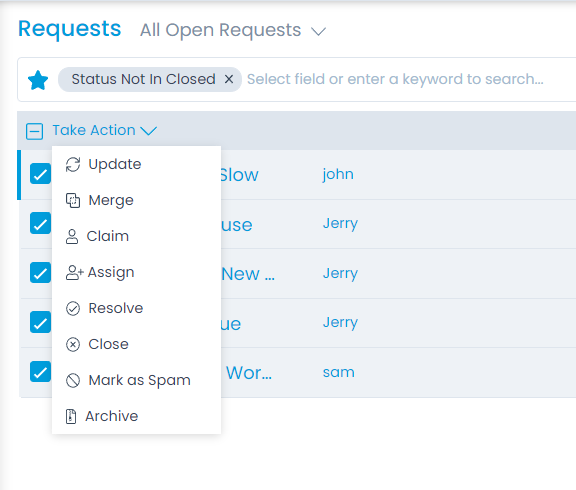
Bulk Operations
With bulk operations, you can manage multiple Requests together. The option is visible when you select a Request. An option Take Action displays with a list of options supported for bulk operations.
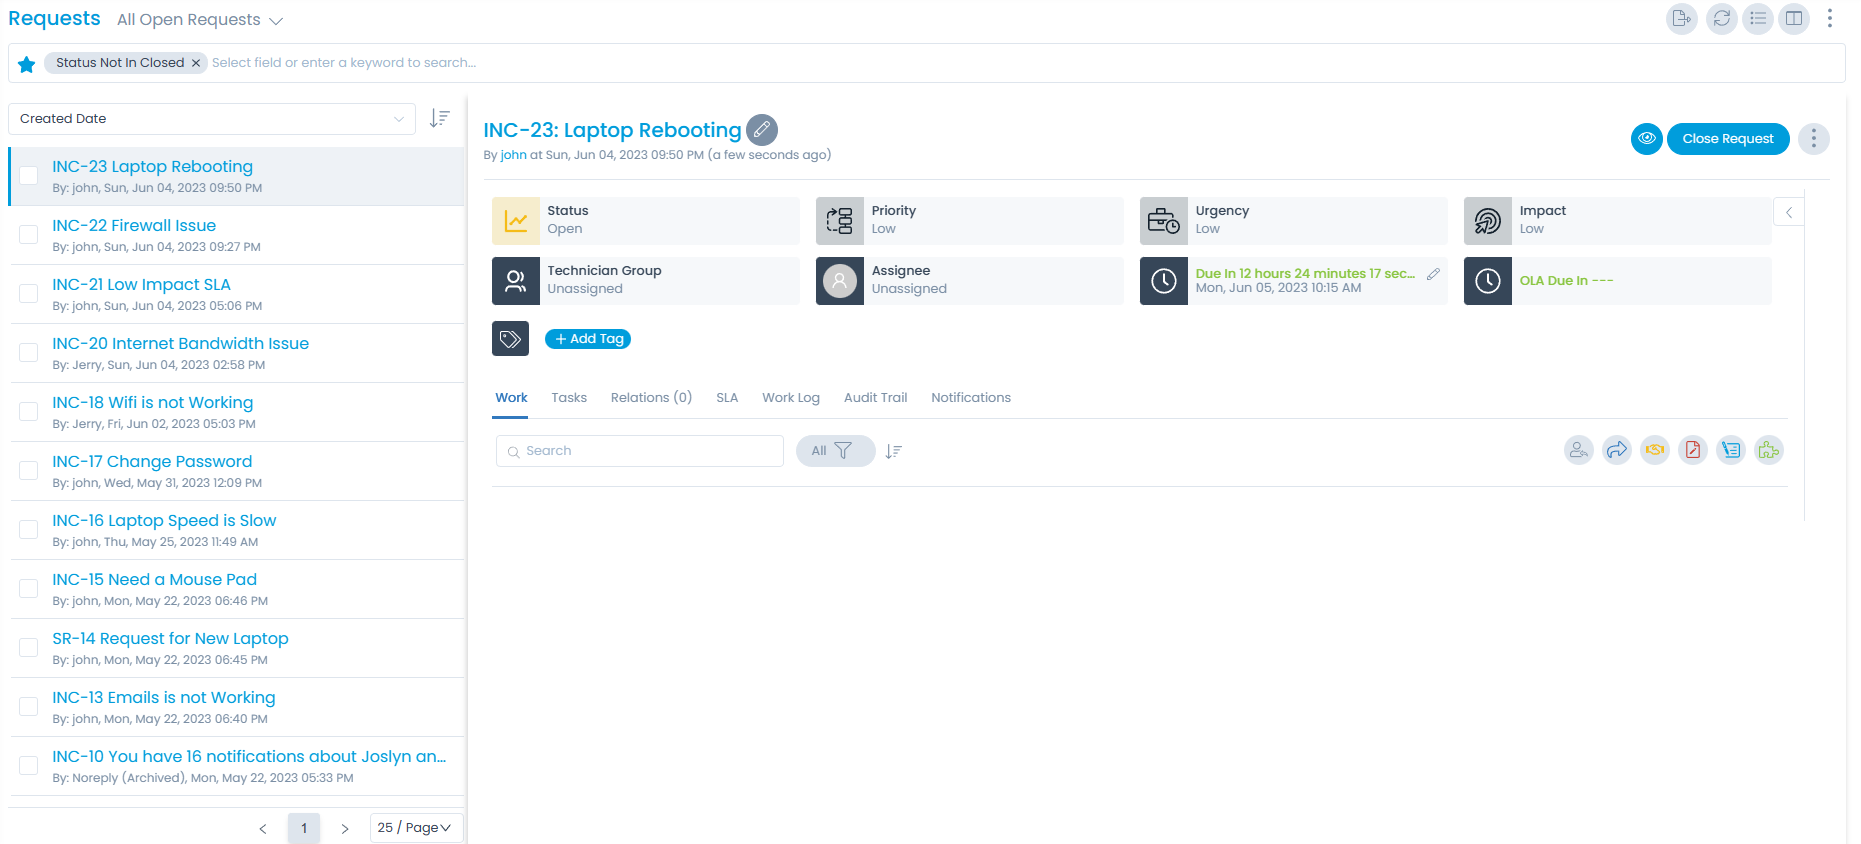
Split/List View
Default view is the list view. You can also click on Split View/List View icon to change the view. The split view displays the list of requests on the left side and the details of the selected request on the right side. To know about the details page options, click here.
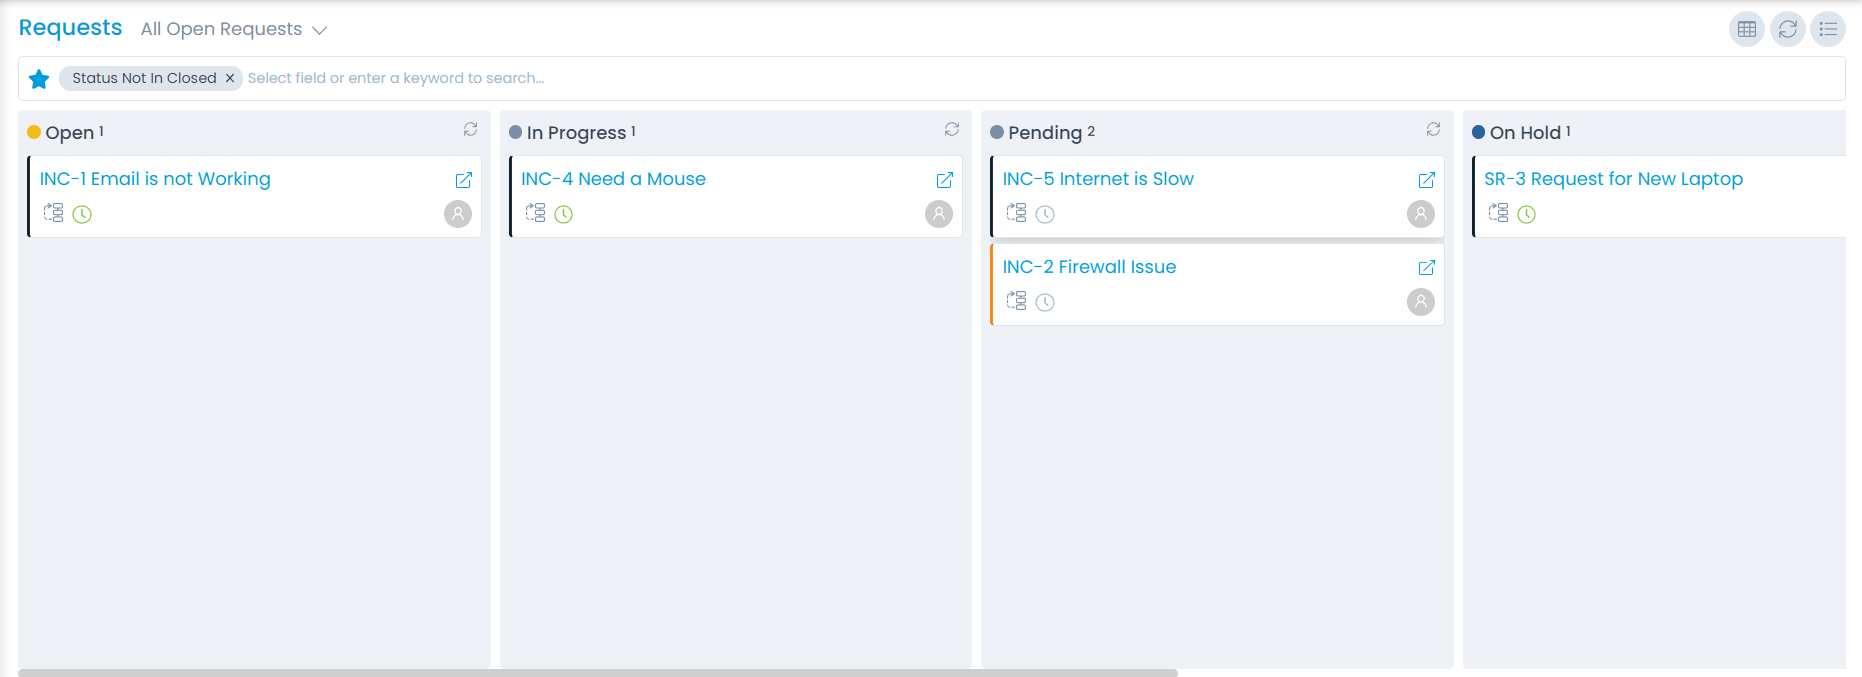
Kanban View
Default view is the list view. You can click on the Kanban View option to change the view. The Kanban view displays a list of requests based on their status as shown below.
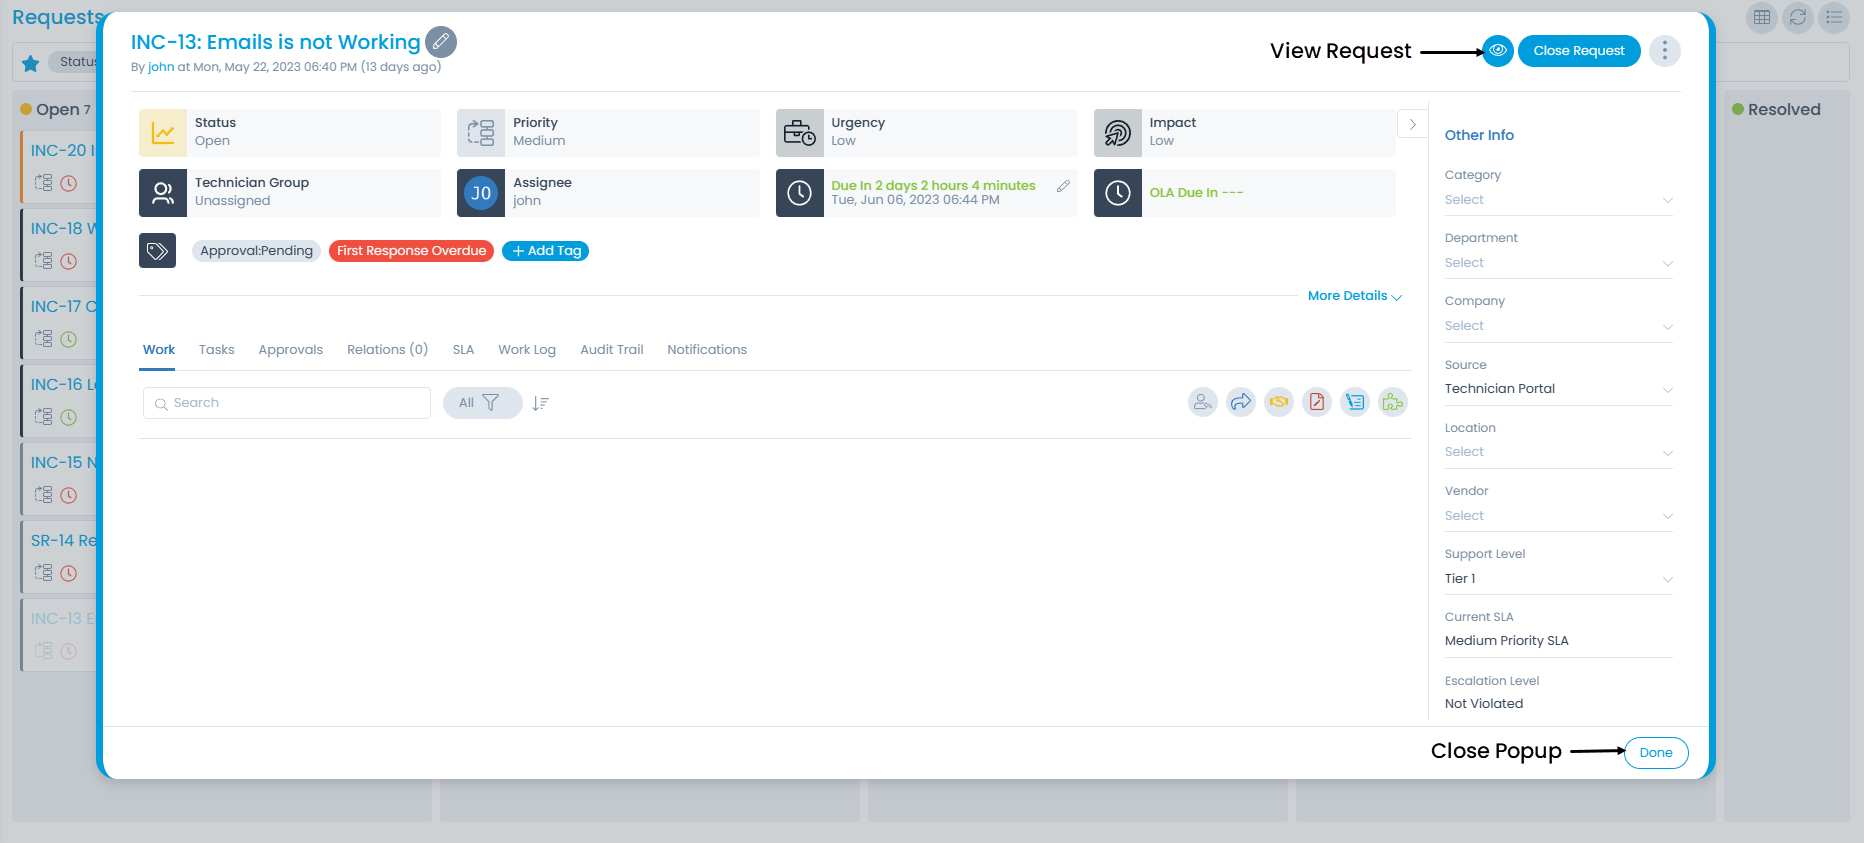
- You can also view the details of a particular request by clicking on it and a popup appears. Here, you can make the required changes. For more details, you can refer to the Request Details Page. To close the popup, click Done at the bottom-right corner.
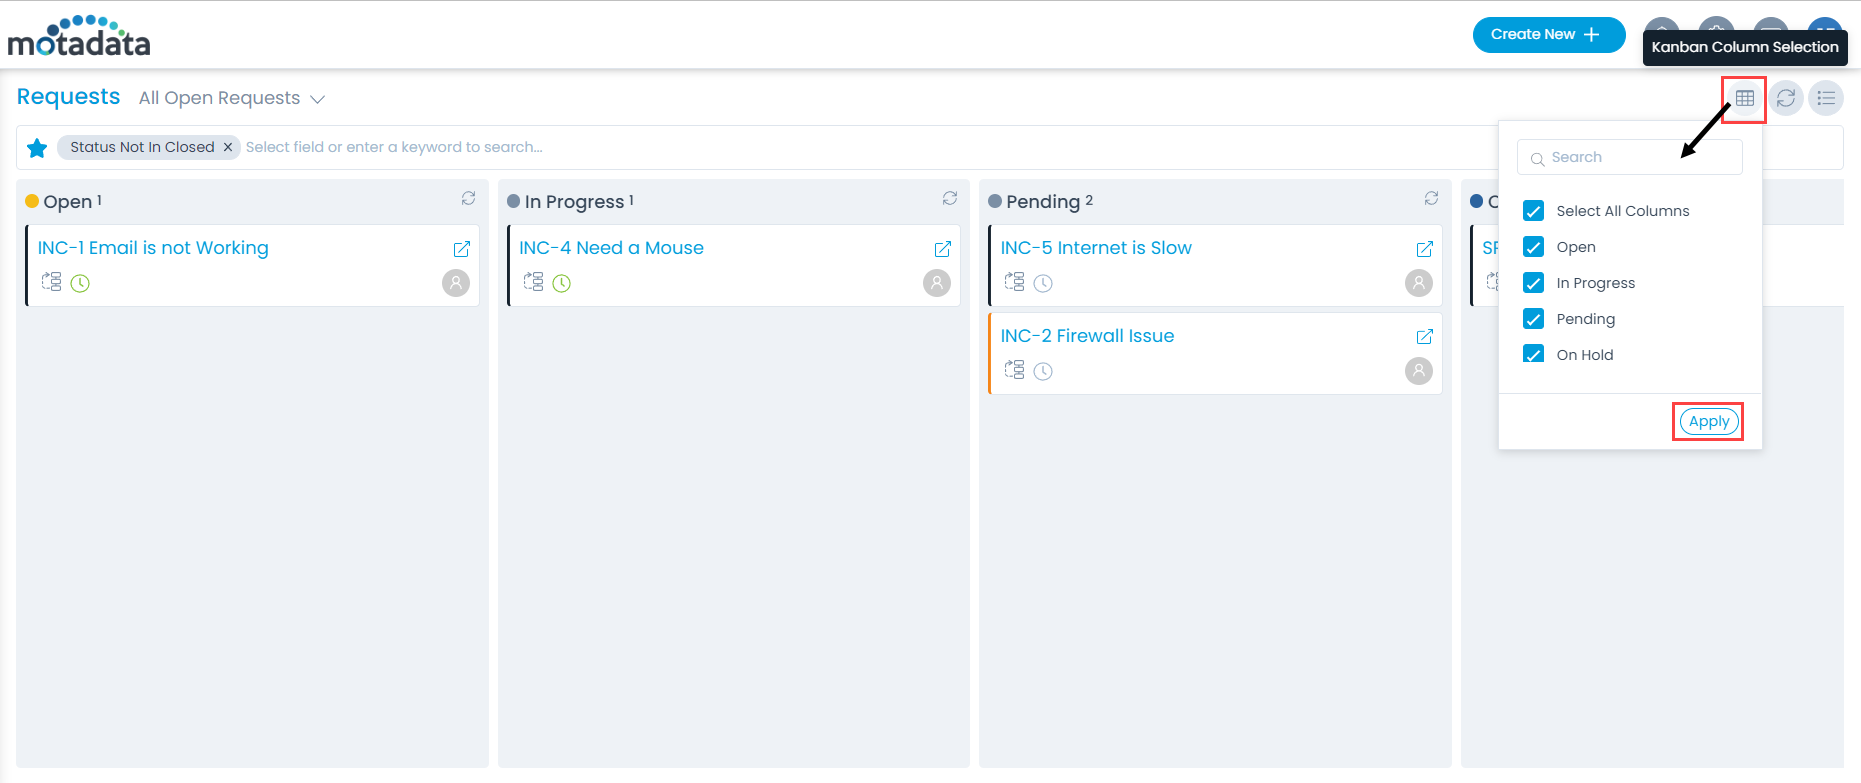
- In this view, you can select the statuses to be available on the screen using the Kanban Column Selection icon as shown below.
Import and Export Incident Request
To import multiple requests in bulk, follow the below steps:
- Click the More Options icon (three dots) on the top-right corner of the page and select the Import Request option. The Request Batches page appears.
- Click the Import CSV Batch button.
- Select the file type as CSV or Excel.
- Select the Date format to be used.
- Based on the file type selected, select the required file if you already have it filled with the respective fields. If not, select the new .csv/.exe file using Click Here and fill in the respective details. You can also add attachments to the file by mentioning its path in the Attachment column. For more details, refer to the "Guidelines for Importing Attachments in Request" document. Once the file is uploaded, click Next.

- Map the fields as per the requirement. By default it is mapped, only in case of removal/change of some parameters mapping is necessary, and click Save Batch.

- The Request Batches page appears. It displays the status of the import along with the details like processing time, total records, success records, failed records, etc. as shown below. Once successful, the imported requests will appear in the request list page.

To export the request list locally in the form of CSV or Excel,
- Click on the Export icon and a popup appears.
- Select the Format as CSV or Excel.
- If Excel is selected, you can enable the Password Protected option to secure the file. If enabled enter the Attachment Password. If not provided, the common password set from Edit User Profile page will be used.
- Select the desired fields to be exported.
- Click Export and an email is sent to the Administrator's email address with the link to download the list in the selected format.
Import Service Request
To import multiple service requests in bulk, follow the below steps:
- Click the More Options icon (three dots) on the top-right corner of the page and select the Import Service Request option. The Service Catalog Batches page appears.
- Click the Import CSV Batch button.
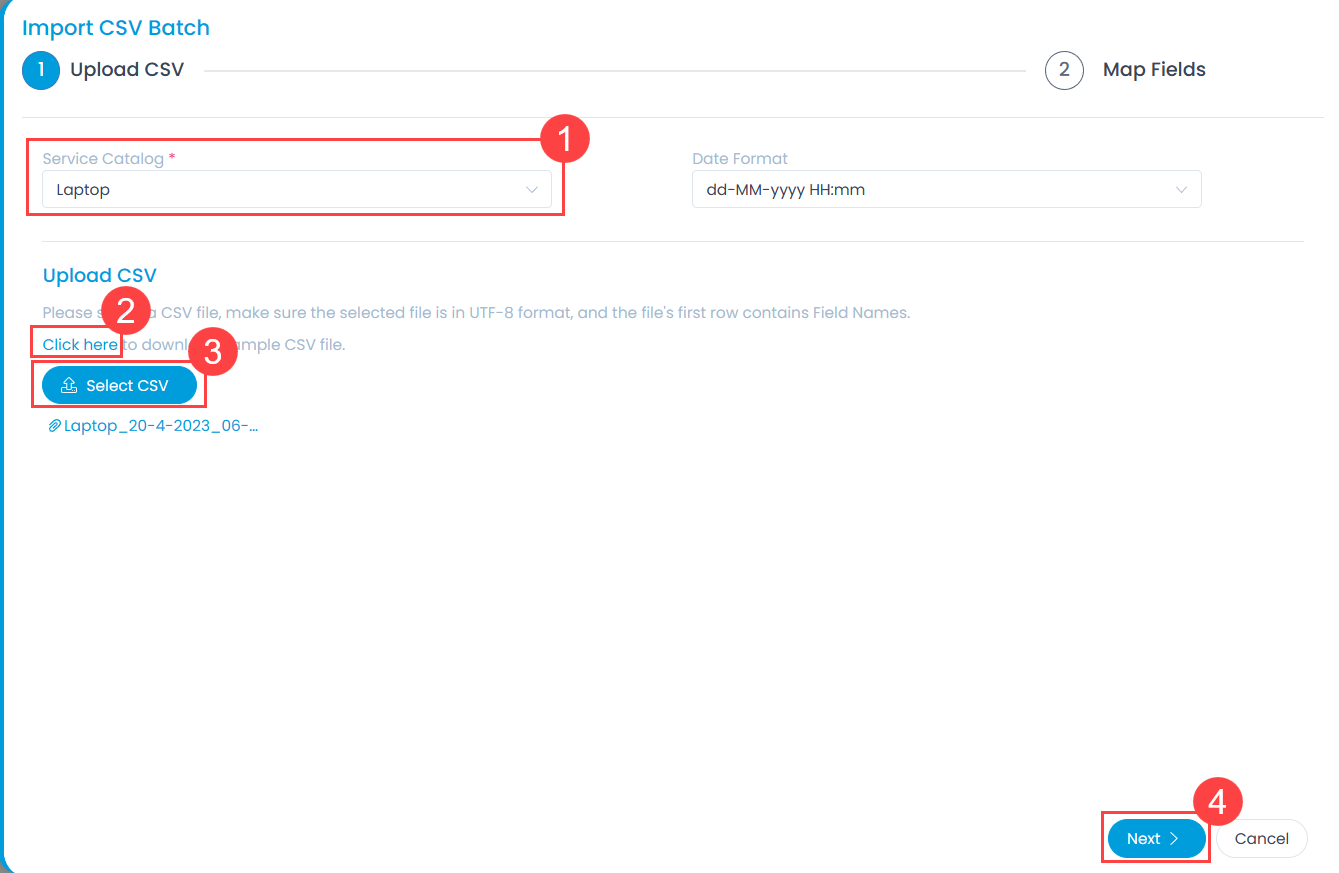
- Select the Service Catalog based on which the requests should be imported. You can also select the date format.
- Select the .csv file if you already have it filled with the respective fields. If not, select the new .csv file using Click Here, and fill in the respective details. The CSV file will contain fields based on the selected Service Catalog. Once the file is uploaded, click Next.
The Click Here link will be available only after selecting the Service Catalog.
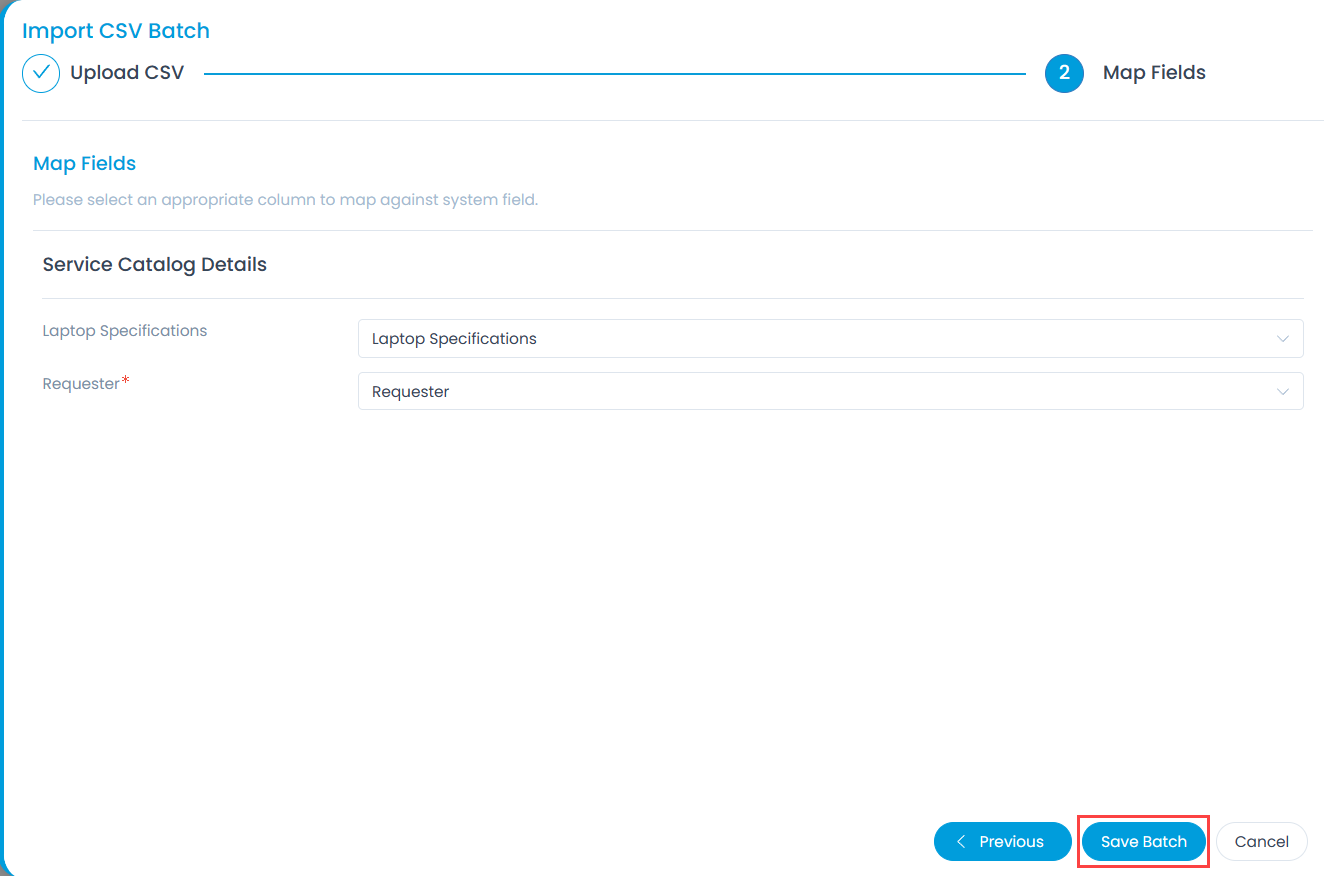
- Map the fields as per the requirement. By default it is mapped, only in case of removal/change of some parameters mapping is necessary, and click Save Batch.
- The Service Catalog Batches page appears. It displays the status of the import along with the details like processing time, total records, success records, failed records, etc. as shown below. Once successful, the imported service requests will appear in the request list page.
