Work Conversations
In the Work tab, you can collaborate and communicate to resolve the request. You can also select the specific Outgoing Email server using which email can be sent. The Work tab is at the bottom of the details view of a request. Ideally, here you can add comments, notes, diagnosis, solutions, and tag other technicians.
This tab can be disabled using the Request Form Rule. If disabled, the options Reply, Forward, Collaborate, Note, Diagnosis, and Solution will be hidden. You can only search, filter, and sort.
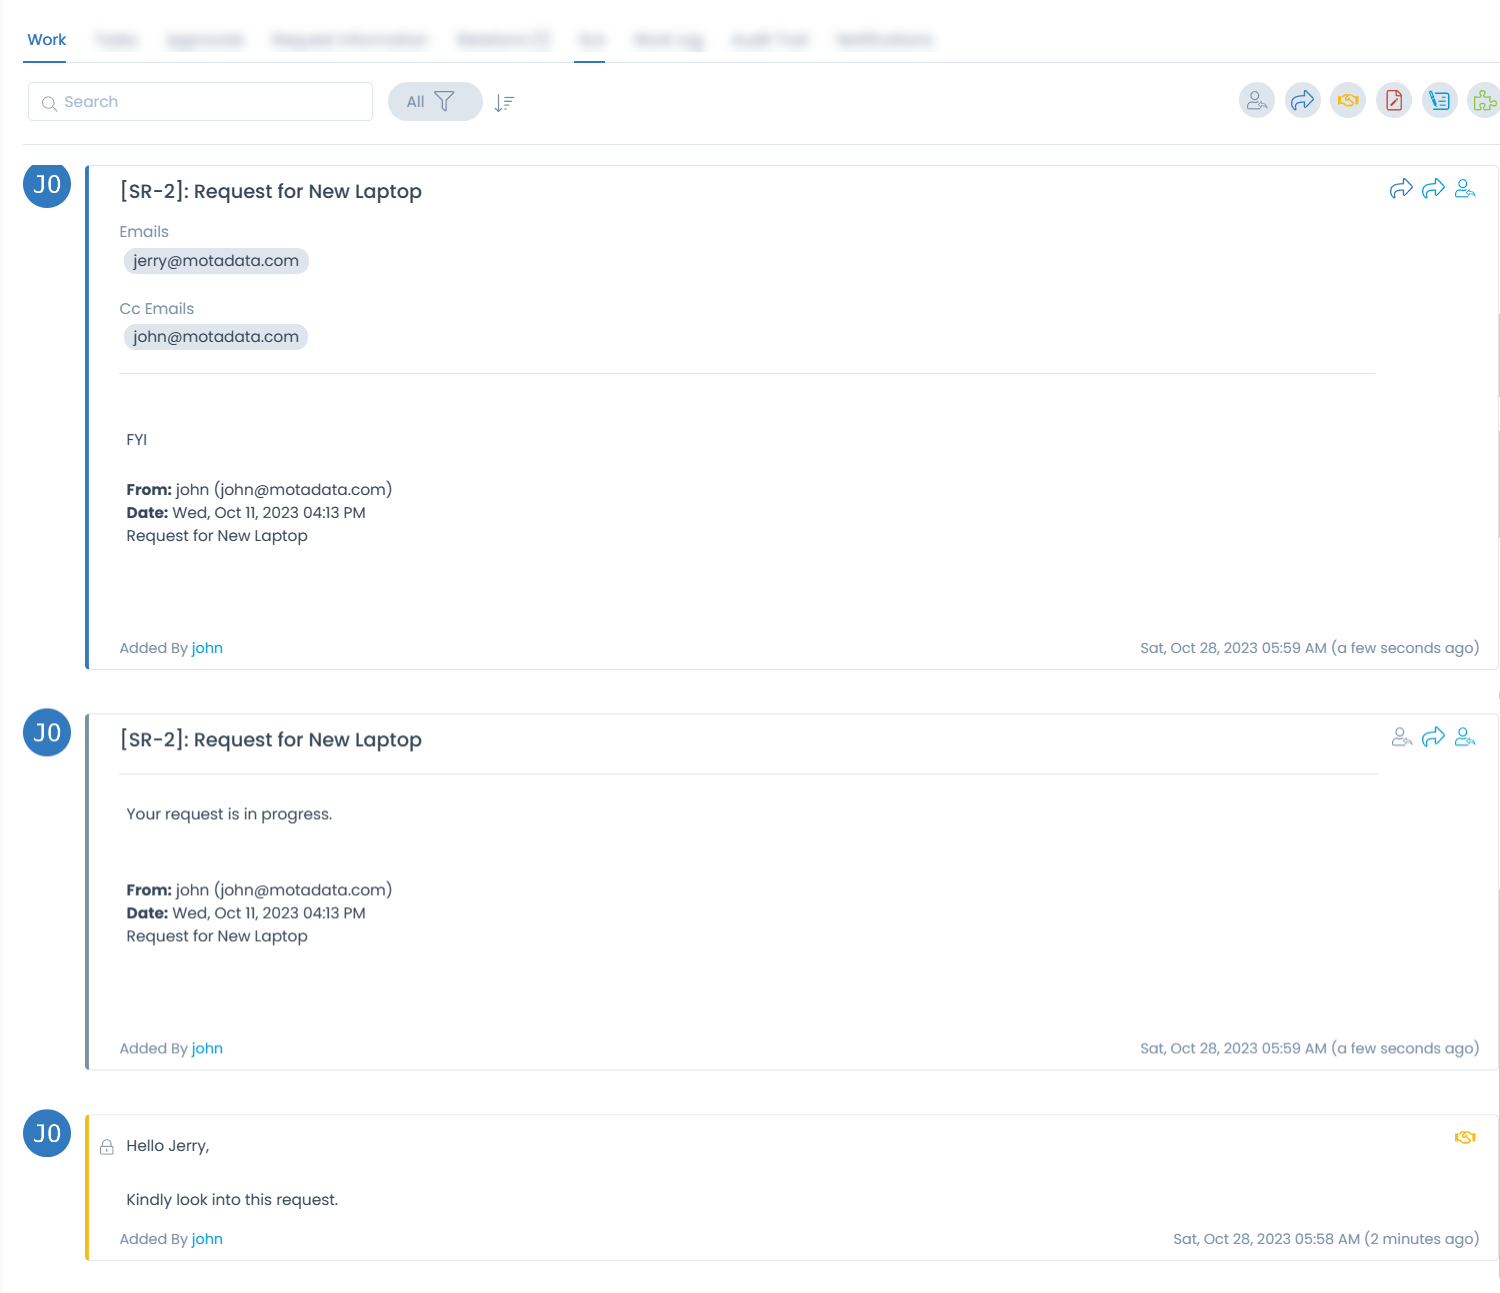
The Work tab shows all the work and communication done for a request. Here, you can perform the following activities:
| Parameters | Description |
|---|---|
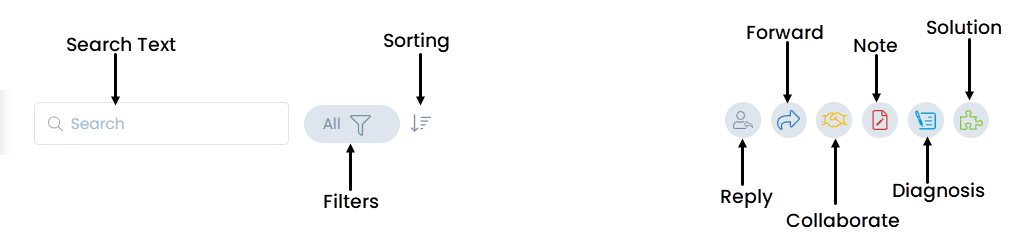
| Search | The search works on the content of the notes and comments in the tab. It matches your query with all the content (that technicians have entered) to find the results. This search is case sensitive. |
| Filter | You can search for the notes and comments based on their type. The available types are: All, Requester Communication, Collaborations, Notes, and Feedback. |
| Sort | You can sort all the items from latest-to-oldest and oldest-to-latest. |
| Reply | You can communicate with other technicians and the Requester. The Requester gets an email notification on every message you post and vice-versa (Requester and assigned Technician are the default recipients for email notification). The Requester can reply to the old emails and the replies are added to the comment thread. |
| Forward | You can select the desired request conversations to forward along with the previous email trail and attachments to some other user. You can forward the emails received from Requesters as well as sent to Requesters. You can also use the shortcut key f to forward requests. The forwarded email also contains the technician's signature, if configured. |
| Collaborate | You can collaborate with other technicians. You can start a message thread which is visible to other concerned people. You cannot change or delete a collaboration message. |
| Note | You can add additional information about the Request so that others can view the same. You cannot change or delete a collaboration message. |
| Diagnosis | You can add an inspection of the related problem. The diagnosis statement sits on top of the pane with a different color scheme. You can add only one diagnosis statement per Request. You can modify the diagnosis statement after adding one. |
| Solution | You can add a solution to the request and also convert it to knowledge. The solution is just below the diagnosis with a different color scheme. You can add only one solution statement per request. When you add a solution, the system asks you if you want to resolve the request. You can also modify the solution statement after adding one. |
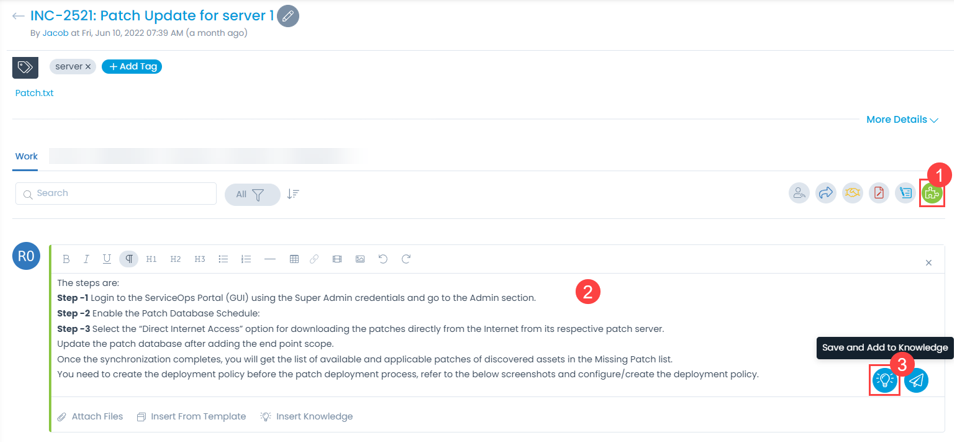
To convert the solution content into knowledge (KB article), you can click the Solution icon, type the content in the text box, and click the Save and Add to Knowledge button, as shown below.
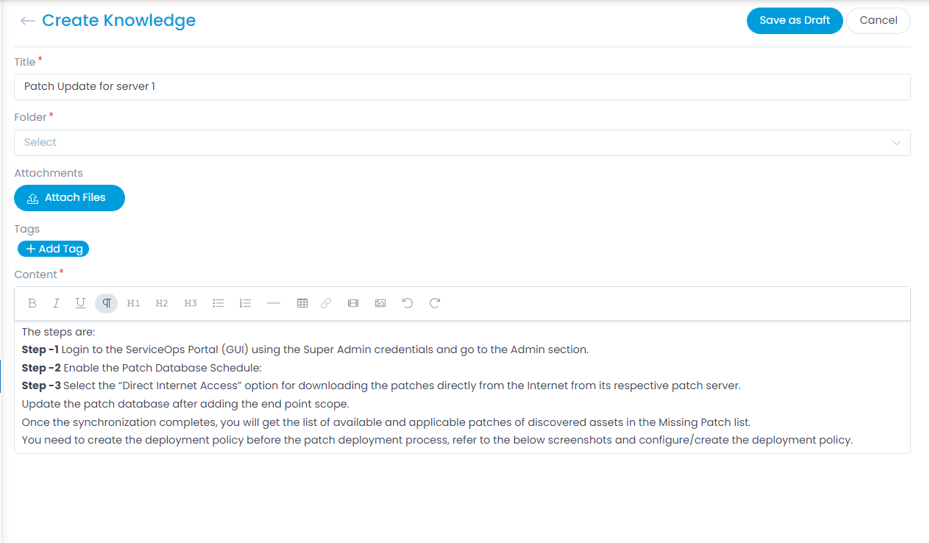
Once clicked, you are redirected to the Create Knowledge page as shown below. Here, the article takes the name of the ticket subject by default. However, you can change it if required. Once done, click Save as Draft, and then later Publish it to make it live.
Adding a New Work
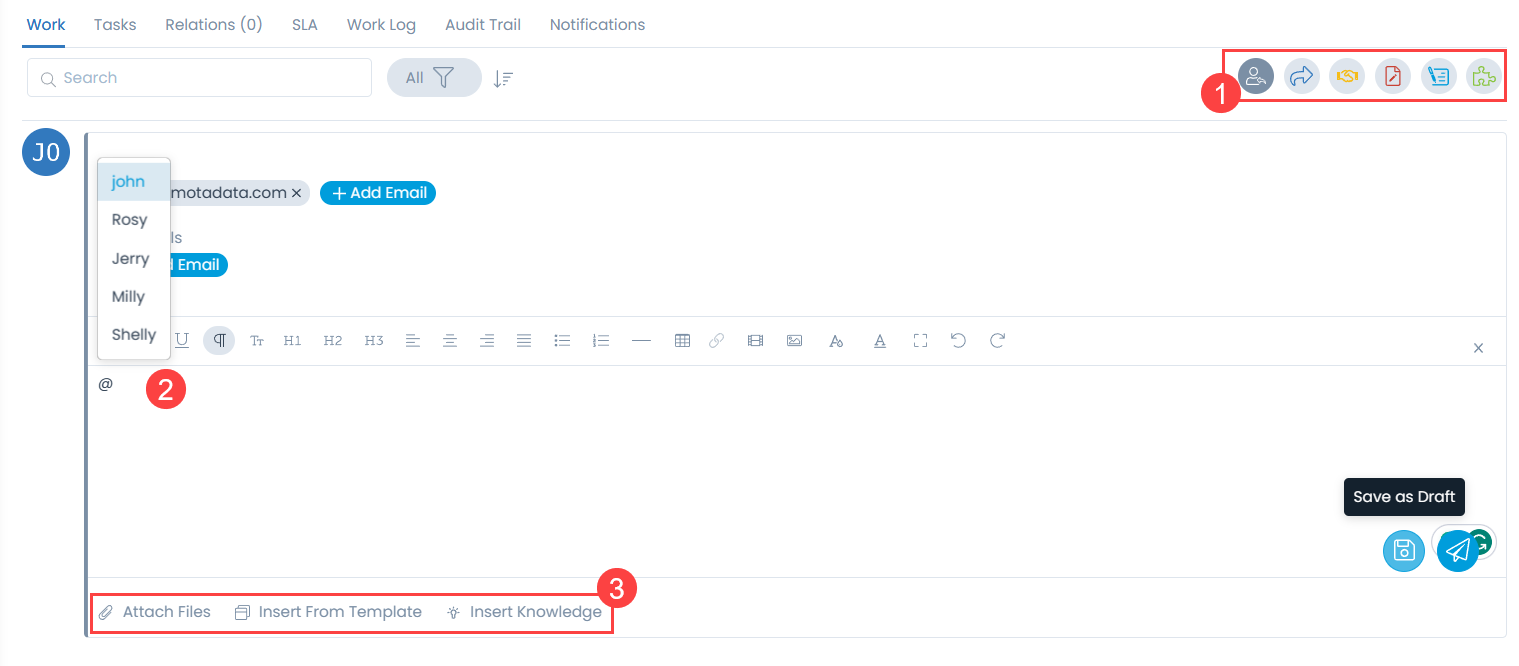
- Select the type of work: Reply, Forward, Collaborate, Note, Diagnosis, or Solution. Some work will be visible to the requester while some will be visible only to the technicians.
- Enter the body of the message. To mention someone, press '@'. You will see a list of available names. Choose the person whom you want to tag.
- You can also attach files, insert from template, and insert knowledge.
- If the work is a standard communication, you can enter the body content using the response templates. These templates automate the task of typing the same response every time. Refer to the Admin settings for creating response templates.

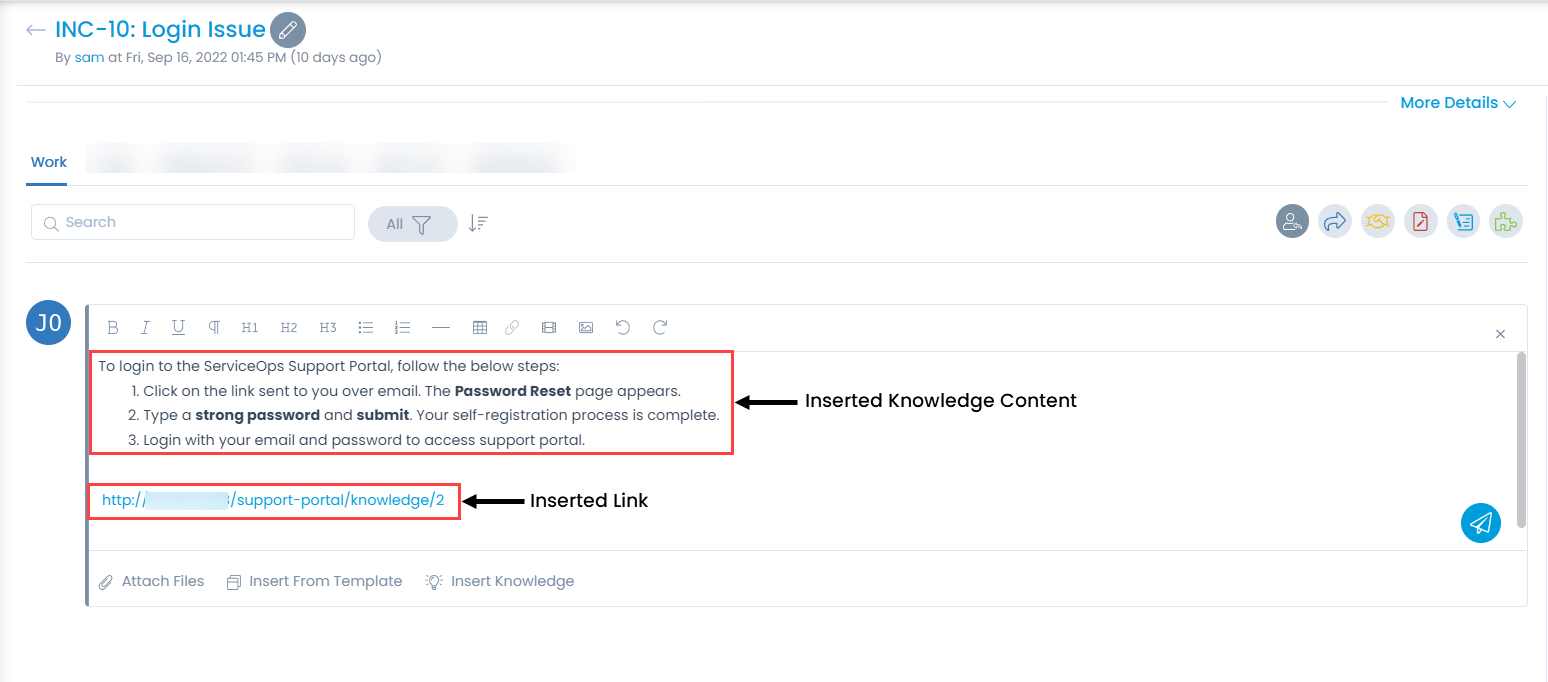
- You can also insert the Knowledge content or link to provide some standard information in the form of a Knowledge base as shown below. To insert the content, use the Insert Knowledge button. To insert the link, use the Insert Link button.
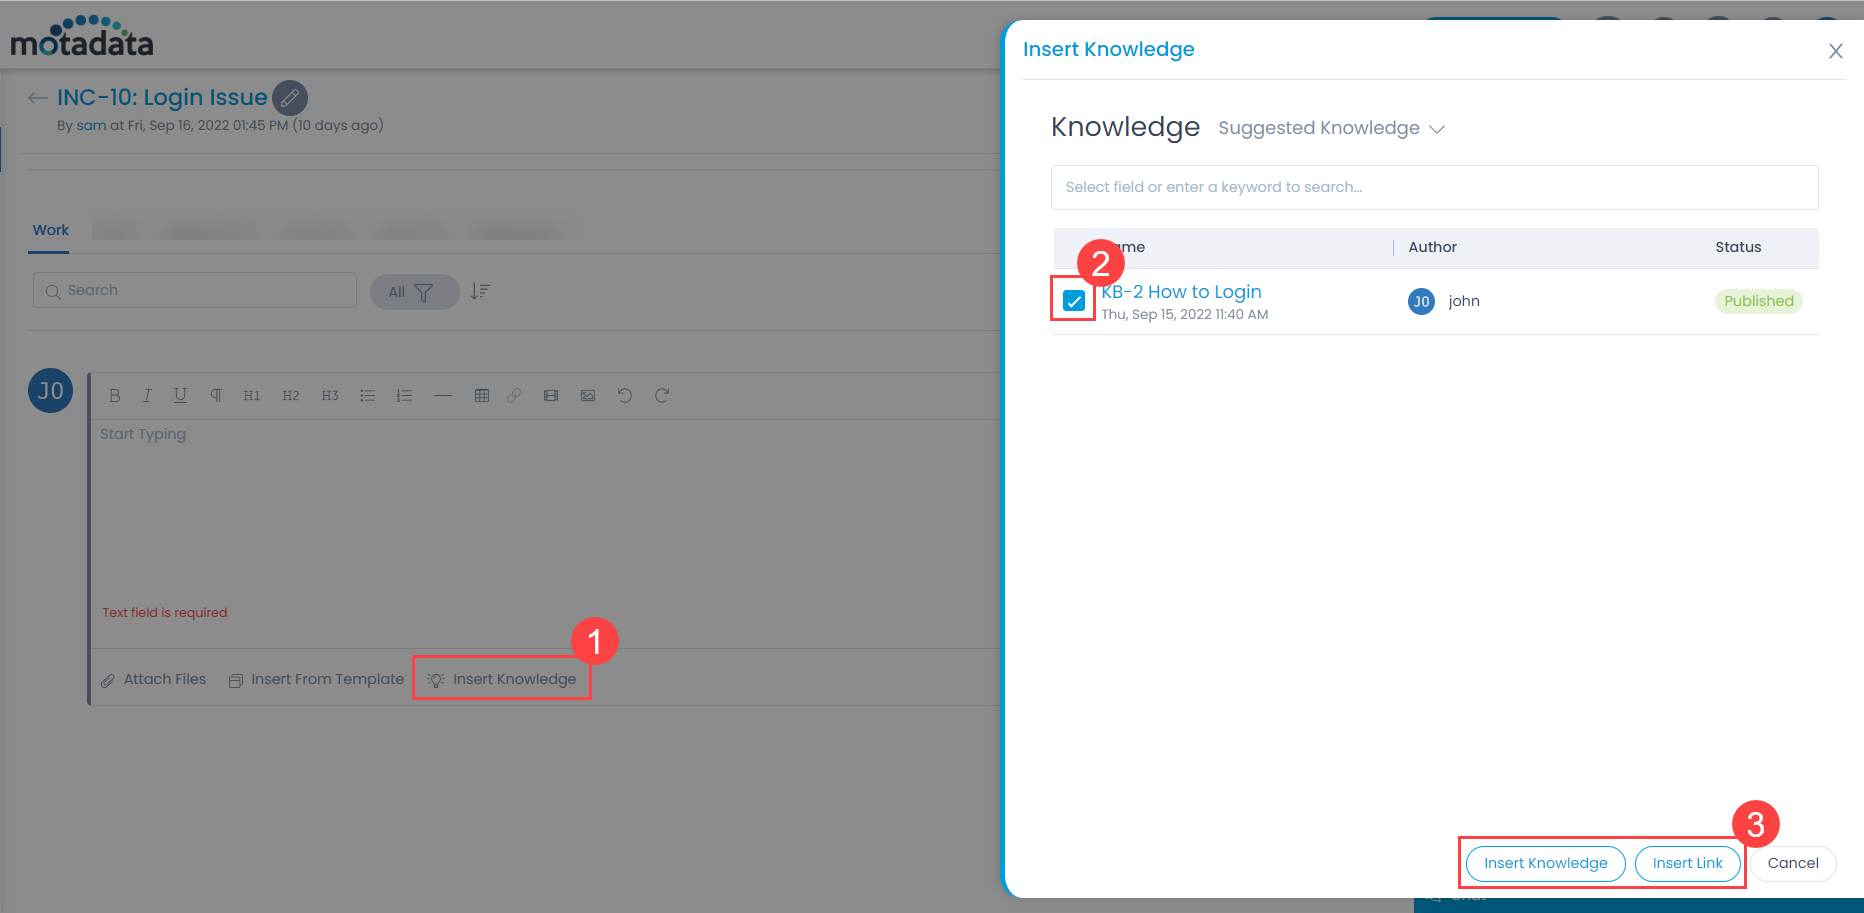
You can insert knowledge at the time of reply, forward, and collaborate requests. Also, you can do so while adding notes, diagnosis, and solution to the requests.