Task Form
The layout of the task management has all the fields required to manage the tasks of an organization. However, to meet the organization’s needs, you can modify the default template, and add new fields. The fields can later be used in the automation settings also.
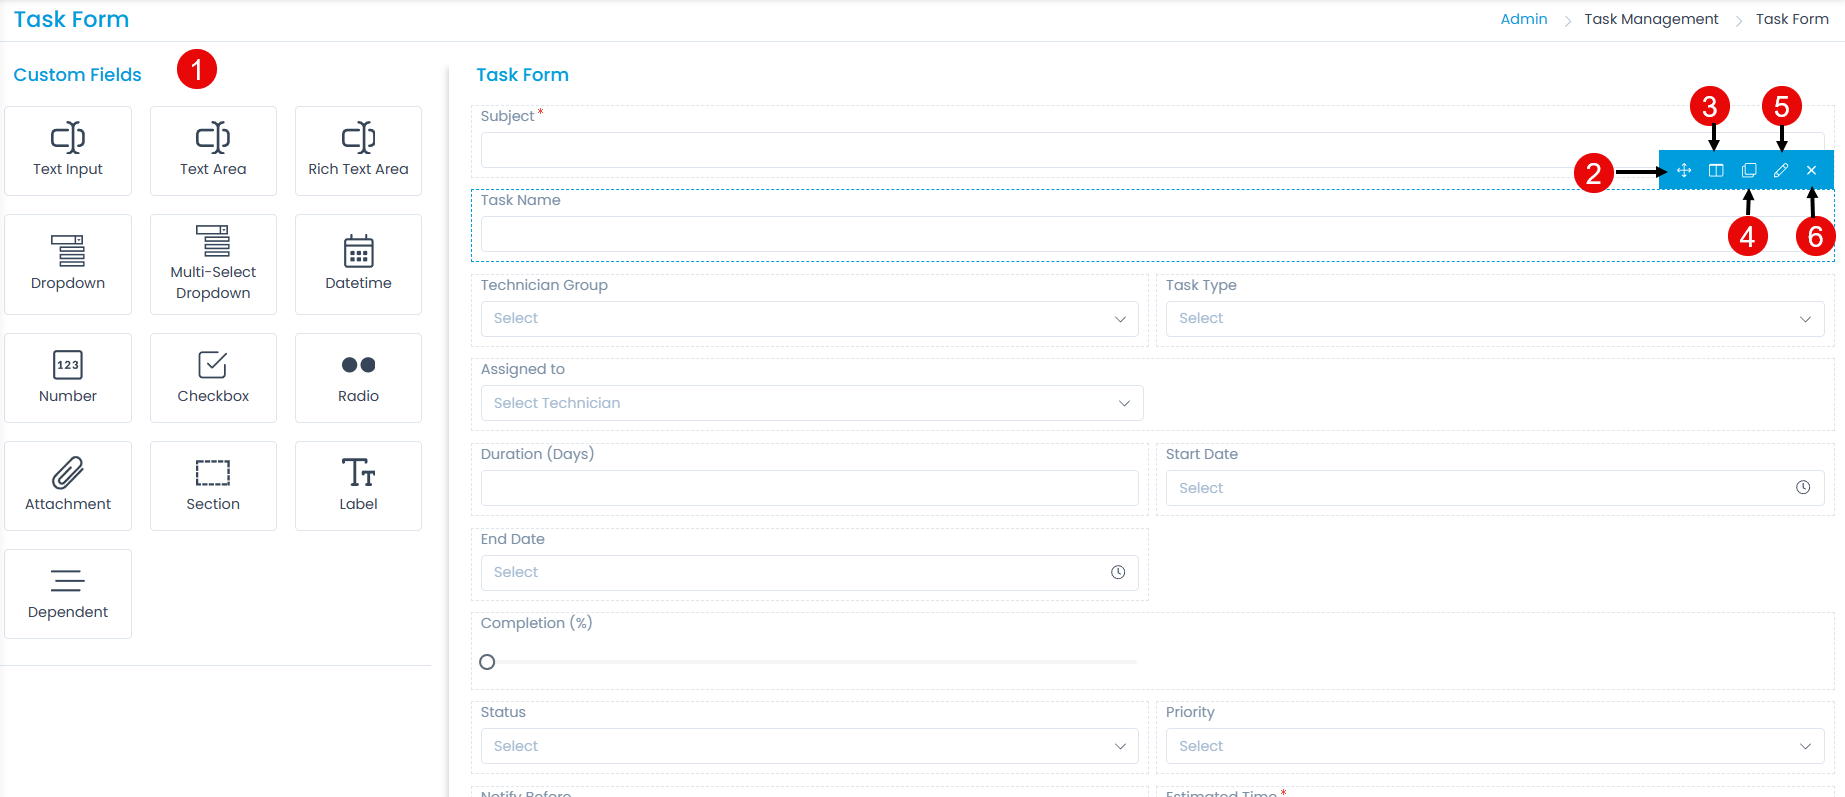
To view the Task Form, navigate to Admin > Task Management > Task Form and the below page appears.
The page displays two types of fields:
- System Fields: These are the primary fields that come with the fresh installation. The field names can neither be changed nor deleted. The list of System fields:
- Custom Fields: These are the additional fields added from the pallet. The fields can be renamed and deleted.
Here, you can customize the form using the below options:
- Field Pallet: You can drag and drop the fields from the pallet to add into the form.
- Re-Order: You can drag and drop the fields to change the order of the form. This option is available for both: default and custom fields.
- Expand/Collapse: You can expand and collapse the fields to show 1 in a row or 2 in a row. If collapsed, the width of the field will get reduced to half. This option is available for both: default and custom fields.
- Duplicate: You can create duplicate fields from the custom fields. This option is available only for custom fields.
- Edit: You can edit the fields and make them mandatory, show on requester form, or change their characteristics. For default fields, some of the options are restricted.
- Remove: You can delete the custom fields and not the default ones.
Deleting the custom field will remove it and its data from all the related tasks. Also, the Workflows, Scenarios, SLAs, and other components containing these custom fields might be affected. Kindly review the impact before proceeding with the removal.
Example Scenario: If you want to know the impact of task on tickets, you can add a TasK Impact Dropdown field in the task form.
Dropdown
To add the Dropdown custom field, drag and drop it on the form in the right-hand side, and a popup appears.
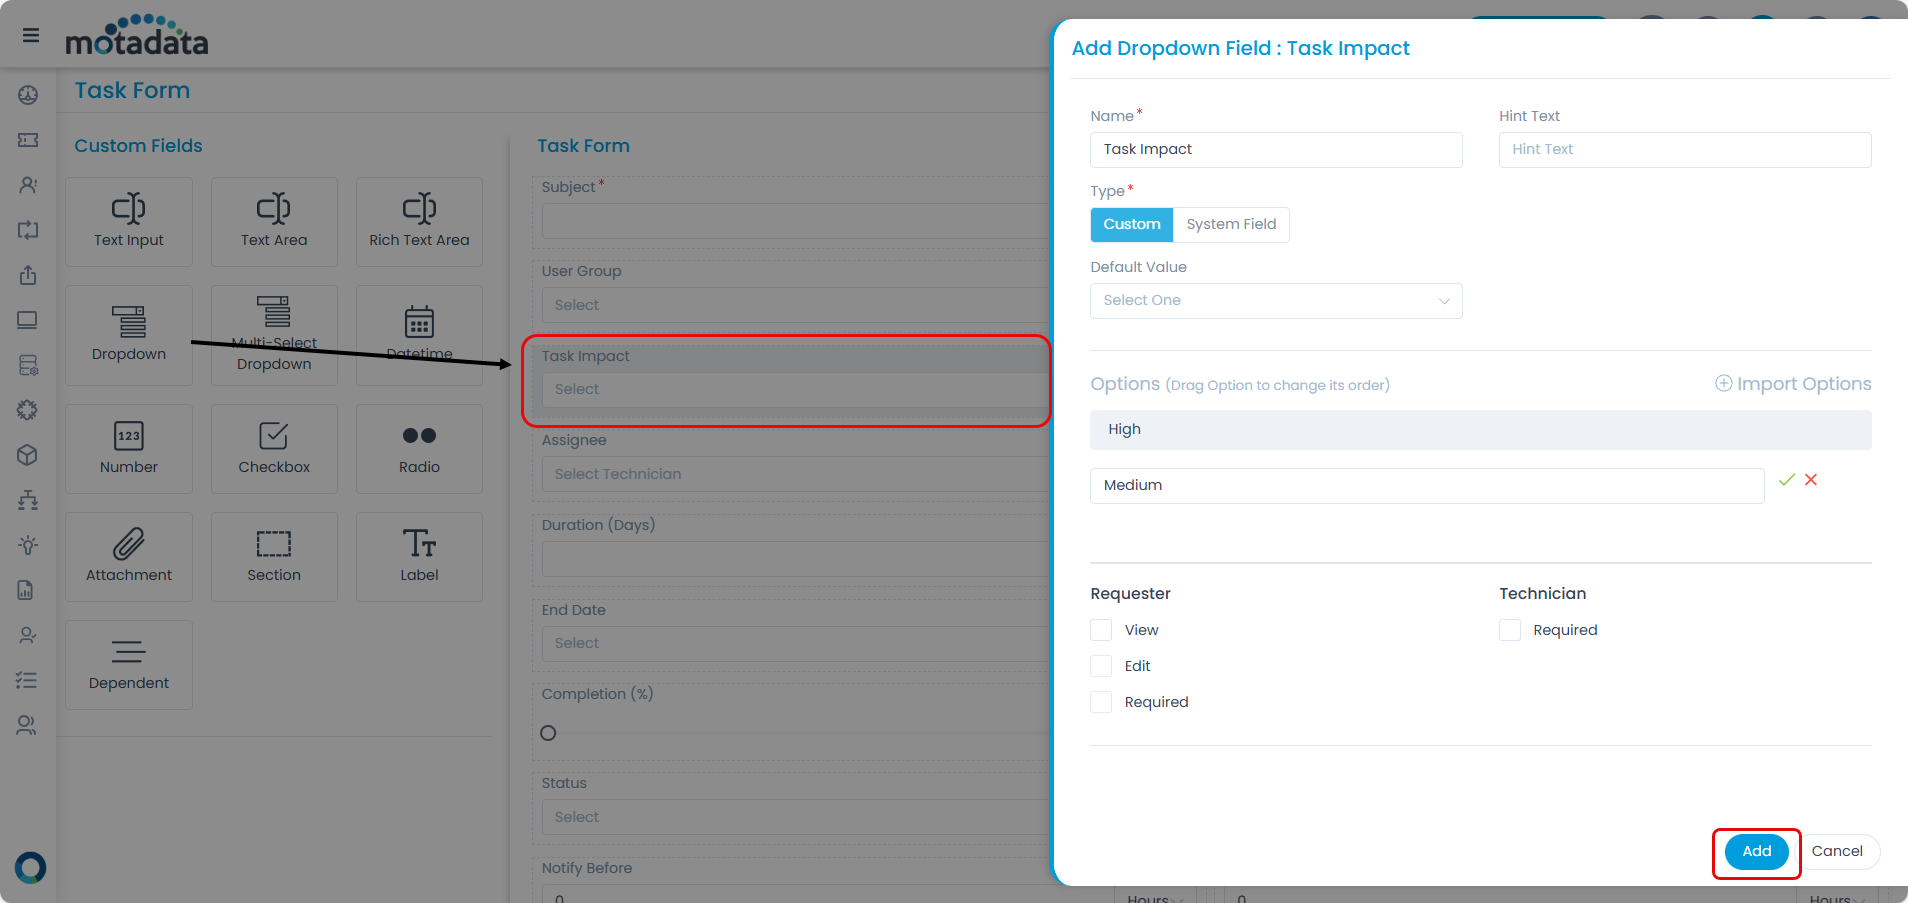
Enter the following details:
- Name: Enter the name of the field.
- Hint Text: Enter the text to appear by default. It appears in grey color.
- Type: Select the type of dropdown field you want to add. The options are:
- Custom: If selected you can add the options that will be available in the dropdown and select a Default Value for the same.
- Default Value: Select the default value of the field from the options added.
- Options: Click Add to add options in the dropdown list or you can import them using the Import Options link. To add manually, click the Add link, enter the option, and select the green right symbol. If required you can also change the order of the options to be displayed in the form using drag and drop.
- System Field: If selected, you can select the system fields whose values will be displayed in this dropdown.
- System Field: Select the field that you want to display in the dropdown. The options are: Technician Group and Technician.
- Custom: If selected you can add the options that will be available in the dropdown and select a Default Value for the same.

Requester: Set the permissions based on which the requester can fill in the details at the time of task creation.
- View: Enable to view the field on the Details page. If enabled, you can only view the field and not edit it. To edit, you need to enable the Edit permission. You can also select the Requester Group Access Level.
- Requester Group Access Level: Select the requester groups who can access the field.
- Edit: Enable to allow the requester to provide input in the field. It will be disabled if the System Managed Field option is enabled.
- Required: Enable to make the field mandatory.
Technician: Set the permission for the technician which will be applicable at the time of task creation.
- Required: Enable to make the field mandatory.
Once done, click Add. You can then re-arrange its location, create a duplicate field, expand/collapse its width, edit, or delete it if required. Similarly, you can add other custom fields. For more details on other fields, refer to the link Request Form.