How to Schedule Daily Reports and Dashboards for Technicians?
Overview
Efficient reporting is essential for tracking progress, monitoring performance, and making data-driven decisions. In IT operations, scheduling reports or dashboards for technicians ensures they have timely access to critical insights without manual intervention. This guide provides a step-by-step approach to scheduling reports or dashboards for technicians, helping you leverage automation for better resource management and decision-making.
Procedure
Schedule Reports
To create a report schedule for the technician,
- Before creating a schedule, add the required technicians to the Admin > Users > Technicians page.

- Next, navigate to the Reports page.

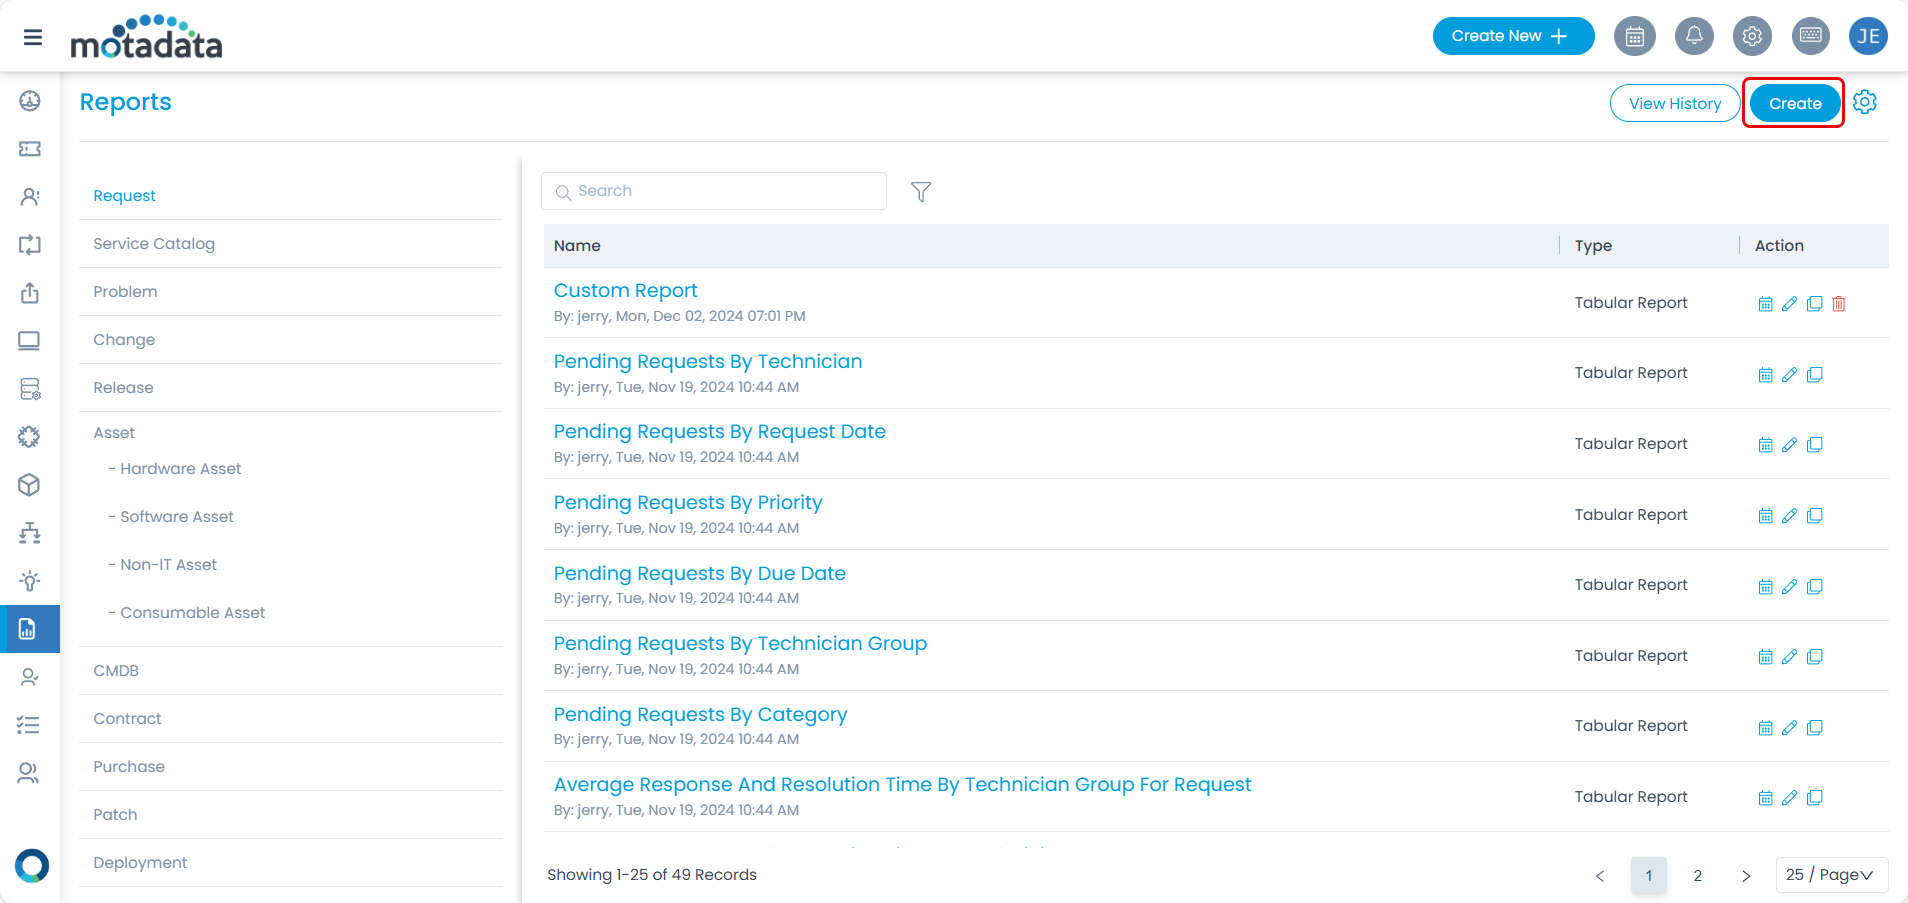
- Create a report by selecting the module from the left panel and clicking the Create button. The Create Report page appears. Fill in the required details.

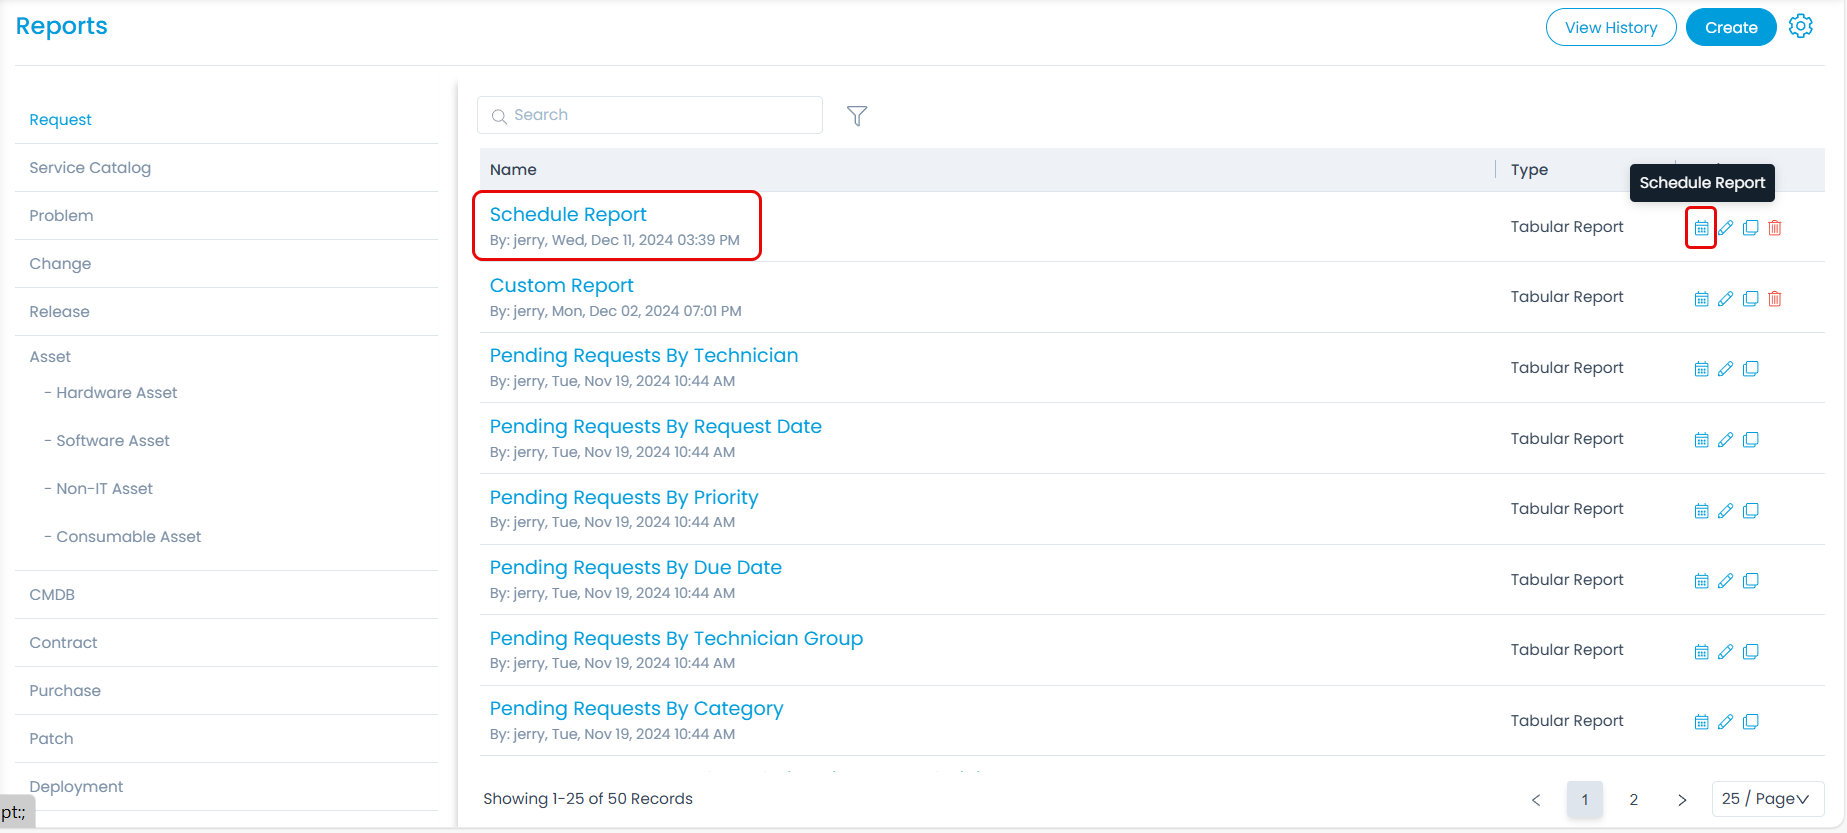
- Once done, click Create. The newly created report will appear on the list page, as shown below.

- Click the Schedule Report icon next to the report for which you wish to create the schedule, and the popup below will appear.


- Enter the below details:
Name: Name of the scheduler.
Emails: Enter the email address of the users to whom the report should be sent.
Format: Select the report format from the options like PDF, Excel, CSV, and Word.
Password Protected: Enables generating a password-protected report file. Once enabled, set the password for it.
Time Filter: Enables to narrow down data to specific timeframes and focus on relevant insights. Different Time Filter options cater to various use cases based on reporting needs, such as tracking recent activities, analyzing trends, or generating periodic summaries. Here's when and why each option should be used:
- Today: It is used when you want to monitor real-time data or events occurring within the current day. Example: A service desk manager uses the "Today" filter to view the number of tickets logged and resolved so far, ensuring SLAs are on track.
- Last N Days: It is used to analyze recent patterns or trends over a short duration. Example: An IT team reviews incidents reported over the last 7 days to identify recurring issues and plan corrective measures.
- Last N Hours: It is used to track activity within a precise, short-term period, ideal for time-sensitive environments. Example: A network administrator monitors traffic spikes or errors in the last 2 hours to address potential outages proactively.
- This Week: It is used to generate a weekly report for operational reviews. Example: A team leader uses "This Week" to prepare a summary of team performance for the weekly staff meeting.
- This Month: It is used to measure monthly goals or progress for compliance and planning. Example: An HR manager reviews the number of employee onboardings completed during the current month.
- This Year: It is used to evaluate annual performance or track long-term goals. Example: A finance team pulls data for all expenses logged "This Year" to prepare a quarterly financial report.
- Custom: It is used to focus on a specific, non-standard time period. Example: A project manager wants to analyze task completion rates for a project phase spanning from October 15 to November 5. The "Custom" filter helps narrow the data for that exact timeframe.
If Custom Time Filter is selected in the Report Scheduler, its value will be as follows:
- If the start and end dates are available, the value will be Custom (start and end date). For example: Thu, Aug 01, 2024 06:47 AM - Thu, Aug 01, 2024 06:47 PM
- If only the Start Date is available, the value will be (Start Date – Schedule Execution Date). For example: Thu, August 01, 2024 06:39 PM - Schedule Execution Date
Technician: Select the technicians to whom you want to send the report.
Technician Group: Select the Technician Group whose members you want to send the report.
Export Option: Select whether you want to export the report as an attachment or an attachment link in the report email.
Schedule Type: Select the Schedule Type from the below options. Here, "Daily" is selected.
- Once: It is used for any one-time or urgent report. For example, an inventory report can be sent as required.
- Daily: It creates and sends the report daily at a specific time to the designated technician or Technician Group. For example, automatically sending a daily status report of network devices at 8:00 AM to the IT team.
- Weekly: It is used to deliver the report on selected days of the week at a defined time. For example, generating a weekly performance summary every Monday at 9:00 AM for the management team.
- Monthly: It is used to send the report on specific days or dates of the month at the chosen time. For example, scheduling a monthly software compliance report for the 1st of each month at 2:00 PM.
- Once done, click Create. The report will be sent daily at 6:00 pm to the selected technicians or members of the technician group. Similarly, you can send reports using other schedule types.
Schedule Dashboard
To create a dashboard schedule for technicians,
- Before creating a schedule, add the required technicians in the Admin > Users > Technicians page.

- Next, navigate to the Dashboard page.

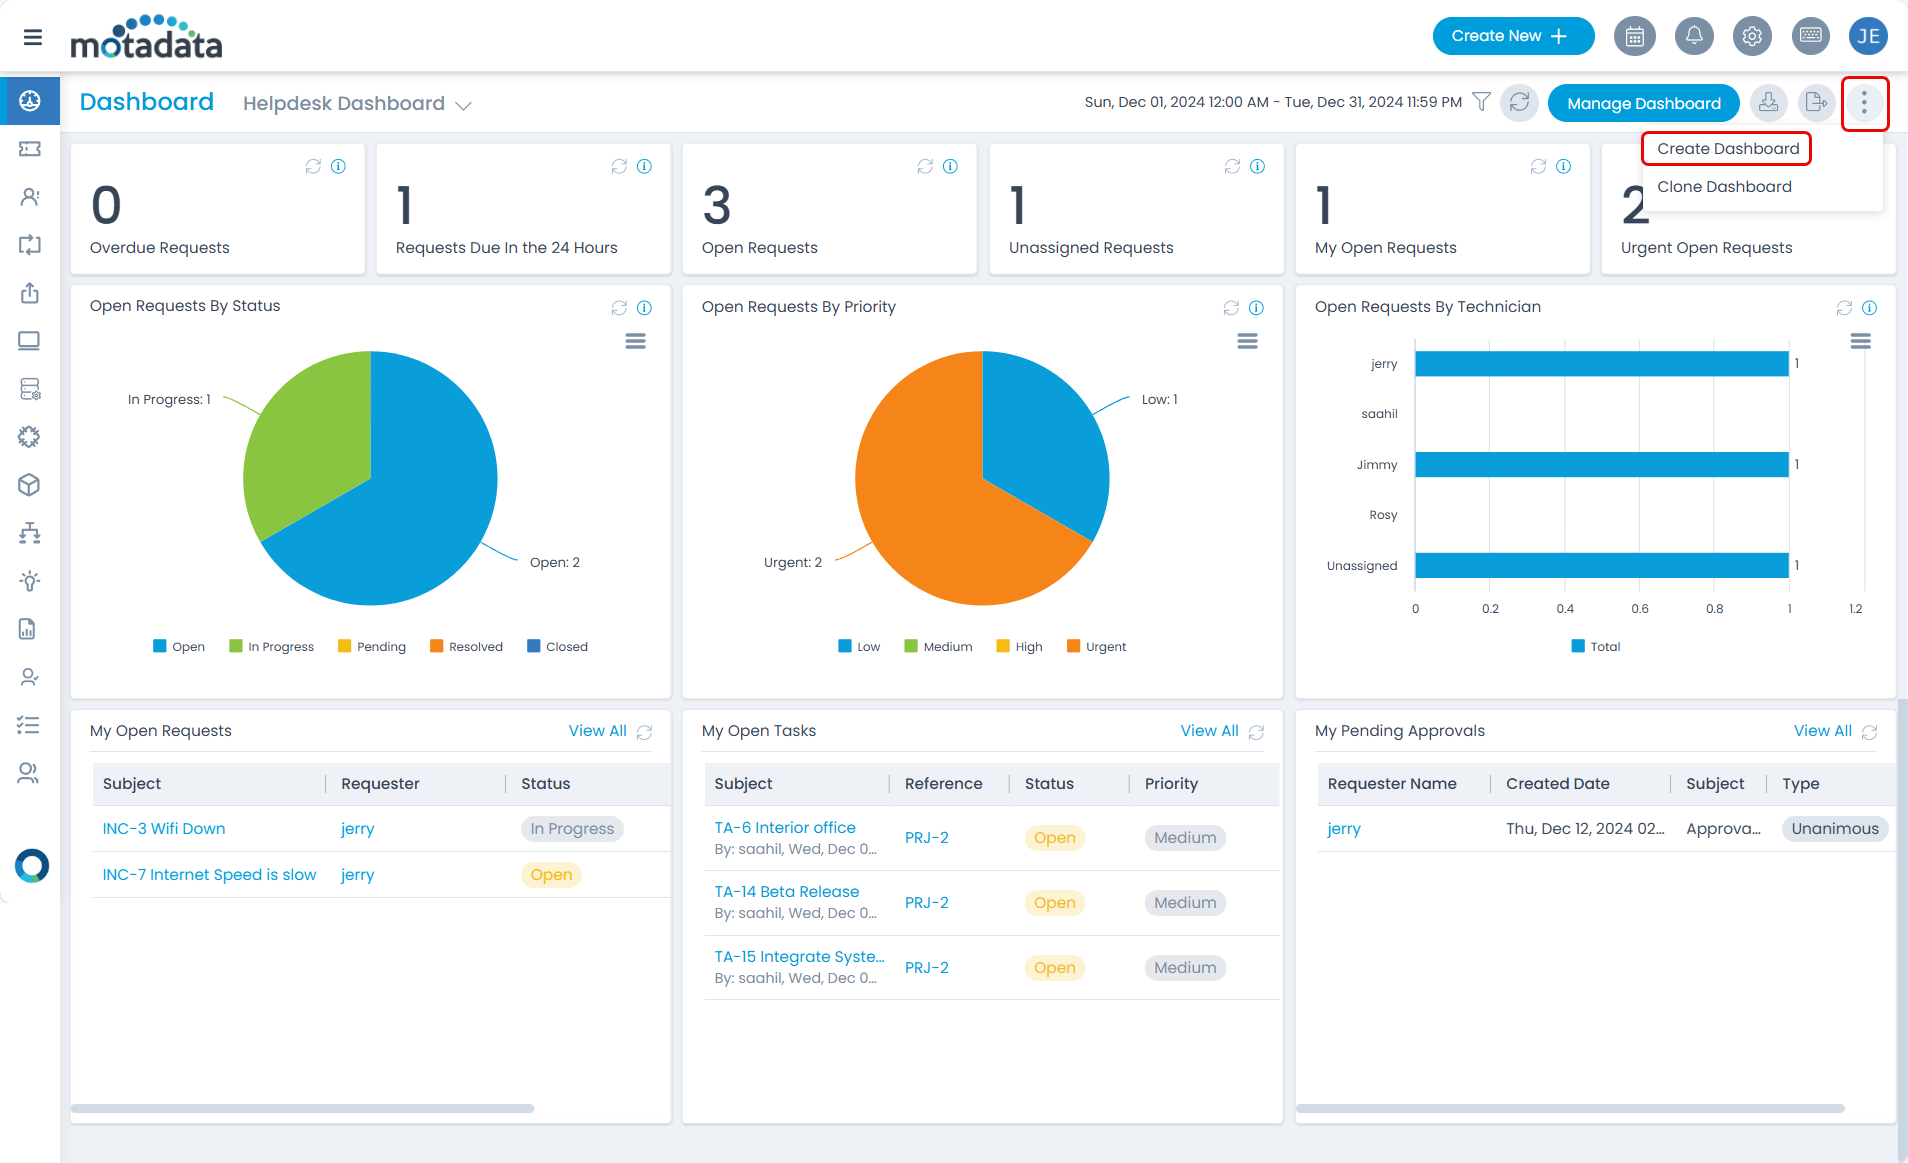
- Create a Dashboard by clicking the More Options icon and selecting the Create Dashboard option. Fill in the required details.

- Once done, click Create. The details page will appear, where you can customize the dashboard by adding widgets, KPIs, and shortcuts.
- Once the customization is done, create a schedule to export the dashboard data in PDF format to the required recipients.
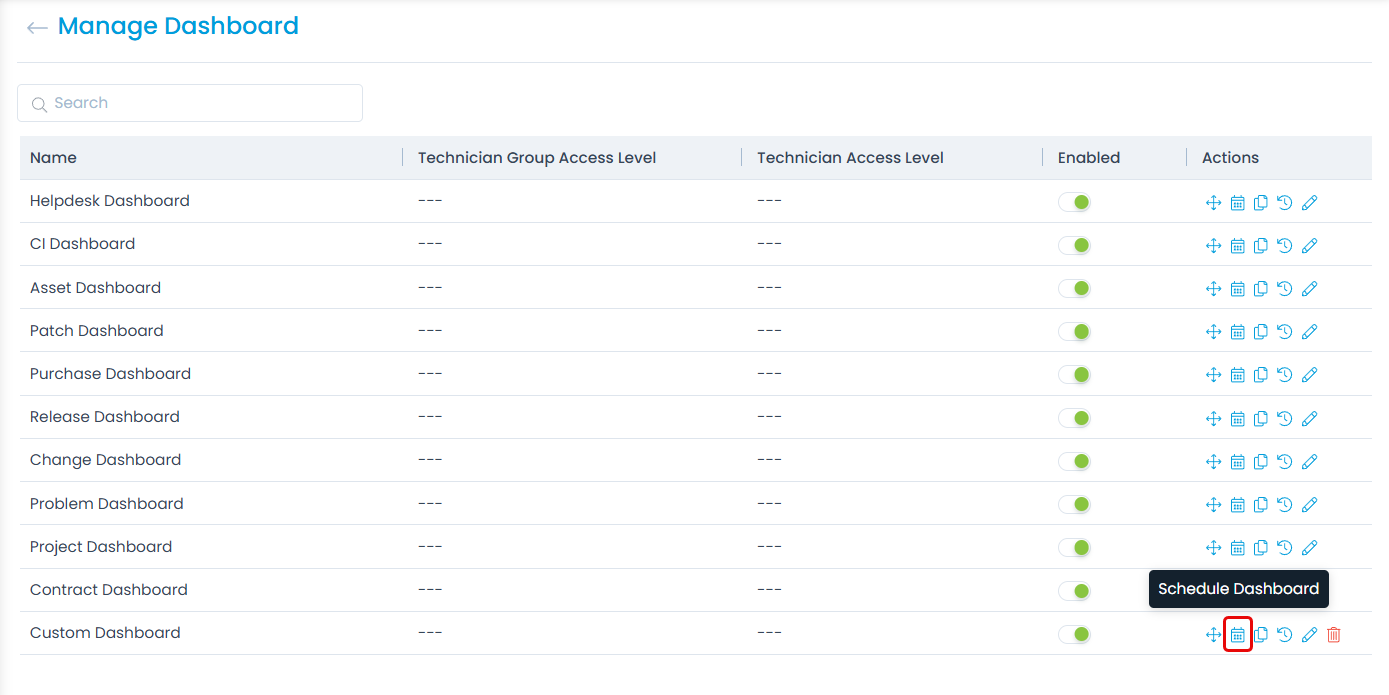
- To schedule the dashboard export, click the Manage Dashboard button, and the following page will appear.

- Click the Schedule Dashboard icon next to the one for whom you wish to create the schedule, and the popup below will appear.


- Enter the below details:
Name: Name of the scheduler.
Emails: Enter the email address of the users to whom the dashboard data should be sent.
Password Protected: Enable the generation of a password-protected dashboard file. Once enabled, set its password.
Time Filter: Enables to narrow down data to specific timeframes and focus on relevant insights. Different Time Filter options cater to various use cases based on reporting needs, such as tracking recent activities, analyzing trends, or generating periodic summaries. Here's when and why each option should be used:
Today: It is used when you want to monitor real-time data or events occurring within the current day. Example: A service desk manager uses the "Today" filter to view the number of tickets logged and resolved so far, ensuring SLAs are on track.
Last N Days: It is used to analyze recent patterns or trends over a short duration. Example: An IT team reviews incidents reported over the last 7 days to identify recurring issues and plan corrective measures.
Last N Hours: It is used to track activity within a precise, short-term period, ideal for time-sensitive environments. Example: A network administrator monitors traffic spikes or errors in the last 2 hours to address potential outages proactively.
This Week: It is used to generate a weekly report for operational reviews. Example: A team leader uses "This Week" to prepare a summary of team performance for the weekly staff meeting.
This Month: It is used to measure monthly goals or progress for compliance and planning. Example: An HR manager reviews the number of employee onboardings completed during the current month.
This Year: It is used to evaluate annual performance or track long-term goals. Example: A finance team pulls data for all expenses logged "This Year" to prepare a quarterly financial report.
Custom: It is used to focus on a specific, non-standard time period. Example: A project manager wants to analyze task completion rates for a project phase spanning from October 15 to November 5. The "Custom" filter helps narrow the data for that exact timeframe.
If Custom Time Filter is selected in the Report Scheduler, its value will be as follows:
If the start and end dates are available, the value will be Custom (start and end date). For example: Thu, Aug 01, 2024 06:47 AM - Thu, Aug 01, 2024 06:47 PM
If only the Start Date is available, the value will be (Start Date – Schedule Execution Date). For example: Thu, August 01, 2024 06:39 PM - Schedule Execution Date
Technician: Select the technicians to whom you want to send the dashboard.
Technician Group: Select the Technician Group whose members you want to send the dashboard.
Export Option: Select whether you want to export the dashboard data as an attachment or an attachment link in the email.
Schedule Type: Select the Schedule Type from the below options. Here, "Daily" is selected.
- Once: It is used for any one-time or urgent dashboard. For example, Schedule a one-time update of the sales dashboard on December 20, 2024, at 10:00 AM for a quarterly review meeting.
- Daily: It creates and sends the report daily at a specific time to the designated technician or Technician Group. For example, automatically update the daily operations dashboard at 7:00 AM to reflect the previous day's data.
- Weekly: It is used to deliver the report on selected days of the week at a defined time. For example, Schedule a weekly refresh of the project status dashboard every Friday at 5:00 PM for the team.
- Monthly: It is used to send the report on specific days or dates of the month at the chosen time. For example, Set the monthly revenue dashboard to refresh on the 1st of each month at 9:00 AM.
- Once done, click Create. The dashboard data will be sent daily at 6:00 pm to the selected technicians or members of the technician group. Similarly, you can send a dashboard as per other schedule types.