How to Automate Asset/CI Discovery?
Overview
In today’s dynamic IT environments, manual asset discovery is inefficient and unreliable. Automating the discovery process via Scheduler ensures accurate, real-time visibility of all connected devices, streamlining operations and boosting security. This guide explores how automated asset/CI discovery simplifies IT management while eliminating the need for manual effort.
Procedure
To automate discovery via schedulers, follow the below steps:
- In the ServiceOps portal, navigate to Admin > Discovery and Agents > Discovery > Network Scan, Public Cloud Network, Private Cloud Network, Domain Scan, or SCCM Scan.
- Click the Create Scan (Discovery,Polling, and Ping) button, and the below popup appears.
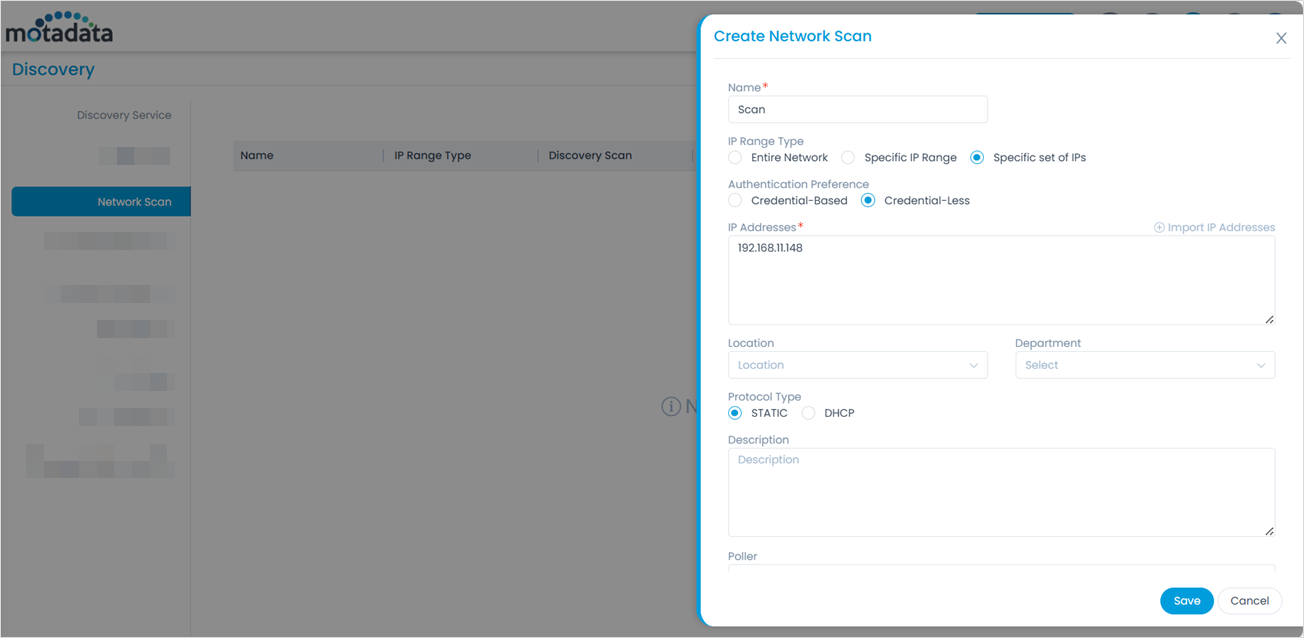
- Enter the required details and click Save. The created network will appear on the list page, as shown below.

- Once the scan is created, click Scheduler from the list page. The following popup appears.
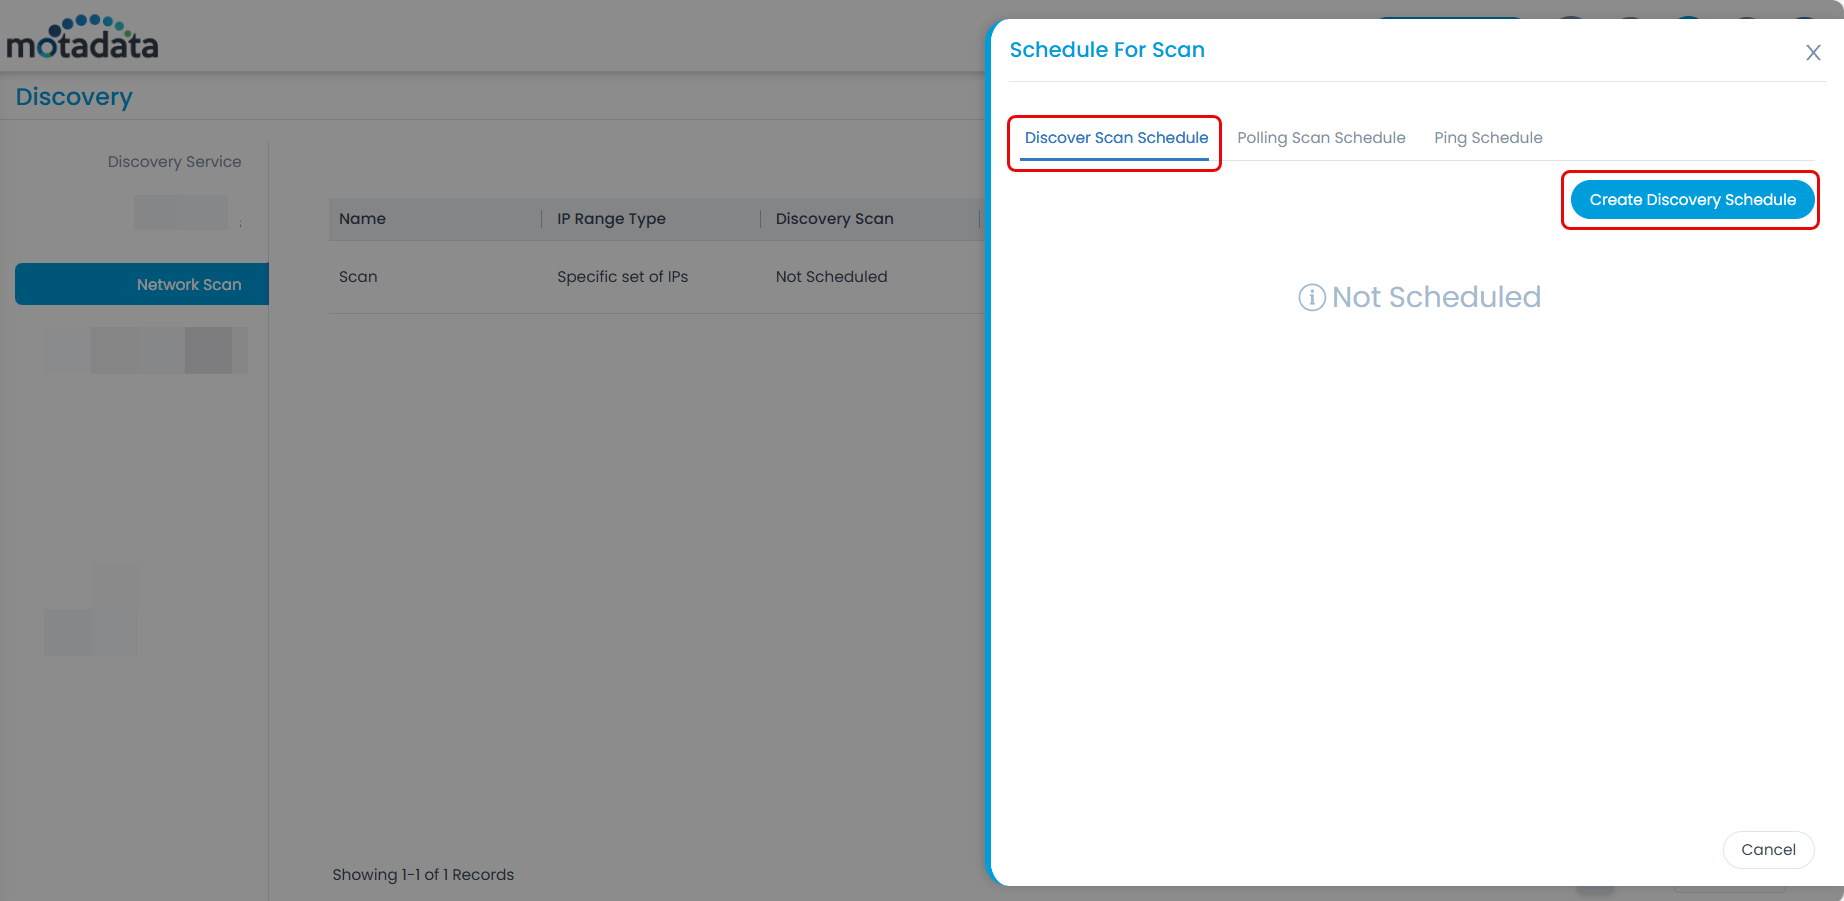
- Here, you can create three types of schedules. The options are:
- Discover Scan Schedule: Configure to automatically populate the inventory with assets and Configuration Items (CIs).
- Polling Scan Schedule: Configure to regularly poll the assets and CI devices to monitor their status in real-time and update the details accordingly.
- Ping Schedule: Configure to check the status (active/inactive) and availability of assets and CIs.
Discover Scan Schedule
This type of schedule is used to automatically discover and populate the inventory with Assets and Configuration Items (CIs). It is majorly used,
- To create a comprehensive list of connected devices.
- To detect new devices or track changes periodically.
For example, To keep the asset inventory up-to-date, create a discovery scan schedule that will run regularly as per the configured time interval and add or update the device details automatically.
To create a discover scan schedule, follow the steps below:
- Select the Discover Scan Schedule tab and click the Create Discovery Schedule button.
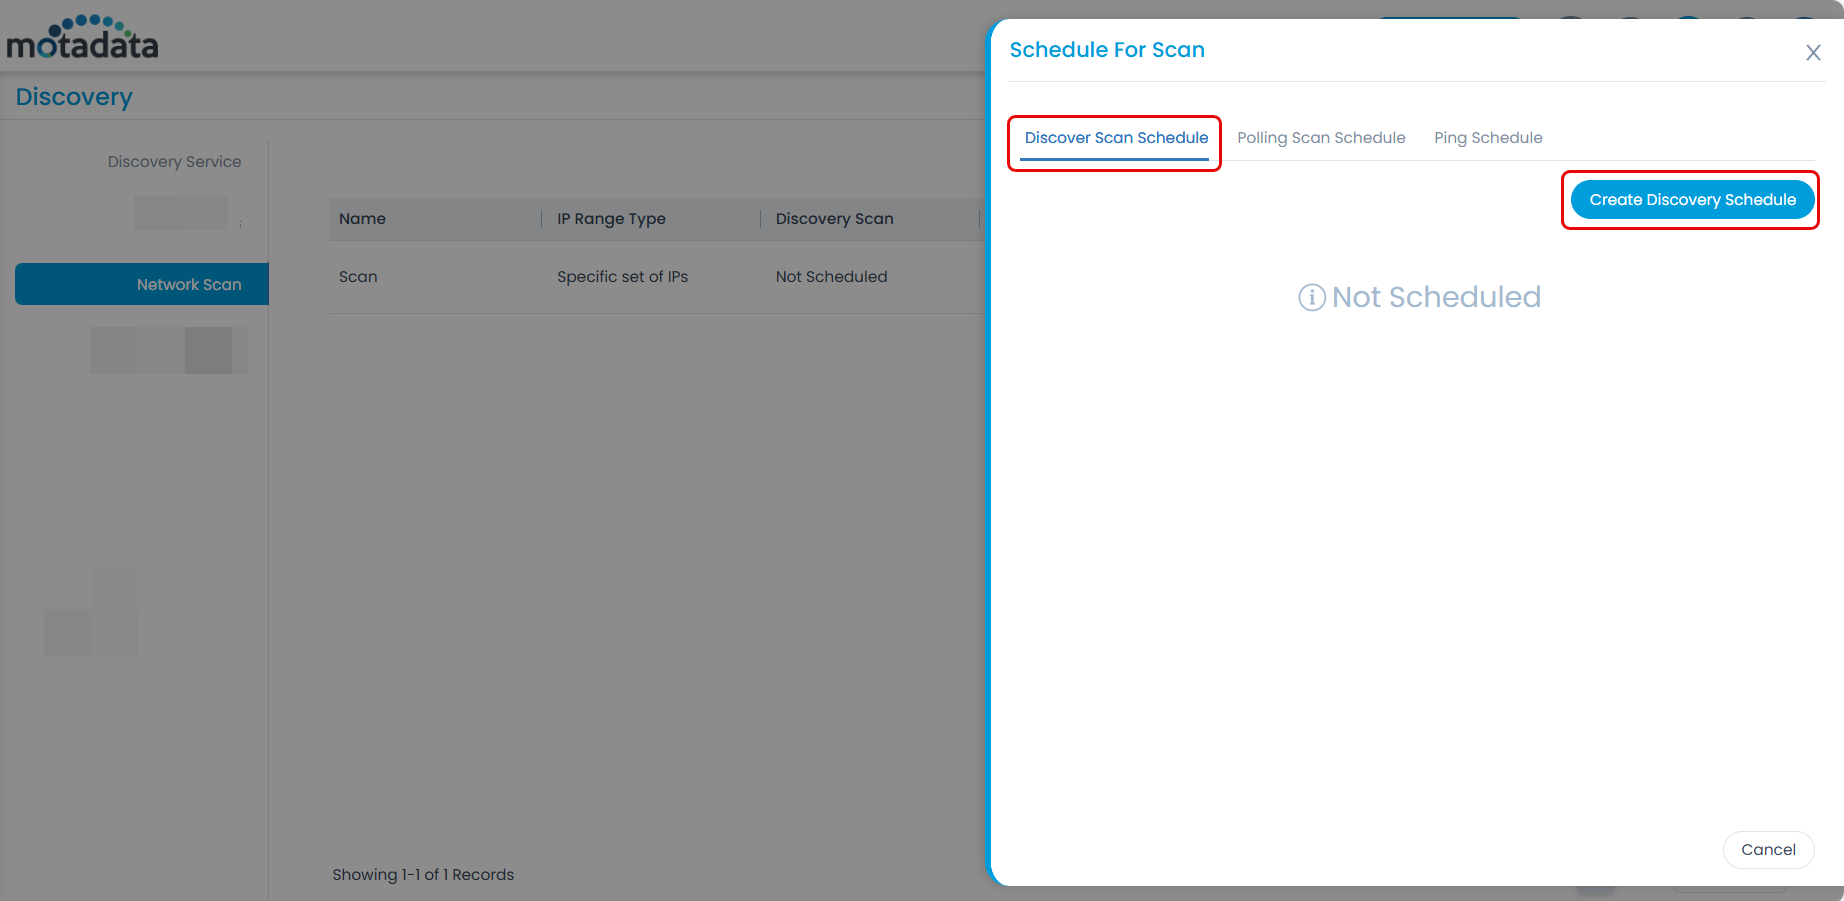
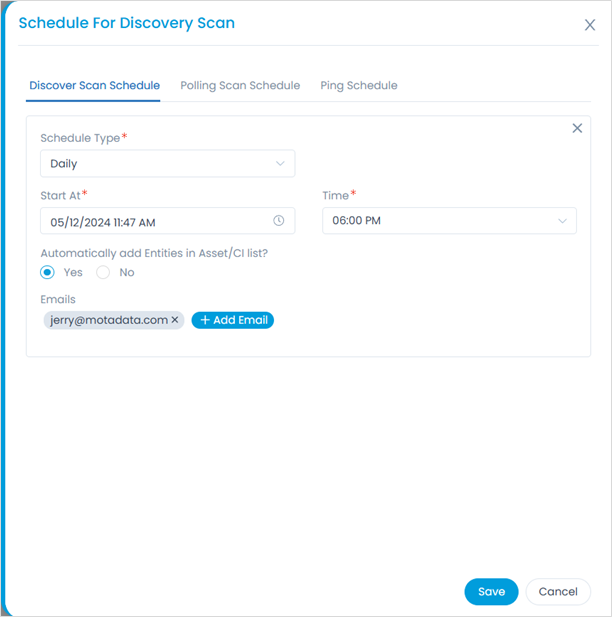
- Select the Schedule Type from the below options. Here, “Daily” is selected.
- Once: It is used for any one-time or urgent task. For example, when a device is to be discovered only once.
- Daily: It is used for identifying and updating the device details on a day-to-day basis.
- Weekly: It is used for tasks that need regular, but not daily, oversight i.e. once in a week. The schedule will run once in a week based on the selected day and time. Also, provide the start date from which the schedule will be applicable.
- Monthly: It is used for strategic, less frequent tasks or evaluations. The schedule will run once a month based on the selected date, time, and month. Also, provide the start date from which the schedule will be applicable.
- Interval: It used for tasks that need to be performed at regular, repeating intervals, irrespective of the time of day. You can set the interval in hours or days within which the schedule should run. Also, provide the start date from which the schedule will be applicable.
- Automatically add Entities in Asset/CI list?: Enable to automatically add the discovered entities in the Asset or CI list.
- Email: You can add the email id’s to receive the notification about network scan results after completion.
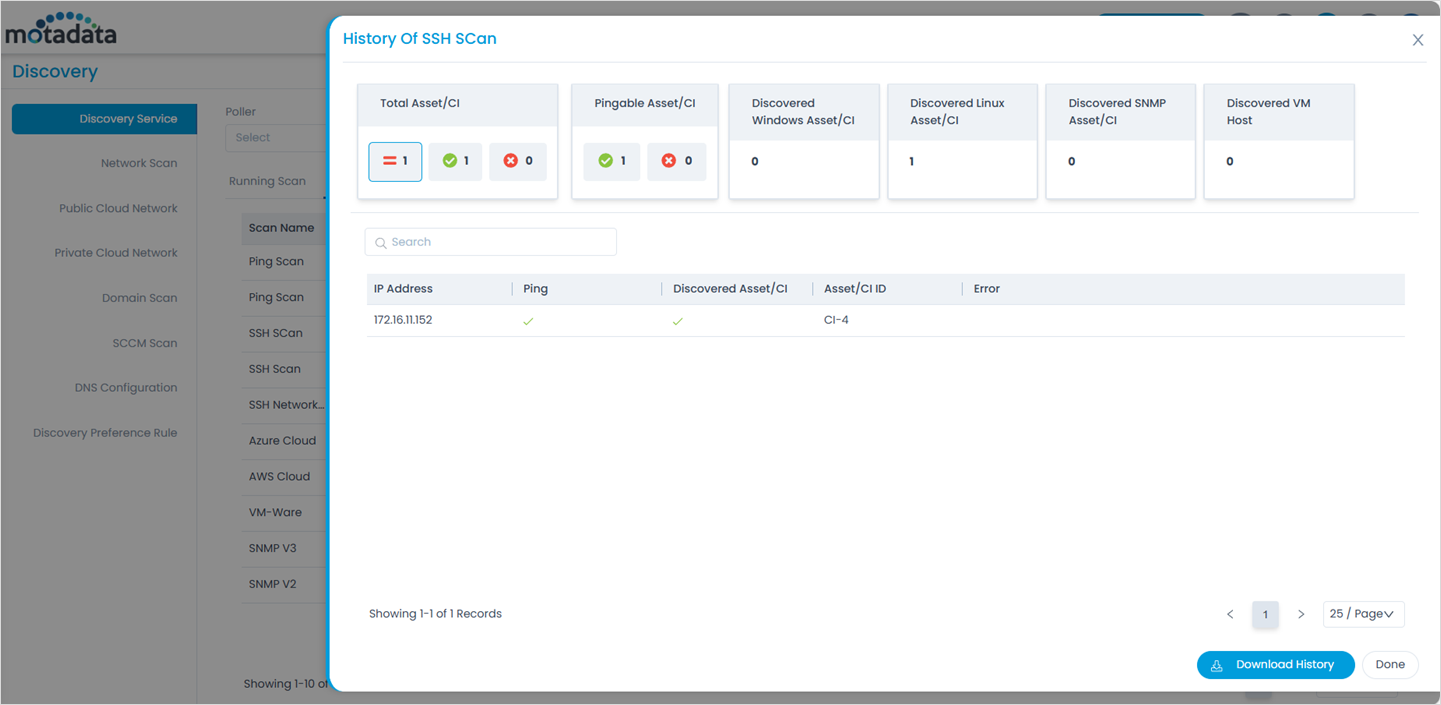
- Once done, click Save. This Scheduler will automatically run daily at 6:00 PM and provide the number of discovered devices on the Discovery > Discovery Service > Completed Scan > View History page. Also, the notification will be sent to the configured email id.
Polling Scan Schedule
This type of schedule is used to check the status of the devices at regular intervals. It is majorly used,
- To track the parameters like CPU usage, memory utilization, and disk space.
- To monitor the health of the devices like servers, routers, and switches.
For example, To continuously check the device status, create a polling scan schedule that will run regularly as per the configured time interval and provide the result automatically. Based on this you can plan for troubleshooting and proactive maintenance.
To create a polling scan schedule, follow the steps below:
- Select the Polling Scan Schedule tab and click the Create Polling Schedule button.


- Select the Schedule Type. For more details, refer to the Discover Scan Schedule options. Here, "Daily" is selected.
- Email: You can add the email id’s to receive the notification about network scan results after completion.
- Once done, click Save. This Scheduler will automatically run daily at 6:00 PM and provide the number of polled devices on the Discovery > Discovery Service > Completed Scan > View History page. Also, the notification will be sent to the configured email id.
Ping Schedule
Ping schedule is used when you only want to check the availability and basic connectivity of devices using ICMP (ping).
For example, if you want to check the whether a device is online, offline, or available, you can create a Ping Schedule. To create,
- Select the Ping Schedule tab and click the Create Ping Schedule button.


- Select the Schedule Type. For more details, refer to the Discover Scan Schedule options. Here, "Daily" is selected.
- Email: You can add the email id’s to receive the notification about network scan results after completion.
- Once done, click Save. This Scheduler will automatically run daily at 6:00 PM and provide the number of online devices on the Discovery > Discovery Service > Completed Scan > View History page. Also, the notification will be sent to the configured email id.

Thus, you can create the different schedulers as per your requirement, enabling automatic discovery, polling, and pinging of the required devices at the specified intervals.
