Problem List View
The Problem List View page displays all the available problems in the system. It is the central hub for a technician, where you can find a problem, and act upon it.

Here, you can do the following:
Filter: You can filter the problems by clicking the desired option. The following filters are available:
Filter Records Displayed All Open Problems Displays all problems that are currently in an active state and have not yet been resolved or closed. All Reactive Problems Displays problems that were raised in response to one or more incidents, as opposed to proactively identified issues. My Unresolved Problems Displays all problems assigned to the currently logged-in technician that are still pending resolution. My Urgent or High Priority Problems Displays problems assigned to the currently logged-in technician that have an Urgent or High priority. My Overdue Problems Displays problems assigned to the currently logged-in technician whose due date has passed without resolution. Unassigned Problems in My Group Displays problems that belong to the logged-in technician's group but have not yet been assigned to any technician. All Problems Displays all problem records in the system regardless of their status, priority, or assignment. All Archived Problems Displays problems that have been archived. Archived problems are removed from the active list but their records are retained in the system. Search: You can look for specific problems by searching them. The search is a faceted search and allows you to search with specific criteria. The filter option uses a predefined criteria and segregates the list accordingly. You can find more details in the search section.
Bulk Operations: You can select multiple problems and take the required action as shown below.

- Grid: Displays all the problems in the grid.
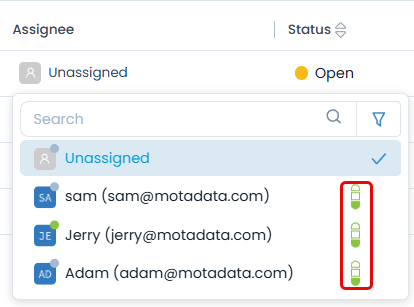
- Change Assignee: You can change the assignee from the Assigned To column by clicking on the assignee's name and selecting the desired technician. The assignee with the Green icon indicates the assignee is Online while Grey indicates Offline. You can also know the load of a particular user based on the color of the load indicator (bar) as shown below. The color indicates the following:
- Green - Low
- Yellow - Medium
- Red - High
- Change Status: You can change the status of the problem by clicking on it and selecting the required option. The options are: Open, In Progress, Pending, Resolved, and Closed. The default value is Open.
- Change Priority: You can change the priority of the problem by clicking on it and selecting the required option. The options are: Low, Medium, High, and Urgent. The default value is Low.
- Export: You can export the problems list in CSV and Excel format. To do so,
- Click the Export button and a popup appears.
- Select the Format as CSV or Excel.
- If Excel is selected, you can enable the Password Protected option to secure the file. If enabled enter the Attachment Password. If not provided, the common password set from Edit User Profile page will be used.
- Select the desired fields to be included in the file.
- Click Export and the link to download the file is sent via an email as shown below.

- Download: You can download the problem list in CSV and Excel format. Moreover, you can password-protect the Excel file for added security.
- Refresh: You can refresh the problem list. This is useful when multiple people are working on the problem and contents are updated frequently.
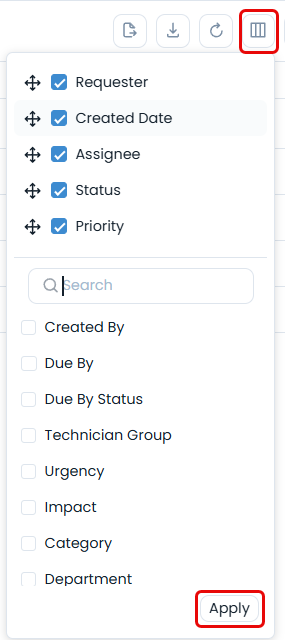
- Column Selection: You can select the columns to be displayed in the grid table.
More Options: You can click and select any of the below options:
- Auto Refresh Interval: Apart from the manual refresh, you can set the time interval, after which the Technician Portal page will get refreshed automatically. Thus, you don't need to click the refresh button repeatedly. It applies to the Request, Problem, Change, Release, Asset (Hardware, Software, Non-IT, Consumable), and My Task modules. Once selected, set the time interval after which the page will get refreshed everytime, and click Update.
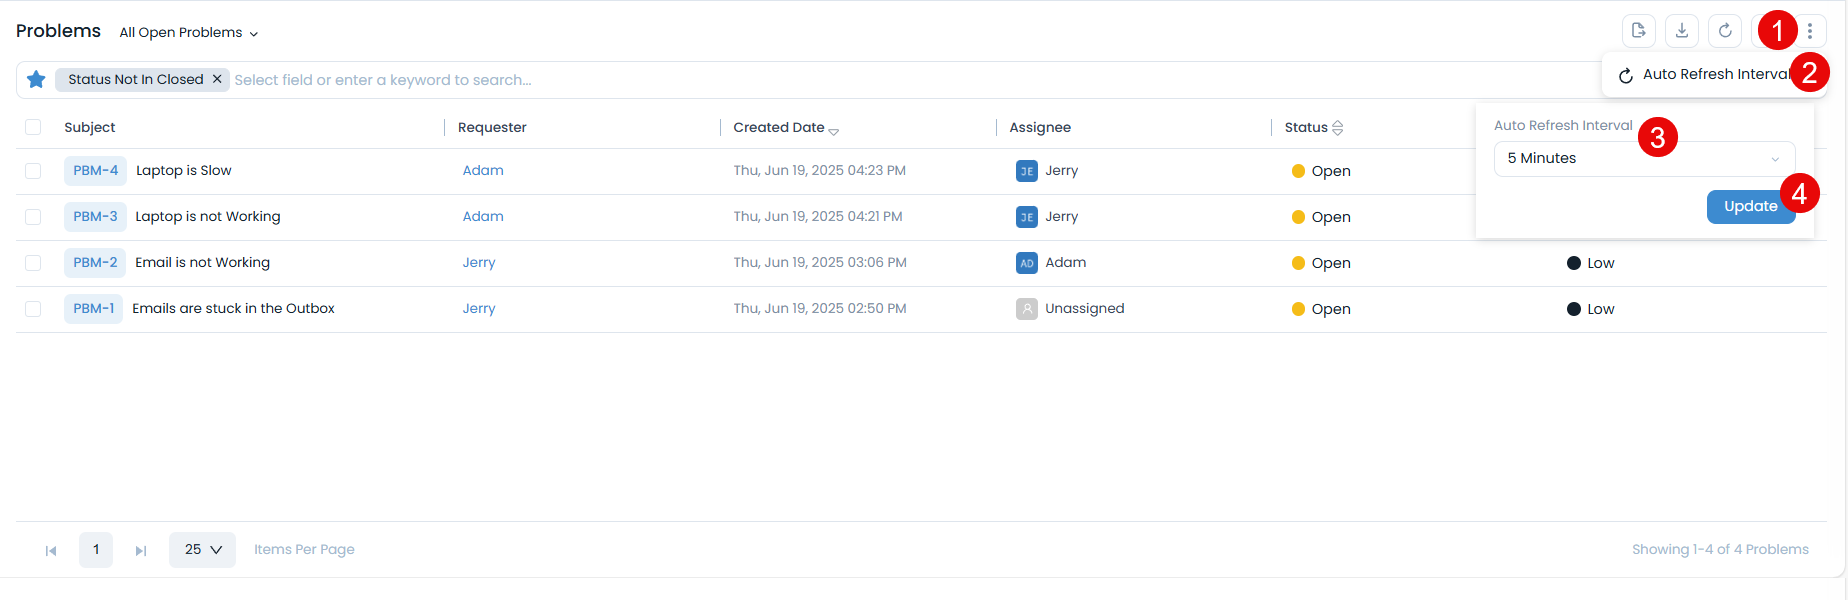
Once updated, the timer will be visible on the screen as shown below.
