Problem Analysis
A problem analysis is finding the relationship between a stated problem and understanding various characteristics associated with it. For example: A problem could be as simple as a laptop malfunction. By analysis you can identify the root cause, symptoms, impact, and work around for it. Since the symptoms of various problems can be similar, it is recommended to define the problem statement accurately.
In Analysis tab, you can define all the four characteristics of the problem: Root Cause, Symptoms, Impact, and Work Around fields are present for every problem. You can edit the fields and add the related content.
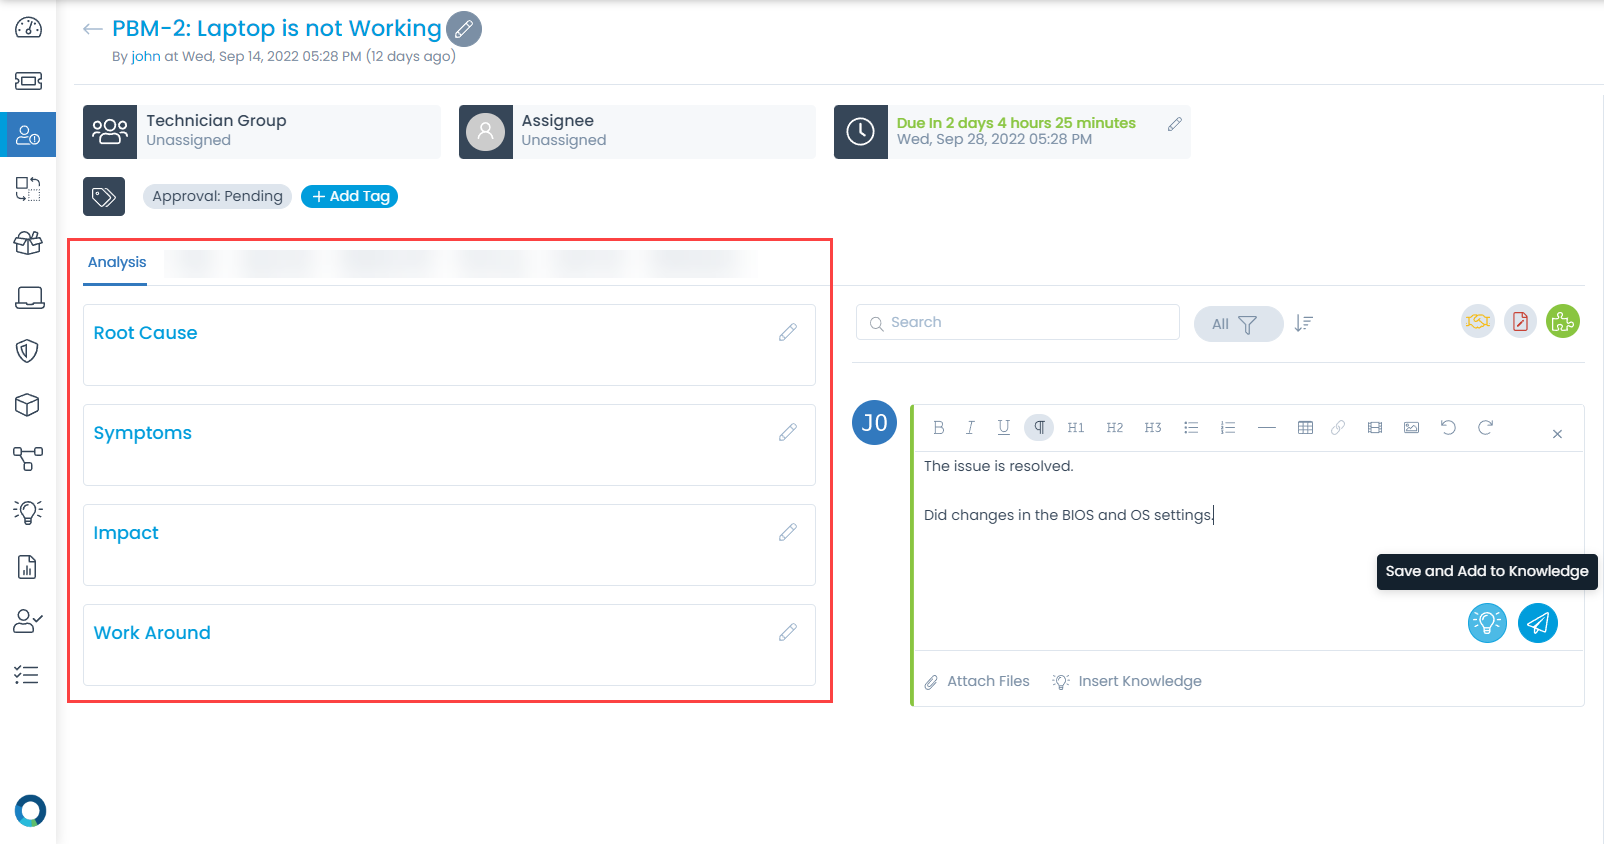
The tab also displays all the work and communication done for a problem. Here, you can do the following activities:
- Search: The search works on the content of the notes and comments in the tab. It matches your query with all the content (that technicians have entered) to find the results.
- Filter: You can search for the notes and comments based on their type. The available types are: All, Requester Communication, Collaborations, Notes, and Feedback.
- Sort: You can sort all the items in ascending and descending order.
- Collaborate: You can collaborate with other technicians. You can start a message thread which is visible to other concerned people. You cannot change or delete a collaboration message.
- Notes: You can add additional information about the problem so that others can view the same.
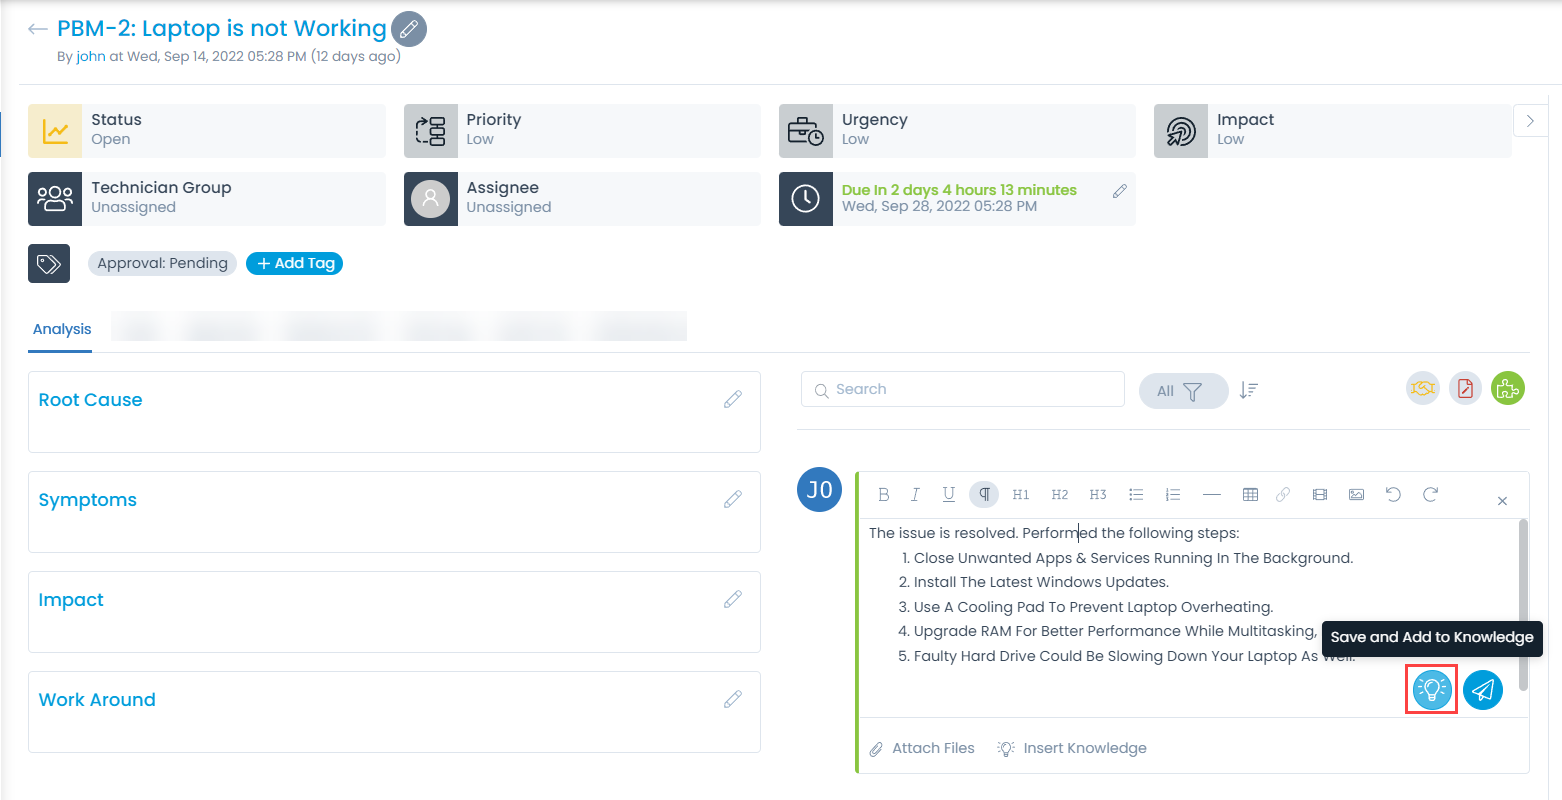
- Solution: You can add a solution to the problem and also convert it to knowledge. The solution is just below the diagnosis with a different color scheme. You can add only one solution statement per problem. When you add a solution, the system asks you if you want to close the problem. You can also modify the solution statement after adding one.
To convert the solution content into knowledge (KB article), you can click the Solution icon, type the content in the text box, and click the Save and Add to Knowledge button, as shown below.
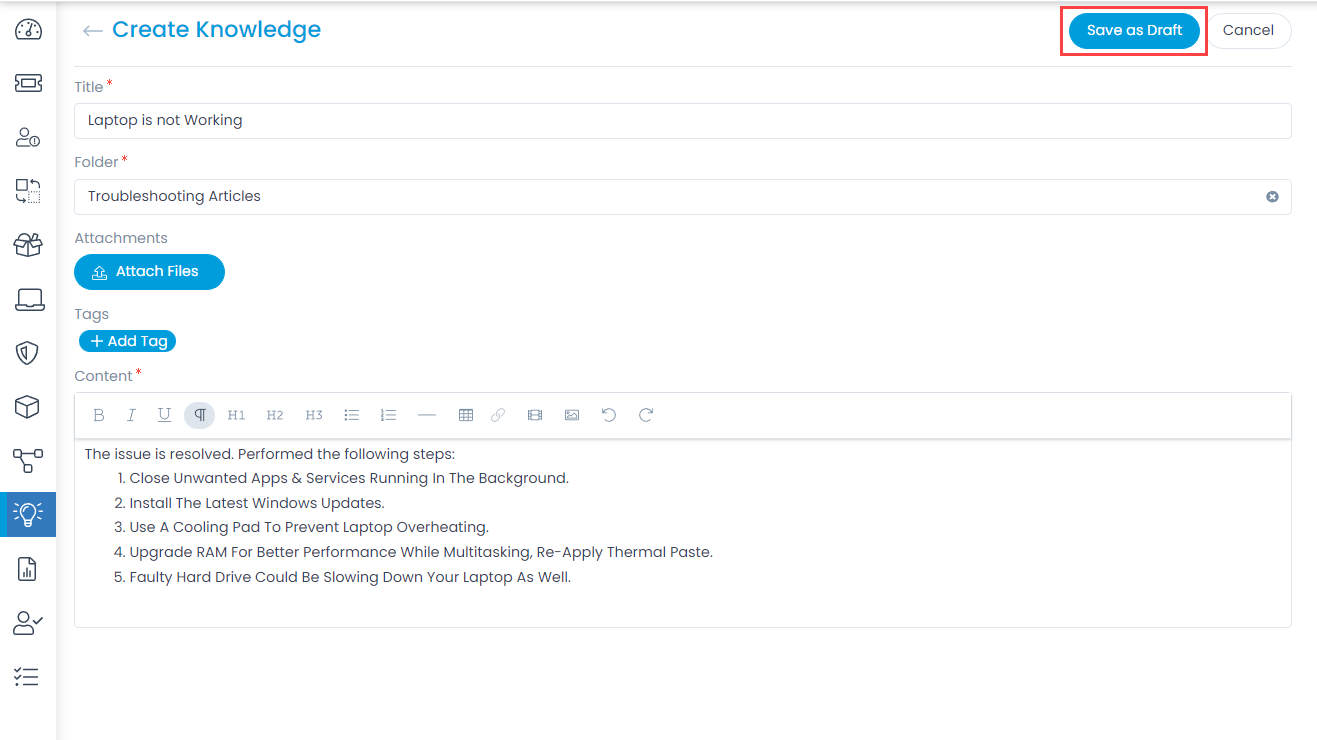
Once clicked, you are redirected to the Create Knowledge page as shown below. Here, the article takes the name of the ticket subject by default. However, you can change it if required. Once done, click Save as Draft and then later Publish it to make it live.
Adding a New Analysis
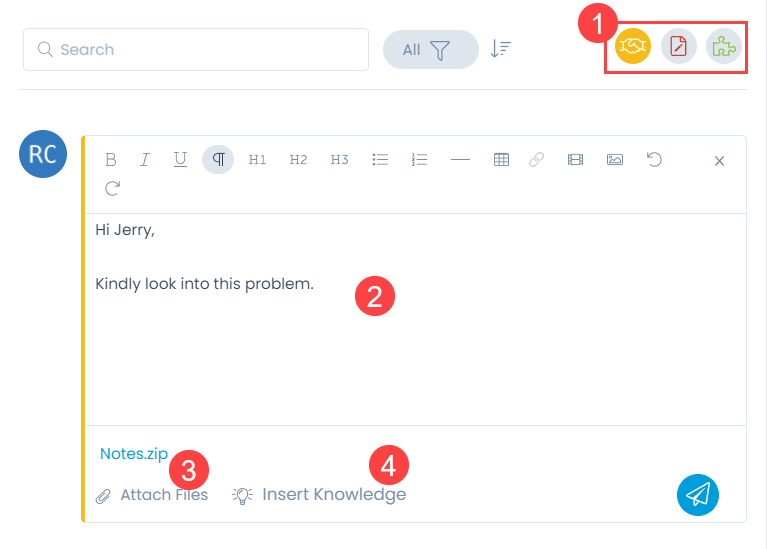
- Select the type of work: Collaborate, Notes, and Solution.
- Enter the body of the message.
- Attach files if required.
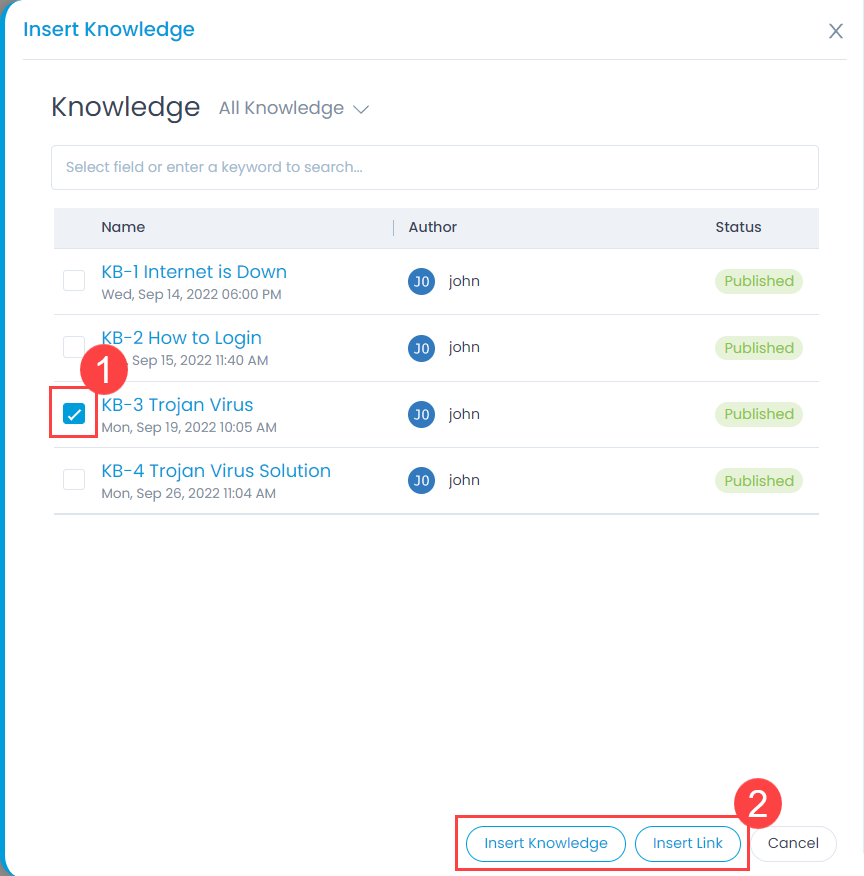
- Associate a knowledge article if required for reference. You can associate by inserting the content or link using the respective options.
To insert the knowledge in Collaborate, Notes, and Solution section,
- Click the Insert Knowledge link and a popup appears.
- Select the required knowledge article. You can also search by selecting the fields or entering a keyword in the search bar. Also, you can filter the list by selecting a pre-defined filter. The options are: Suggested Knowledge and All Knowledge.
- Click the Insert Knowledge if you want to insert the content or click Insert Link to add only the link of the knowledge article.
