Remote Offices
Modern organizations are geographically dispersed. They have offices at different locations all controlled from a main office. Offices that are away from the main office are termed as Remote Offices. It may happen that all the offices of an organization form part of a single network. Individual offices may have a relay server: A relay server is used to allow communications from outside a company’s firewall to the internal Servers.
In order to accommodate such situations, we have the following Remote Automation features:
- A user can create a group of computers for a location and save it as a Remote Office.
- A user can add a Remote Office in a scope (Endpoint Scope) instead of individual computers for Patch/Package/Registry Management.
- Users can point a Remote Office to a Relay Server. This is useful when there are multiple offices, and the admin doesn’t want them to hog the central File Server for Patch/Package download. This is why we have the feature that allows a Remote Office to download Patches/Packages from a Relay Server rather than the central File Server.
To view the Remote Offices page, navigate to Admin > Patch Management > Remote Offices.

Create Remote Office
To create a Remote Office,
- Click the Create Remote Office button on the top-right corner of the page and a popup appears.

- Enter the below details:
- Name: Enter the name of the remote office.
- Description: Enter a short description about the remote office.
- Communication Type: It is where you configure for a relay server. The options are:
- Distribution Server: Select if your remote office is outside your local network at a remote location. Enter the Distribution Server URL so that the main server can route the Patches or Packages to the Remote Office’s relay server.
- Direct Communication: Select when you are creating a remote office locally within your base network.
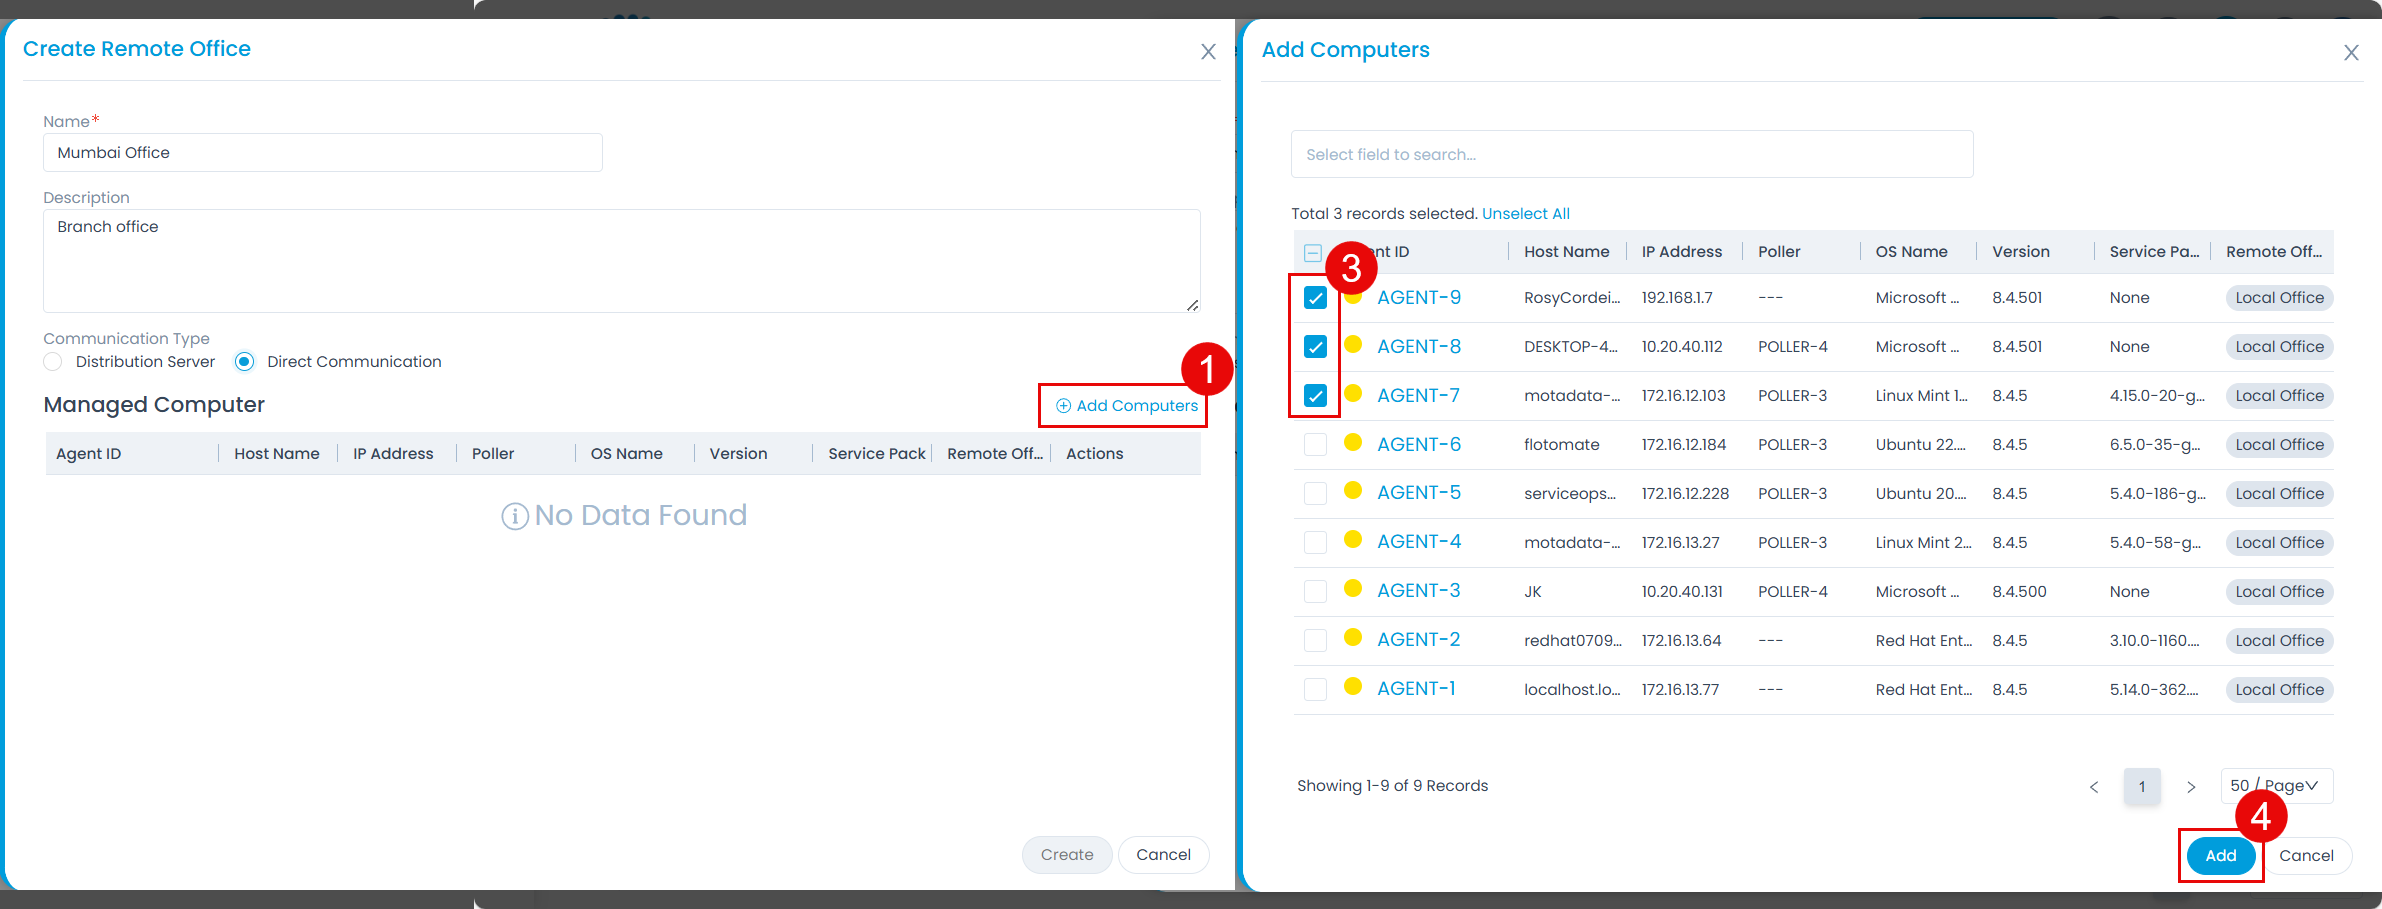
- Add Computers: Add computers to the remote office using the Add Computers link as shown below. A list of Agents appears, select the desired agents and click Add.


- Once done, click Create, and the remote office appears on the list page. Once added, you can edit or delete them using the respective icons. If delete is clicked, a confirmation message appears. Click Yes to continue or Cancel to stop the process.