Adding Container Orchestration Devices for Monitoring
ObserveOps (formerly known as AIOps) monitors container orchestration platforms by discovering cluster nodes through a credential profile and provisioning them as monitors. Once provisioned, ObserveOps continuously collects performance metrics and generates alerts based on what it finds.
Supported Orchestration Platforms
| Platform |
|---|
| Kubernetes |
| Tanzu Kubernetes |
| OpenShift |
- Kubernetes
- Tanzu Kubernetes
- OpenShift
Adding Kubernetes
1. Create a Credential Profile
Go to Menu. Select Settings  . Select Discovery Settings
  . Select Credential Profile. The Credential Profile screen opens. Select Create Credential Profile.
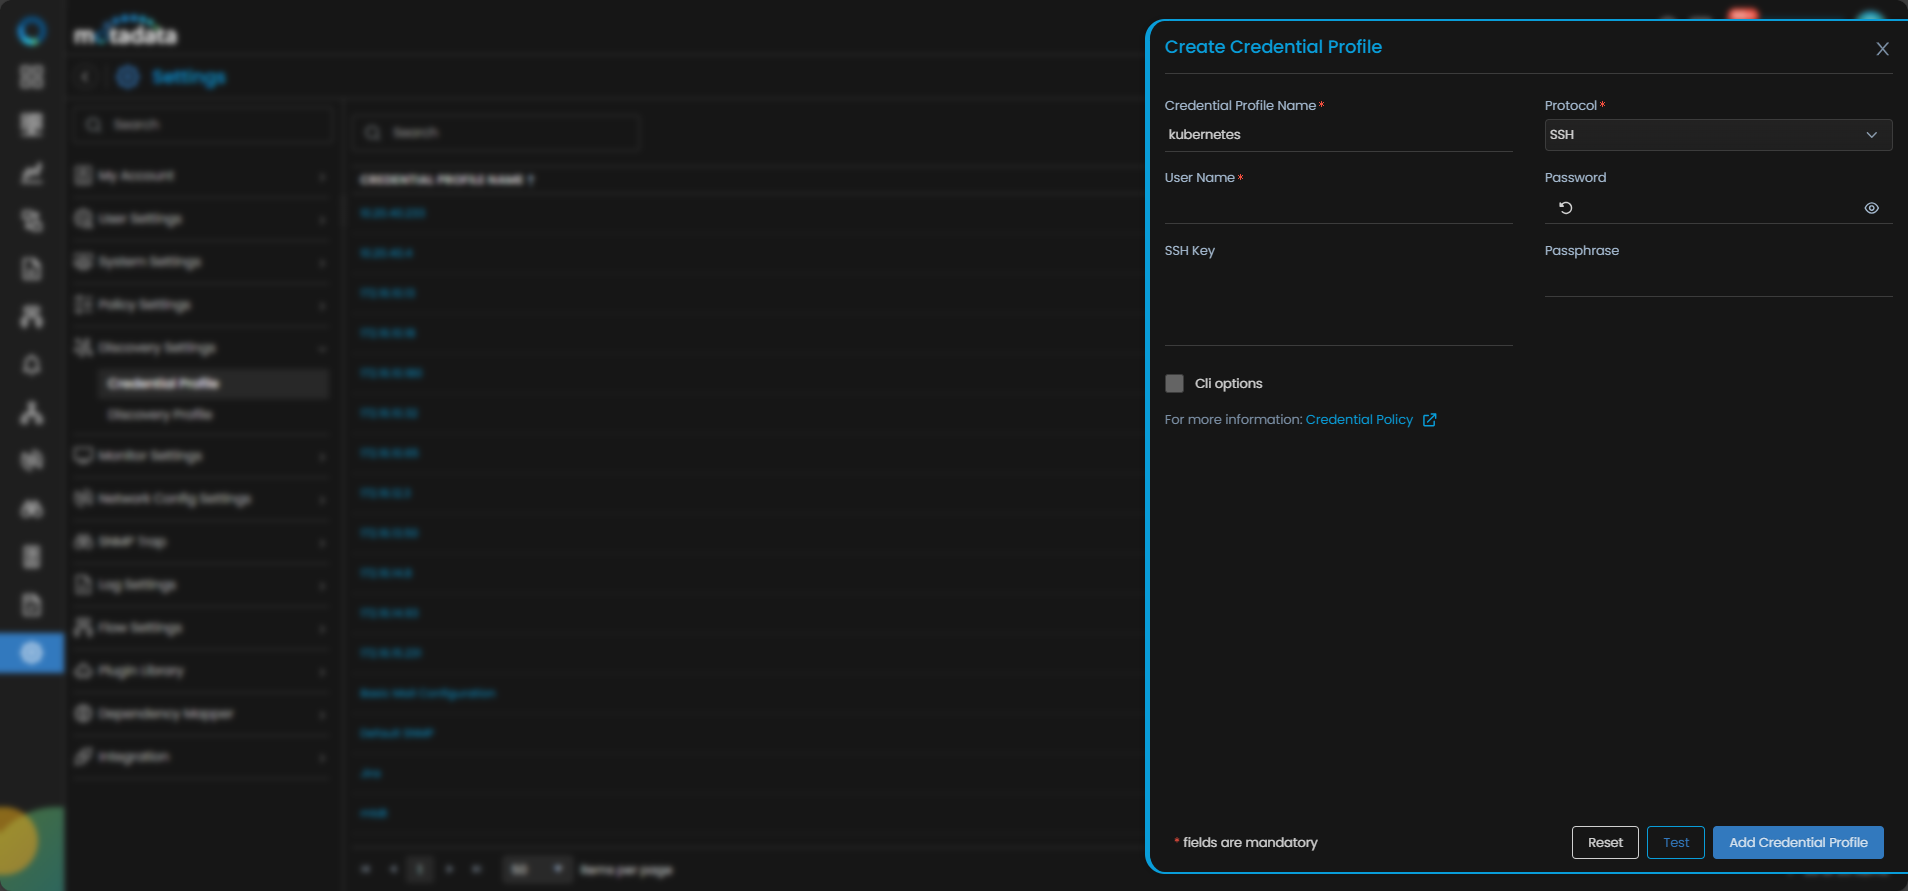
The Create Credential Profile form opens.
| Field | What to Enter |
|---|---|
| Credential Profile Name | A unique name to identify this profile |
| Protocol | Select SSH |
| Username | The Kubernetes master node username |
| Password | The password for that account |
| SSH Key and Passphrase | The SSH private key and passphrase if using key-based authentication |
| CLI Options | Optional. Select to configure Config Transfer Protocol, Enable User Name, Enable Password, Enable Command, Enable Prompt, Config Mode Command, Config Password, and VRF Number. |
Select Test to verify the credentials. Select Reset to clear all fields. Select Add Credential Profile to save.
2. Create a Discovery Profile
Go to Menu. Select Settings . Select Discovery Settings . Select Discovery Profile. The Discovery Profile screen opens. Select Create Discovery Profile.
The Create Discovery Profile form opens. Select Container Orchestration from the sidebar. Select Kubernetes.
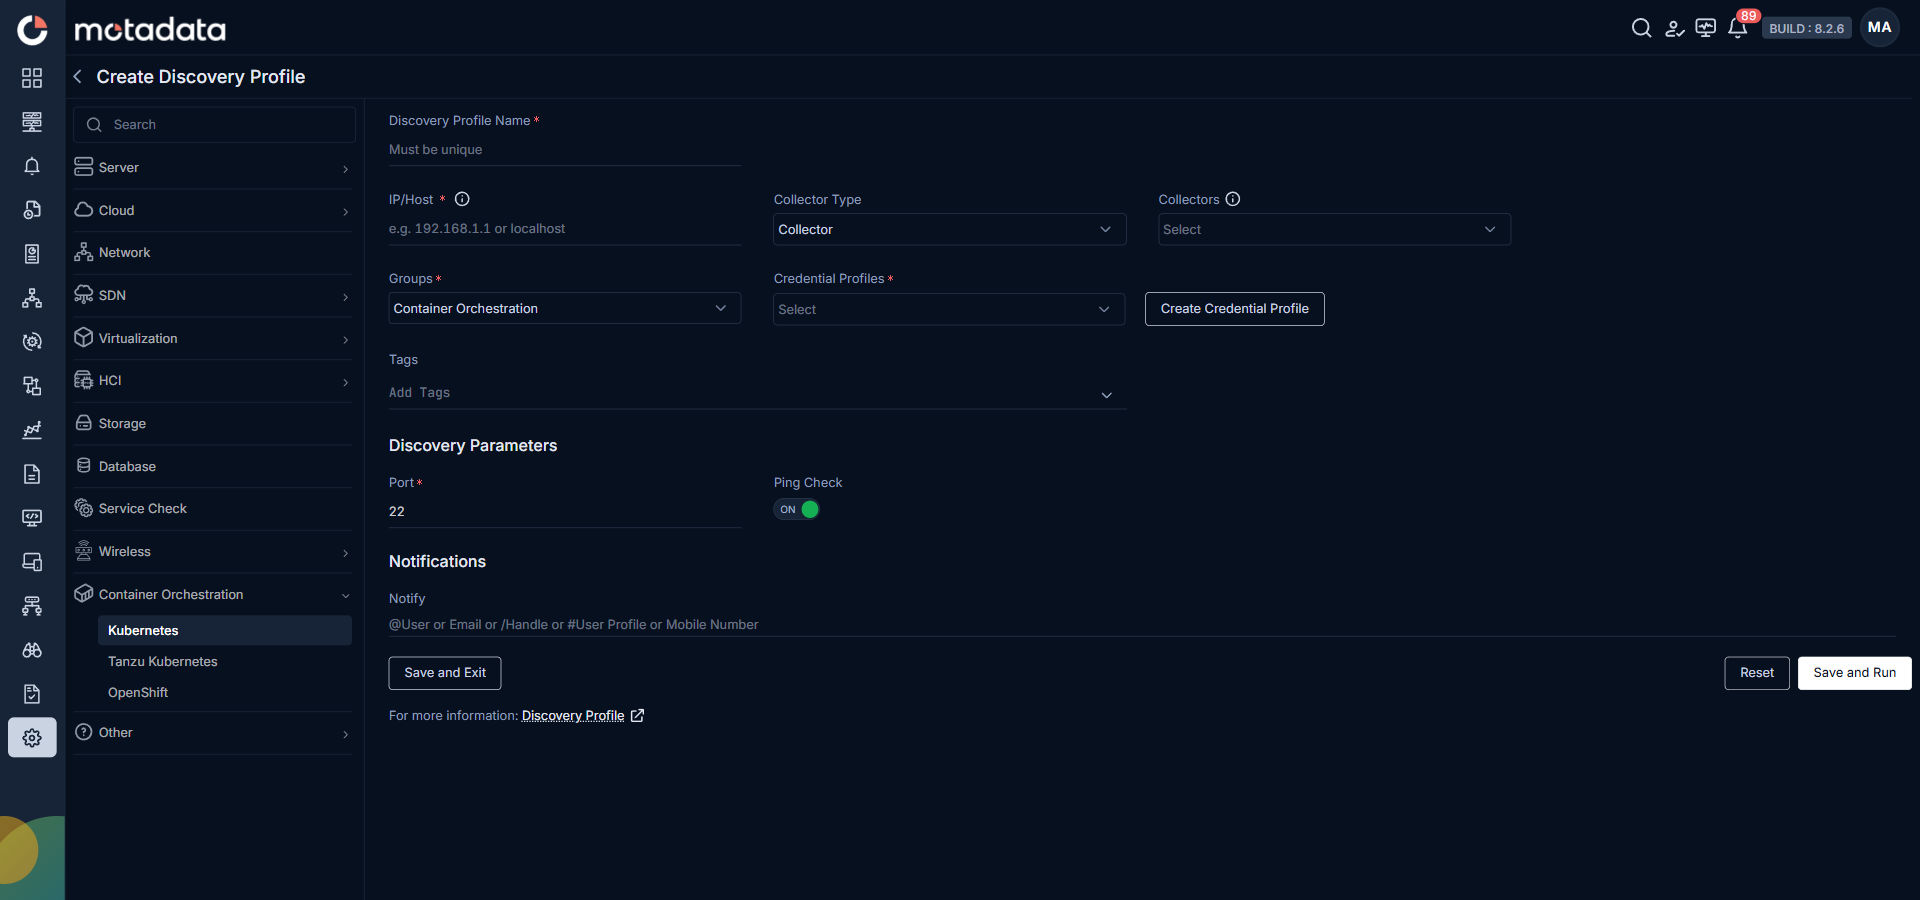
| Field | What to Enter |
|---|---|
| Discovery Profile Name | A unique name to identify this profile |
| IP / Host | The IP address of the Kubernetes master node |
| Collectors | One or more Collectors for data collection. If you skip this, ObserveOps selects a Collector automatically. |
| Groups | One or more Groups to assign to provisioned monitors |
| Credential Profile | Select the Kubernetes credential profile you just created |
| Tags | Tags to assign to discovered devices |
| Port | Pre-populated. No change needed. |
| Ping Check | On by default. Toggle off to discover devices that don't respond to ping. |
| Notify Team | Email addresses, handles, or user profiles to notify when discovery completes |
Select Save and Run to save and start discovery immediately. Select Save and Exit to save without running.
Adding Tanzu Kubernetes
1. Create a Credential Profile
Go to Menu. Select Settings . Select Discovery Settings . Select Credential Profile. The Credential Profile screen opens. Select Create Credential Profile.
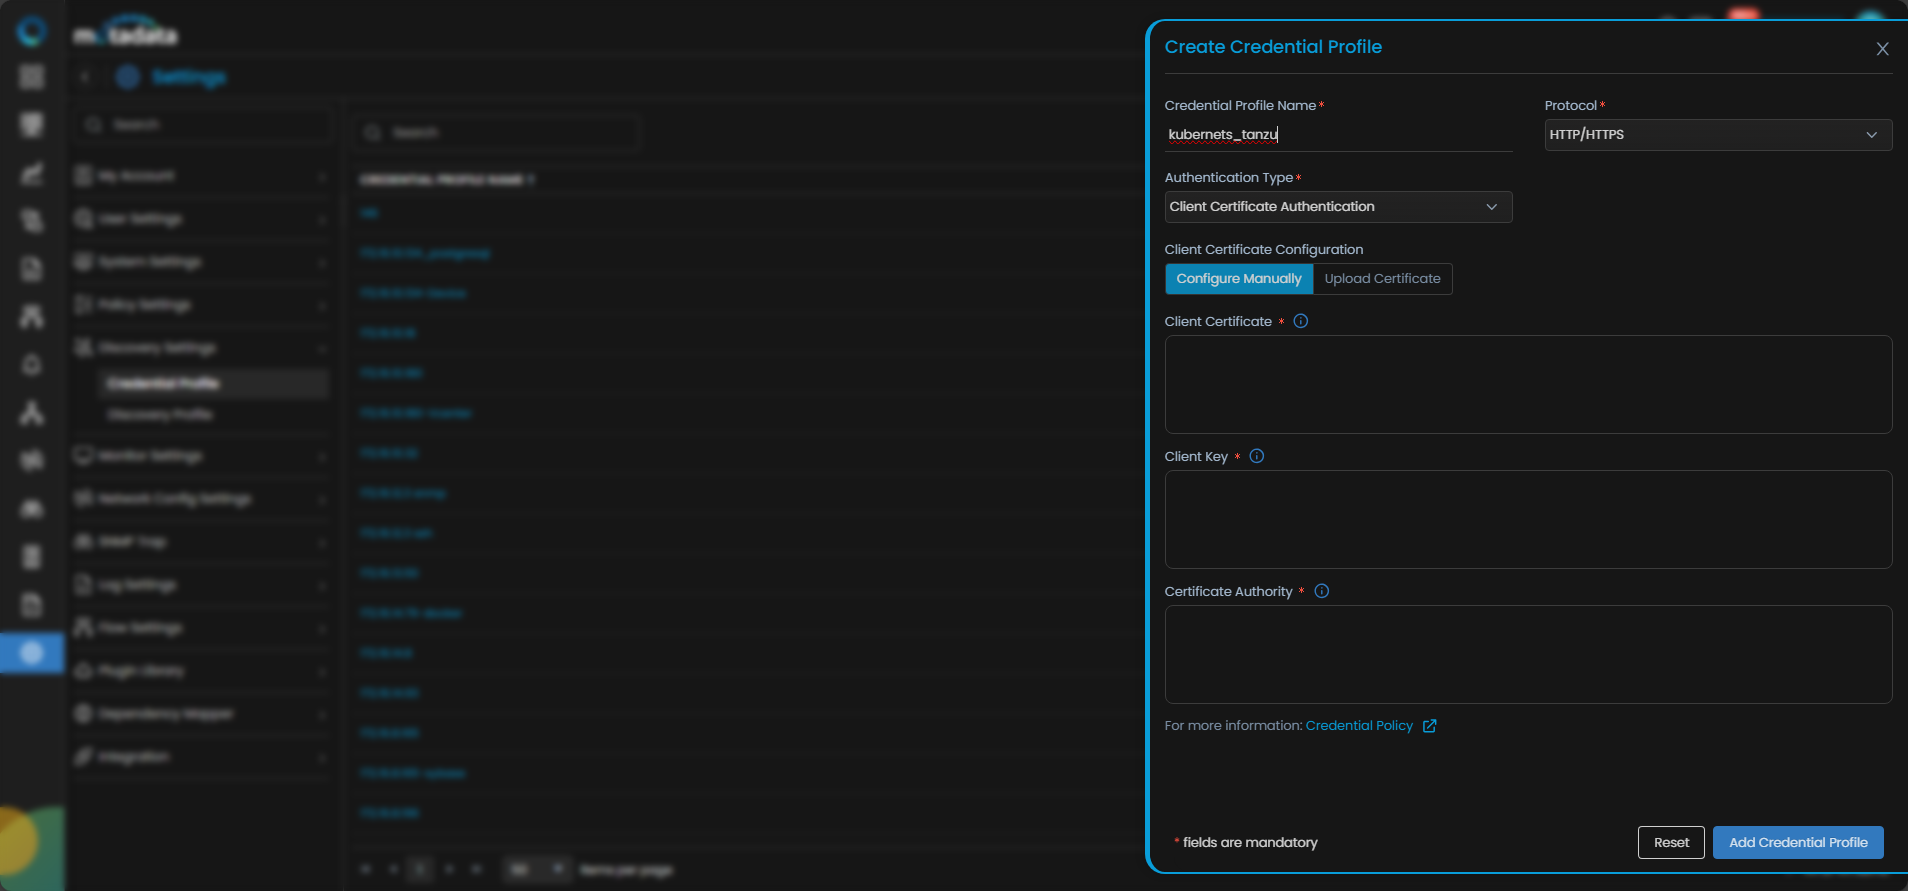
The Create Credential Profile form opens.
| Field | What to Enter |
|---|---|
| Credential Profile Name | A unique name to identify this profile |
| Protocol | Select HTTP or HTTPS |
| Authentication Type | Select Client Certificate Authentication |
| Client Certificate Configuration | Select Configure Manually or Upload Certificate |
| Client Certificate | The Base64-encoded client certificate string |
| Client Key | The Base64-encoded private key associated with the client certificate |
| Certificate Authority | The Base64-encoded certificate authority string |
Select Test to verify the credentials. Select Reset to clear all fields. Select Add Credential Profile to save.
2. Create a Discovery Profile
Go to Menu. Select Settings . Select Discovery Settings . Select Discovery Profile. The Discovery Profile screen opens. Select Create Discovery Profile.
The Create Discovery Profile form opens. Select Container Orchestration from the sidebar. Select Tanzu Kubernetes.
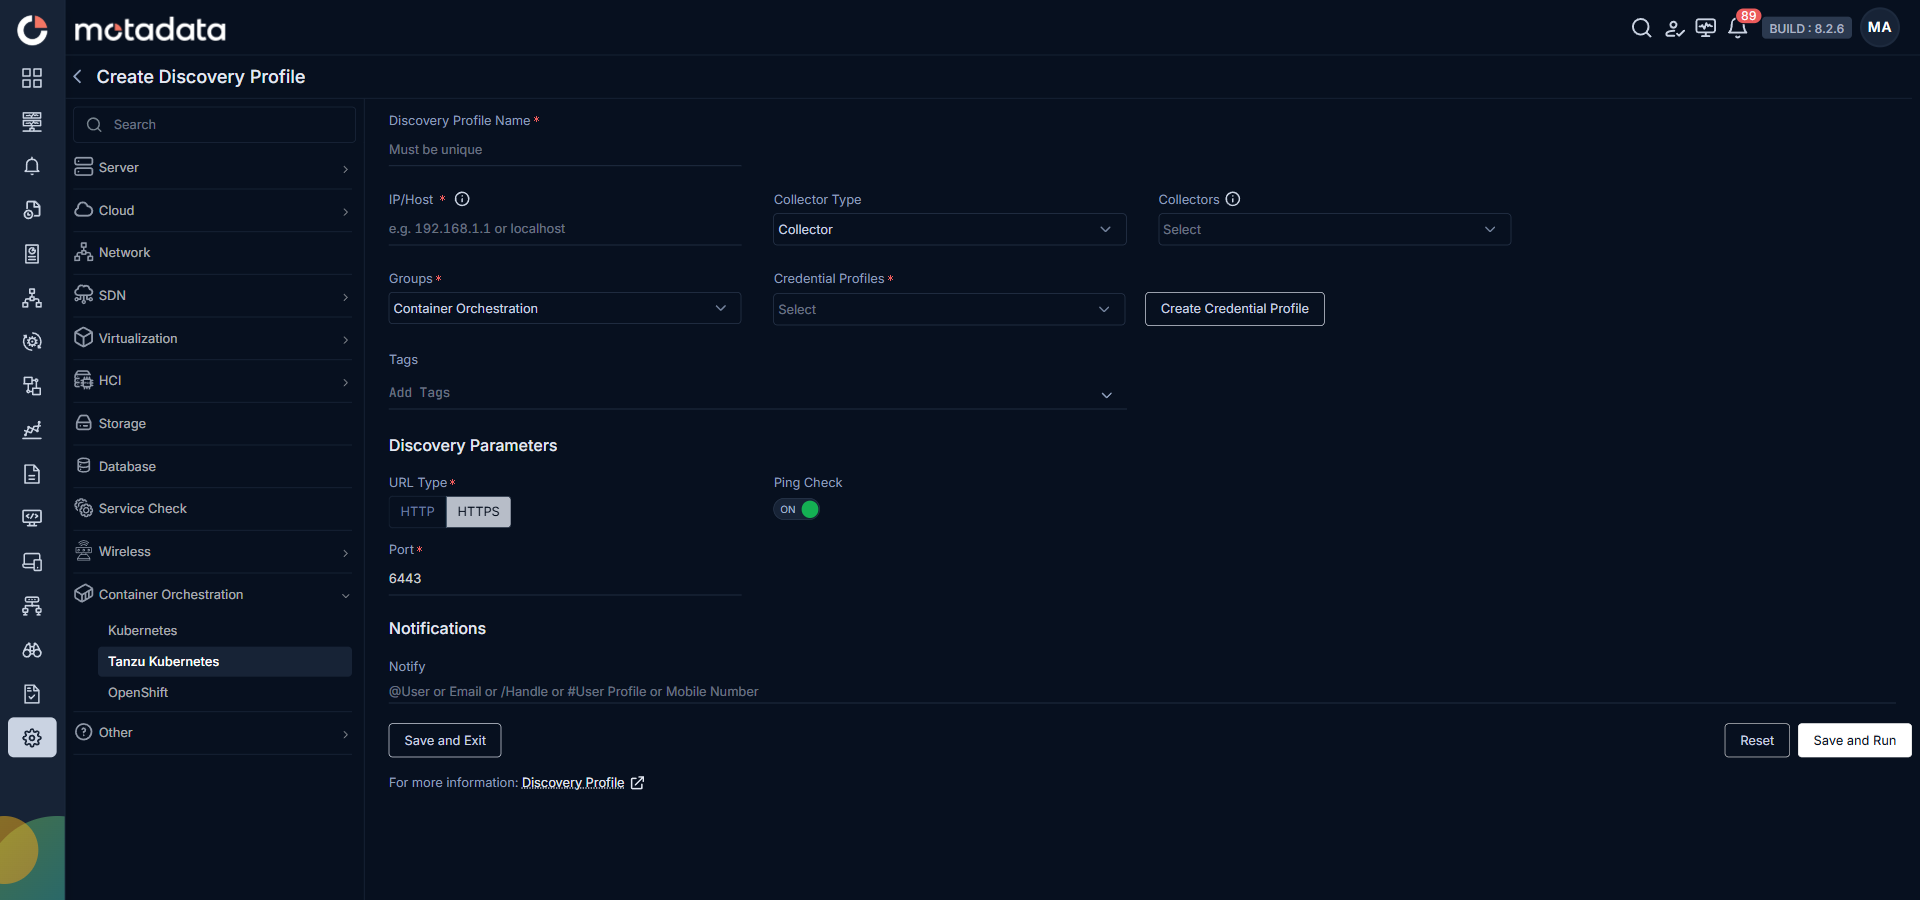
| Field | What to Enter |
|---|---|
| Discovery Profile Name | A unique name to identify this profile |
| IP / Host | The IP address of the Tanzu Kubernetes cluster |
| Collectors | One or more Collectors for data collection. If you skip this, ObserveOps selects a Collector automatically. |
| Groups | One or more Groups to assign to provisioned monitors |
| Credential Profile | Select the Tanzu Kubernetes credential profile you just created |
| Tags | Tags to assign to discovered devices |
| URL Type | Select the URL type from the available options |
| Port | Pre-populated. No change needed. |
| Ping Check | On by default. Toggle off to discover devices that don't respond to ping. |
| Notify Team | Email addresses, handles, or user profiles to notify when discovery completes |
Select Save and Run to save and start discovery immediately. Select Save and Exit to save without running.
Prerequisites
Before adding an OpenShift cluster, the API server hostname must be resolvable from the ObserveOps server.
Confirm the API hostname is accessible. You need a valid kubeconfig file containing the Cluster API endpoint (
server: https://<cluster-domain>:6443) and the Certificate Authority (certificate-authority-data).Locate the kubeconfig file and confirm it has read permissions:
sudo find / -type f -name "kubeconfig" 2>/dev/nullPoint the OpenShift CLI to the correct kubeconfig:
export KUBECONFIG=/var/home/core/kubeconfigVerify connectivity to the API server:
oc whoami --show-serverThe output should return the full API server URL.
Resolve the cluster DNS name to its IP address. On Windows, add the mapping to
C:\Windows\System32\drivers\etc\hosts.Open Notepad as Administrator. Open the file
C:\Windows\System32\drivers\etc\hosts.noteYou may need to change the file type filter to All Files to see the
hostsfile.Add a line at the bottom of the file:
172.16.11.76 api.openshift-cluster.motadata.localnoteThis entry tells Windows to send all requests to
api.openshift-cluster.motadata.localto IP172.16.11.76. Replace both values with your cluster's actual IP and hostname.Save the file.
Adding OpenShift
1. Create a Credential Profile
Go to Menu. Select Settings . Select Discovery Settings . Select Credential Profile. The Credential Profile screen opens. Select Create Credential Profile.
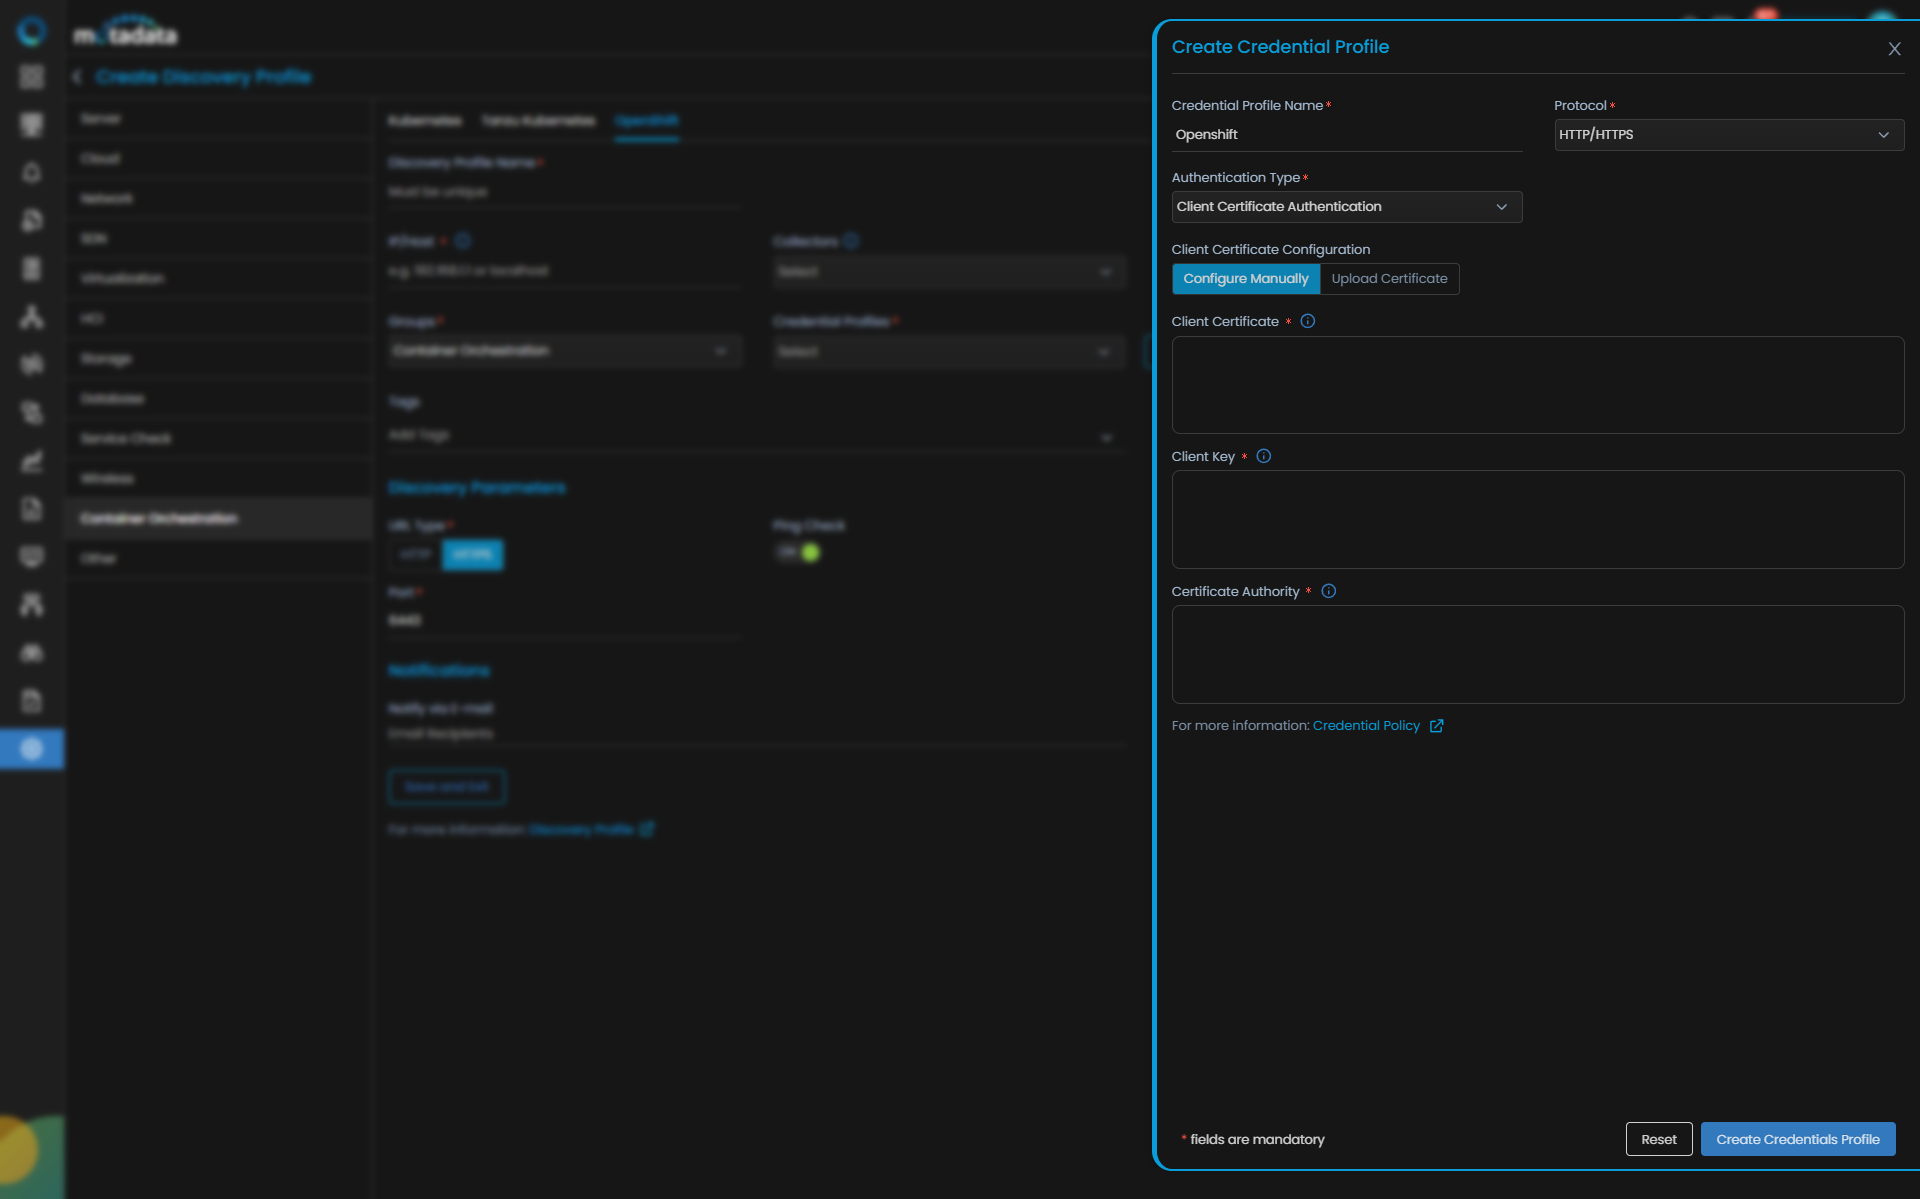
The Create Credential Profile form opens.
| Field | What to Enter |
|---|---|
| Credential Profile Name | A unique name to identify this profile |
| Protocol | Select HTTP or HTTPS |
| Authentication Type | Select Client Certificate Authentication |
| Client Certificate Configuration | Select Configure Manually or Upload Certificate |
| Client Certificate | The Base64-encoded client certificate string |
| Client Key | The Base64-encoded private key associated with the client certificate |
| Certificate Authority | The Base64-encoded certificate authority string |
Select Test to verify the credentials. Select Reset to clear all fields. Select Add Credential Profile to save.
2. Create a Discovery Profile
Go to Menu. Select Settings . Select Discovery Settings . Select Discovery Profile. The Discovery Profile screen opens. Select Create Discovery Profile.
The Create Discovery Profile form opens. Select Container Orchestration from the sidebar. Select OpenShift.
| Field | What to Enter |
|---|---|
| Discovery Profile Name | A unique name to identify this profile |
| IP / Host | The IP address of the OpenShift API server |
| Collectors | One or more Collectors for data collection. If you skip this, ObserveOps selects a Collector automatically. |
| Groups | One or more Groups to assign to provisioned monitors |
| Credential Profile | Select the OpenShift credential profile you just created |
| Tags | Tags to assign to discovered devices |
| Port | Pre-populated. No change needed. |
| Ping Check | On by default. Toggle off to discover devices that don't respond to ping. |
| Notify Team | Email addresses, handles, or user profiles to notify when discovery completes |
Select Save and Run to save and start discovery immediately. Select Save and Exit to save without running.