Adding Cloud Devices for Monitoring
ObserveOps (formerly known as AIOps) monitors cloud resources from AWS, Azure, Office 365, Oracle Cloud, and Google Cloud Platform (GCP) by discovering them through a cloud credential profile and provisioning them as monitors. Once provisioned, ObserveOps continuously collects performance metrics and generates alerts based on what it finds. You can customize Monitor Settings for each monitor, including polling intervals, thresholds, and alert notifications.
Cloud Vendors and Services Supported
Amazon Web Services (AWS)
| Supported Service |
|---|
| Amazon CloudFront |
| Amazon DocumentDB |
| Amazon DynamoDB |
| Amazon EBS |
| Amazon EC2 |
| Amazon RDS |
| Amazon S3 |
| Amazon SNS |
| Amazon SQS |
| Amazon ELB |
| AWS Lambda |
| AWS Elastic Beanstalk |
| AWS Auto Scaling |
| Amazon Bedrock |
| Amazon Kinesis Data Firehose |
| Amazon SageMaker |
| Amazon MQ |
| AWS WAF |
| AWS ACM (Certificate Manager) |
| AWS KMS (Key Management Service) |
| AWS CloudTrail |
| Amazon Cognito User Pool |
| Amazon Athena |
| AWS Config |
Microsoft Azure
| Supported Service |
|---|
| Web App Service |
| Azure Storage |
| Azure VMs |
| Azure SQL Database |
| Azure Cosmos DB |
| Azure Application Gateway |
| Azure CDN |
| Azure Load Balancer |
| Virtual Machine Scale Sets |
| Azure Service Bus |
| Azure Functions |
Microsoft Office 365 (O365)
| Supported Service |
|---|
| Microsoft Teams |
| Microsoft SharePoint |
| Microsoft Exchange Online |
| Microsoft OneDrive |
Oracle Cloud
| Supported Service |
|---|
| Oracle Compute Instance |
| Oracle Autonomous Database |
| Oracle Object Storage |
| Oracle Load Balancer |
| Oracle Virtual Cloud Network |
Google Cloud Platform (GCP)
| Supported Service |
|---|
| GCP Compute Engine |
| GCP Cloud Storage |
| GCP Cloud SQL |
| GCP GKE |
| GCP Filestore |
- AWS
- Azure
- Office 365
- Oracle Cloud
- GCP
Adding AWS Resources for Monitoring
Prerequisites
- You need the Access Key and Secret Key of the AWS account.
- Your AWS IAM user needs specific permissions assigned. View the JSON file with required permissions here.
1. Create a Credential Profile
Go to Menu. Select Settings  . Select Discovery Settings
  . Select Credential Profile. The Credential Profile screen opens. Select Create Credential Profile.
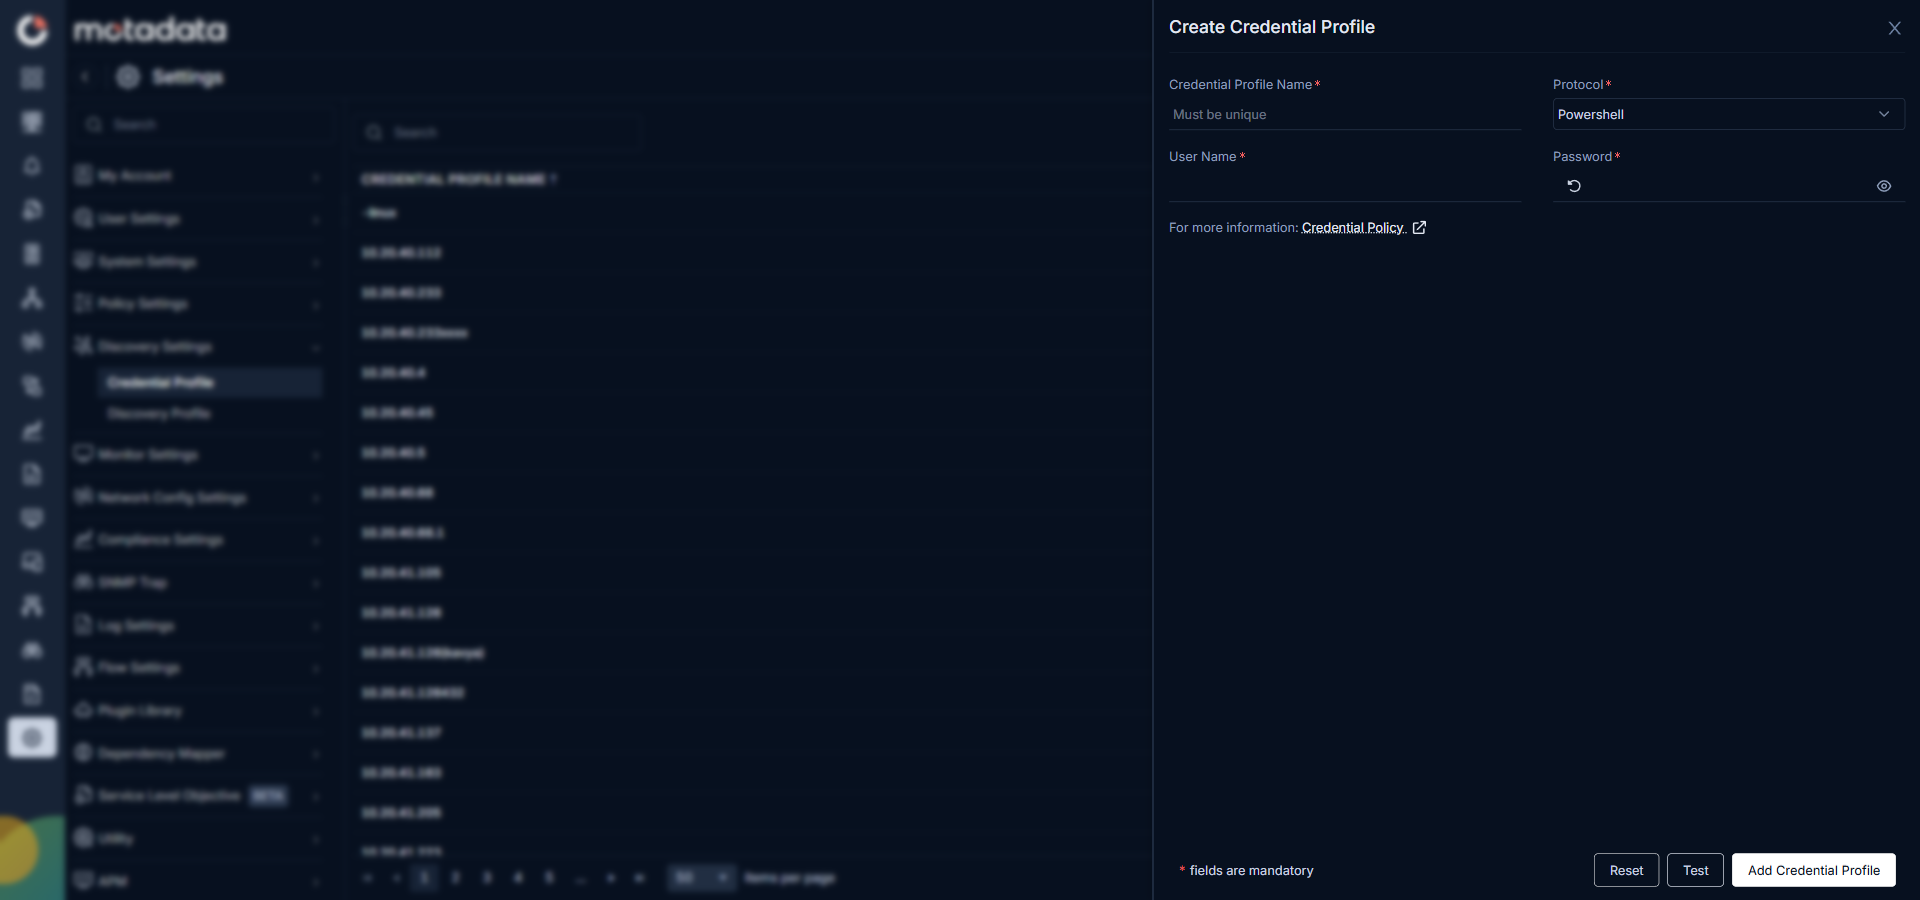
The Create Credential Profile form opens.
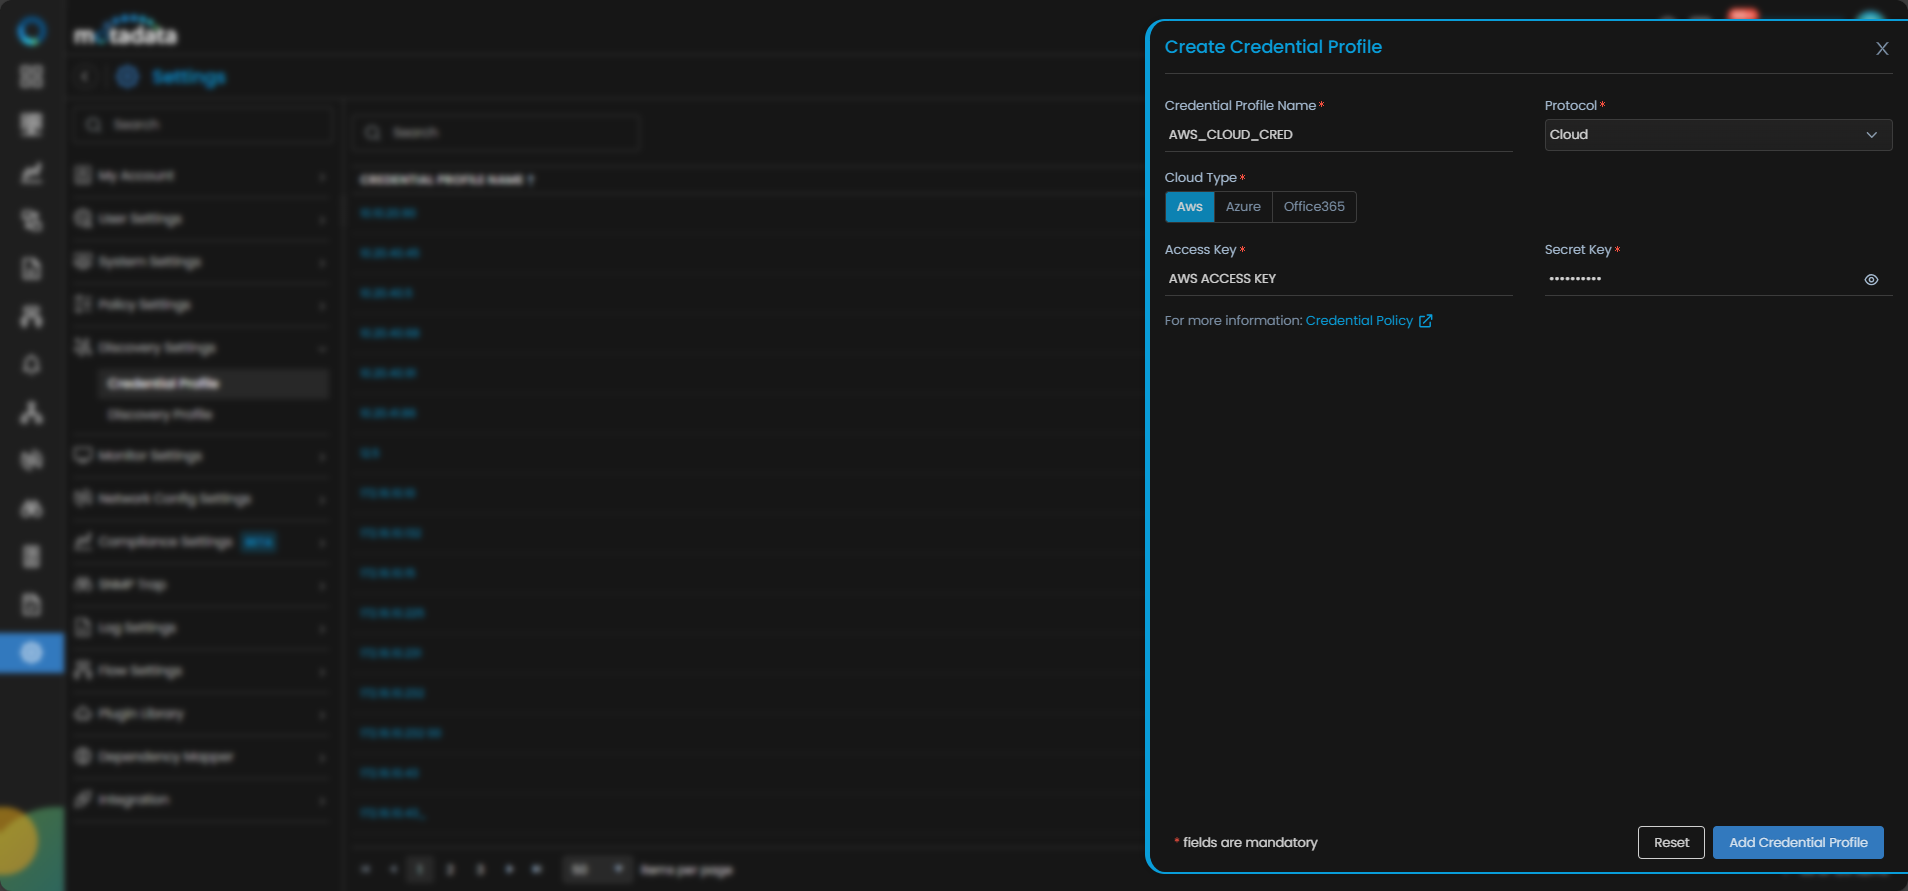
| Field | What to Enter |
|---|---|
| Credential Profile Name | A unique name to identify this profile |
| Protocol | Select Cloud |
| Cloud Type | Select AWS |
| Access Key | The AWS IAM access key ID |
| Secret Key | The AWS IAM secret access key |
Select Reset to clear all fields. Select Add Credential Profile to save.
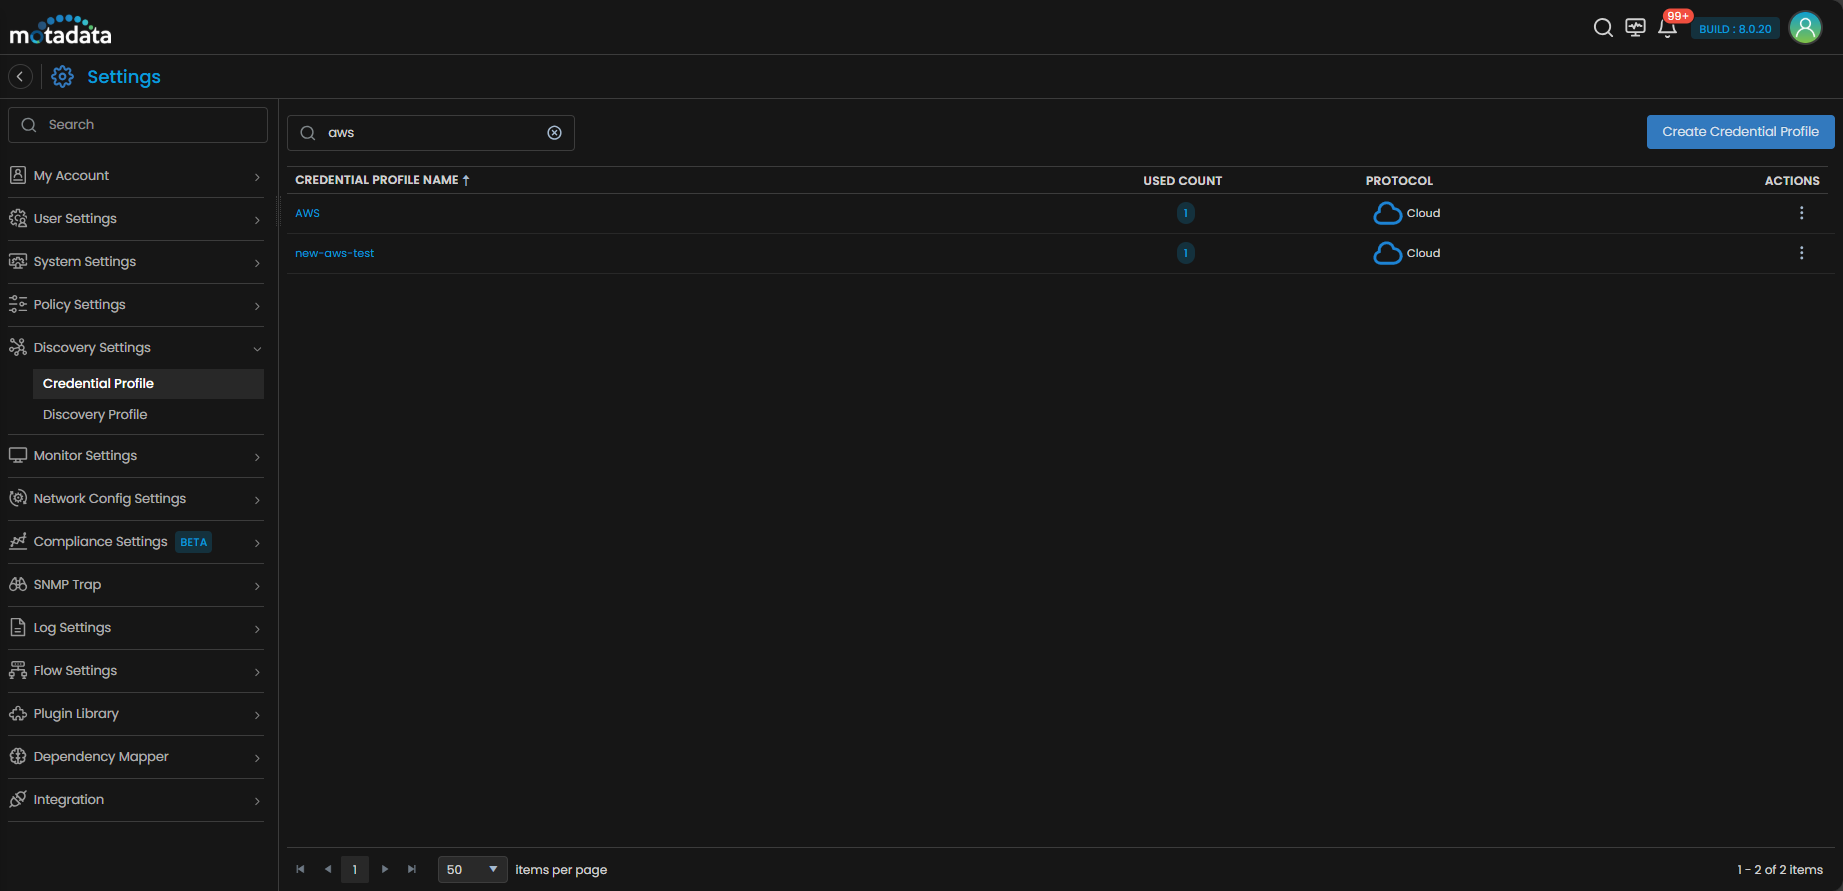
The profile now appears in the Credential Profile list.
2. Create a Discovery Profile
Go to Menu. Select Settings . Select Discovery Settings . Select Discovery Profile. The Discovery Profile screen opens. Select Create Discovery Profile.
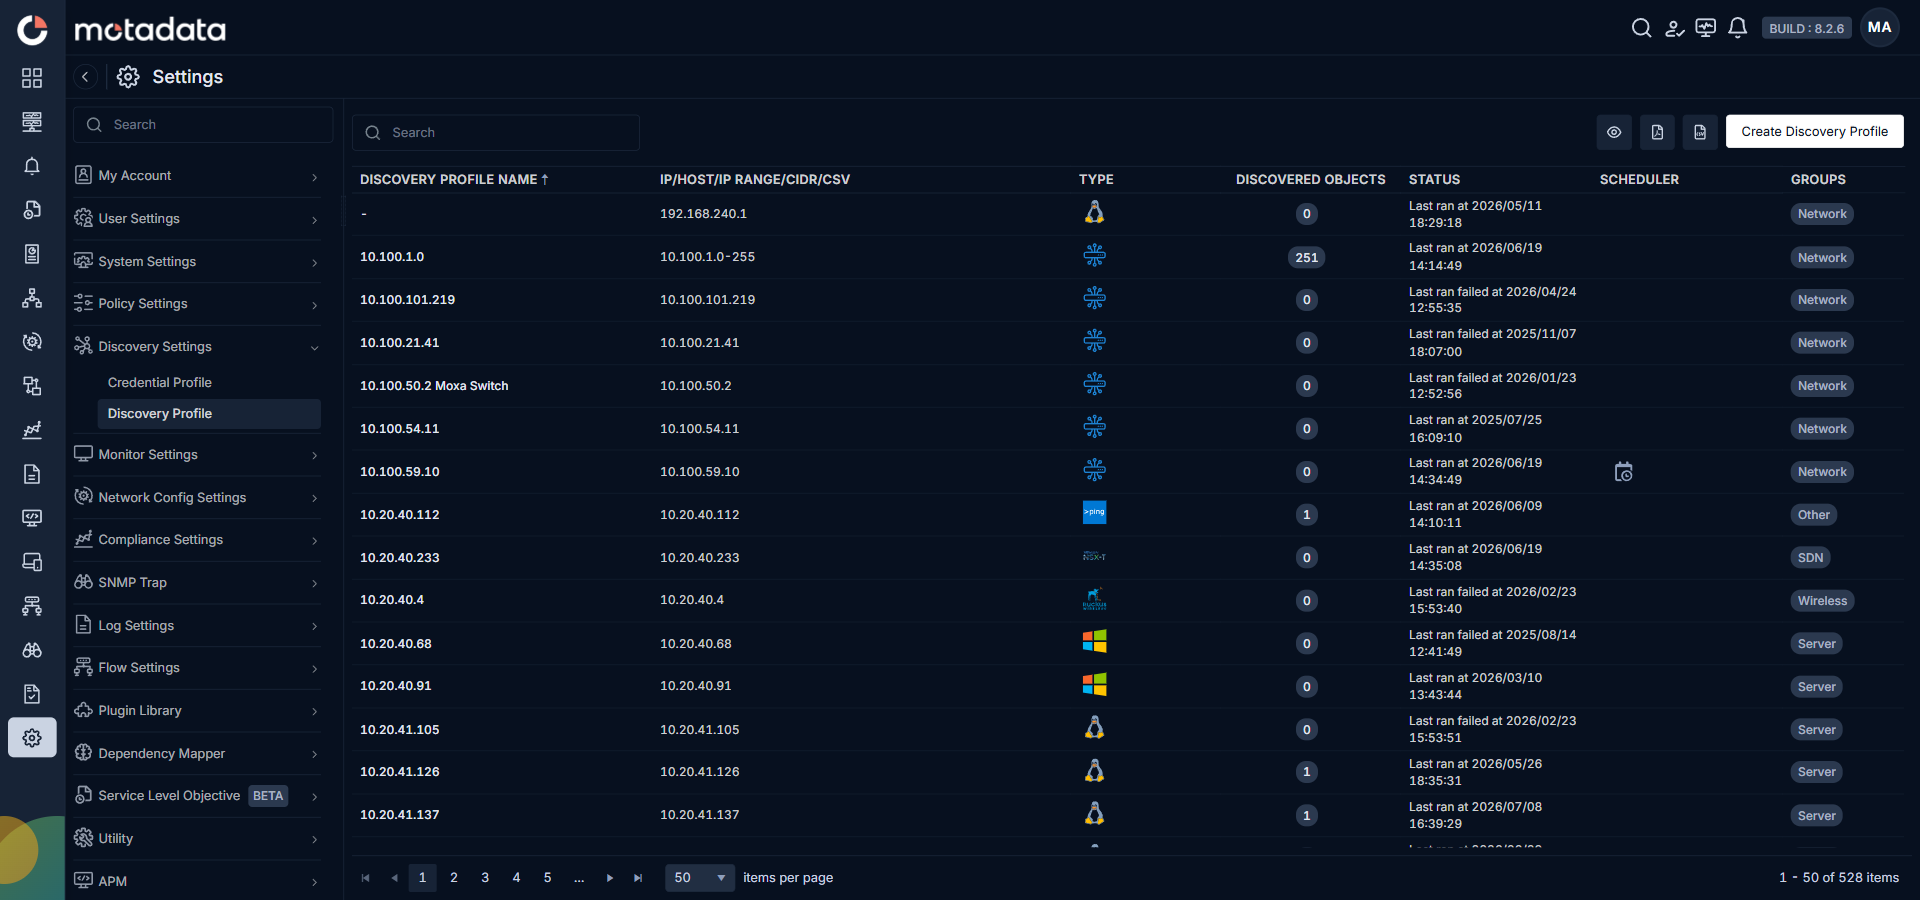
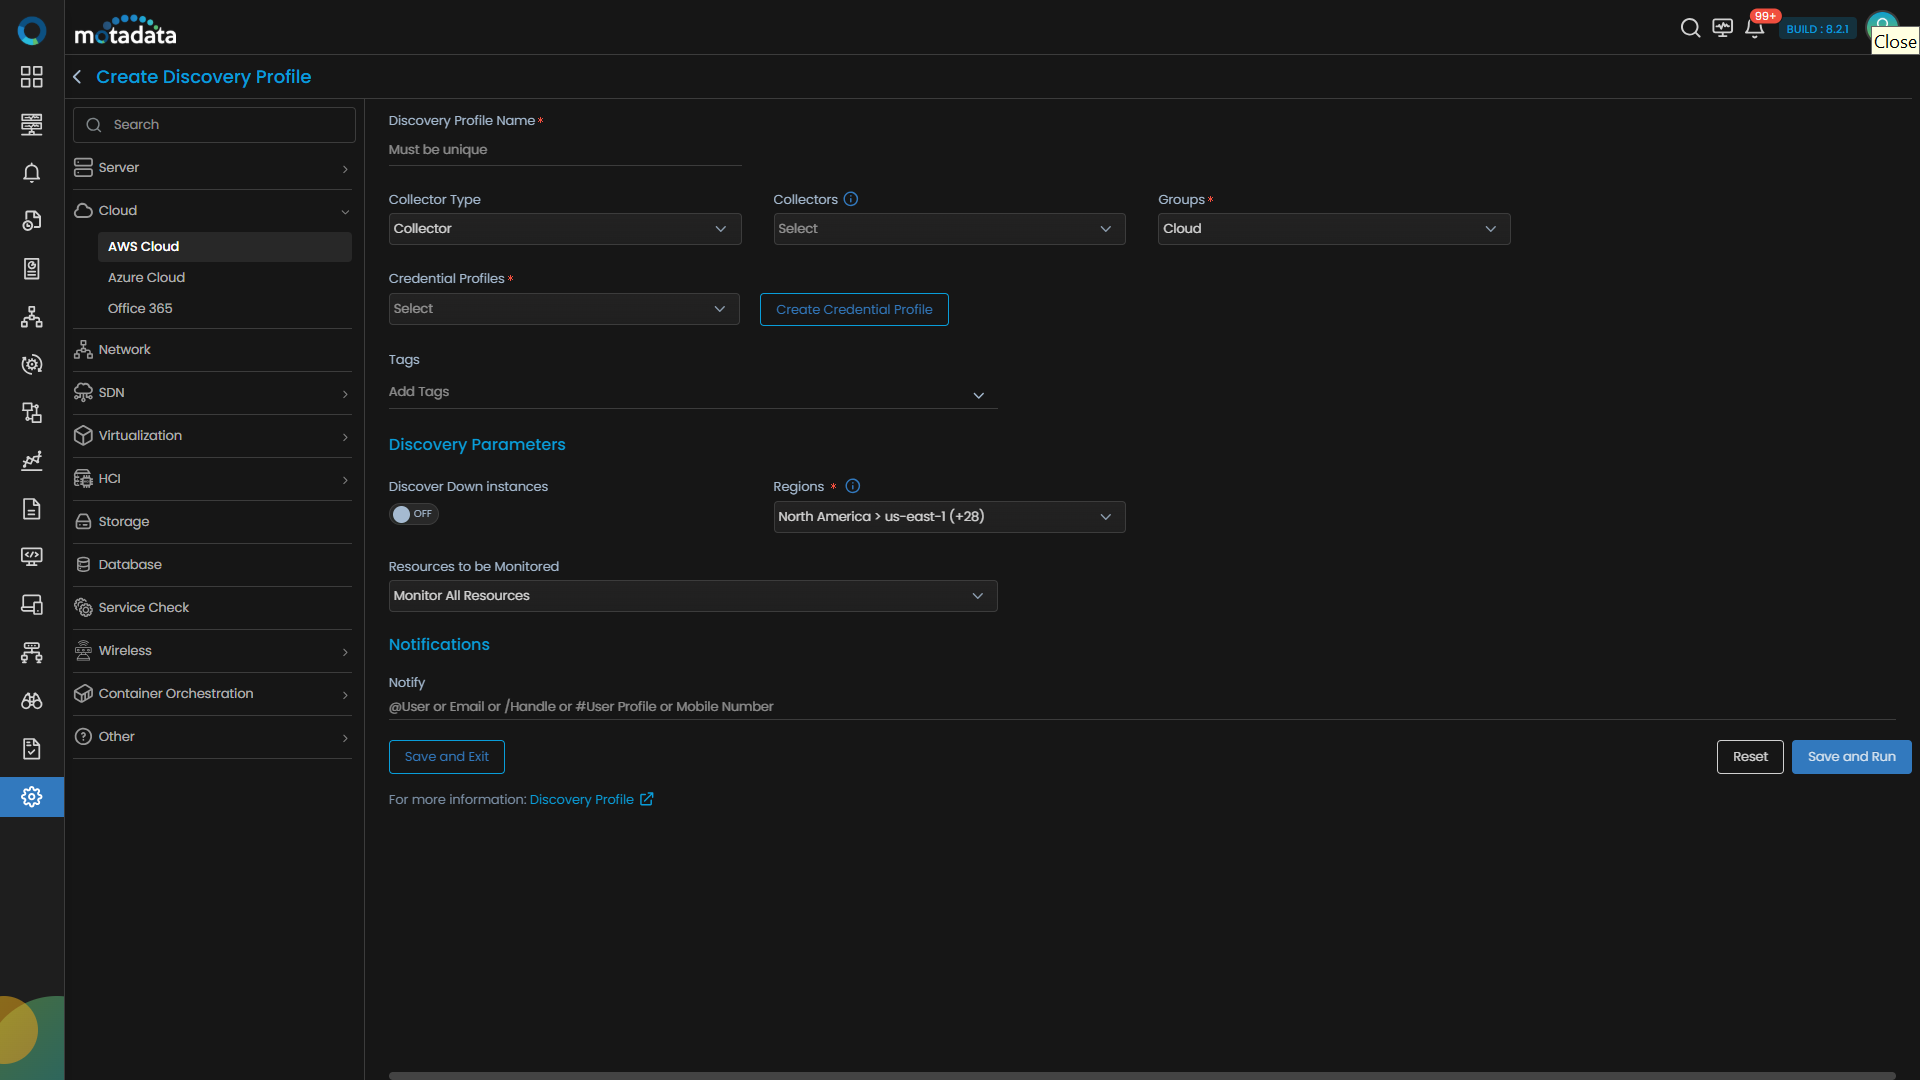
The Create Discovery Profile form opens. Select Cloud from the sidebar.

AWS Cloud is selected by default.
| Field | What to Enter |
|---|---|
| Discovery Profile Name | A unique name to identify this profile |
| Collectors | One or more Collectors for data collection. If you skip this, ObserveOps selects a Collector automatically. |
| Groups | One or more Groups to assign to provisioned monitors |
| Credential Profile | Select the AWS Cloud credential profile you just created |
| Tags | Tags to assign to discovered devices |
| Discover Down Instances | Set to ON to discover instances even when their services are down. Set to OFF to skip them. |
| Resources to be Monitored | Select Monitor All Resources to monitor everything discovered. Select Monitor Resources Selected By Tags to filter by AWS resource tags. |
| Key/Value | The tag key and value to filter by. Only appears when you select Monitor Resources Selected By Tags. |
| Notify Team | Email addresses, handles, or user profiles to notify when discovery completes |
Select Collectors based on how you want to distribute the monitoring load.
Select Save and Run to save and start discovery immediately. Select Save and Exit to save without running.
3. Provision the Discovered Devices as Monitors
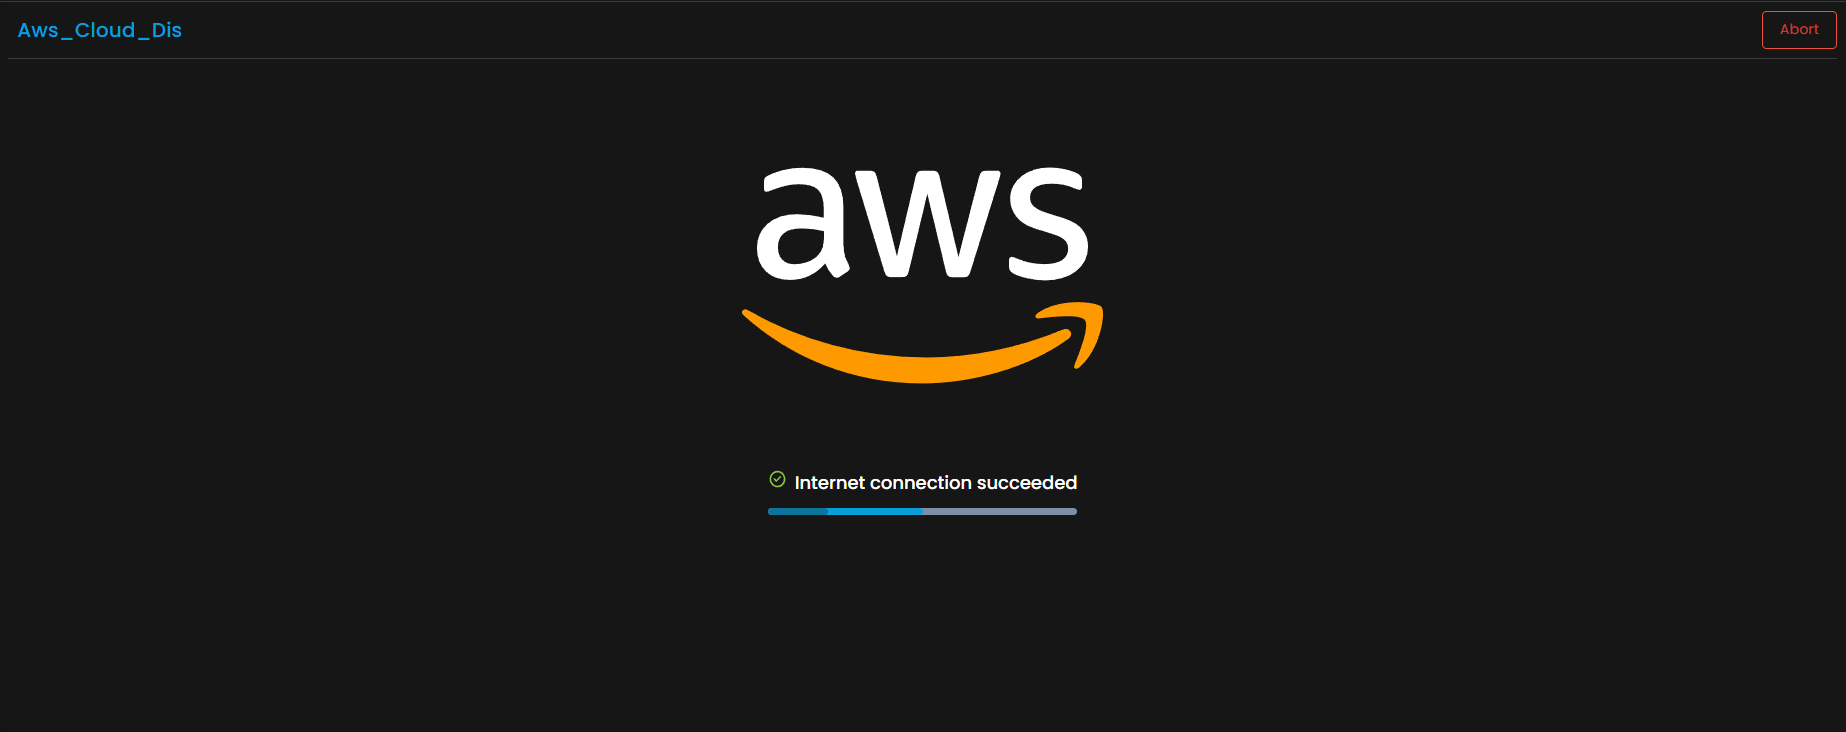
After discovery starts, ObserveOps connects to your AWS account and scans for resources.
When the run completes, ObserveOps shows all discovered resources. Select the ones you want to add as Monitors.
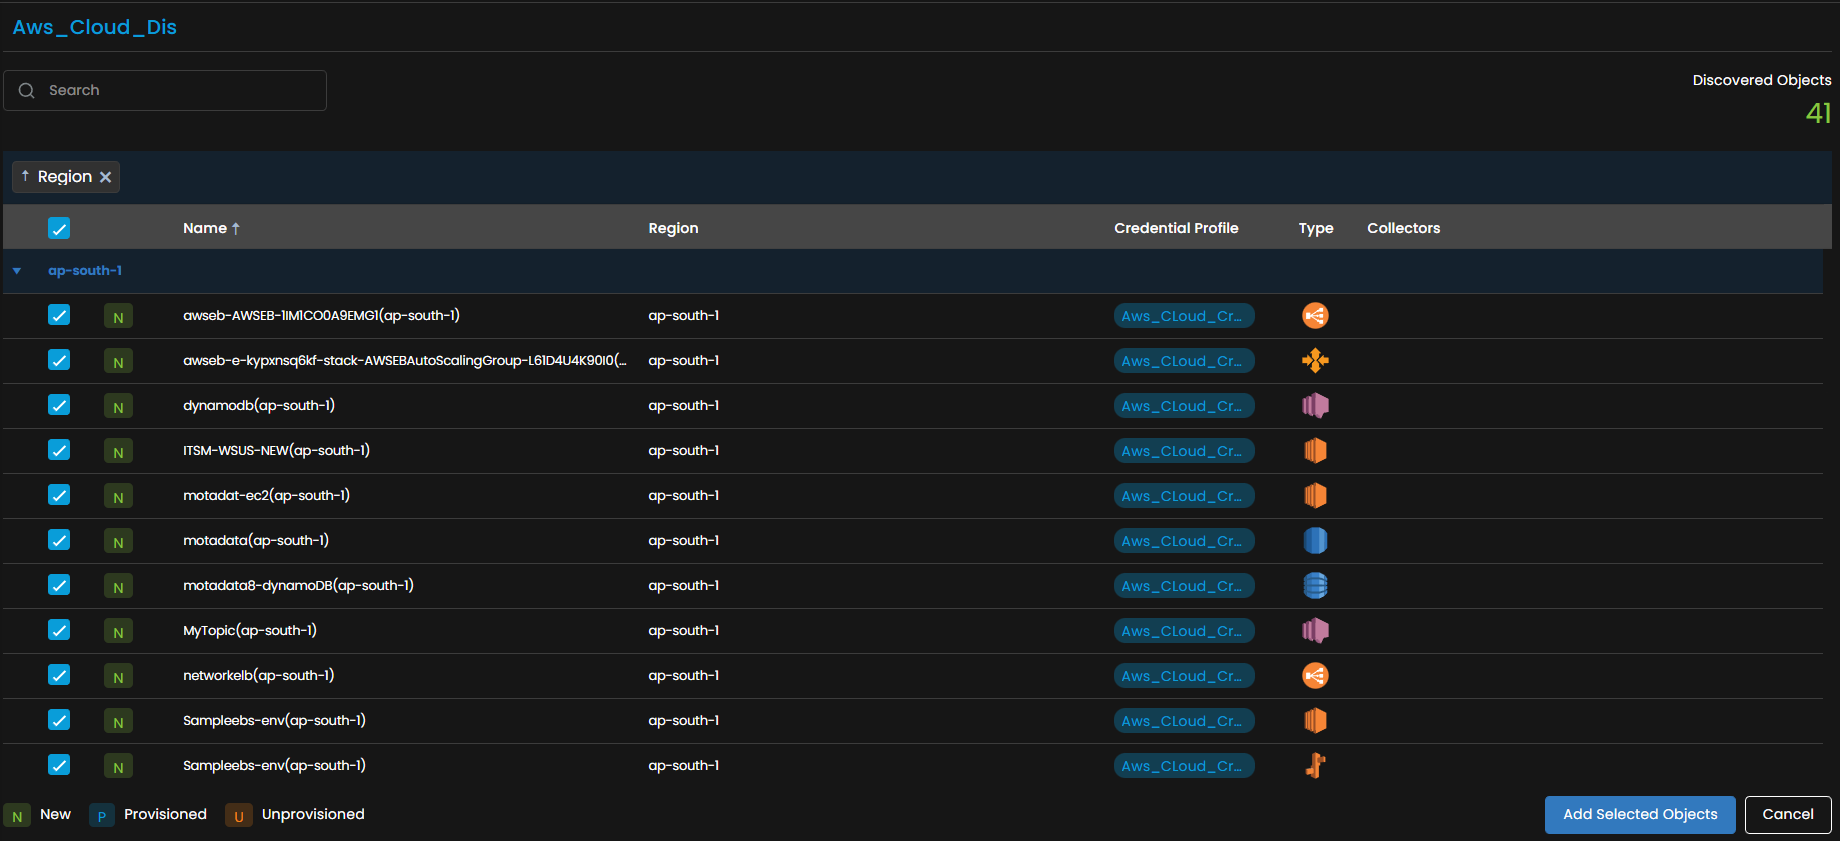
Select Add Selected Objects to provision the selected resources as monitors. ObserveOps now collects metrics continuously.
To view the monitors, go to Menu. Select Monitor. Select Cloud.

The AWS resources are now added to ObserveOps.
Adding Azure Resources for Monitoring
Prerequisites
- You need the Client ID, Tenant ID, and Secret Key of the Azure account. Refer to the Azure integration steps to retrieve these values from the Azure portal.
1. Create a Credential Profile
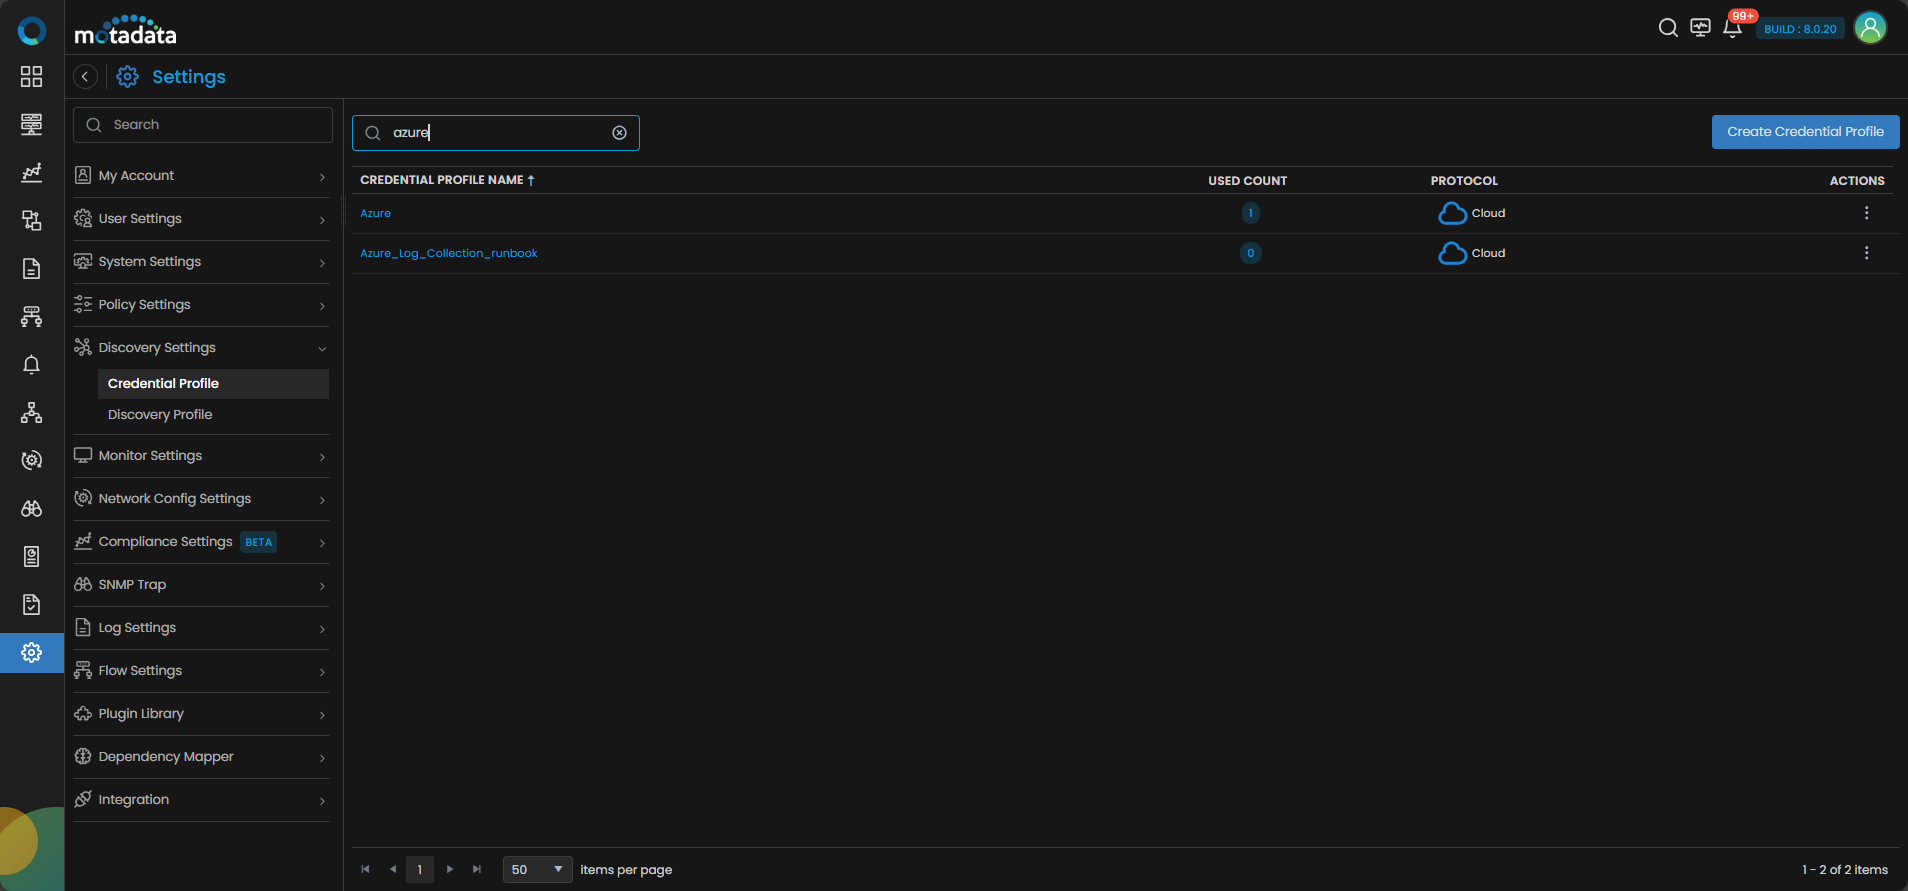
Go to Menu. Select Settings . Select Discovery Settings . Select Credential Profile. The Credential Profile screen opens. Select Create Credential Profile.
The Create Credential Profile form opens.
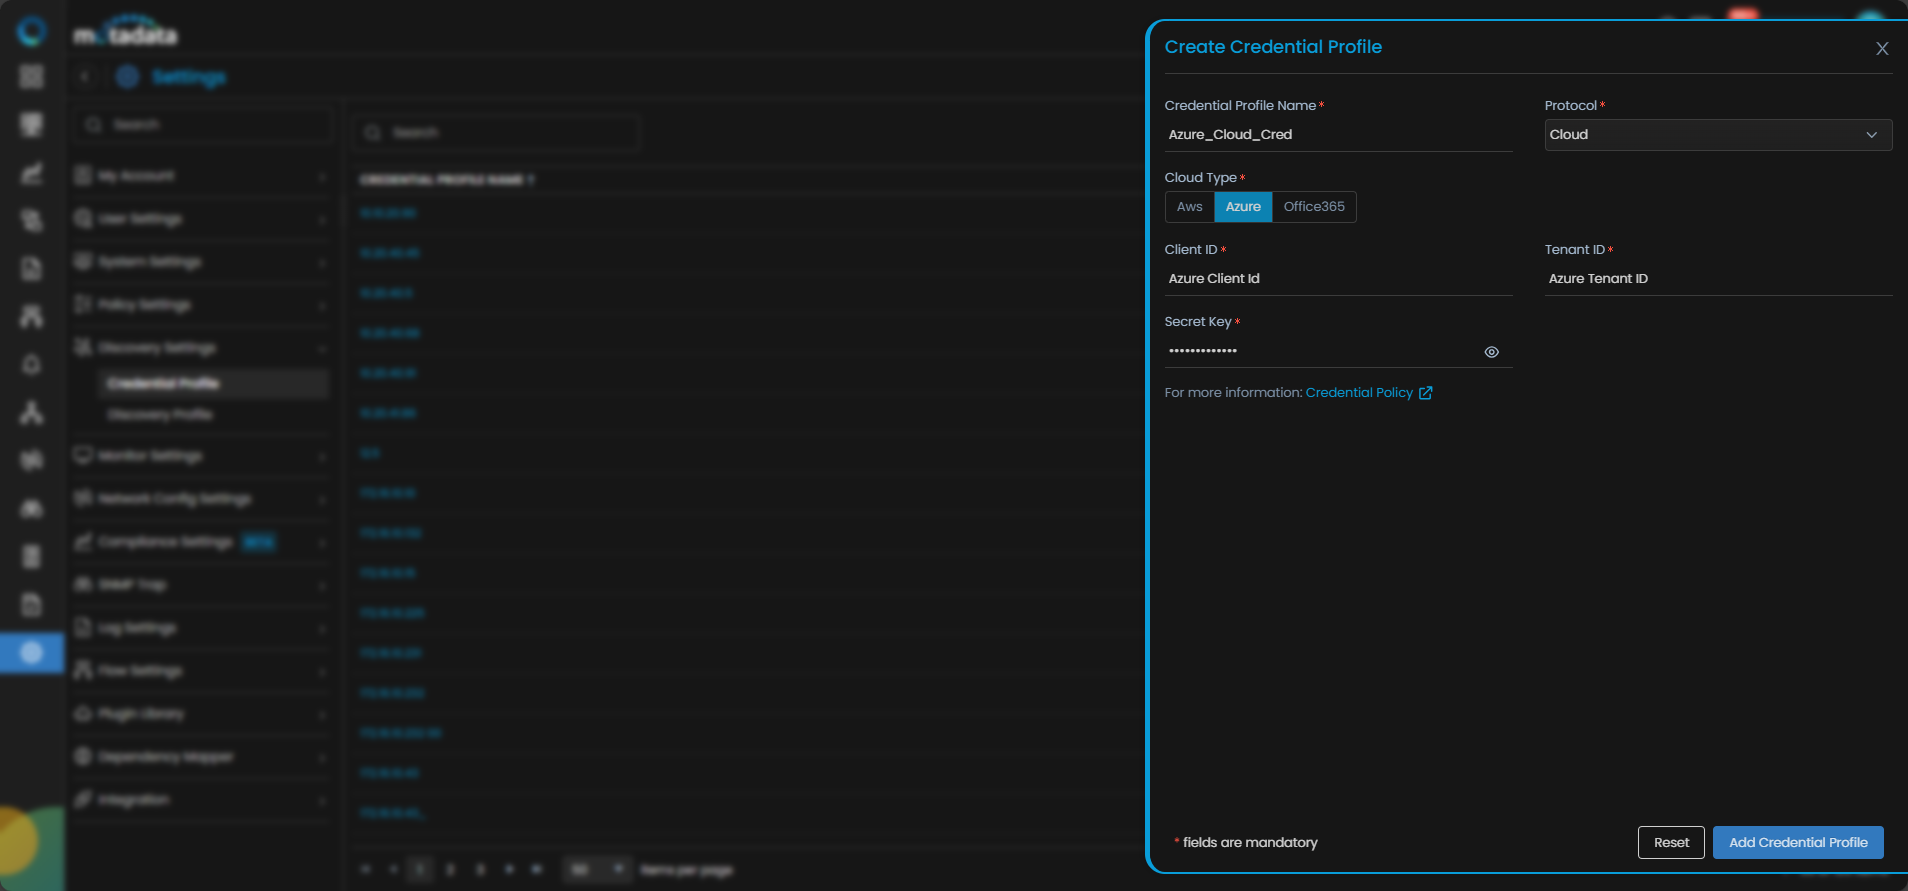
| Field | What to Enter |
|---|---|
| Credential Profile Name | A unique name to identify this profile |
| Protocol | Select Cloud |
| Cloud Type | Select Azure |
| Client ID | The Application (client) ID from your Azure app registration |
| Tenant ID | The Directory (tenant) ID of your Azure Active Directory |
| Secret Key | The client secret value generated for the app registration |
Select Reset to clear all fields. Select Add Credential Profile to save.
The profile now appears in the Credential Profile list.
2. Create a Discovery Profile
Go to Menu. Select Settings . Select Discovery Settings . Select Discovery Profile. The Discovery Profile screen opens. Select Create Discovery Profile.
The Create Discovery Profile form opens. Select Cloud from the sidebar.
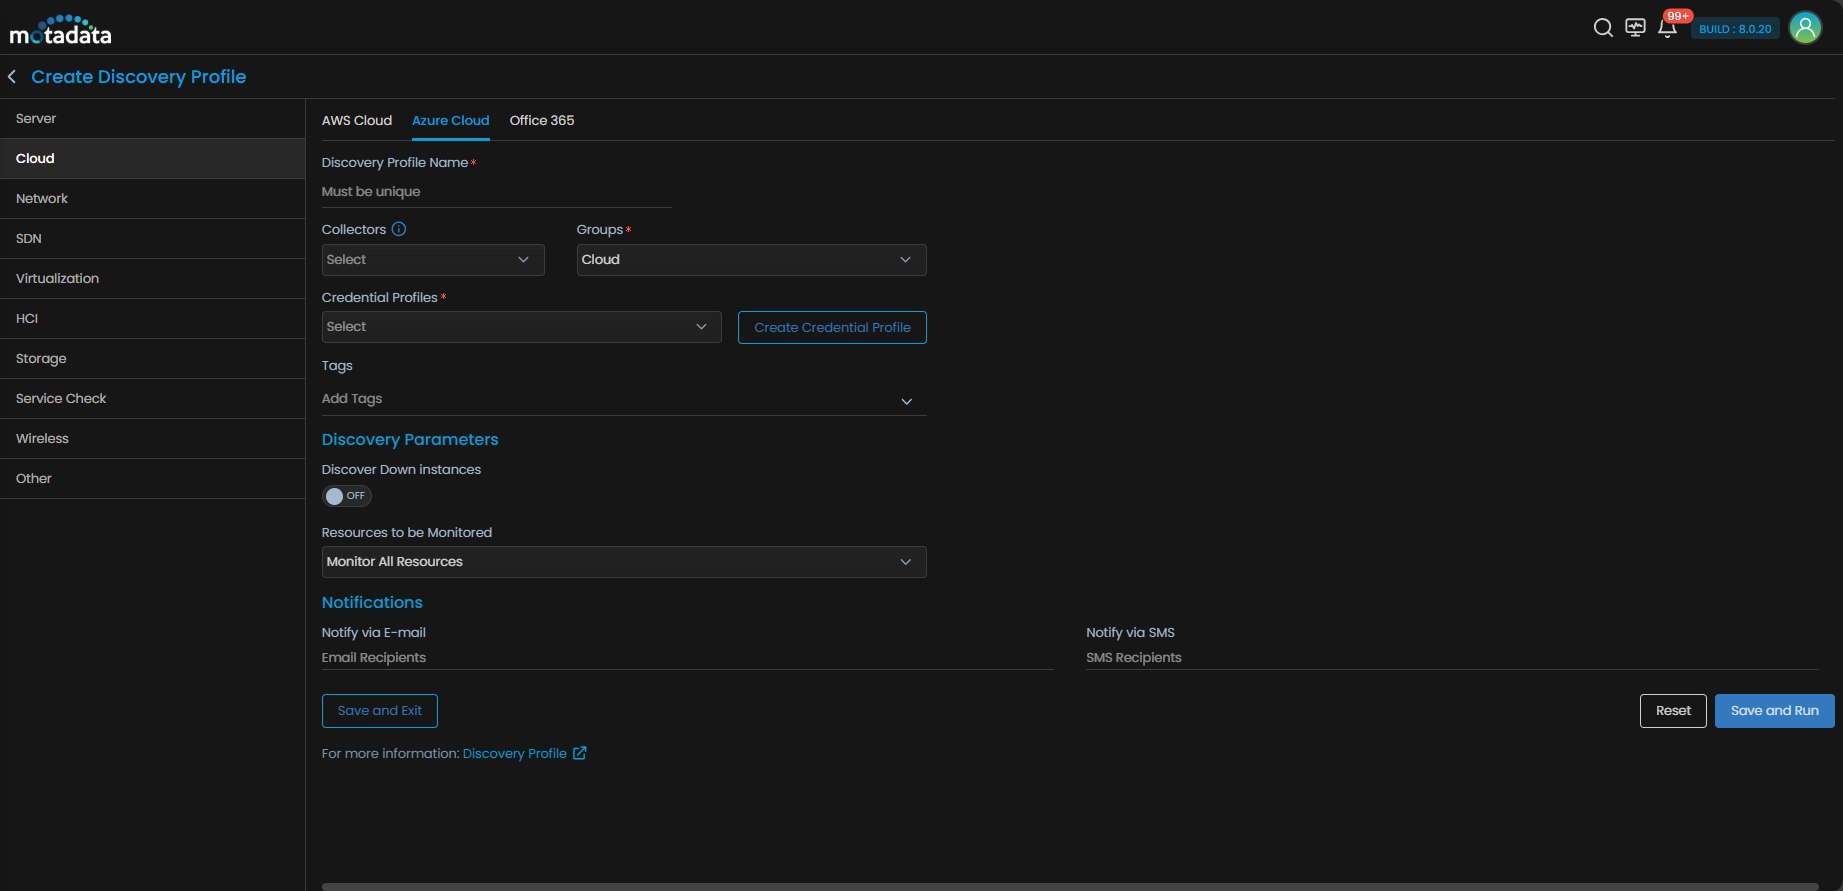
AWS Cloud is selected by default. Select Azure Cloud to switch to Azure.
| Field | What to Enter |
|---|---|
| Discovery Profile Name | A unique name to identify this profile |
| Collectors | One or more Collectors for data collection. If you skip this, ObserveOps selects a Collector automatically. |
| Groups | One or more Groups to assign to provisioned monitors |
| Credential Profile | Select the Azure Cloud credential profile you just created |
| Tags | Tags to assign to discovered devices |
| Discover Down Instances | Set to ON to discover instances even when their services are down. Set to OFF to skip them. |
| Resources to be Monitored | Select Monitor All Resources to monitor everything discovered. Select Monitor Resources Selected By Tags to filter by Azure resource tags. |
| Key/Value | The tag key and value to filter by. Only appears when you select Monitor Resources Selected By Tags. |
| Notify Team | Email addresses, handles, or user profiles to notify when discovery completes |
Select Collectors based on how you want to distribute the monitoring load.
Select Save and Run to save and start discovery immediately. Select Save and Exit to save without running.
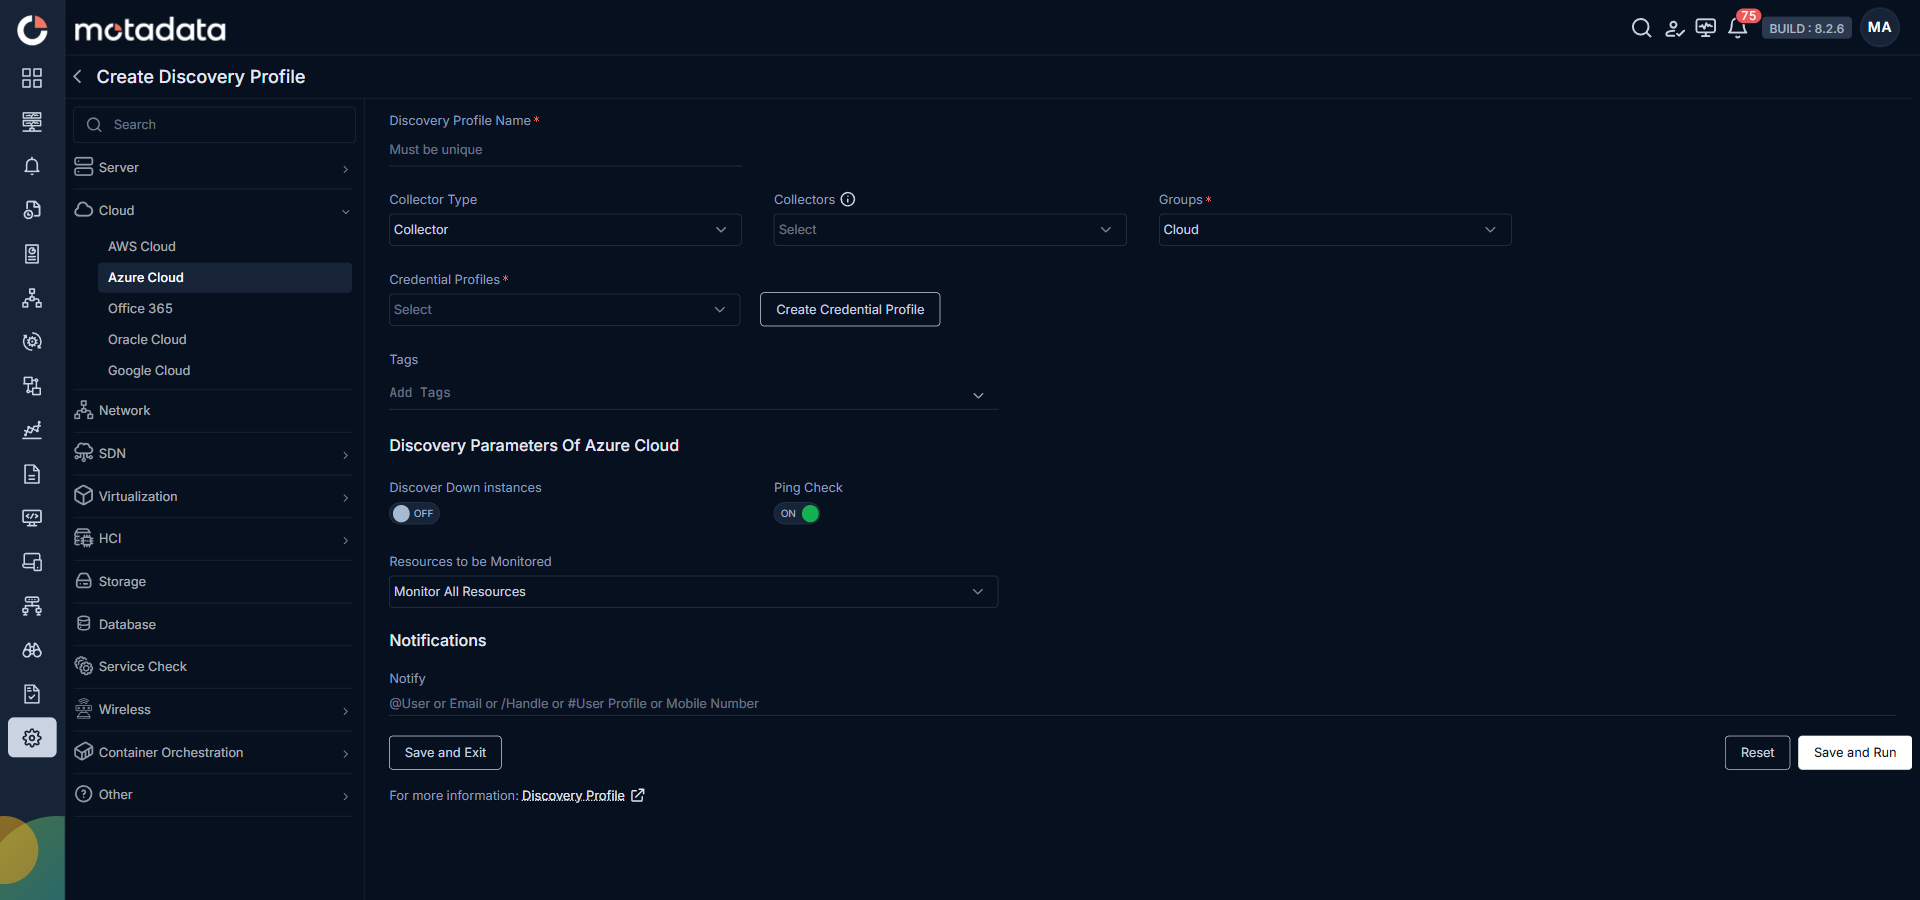
3. Provision the Discovered Devices as Monitors
After discovery starts, ObserveOps connects to your Azure account and scans for resources.
When the run completes, ObserveOps shows all discovered resources. Select the ones you want to add as Monitors.
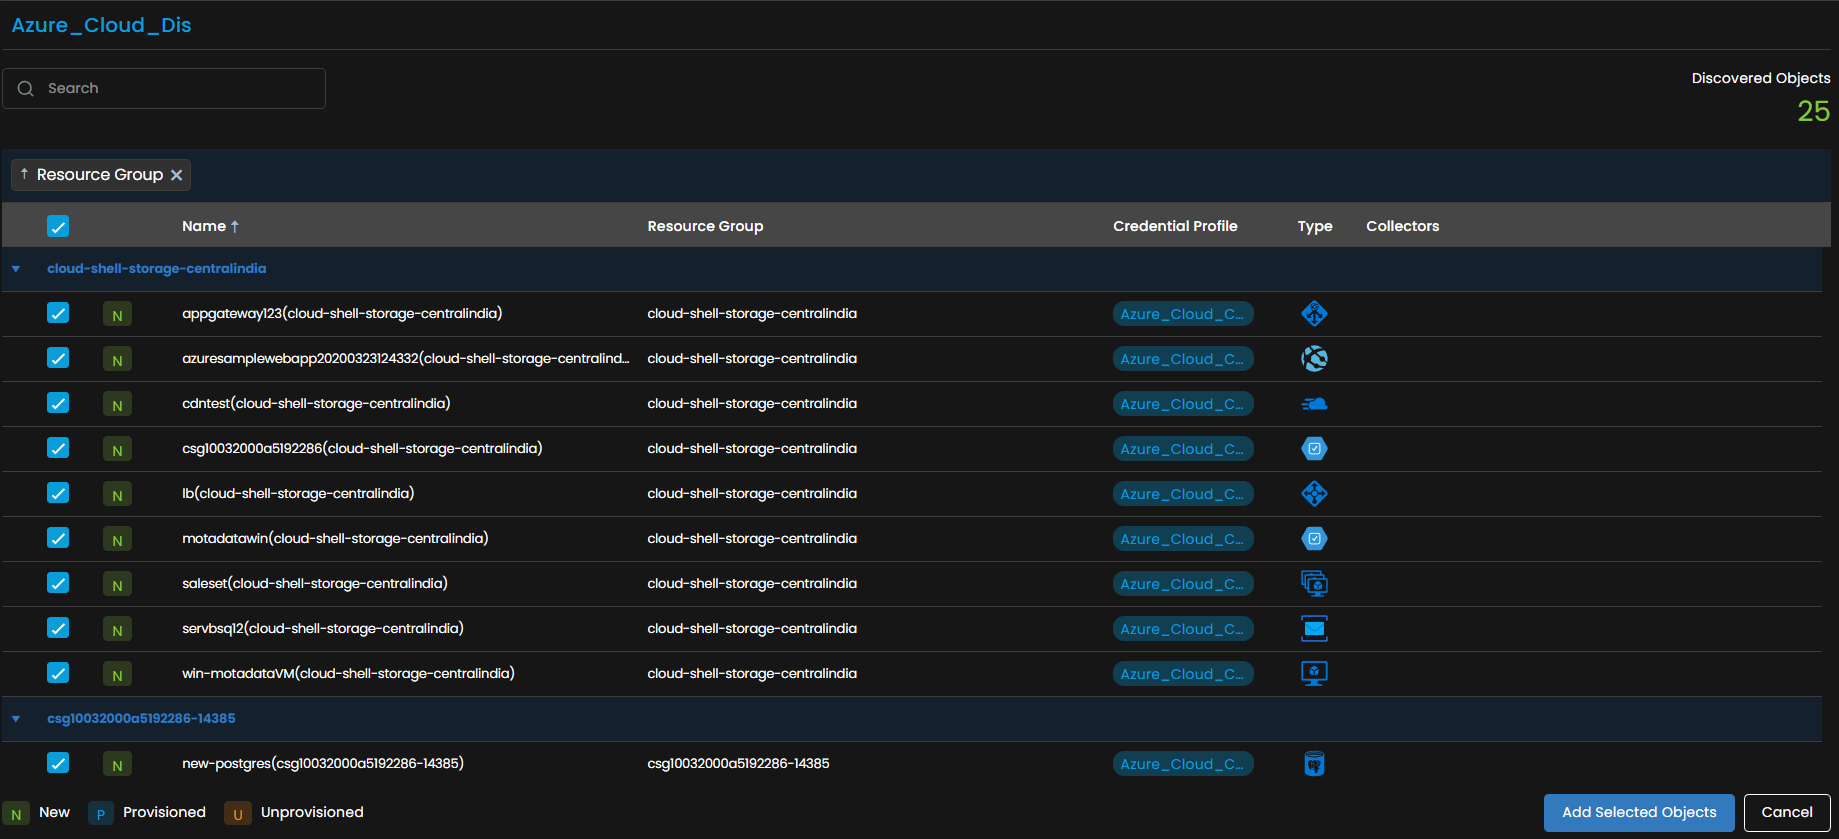
Select Add Selected Objects to provision the selected resources as monitors. ObserveOps now collects metrics continuously.
To view the monitors, go to Menu. Select Monitor. Select Cloud.
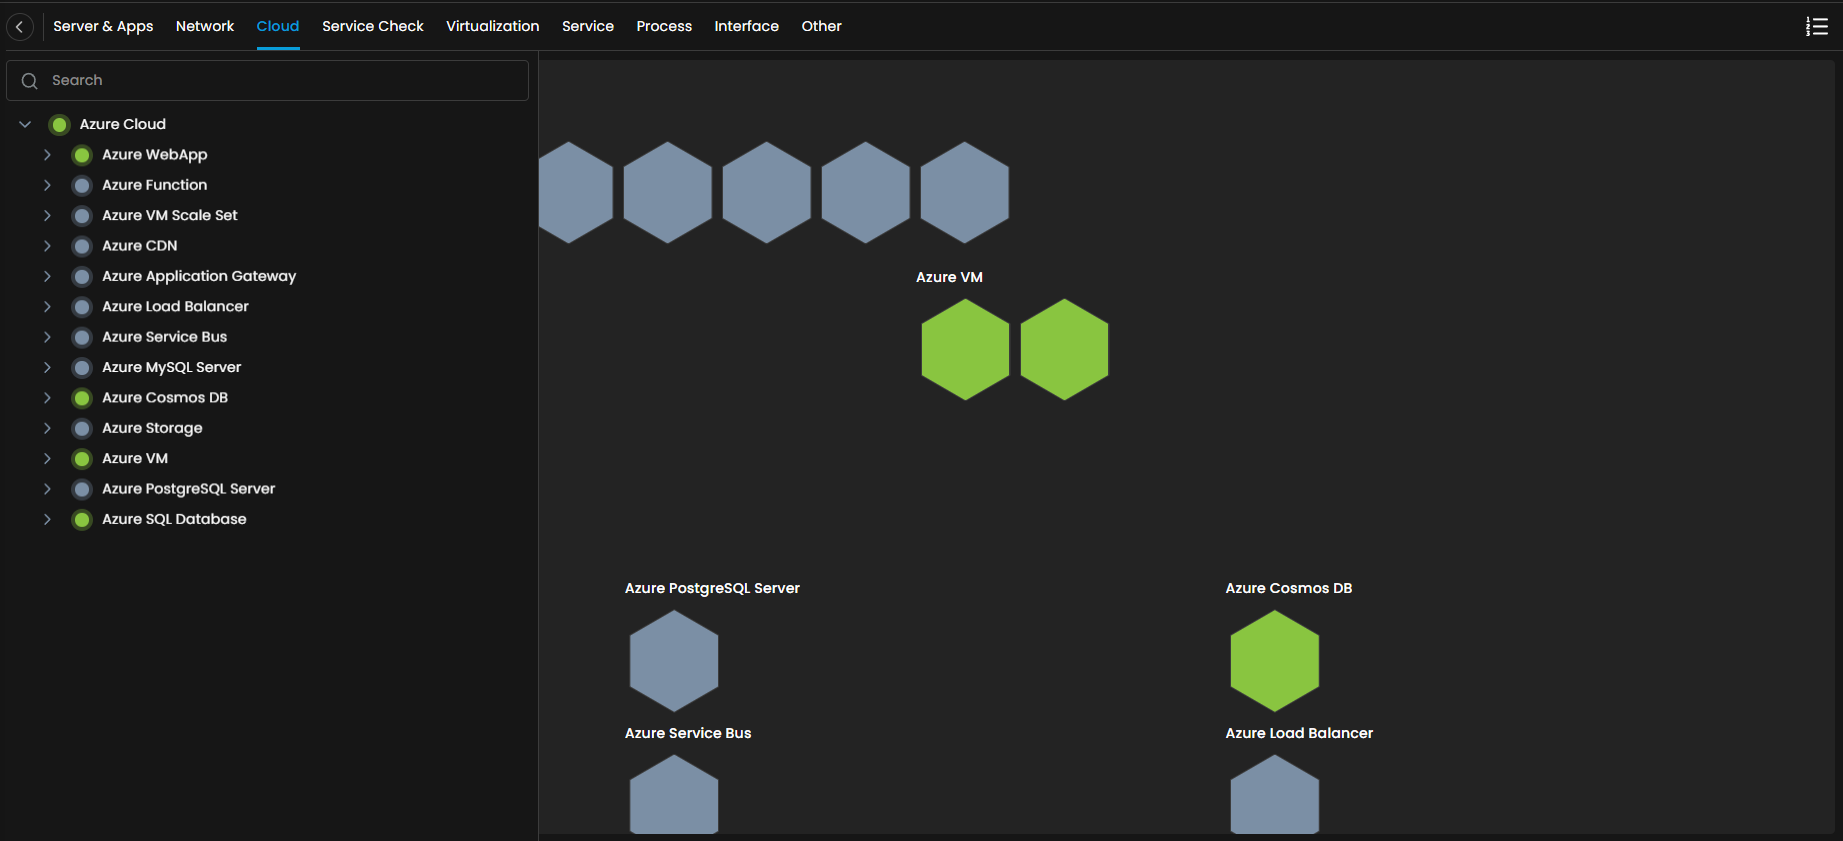
The Azure resources are now added to ObserveOps.
Adding Office 365 Resources for Monitoring
Prerequisites
- You need the Client ID, Tenant ID, and Secret Key of your Office 365 tenant. Refer to the Office 365 integration steps to retrieve these values.
1. Create a Credential Profile
Go to Menu. Select Settings . Select Discovery Settings . Select Credential Profile. The Credential Profile screen opens. Select Create Credential Profile.
The Create Credential Profile form opens.
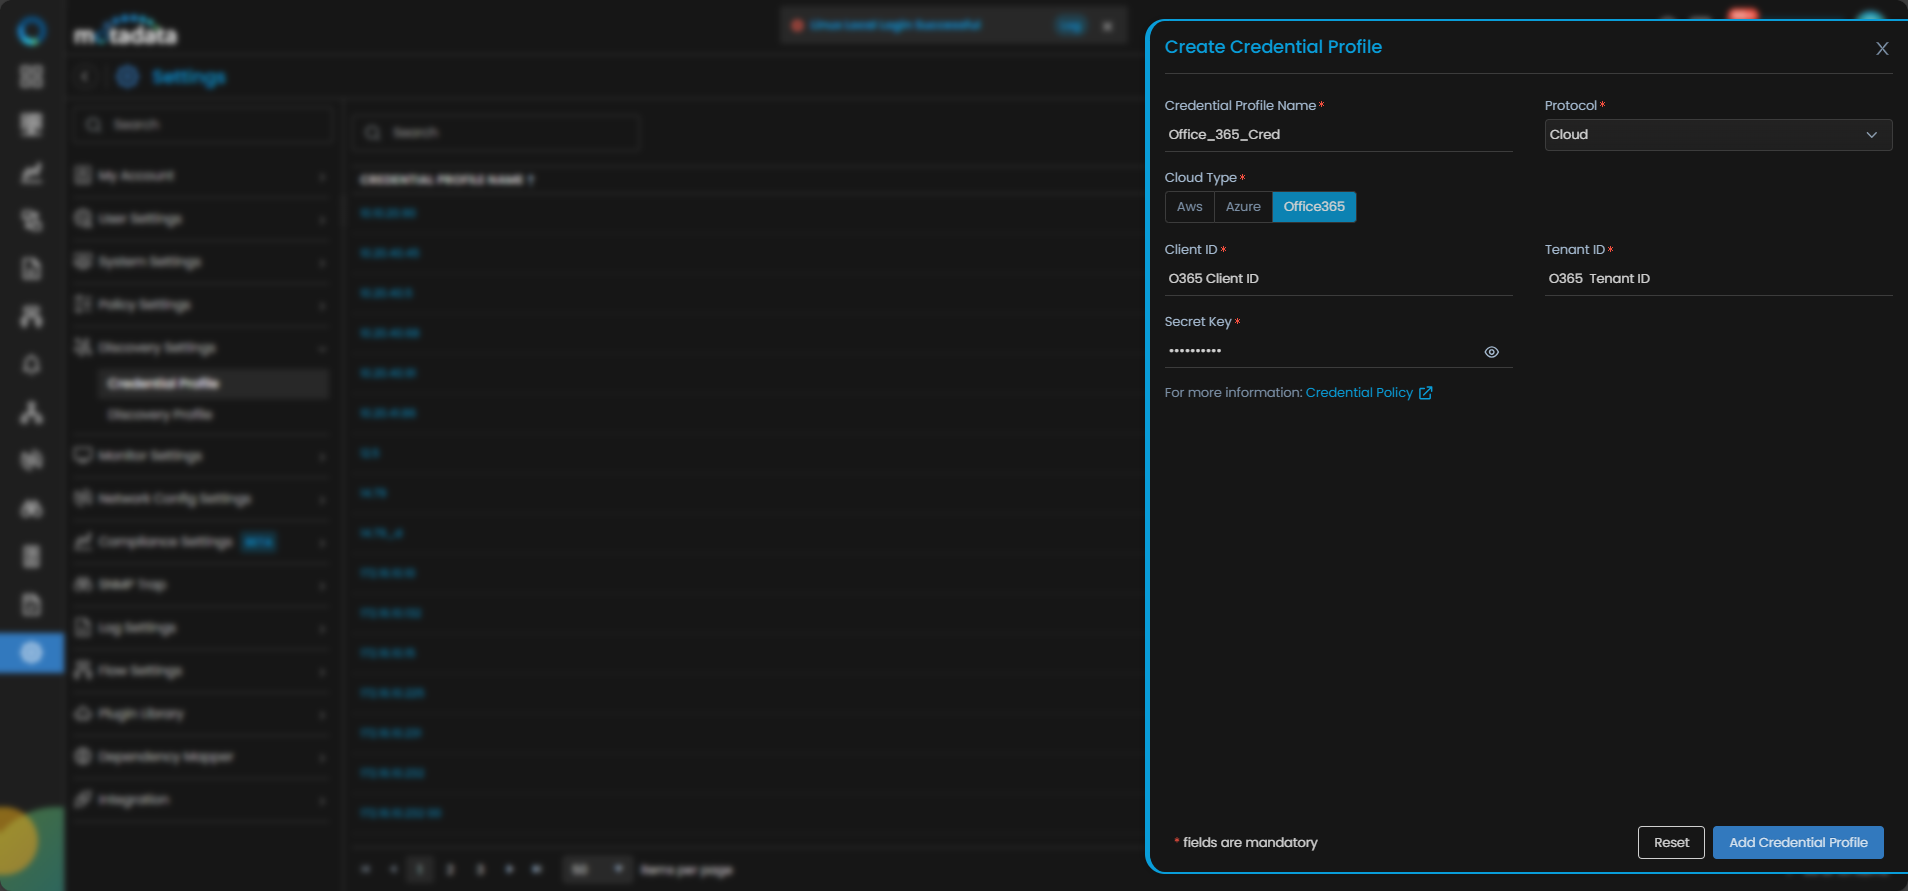
| Field | What to Enter |
|---|---|
| Credential Profile Name | A unique name to identify this profile |
| Protocol | Select Cloud |
| Cloud Type | Select O365 |
| Client ID | The Application (client) ID from your Microsoft Entra app registration |
| Tenant ID | The Directory (tenant) ID of your Microsoft 365 tenant |
| Secret Key | The client secret for the app registration |
Select Reset to clear all fields. Select Add Credential Profile to save.
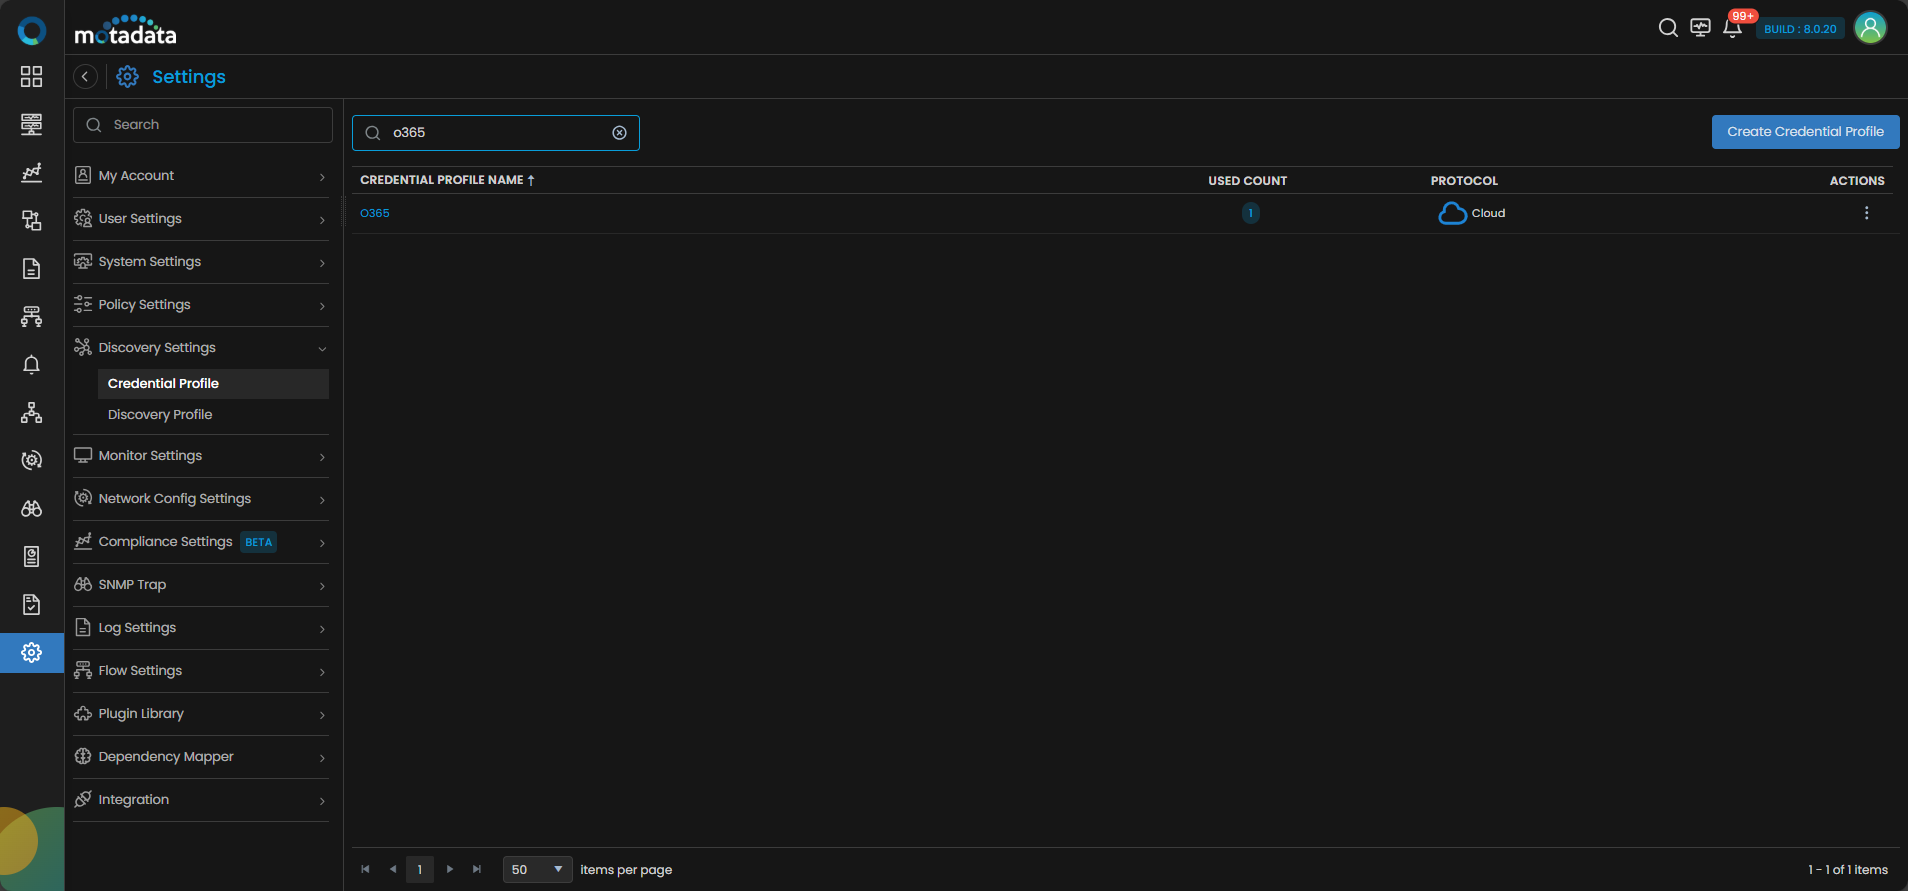
The profile now appears in the Credential Profile list.
2. Create a Discovery Profile
Go to Menu. Select Settings . Select Discovery Settings . Select Discovery Profile. The Discovery Profile screen opens. Select Create Discovery Profile.
The Create Discovery Profile form opens. Select Cloud from the sidebar.
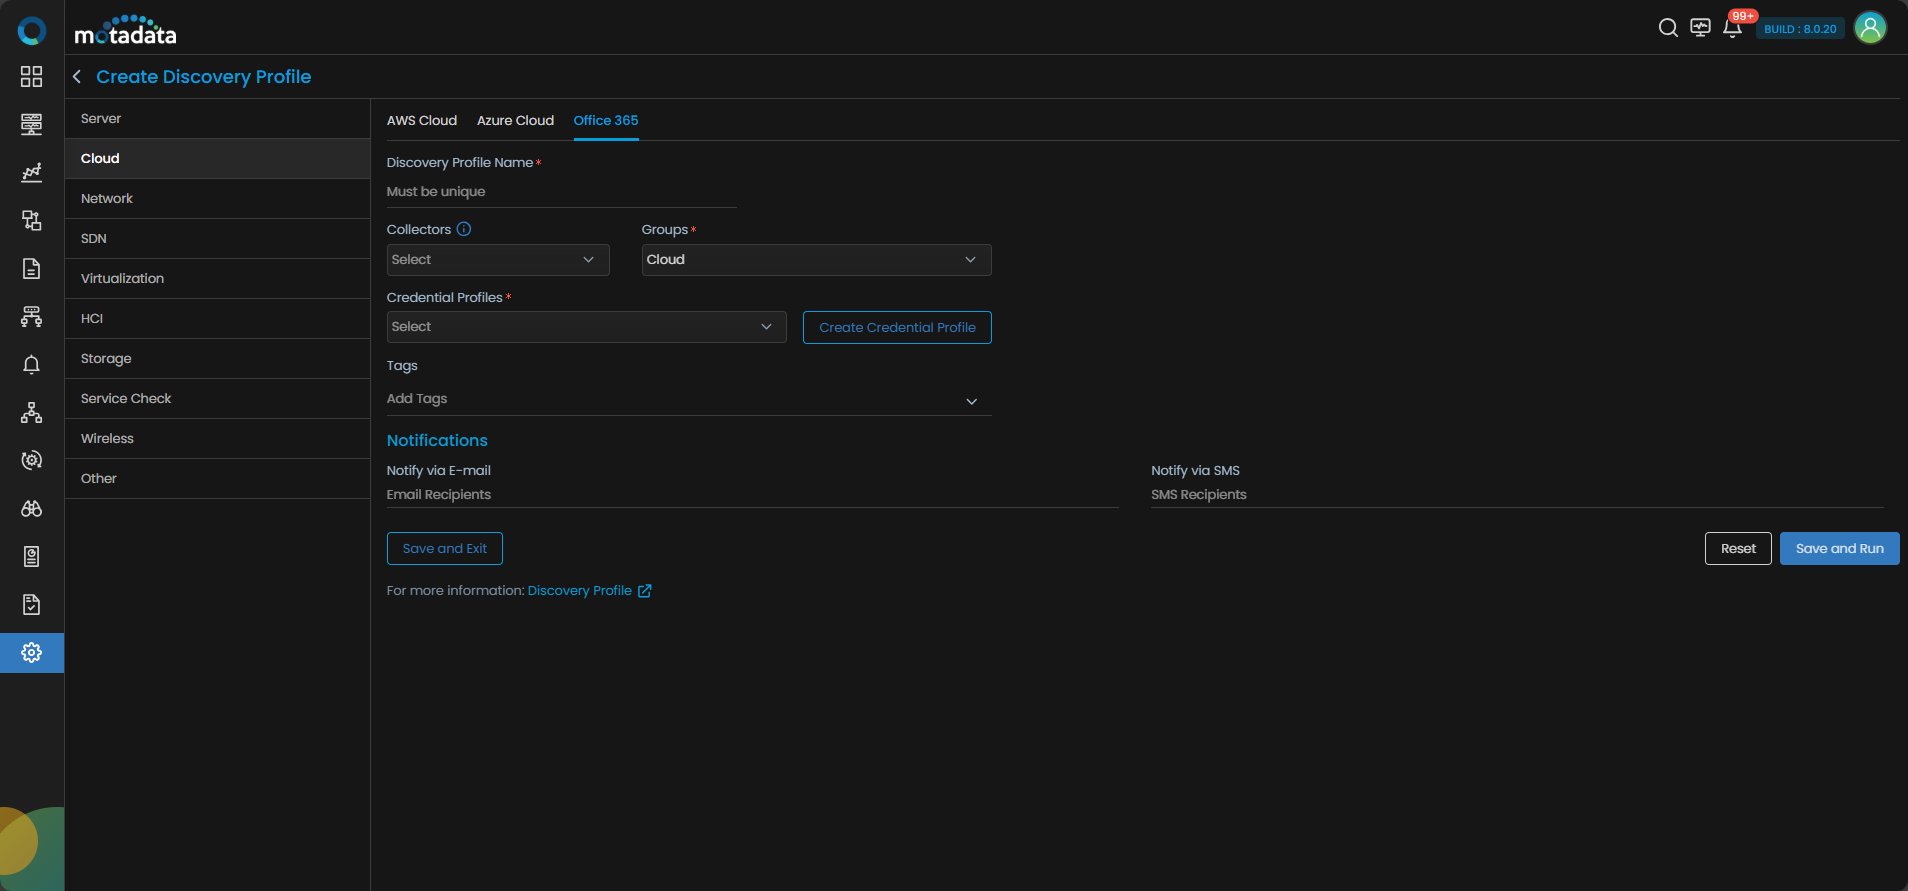
AWS Cloud is selected by default. Select Office 365 to switch to Office 365.
| Field | What to Enter |
|---|---|
| Discovery Profile Name | A unique name to identify this profile |
| Collectors | One or more Collectors for data collection. If you skip this, ObserveOps selects a Collector automatically. |
| Groups | One or more Groups to assign to provisioned monitors |
| Credential Profile | Select the Office 365 credential profile you just created |
| Tags | Tags to assign to discovered devices |
| Notify Team | Email addresses, handles, or user profiles to notify when discovery completes |
Select Collectors based on how you want to distribute the monitoring load.
Select Save and Run to save and start discovery immediately. Select Save and Exit to save without running.
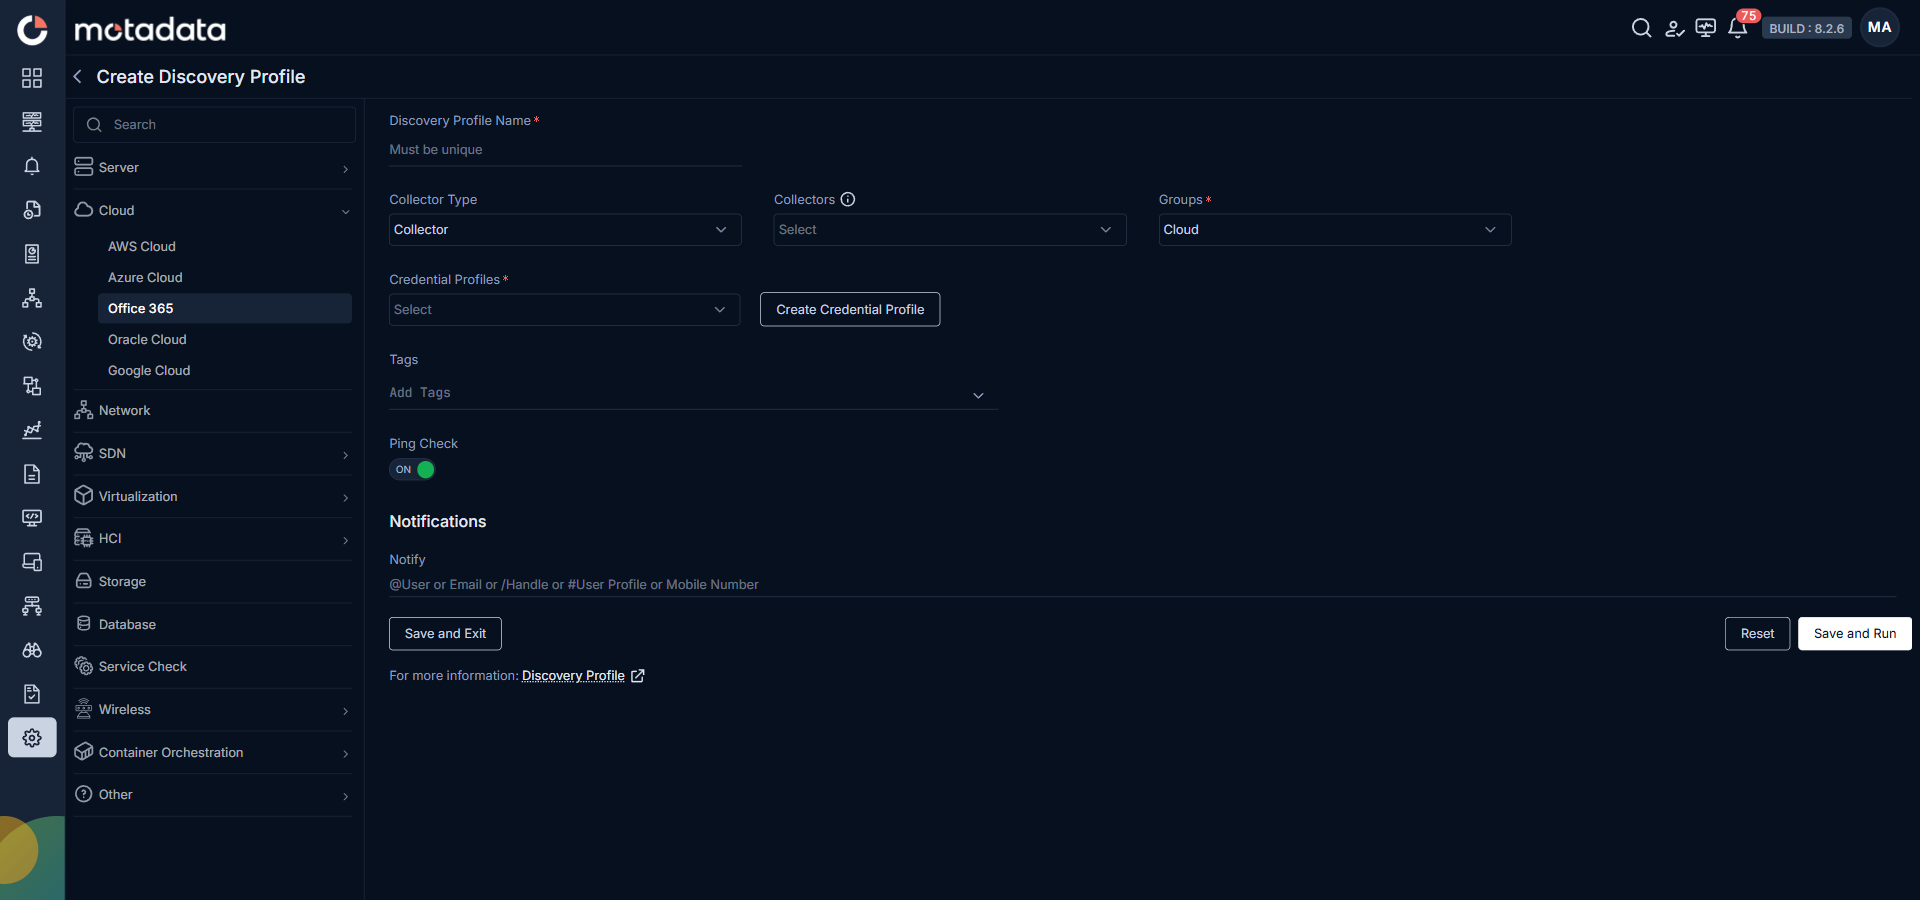
3. Provision the Discovered Devices as Monitors
After discovery starts, ObserveOps connects to your Office 365 tenant and scans for resources.
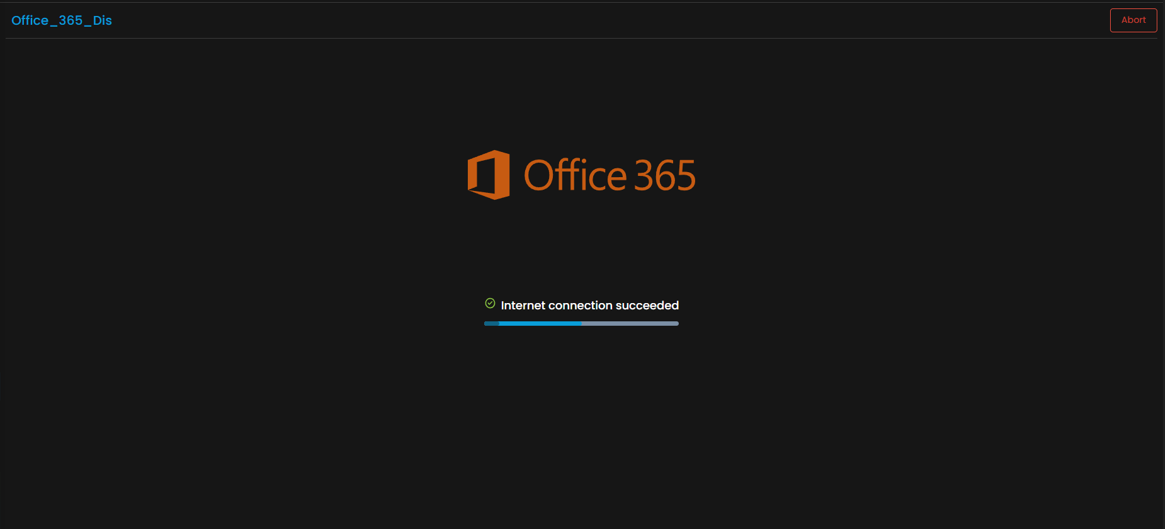
When the run completes, ObserveOps shows all discovered resources. Select the ones you want to add as Monitors.
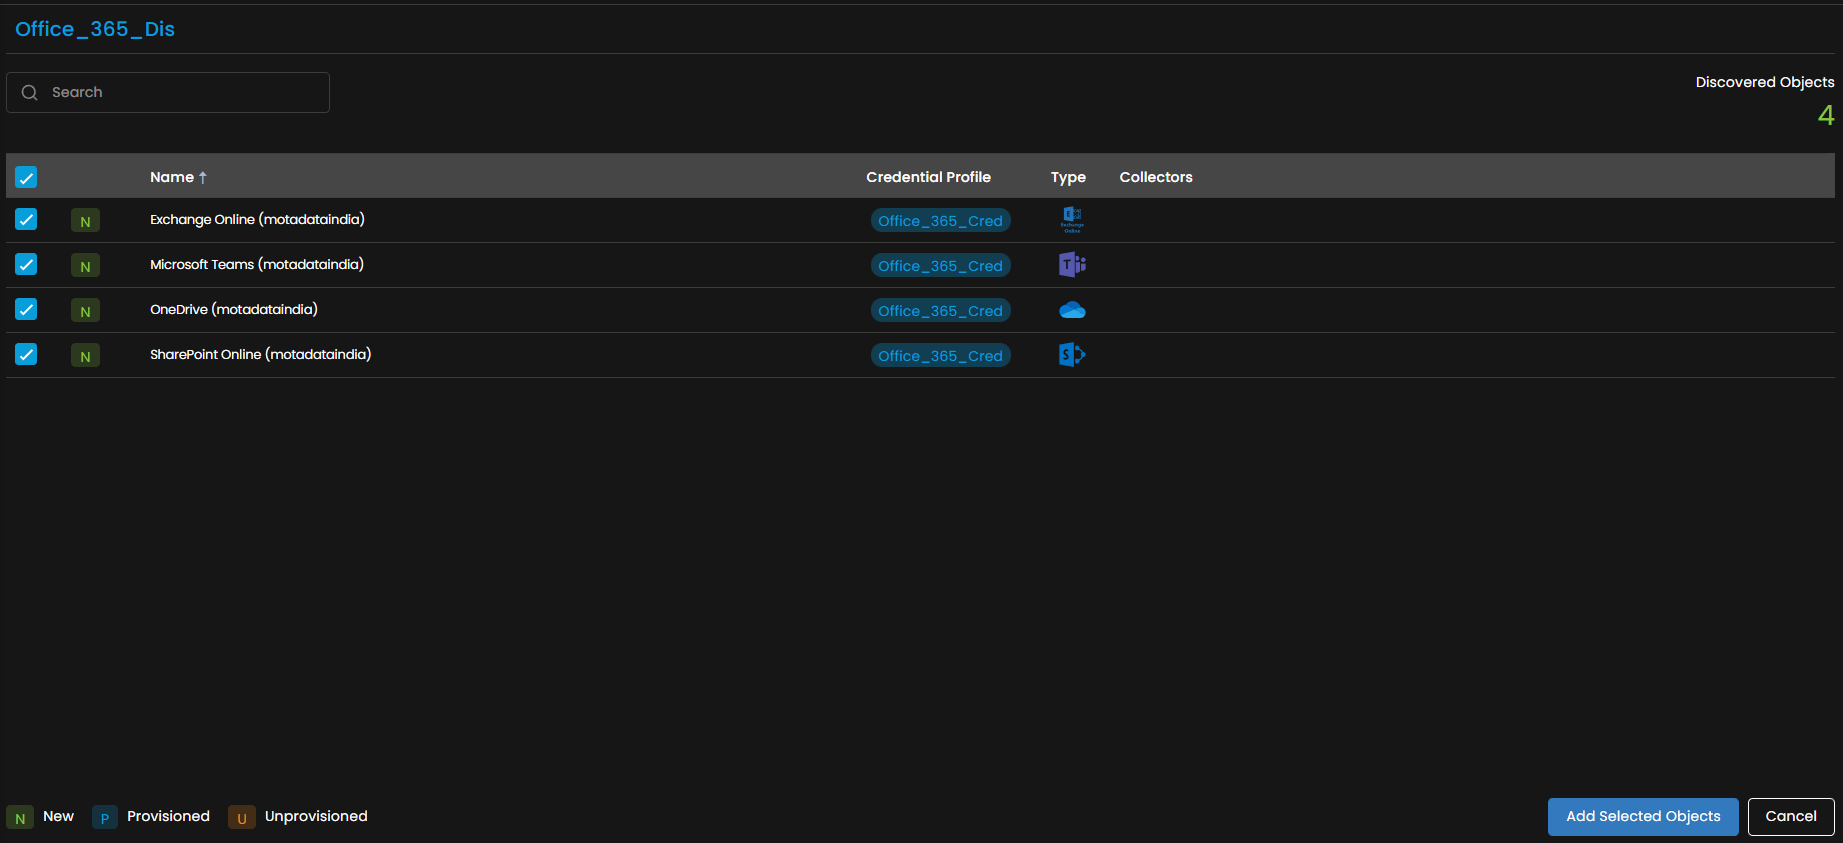
Select Add Selected Objects to provision the selected resources as monitors. ObserveOps now collects metrics continuously.
To view the monitors, go to Menu. Select Monitor. Select Cloud.
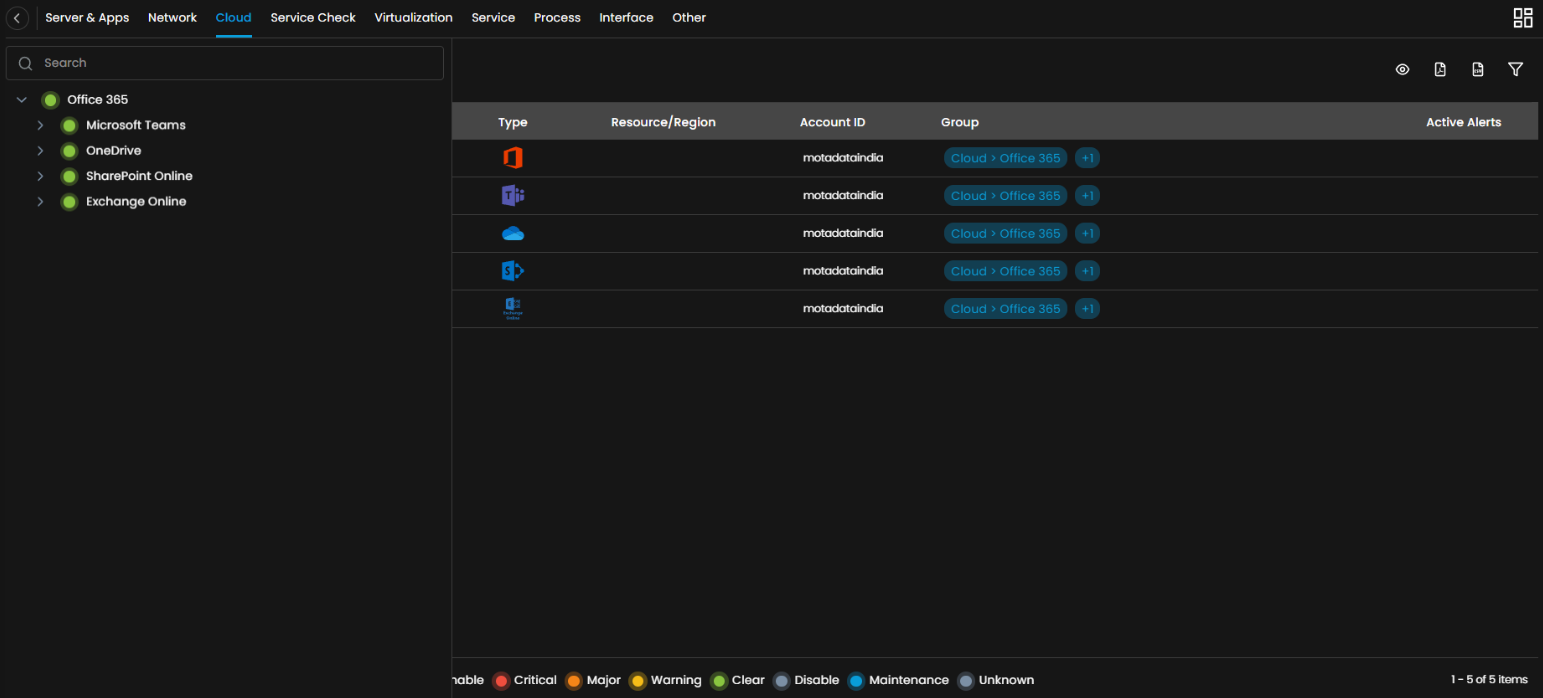
The Office 365 resources are now added to ObserveOps.
Adding Oracle Cloud Resources for Monitoring
Prerequisites
- You need the Tenancy OCID, User OCID, Private Key, and Fingerprint of your Oracle Cloud account.
- Refer to the Oracle Cloud Integration Steps to retrieve these values from the Oracle Cloud Console.
1. Create a Credential Profile
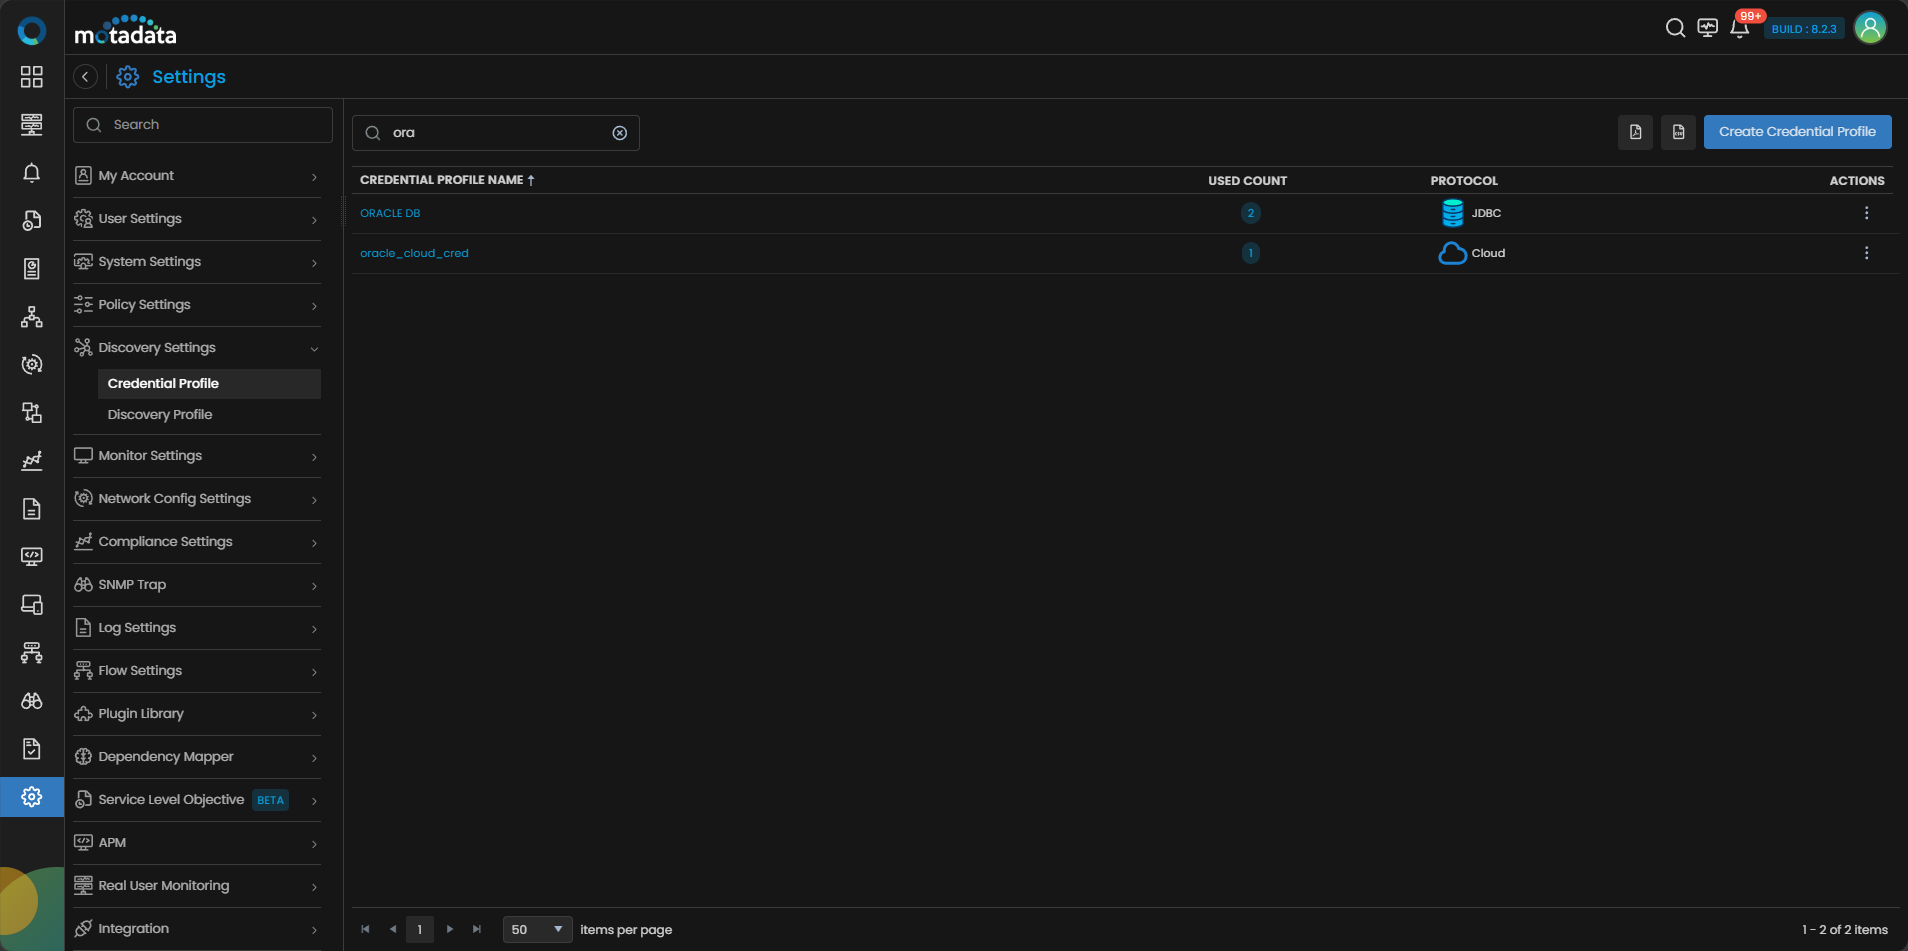
Go to Menu. Select Settings . Select Discovery Settings . Select Credential Profile. The Credential Profile screen opens. Select Create Credential Profile.
The Create Credential Profile form opens.
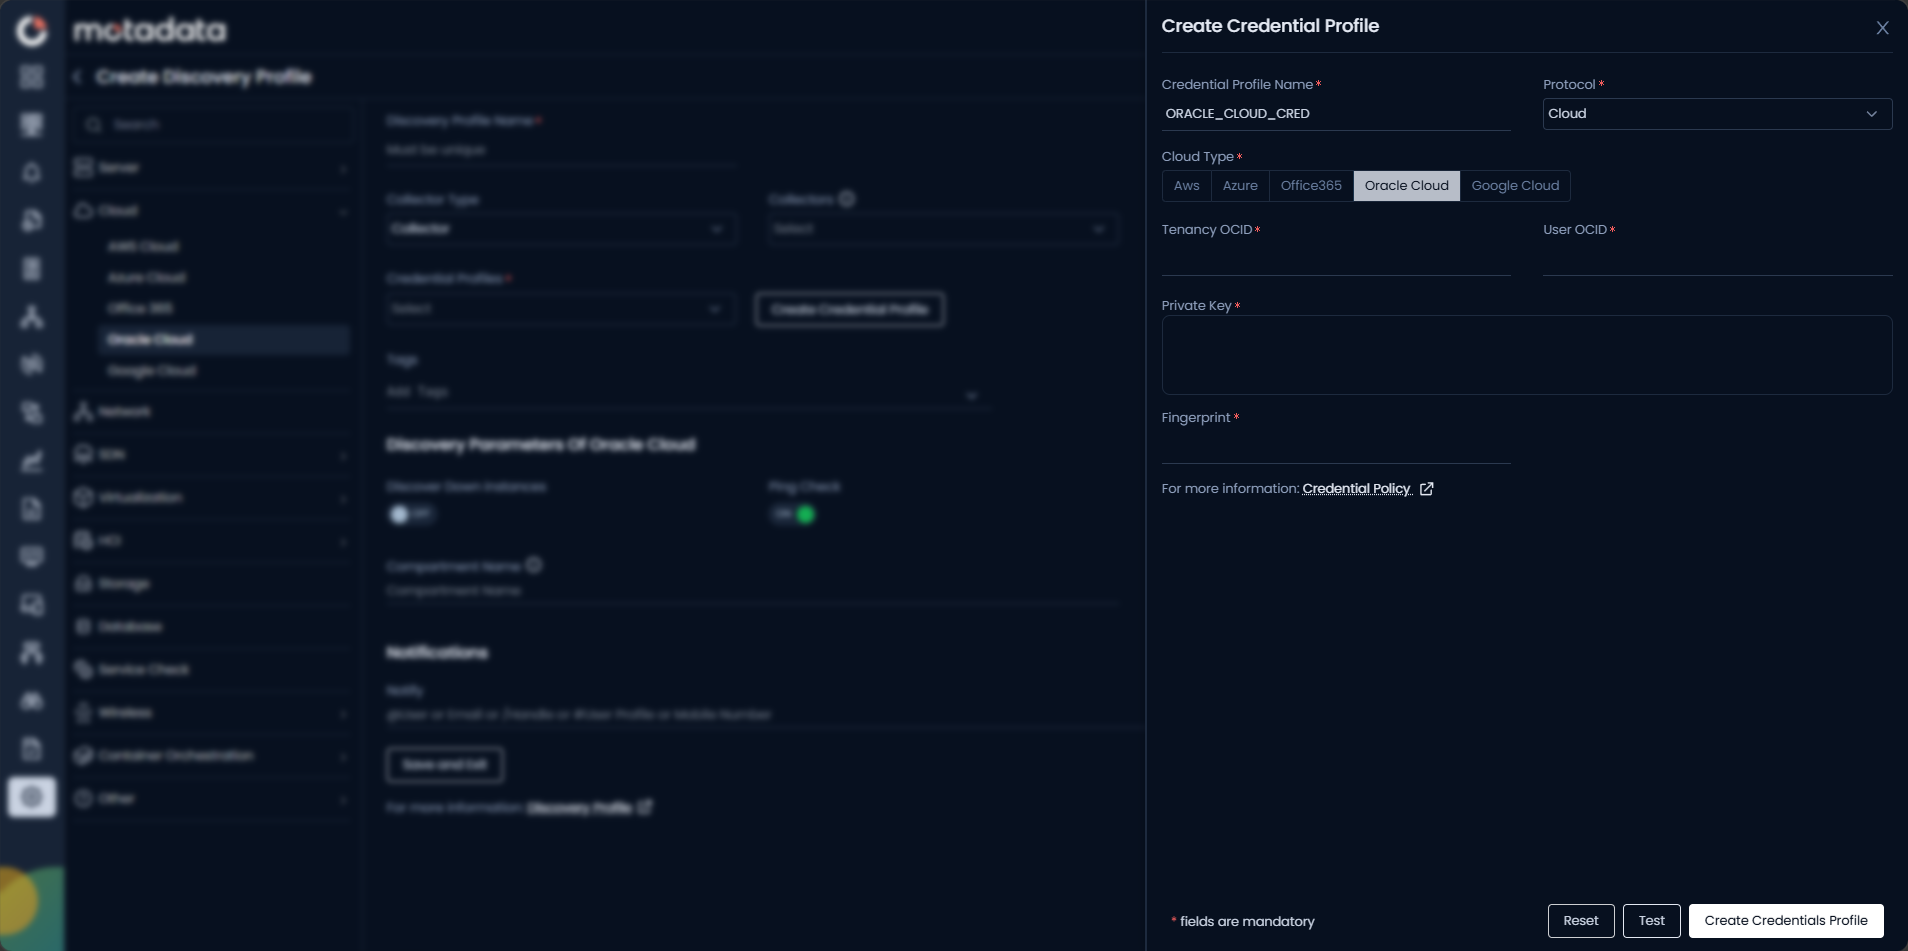
| Field | What to Enter |
|---|---|
| Credential Profile Name | A unique name to identify this profile |
| Protocol | Select Cloud |
| Cloud Type | Select Oracle Cloud |
| Tenancy OCID | The OCID of your Oracle Cloud tenancy |
| User OCID | The OCID of the API-enabled user |
| Private Key | The PEM-format private key associated with the user |
| Fingerprint | The fingerprint of the uploaded public key |
Select Test to verify the credentials. Select Reset to clear all fields. Select Create Credential Profile to save.
The profile now appears in the Credential Profile list.
2. Create a Discovery Profile
Go to Menu. Select Settings . Select Discovery Settings . Select Discovery Profile. The Discovery Profile screen opens. Select Create Discovery Profile.
The Create Discovery Profile form opens. Select Cloud from the sidebar. Select Oracle Cloud.
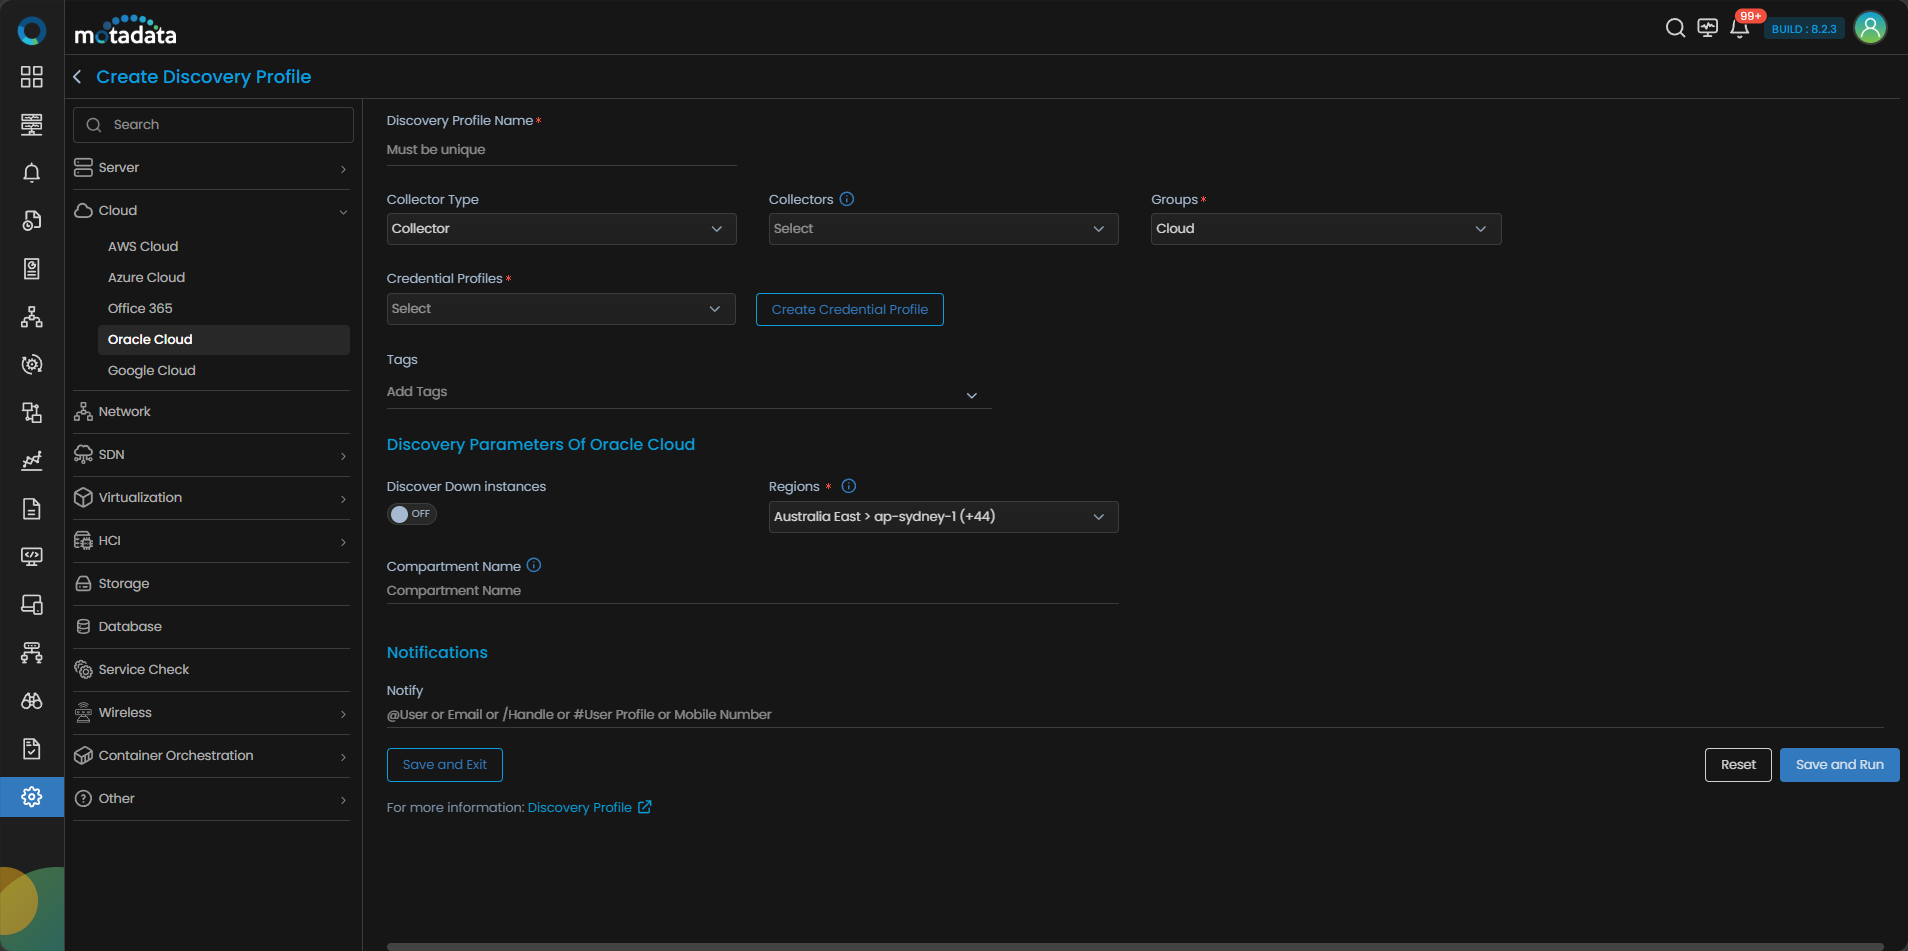
| Field | What to Enter |
|---|---|
| Discovery Profile Name | A unique name to identify this profile |
| Collectors | One or more Collectors for data collection. If you skip this, ObserveOps selects a Collector automatically. |
| Groups | One or more Groups to assign to provisioned monitors |
| Credential Profile | Select the Oracle Cloud credential profile you just created |
| Tags | Tags to assign to discovered devices |
| Discover Down Instances | Set to ON to discover instances even when their services are down. Set to OFF to skip them. |
| Regions | Select the OCI regions to discover Oracle services in |
| Compartment Name | Enter compartment names to limit discovery to specific compartments. Leave blank to discover all compartments. |
| Notify Team | Email addresses, handles, or user profiles to notify when discovery completes |
Select Collectors based on how you want to distribute the monitoring load.
Select Save and Run to save and start discovery immediately. Select Save and Exit to save without running.
3. Provision the Discovered Devices as Monitors
After the discovery run completes, ObserveOps shows all discovered resources. Select the ones you want to add as Monitors.
Select Add Selected Objects to provision the selected resources as monitors. ObserveOps now collects metrics continuously.
To view the monitors, go to Menu. Select Monitor. Select Cloud.
The Oracle Cloud resources are now added to ObserveOps.
Adding GCP Resources for Monitoring
Prerequisites
- You need the Client ID, Client Secret, Authentication URL, Token URL, and Scope of your GCP account.
- Refer to the GCP Cloud Integration Steps to retrieve these values from the GCP Console.
1. Create a Credential Profile
Go to Menu. Select Settings . Select Discovery Settings . Select Credential Profile. The Credential Profile screen opens. Select Create Credential Profile.
The Create Credential Profile form opens.
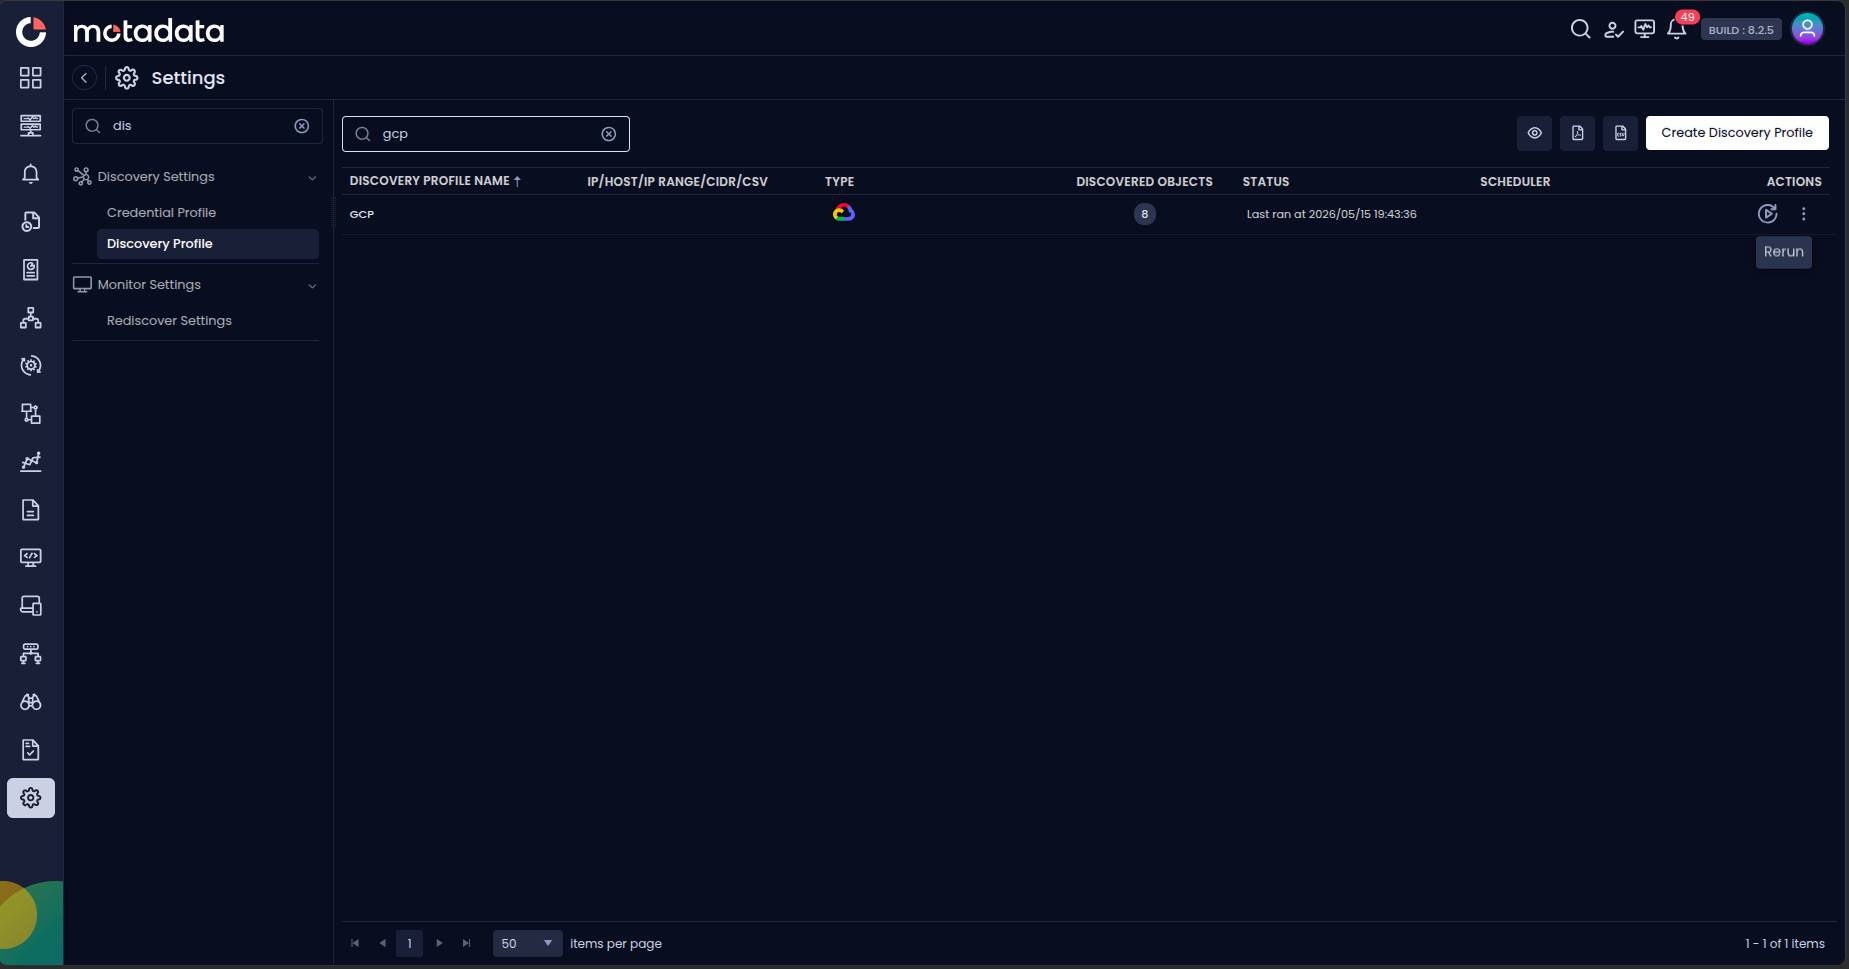
| Field | What to Enter |
|---|---|
| Credential Profile Name | A unique name to identify this profile |
| Protocol | Select Cloud |
| Cloud Type | Select Google Cloud |
| Client ID | The OAuth 2.0 client ID from the GCP Console |
| Client Secret | The client secret for the OAuth 2.0 application |
| Authentication URL | The OAuth 2.0 authorization endpoint URL |
| Token URL | The OAuth 2.0 token endpoint URL |
| Scope | The GCP API scopes required for monitoring |
Select Test to verify the credentials. Select Reset to clear all fields. Select Create Credential Profile to save.
The profile now appears in the Credential Profile list.
2. Create a Discovery Profile
Go to Menu. Select Settings . Select Discovery Settings . Select Discovery Profile. The Discovery Profile screen opens. Select Create Discovery Profile.
The Create Discovery Profile form opens. Select Cloud from the sidebar. Select GCP Cloud.
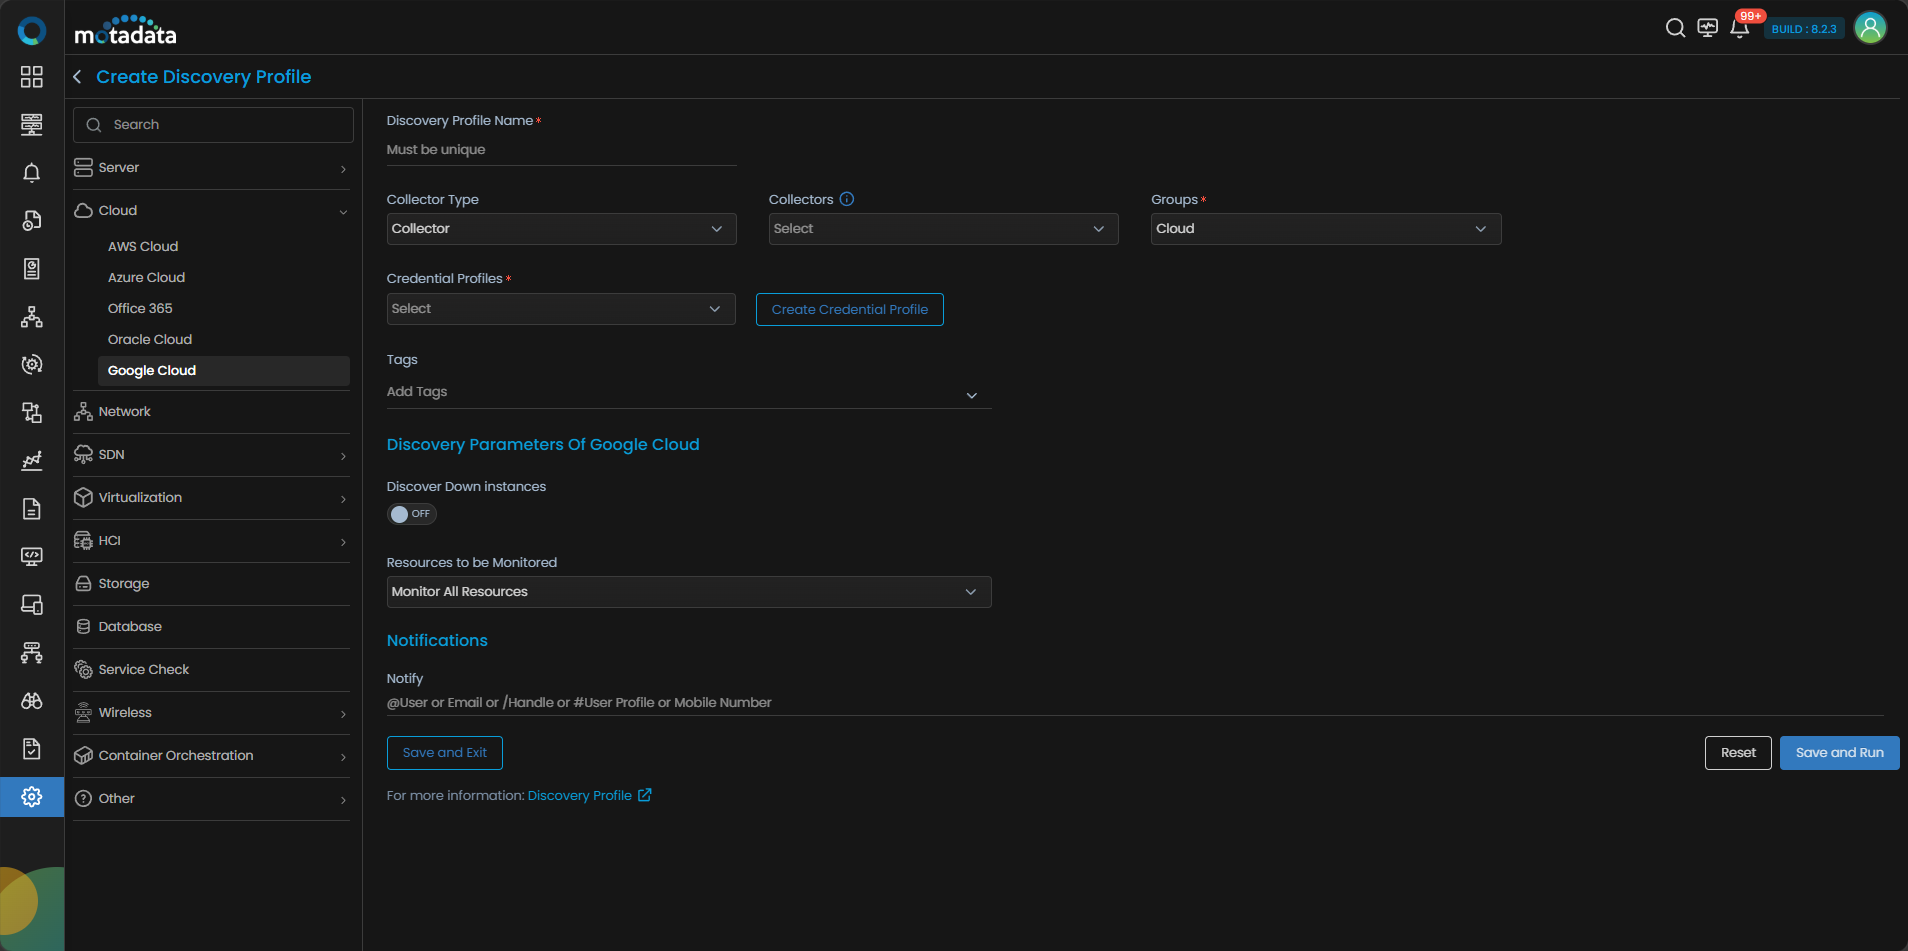
| Field | What to Enter |
|---|---|
| Discovery Profile Name | A unique name to identify this profile |
| Collectors | One or more Collectors for data collection. If you skip this, ObserveOps selects a Collector automatically. |
| Groups | One or more Groups to assign to provisioned monitors |
| Credential Profile | Select the GCP Cloud credential profile you just created |
| Tags | Tags to assign to discovered devices |
| Discover Down Instances | Set to ON to discover instances even when their services are down. Set to OFF to skip them. |
| Resources to be Monitored | Select Monitor All Resources to monitor everything discovered. Select Monitor Resources Selected By Tags to filter by GCP resource labels. |
| Key / Value | The label key and value to filter by. Only appears when you select Monitor Resources Selected By Tags. |
| Notify Team | Email addresses, handles, or user profiles to notify when discovery completes |
Select Collectors based on how you want to distribute the monitoring load.
Select Save and Run to save and start discovery immediately. Select Save and Exit to save without running.
3. Provision the Discovered Devices as Monitors
After the discovery run completes, ObserveOps shows all discovered resources.
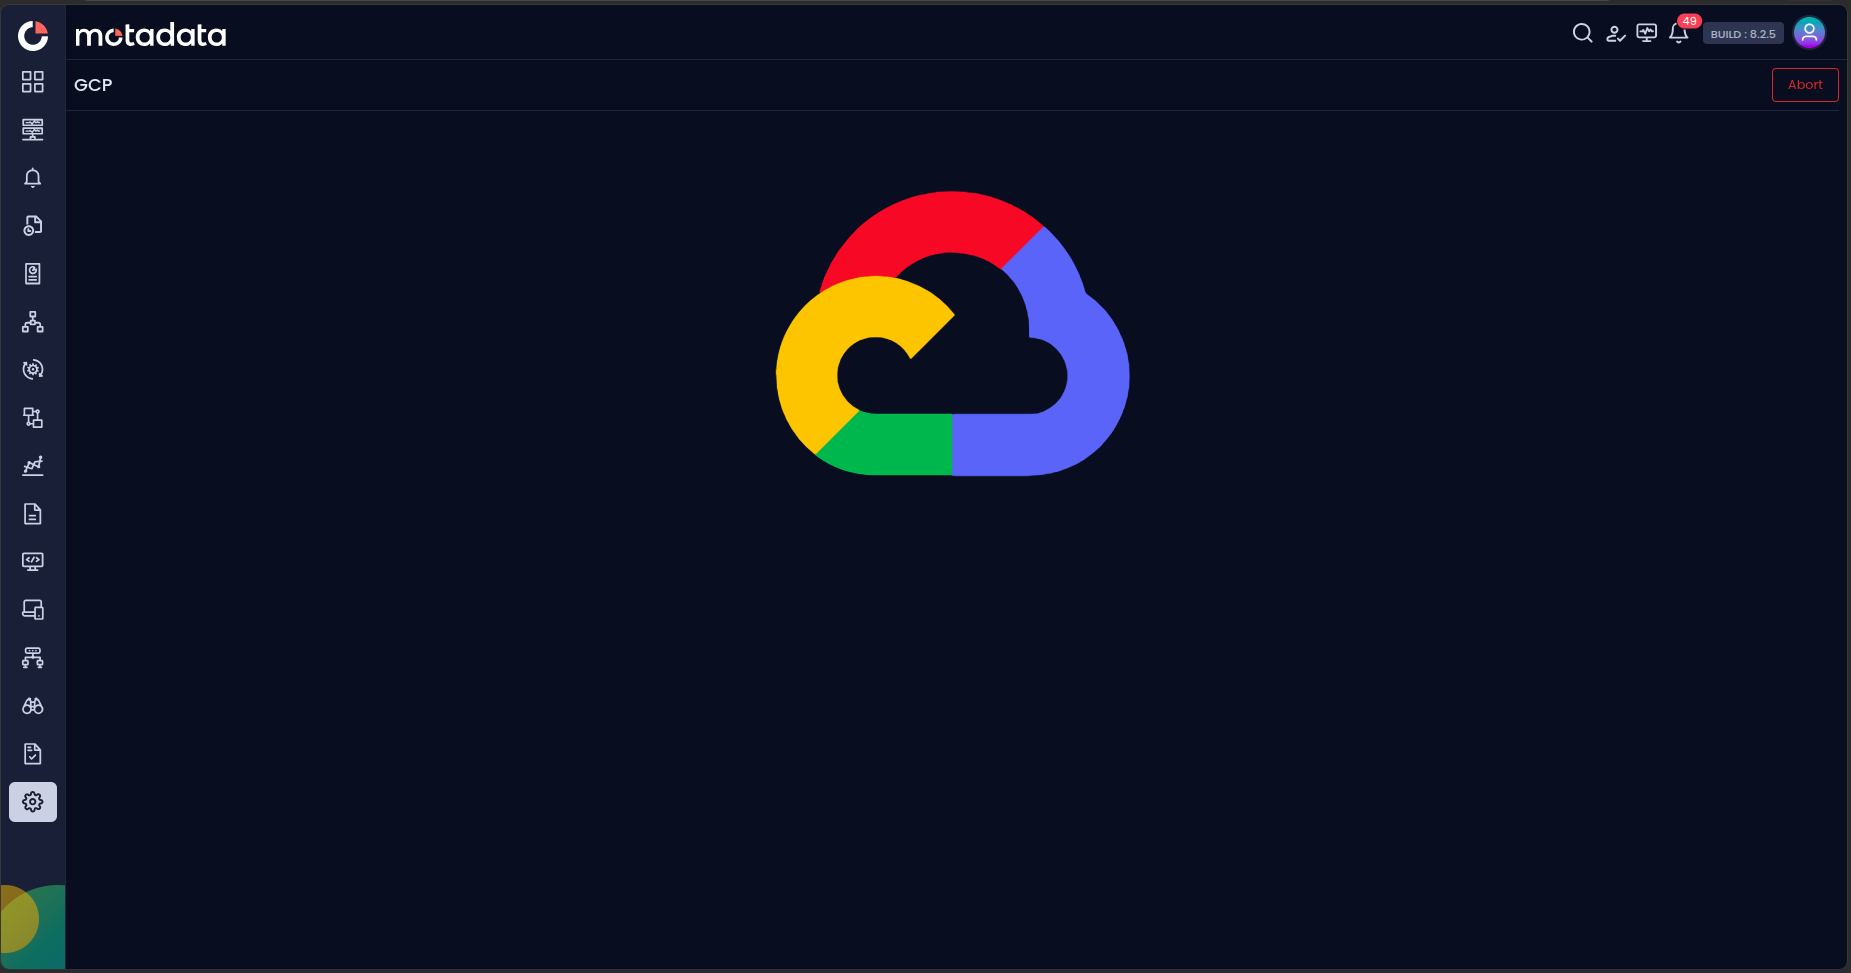
Select the ones you want to add as Monitors.
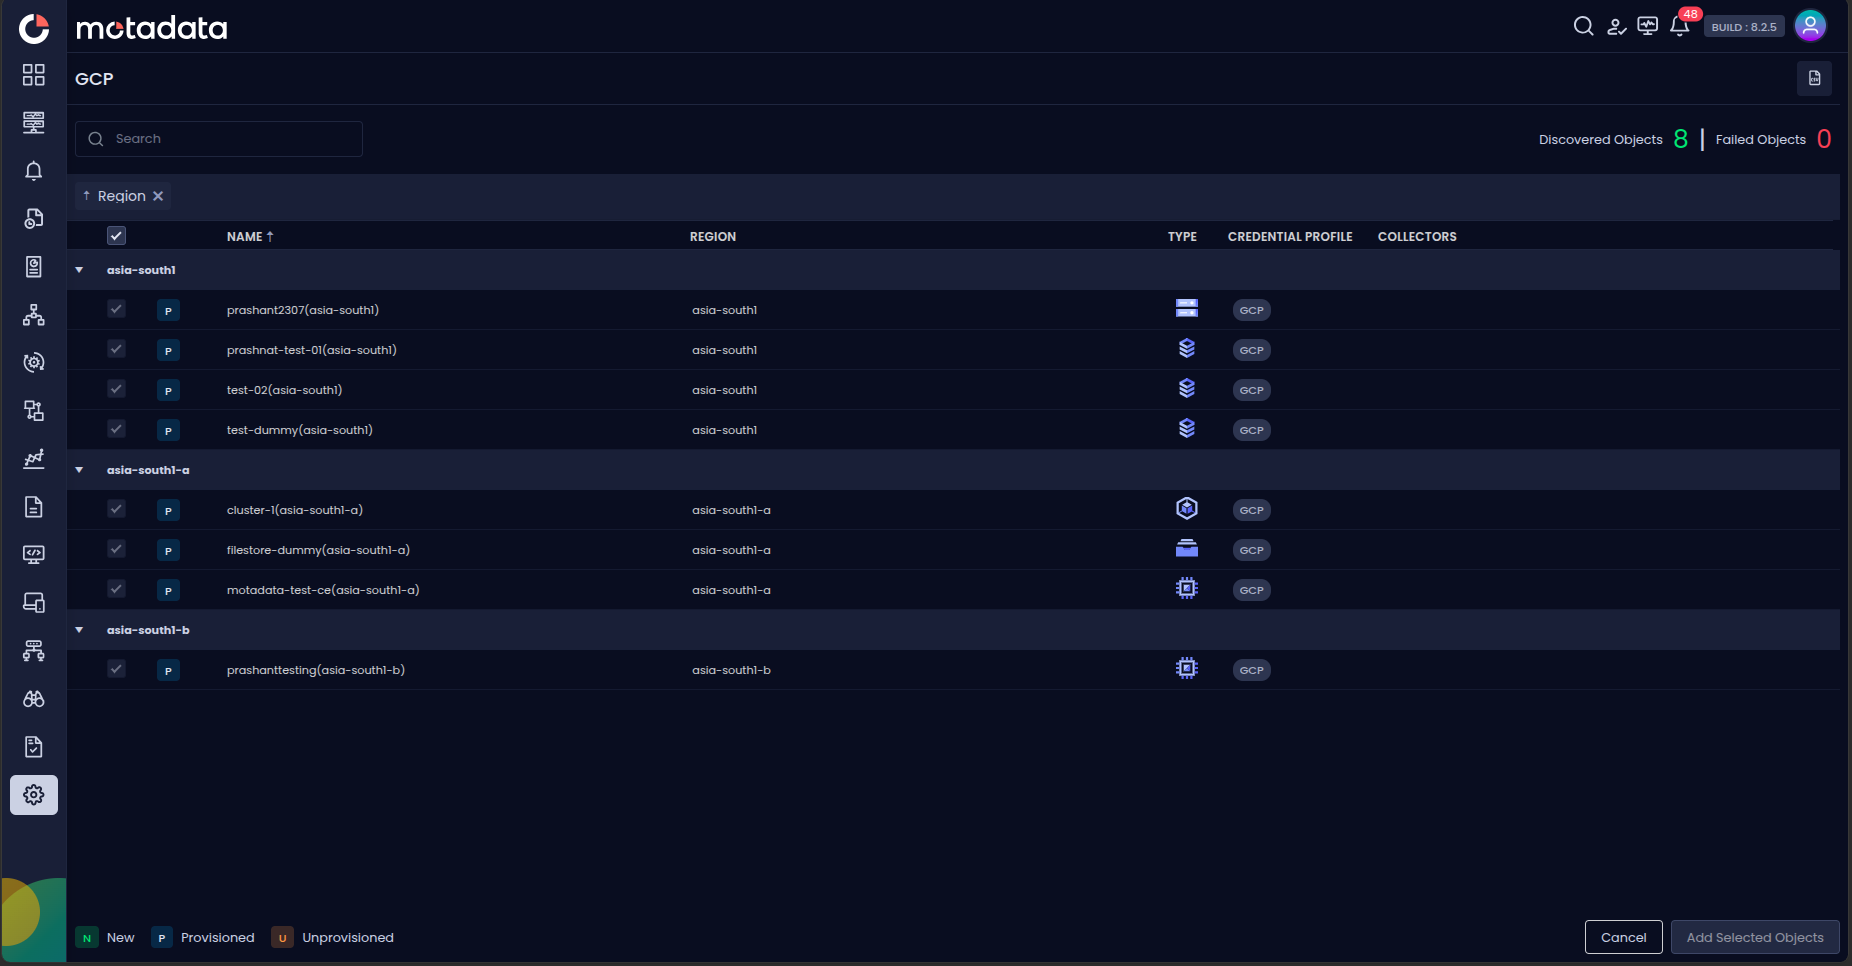
Select Add Selected Objects to provision the selected resources as monitors. ObserveOps now collects metrics continuously.
To view the monitors, go to Menu. Select Monitor. Select Cloud.
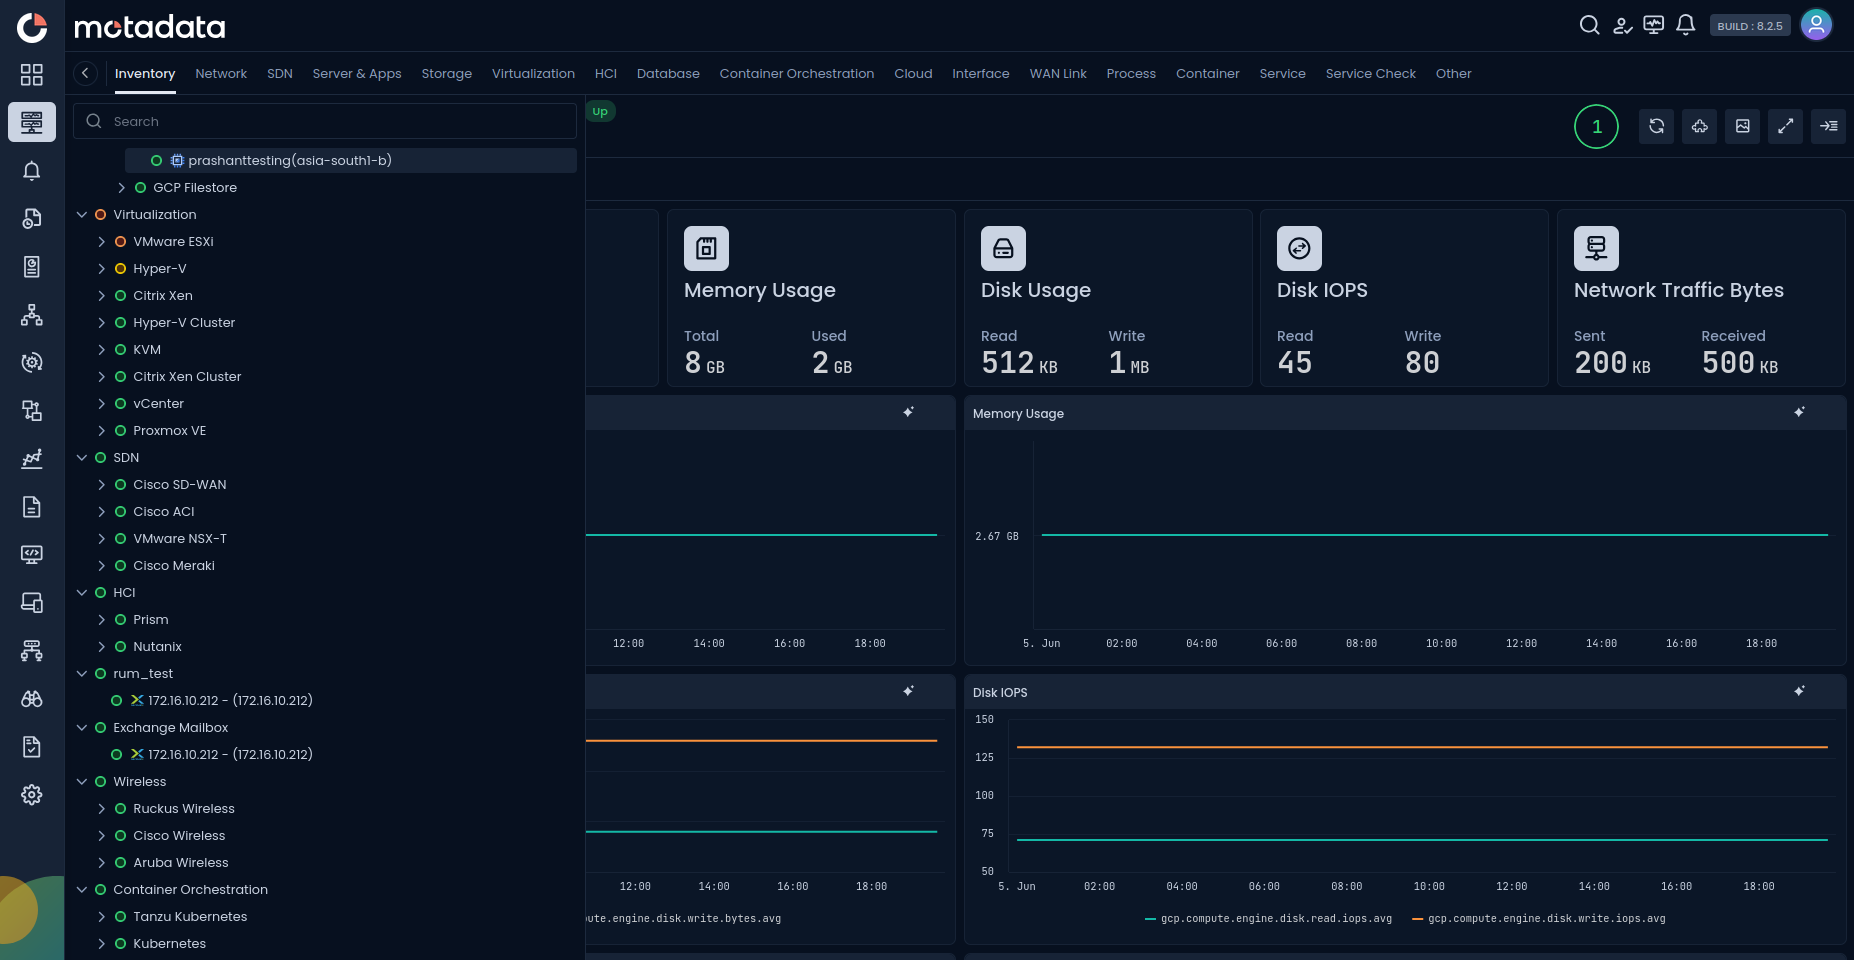
The GCP Cloud resources are now added to ObserveOps.