11.7. Managing Asset Groups
Motadata allows you to categorize Assets in the CMDB in to groups. Groups are a convenient way to compartmentalize Assets based on certain similarities. For example; you can have an Asset Group called Network for your network devices.
One benefit of having Asset Groups is that you can mark non-Software Assets for notification by adding them to a group and mentioning the group while adding subscribers for the notification.
11.7.1. Adding an Asset Group
You have to first create Groups and then add Assets to them.
To Create an Asset Group:
Note
This operation requires Admin rights.
Go to Asset List View.
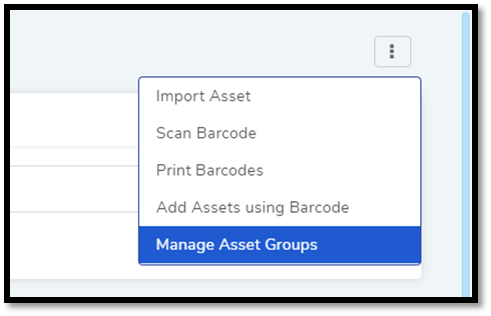
Click on the Action Menu and select Manage Asset Groups from the pop-up menu.

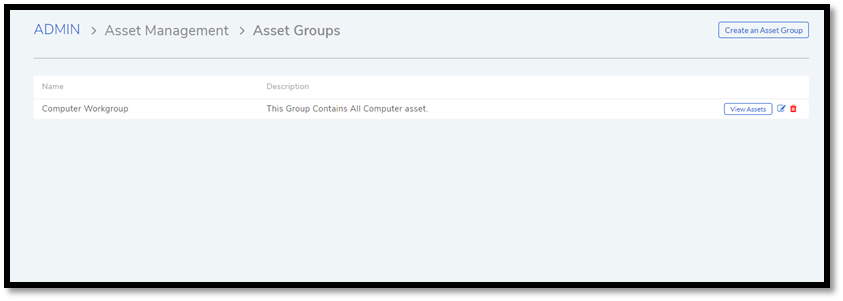
The Asset Groups page opens. Here you can view all your Groups and their Assets.

Note
You can access the Asset Groups page from Admin >> Asset Group (under Asset Management).
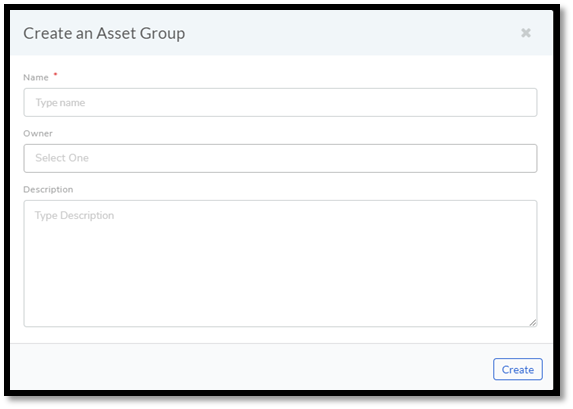
Click on Create an Asset Group situated in the top right corner of the page. A dialog box opens with the following fields:
Name: Provide a suitable name to the group.
Owner: Select an owner of the group from the Technician list.
Description: Write the purpose of the group.

When you are done hit Create. Your Asset Group is added to the Asset Groups page.
11.7.2. Editing/Deleting Asset Groups
To Edit an Asset Group:
Go to the Asset Groups page from List View.
- In the Asset Groups page, click on the Edit Icon adjacent to the
Asset Group that you want to edit.
- Perform your edits in the Edit Asset Group dialog box and hit
Update.
You can view the Assets in a group by clicking on View Assets button adjacent to a group name.
To Delete an Asset Group:
In the Asset Groups page, click on the Delete Icon adjacent to the Asset Group that you want to delete. You see a confirmation box and on confirming the Asset Group is deleted.
11.7.3. Default Asset Group
The product has a predefined group called Computer Workgroup. All Assets with the type Computer or any of its child group are by default added to the Computer Workgroup.
