1.2.1. Creating a Request
There are multitude of ways to create a Request (Incident) in our Helpdesk product. Technicians can create Requests using the email to ticket feature or they can use the Create a Request dialog box.
The Create Request dialog box is available on both the Customer and Technician Portal. However, the Create Request form on the Technician portal is different. It has additional fields that are specific to the needs of a Technician.
Only people with create Request rights can create Requests. Please refer Roles (Users) in the Administration Manual.
To create a new request ticket:
Log in to the Technician Portal. Hover your mouse over the Create button in one of the Navigation Tabs. You see a popup menu; click on Request.
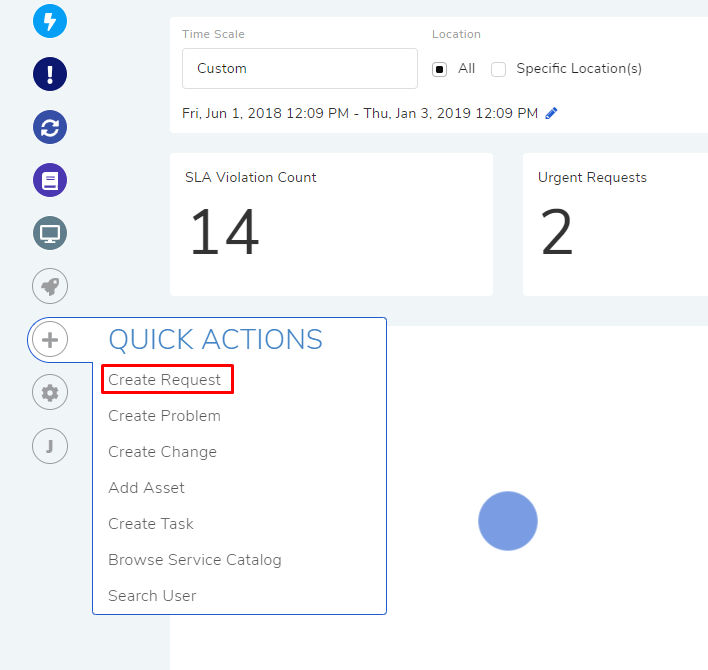
The Create-a-Request dialog box opens.
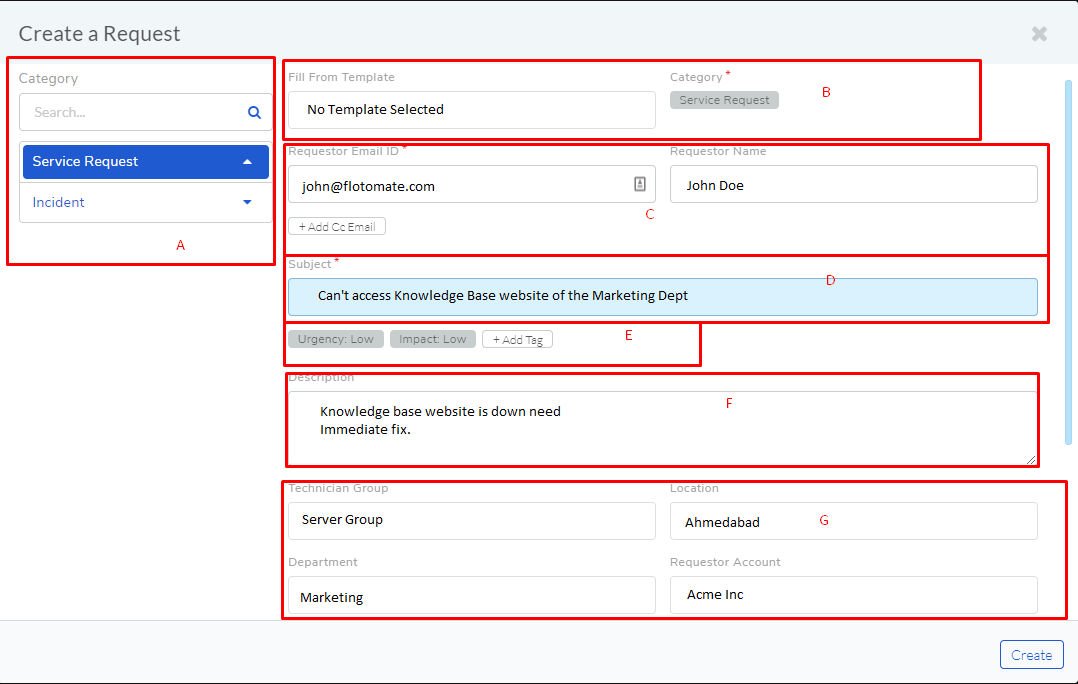
You have to set a Request Category in section-A (
rmf-2). It helps to categorize a Request. The product has two predefined Categories (Incident and Service Requests) to choose from, and you can add more categories. Each category can have Sub-Categories, up to three levels. Please refer Request Category (Helpdesk) in the Administration Manual to learn how to add Categories and Sub-Categories. The dialog box highlights the selected Category in the Category field in section-B (rmf-2).You can fill the form using a template which is a quicker way to submit Requests that are recurring in nature. Section-B has the field that lets you populate the form from a custom template.
You can manage custom templates from Request Templates (Helpdesk) in Admin. Please refer the Administration Manual on how to add templates.
Note
The person who creates Templates must have admin rights.
Loading a custom Template (if any) performs the following changes:
It populates the Subject of the Request.
It configures the following classifiers of the Request:
Urgency level of the Request.
Impact of the Request on the organization.
It can add Tags to the Request.
It can add a category and Requestor Account.
It can add a Description.
In section-C, you need to add the Requestor email and name (Requestor Email ID and Requestor Name). You cannot create a Request with an unauthenticated email. You have to ask an Administrator to enable Request creation without login to do so.
You can add other emails using Add Cc Email. That adds them to the Watcher list, which means they get notifications that the Requestor gets.
In section-D, you add the Subject line that gives a brief introduction to the Request. If you use a Template, the field auto-populates. Else, you have to fill it yourself because it is a mandatory field.
In section-E, you set the Urgency, Impact and Tags. This data is vital for tracking and managing Requests.
If you are using a template, then you don’t have to set them manually.
Tags are optional identifiers that you can add. You can add multiple tags if you want.
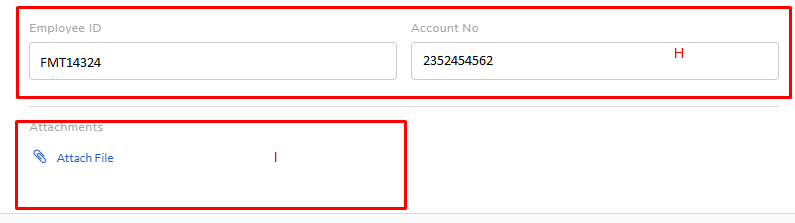
Section-F is the Description area where you write a detailed explanation of the Request. It should talk about the symptoms that lead to the Request. You can attach additional documents to support the resolution process in section-I.
In section-G, you can add a Technician Group, Location, and Department. These fields have a drop-down list of values predefined by an Administrator; you just need to select the appropriate values. You can also search the values to prevent accidental selecting a wrong value.Please refer the Administration Manual to know more about the above fields.
Considering, the above added Technician Group and Department, admin can also link the Assets associated with the particular requester or Technician using the Link Asset using the Link Icon
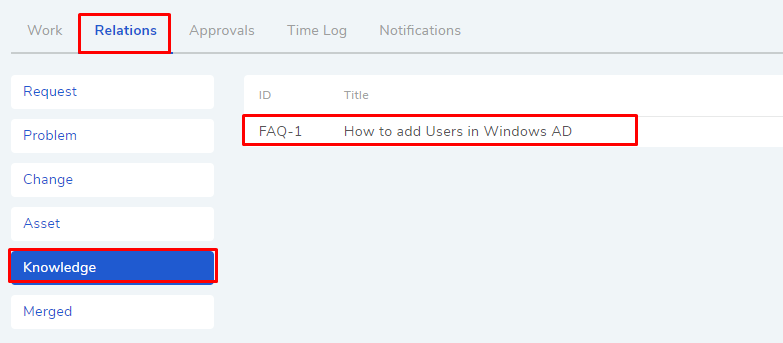
Linking Asset
Fields in section-H are custom fields. You can add n number of fields from the admin section. You can control the visibility of such fields. Learn how to create a Request Custom Field.
Hit Create when you are done filling the form. Now you have successfully created your Request. An email is sent to the Requestor acknowledging the Request.
1.2.1.1. Email to ticket
Motadata gives the option to set up an email as the Helpdesk email address. Technicians can send an email to create a Request.
The question, who can create a Request, depends on the **Preference (Users)** settings in Admin. If settings allow creating Requests without login (Allow Guest Requester to Report a Request) and email to ticket feature is allowed in Email Server Configuration, then anyone with the Helpdesk email can create a Request. Else, the system accepts email Requests from registered emails only.
When a Technician creates a Request using an email, the email subject becomes the Request Subject, email body becomes the Request Description, and any attachments become the Request attachment.