11.16.8. Allocating Machines/Node/Users in a Software License
Note
Here a machine is referred either to a Workstation, Laptop or Server Asset. A Node is referred to a Hardware Asset.
Allocation gives a machine/node/user, in the CMDB, the right to install a Licensed Software. It lets Motadata keep a count of all valid installations of a Licensed Software. The count is vital for activating compliance specific notifications relating to over and under usage of a Licensed Software.
The Allocation is done manually on the Details View of a Software License. In case the License is either Single User, Volume Users or Unlimited Users, you have to add users instead of Hardware Assets.
To perform Asset/Node Allocation:
Note
While performing allocation in a Node Lock License, the Hardware Assets are referred to as Nodes.
Go to Asset (A Navigation Tab) >> Software Licenses.
Click on the Edit Icon adjacent to the License that needs Allocation, or just click on the License name.
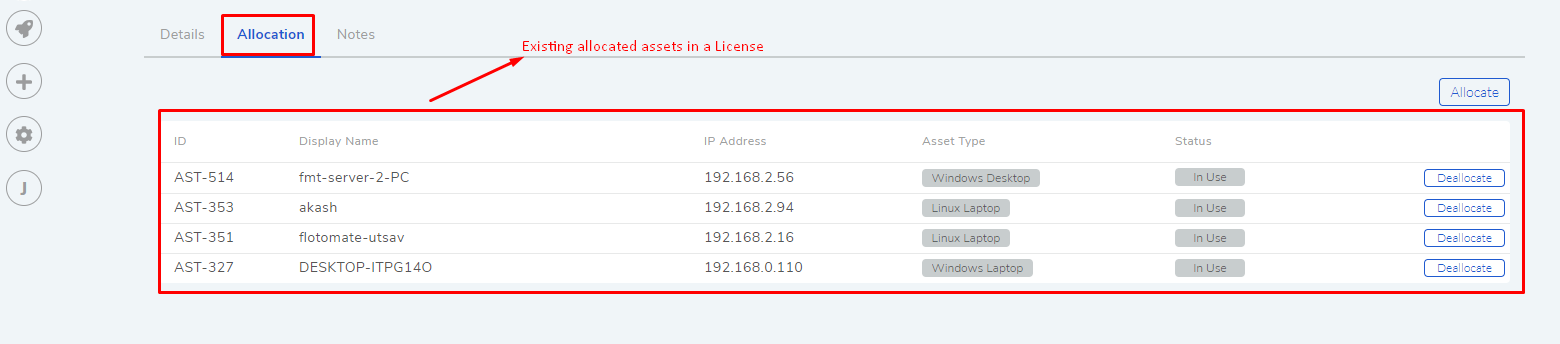
The Details View of the License opens. Scroll down to the Allocation tab. Here you can view the list of all the existing Allocations.
Click on the Allocate/Allocate Node button in the Allocation tab. The Allocate Assets/Node dialog box opens.

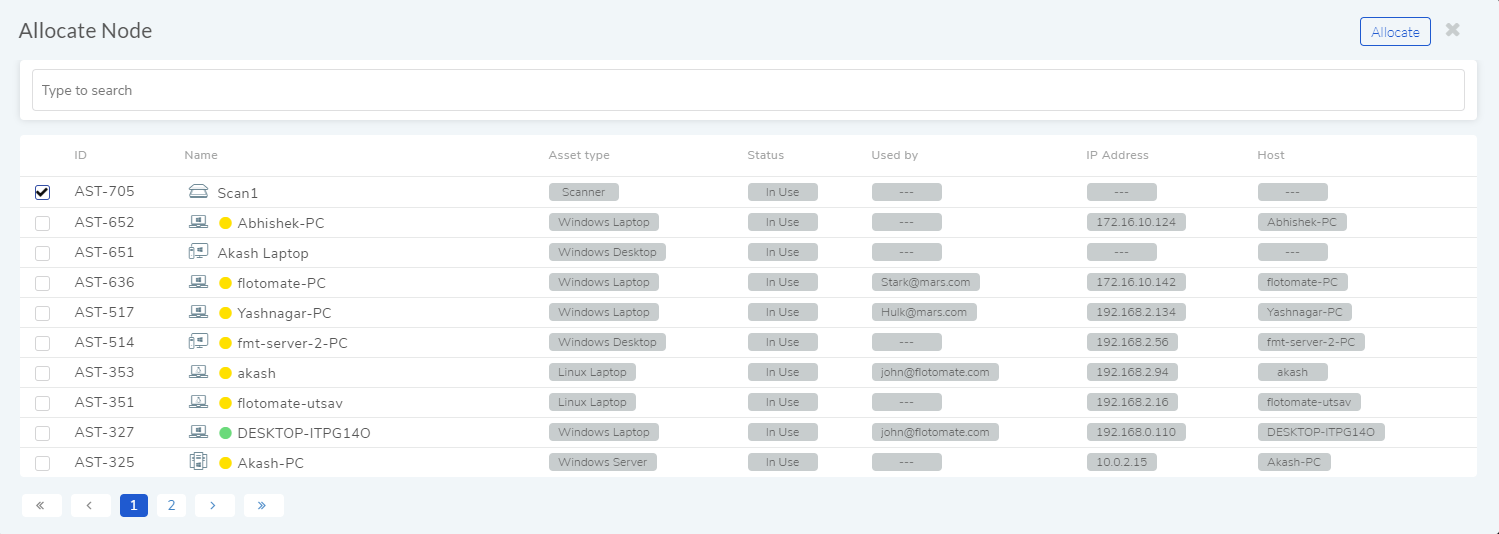
The Allocate Assets/Node dialog box shows you all Hardware Assets (Workstations, Laptops, Servers, etc.) in the CMDB. You can search Assets and allocate them.
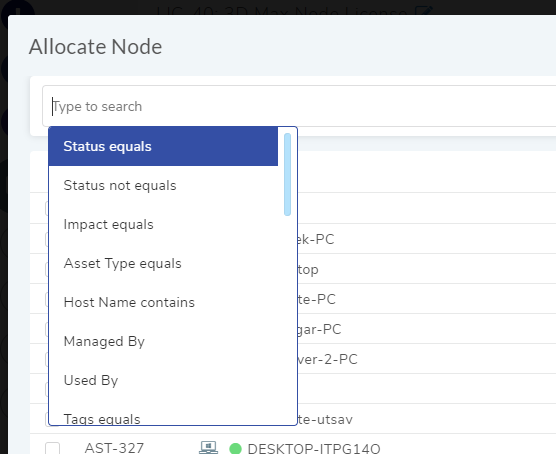
The search bar allows you to use various combinations of predefined search options and keywords. If you want to see the list of all available search options, then click on the search bar. You can select an option or multiple options from the drop-down list.
You can search Hardware Assets with keywords. When you provide a keyword, Motadata searches all the Hardware Assets with the keyword in Name, Description, and Tags.
You can make a filter using a chain of predefined search options and keywords.
Perform search and find the Assets that you want to allocate.
Select the Assets and click on Allocate situated in the top right corner. The selected Assets are allocated to the License.
To Perform User Allocation:
Just like allocating Assets, certain License Types require you to allocate users instead of Assets (Single User, Volume Users, and Unlimited Users). In the Details View of such a License type, click on the User Allocation tab.
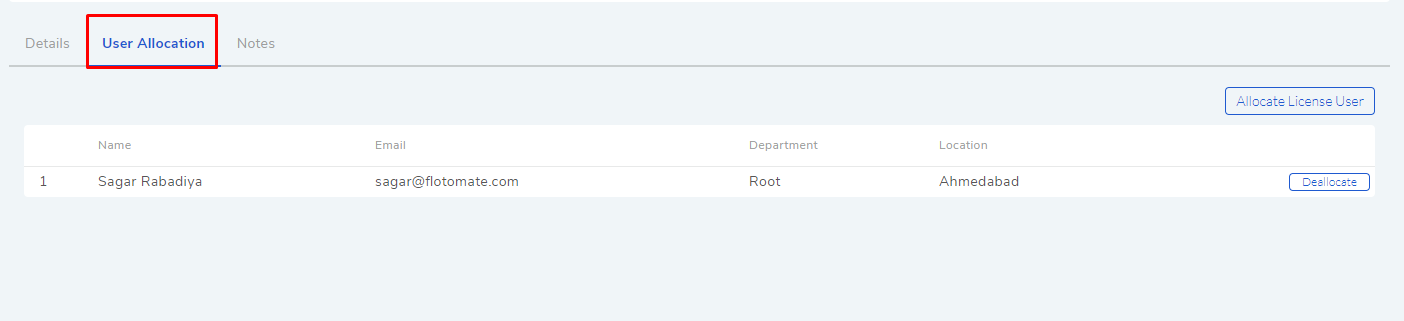
The tab shows all current users added to the License if any.
To add a new user/users, click on the Allocate License User button. This opens the Allocate License User dialog box.
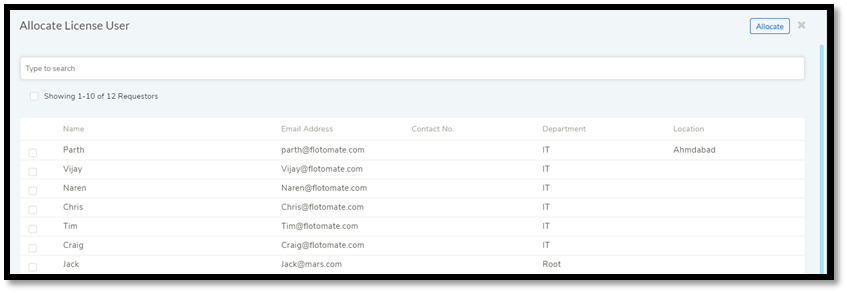
In the dialog box, you can view the names of all the Requesters in the system. You can select multiple users (Requesters) by clicking on the checkbox against their names.
The search bar allows you to search users based on the following options:
Name
Email
Location
Department
VIP Requester status
You can set multiple conditions using the options; you can access the options by clicking on the search bar.
Select the users whom you want to allocate the License and click on the Allocate button. Now you have successfully allocated the License.
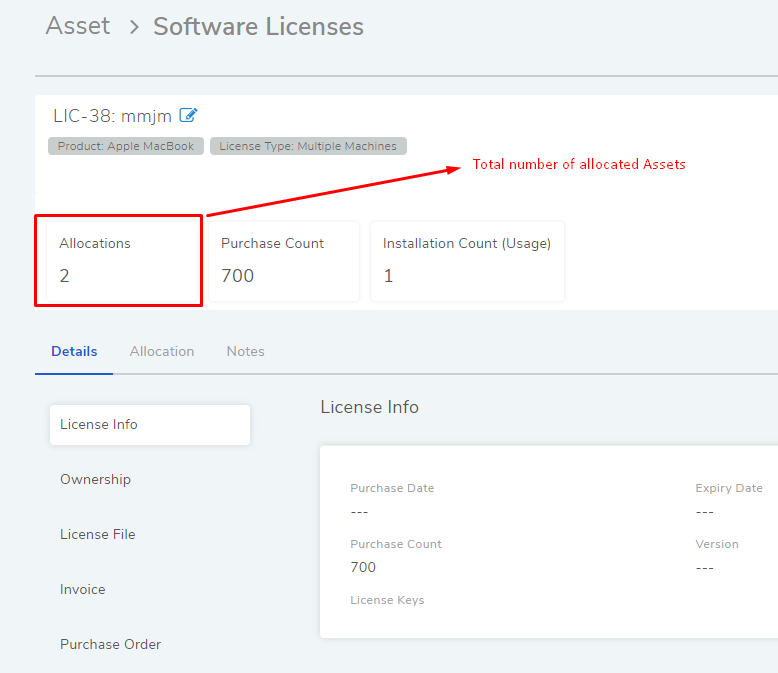
Viewing Allocation Count
When allocating Assets to a License, one can see how many Assets have been allocated from the Details View.