11.10. Importing Assets in Bulk Using CSV
Motadata allows you to import Assets in bulk using a CSV file. The CSV file has to be created in a particular format for this feature to work.
A CSV file allows data to be represented in a tabular structure with each row having a string of values separated by commas. When you upload a CSV file into the system, it treats the first row of the file as the header containing Asset Property names, and each subsequent row as an Asset with property values. The CSV file cannot have a mixture of different Asset Types; it should contain information about a single type.
Apart from uploading Assets, a CSV file can also be used to update existing Assets. The process of updating and importing is the same; the only difference being you upload the same file again with new values.

To Upload Bulk Assets using CSV:
Go to the Asset List View.
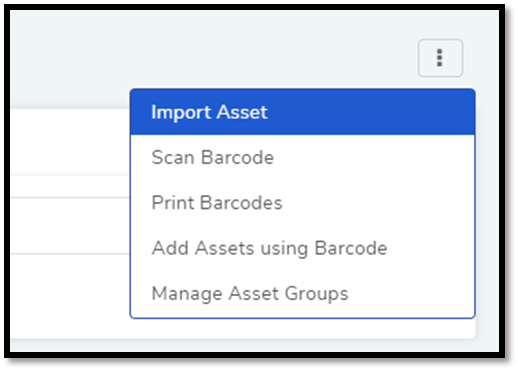
- Click on the Action Menu situated in the top right corner of the
page. Select Import Asset from the pop-up menu.
- The Import page opens. You have to go through four stages before
adding Assets.
Select File: Here you have to select an Asset Type, Date format, and the CSV file for upload.
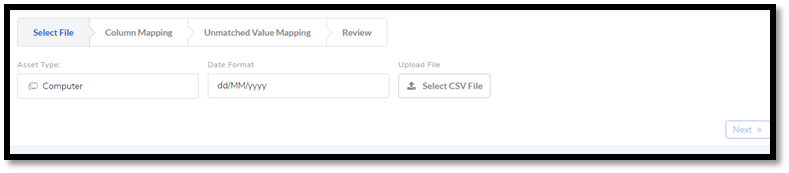
Clicking on Asset Type opens the Asset Type Hierarchy from where you make a selection. If your document contains date, then you have to specify the date format in the Date Format field. Upload the CSV file from your PC.
Custom Asset Types also appear in this section (in the Asset Type field). Learn how to create Custom Asset Type (head to Asset Type)
After finishing this section, click Next.
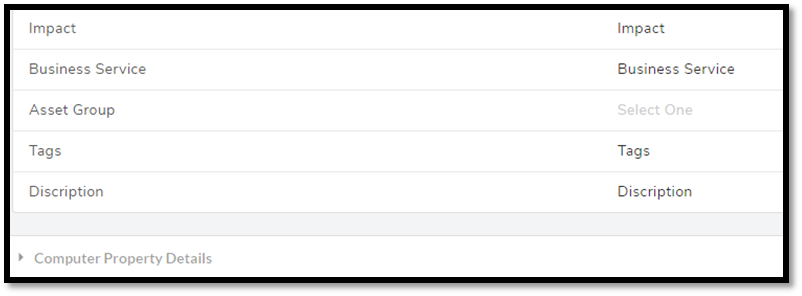
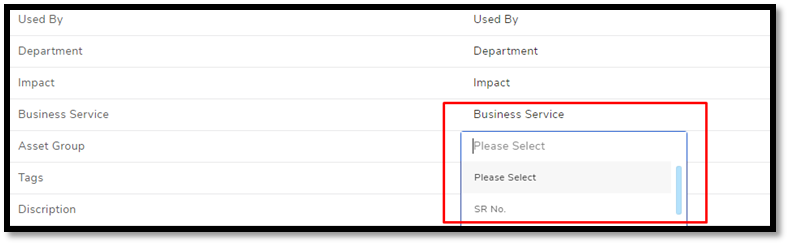
Column Mapping: Every item in the first row (heading) is a name of an Asset Property. The system automatically matches the names in the file heading with all the property names in the system.
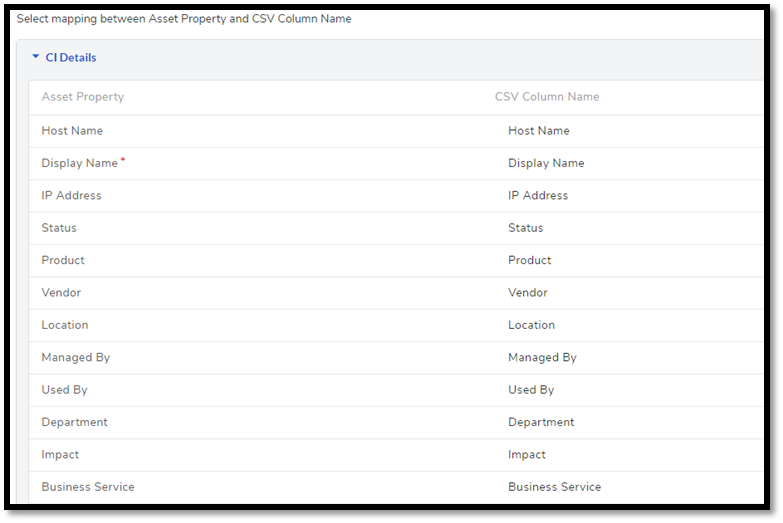
In the above figure, the left-hand side shows all property names under three categories: CI Details, Computer Property Details (shown in Computer Asset Type and its child types), and Hardware Property Details (shown in Hardware and Computer Asset Type, and their child types). The right-hand side shows all the matched names present in the heading of the file.
In case an Asset Property does not have a match, the right-hand side field of the name remains empty. Here you have to manually match the item by clicking on the field and selecting from a list of all other header values in the file.
It is not necessary that all the property field names have to have a match; you can still upload your Assets. Click Next to continue to the next step.
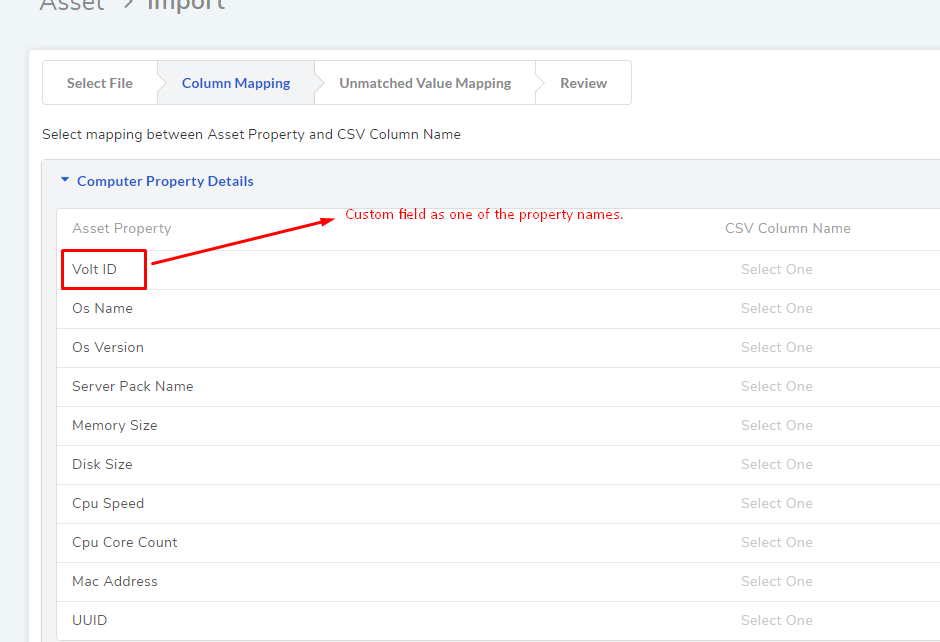
You can add additional property names using custom fields. Whatever custom fields you add appear as column property names. Learn how to add Custom Fields (head to Custom Fields).
Unmatched Value Mapping: The given property names in the header have values (rows). The system checks for property values that aren’t in the system.
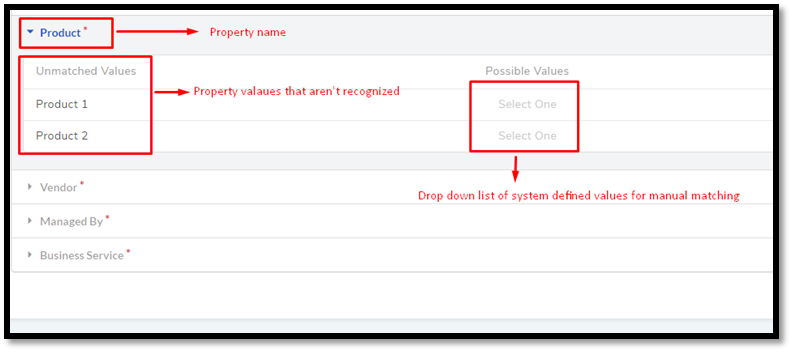
You can manually assign a value from the Possible Values (system values) to an Unmatched Value (value in the file).
You have to match all values (under all property names) else you cannot proceed further. Click Next to continue to the next step.
Review: Here you can review the following information:
Asset Type
Selected Date format
CSV file name
The number of Assets that are going to be imported
In the Review section, click on Import to begin the Import process. When the import process ends, the system shows whether the import was successful or not.