11.4. Manage Asset Details
Another vital component of the interface is the Details View. Every Asset in the CMDB has a Details View that shows all the information available on an Asset. Apart from viewing, it also lets you perform CRUD operations on a stored Asset (CI).
An Asset in our system has many properties and components; all of them can be viewed on the Details View of an Asset. The available fields in Details View depends on the Asset Type; for example, the Details View of a Desktop has more fields compared to a SNMP device.
Details View lets you create maps that tell you about the relations an Asset has with other CIs (Configuration Items).
To Access the Asset Details View:
Go to the Asset List View of any class.
Clicking on the ID or Name of an Asset from the list area takes you to the Asset Details View of the Asset.
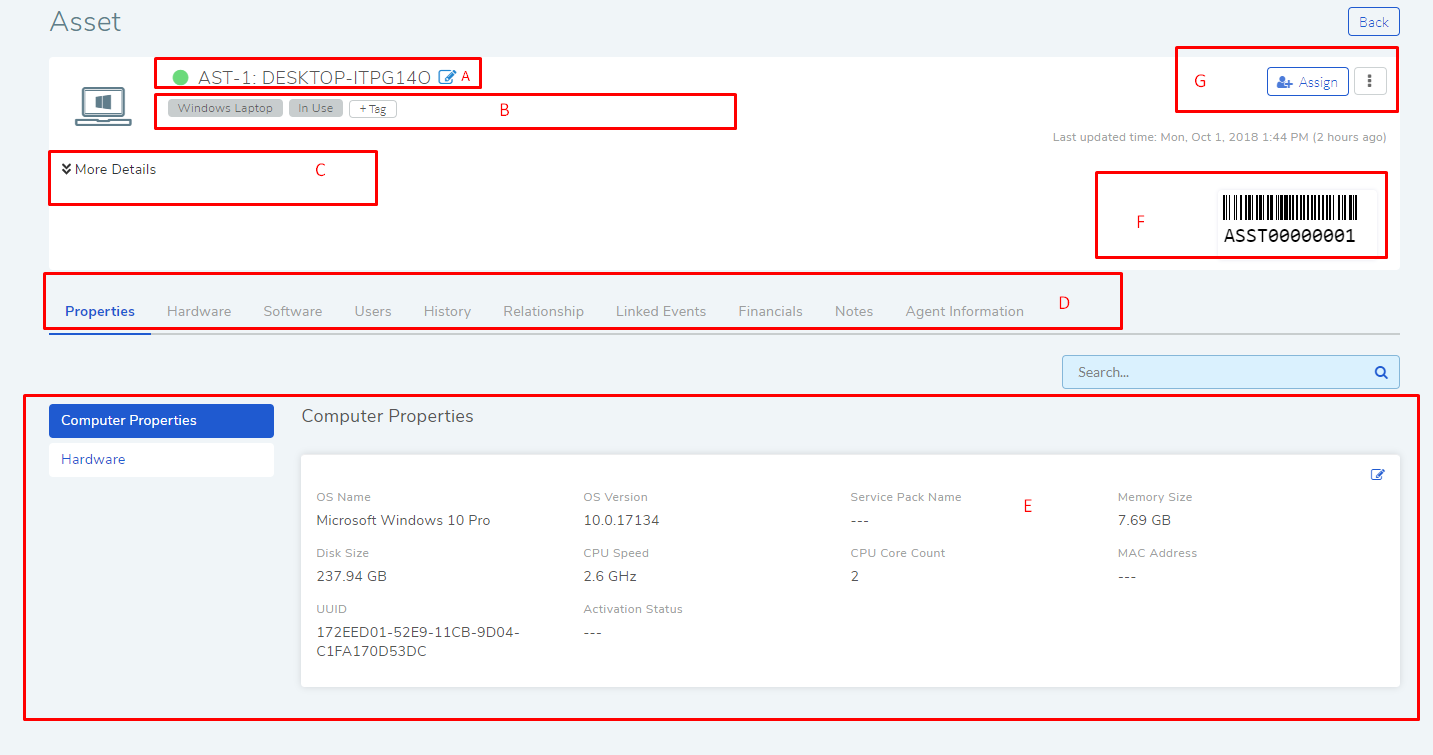
Understanding the Details View is the first step towards managing a single Asset in Motadata.
Section-A houses the Change Name and Description of an Asset.
Section B & C houses the classifiers.
Section-D showcases Properties, Components, Details and other information. Visibility of a tab depends upon the Asset Type.
Properties: These are general information about the Asset. Properties do not contain information traceable to an individual component of an Asset; for example, OS version is identified with an Asset, whereas a 2 GB DDR3 RAM is a component level information and part of an Asset.
The Properties are auto-populated during discovery, but you can edit the information. You can add Properties that haven’t been added by the Probe. In case, you are adding an Asset manually you have to add all the Properties.
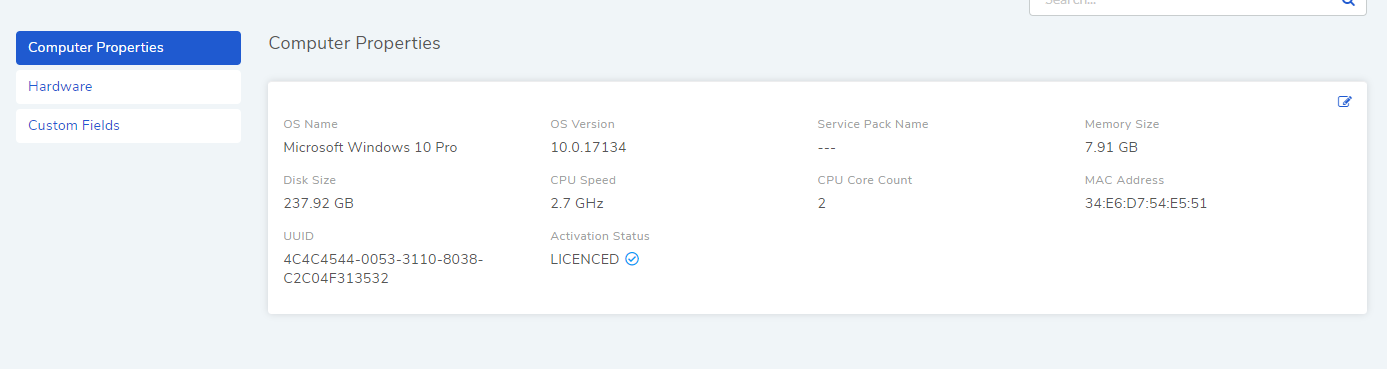
There are four categories of Properties in Motadata:
Computer Properties
Hardware
Software
Business
Cloud
Hardware: Some IT Assets are made up of hardware and software components. The Hardware tab lists all information on individual components of those Assets. The information may come from Discovery or Manual addition.
Software: The Software tab lists all information on all individual Software in Assets that are made up of Hardware and Software components. You can add new Software and edit existing information. Discovered Assets have this section auto-populated by the Probe.
Details: The Details tab contains information on a Software Asset concerning cost, validity, and license.
Consolidated Software: Learn more about Software Consolidation.
History: The History Tab of an Asset shows the following:
Relationships: Learn about Managing Relationships.
Linked Events: Learn about Linked Events.
Installation: The Installation tab of a Software lists all the machines using the Software or have it installed.
Metering: Learn about Software Metering.
Notes: Technicians can add notes in an Asset. Notes are visible to all Technicians who are allowed to view the CMDB. Learn more.
Agent Information: Assets that have been discovered via an Agent have this tab. The tab shows important information about the Agent, for example Agent ID.
Users: If the asset is a hardware asset (mainly a workstation), then the technician can view all the users of the asset. The tab also has a search bar for the technician to search for a specific user.
Financials: Here a technician can view the asset cost of a hardware asset. Learn more.
Section-E is the Display Pane where all the Properties, Components, relationships, editing options, adding options and other information are visible.
Section-F shows the unique Barcode of an Asset. If there’s no Barcode, you can generate a new Barcode by clicking on Add Barcode and then Generate New Barcode. By clicking on an existing Barcode, you can perform the following operations:
View Barcode
Print Barcode
Copy UPC Code
Change Barcode
Remove barcode
Section-G is the Action Menu of the Details View. The available options in this menu depend on the Asset Type. Some of the Options are:
Add Attachments (available in all Asset Class).
Scan Now (Only in Hardware Assets).
Exclude from Scanning (Only in Hardware Assets).
View Audit Trail (available in all Asset Class).
Export Asset (available in Hardware and Software).
Remote Desktop (only in Hardware Assets).
Reconcile (only in Hardware Assets).
Add Barcode (only in Non-Software Assets).
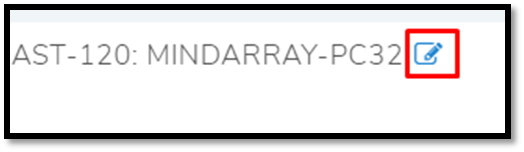
11.4.1. Change (Host) Name and Description of an Asset
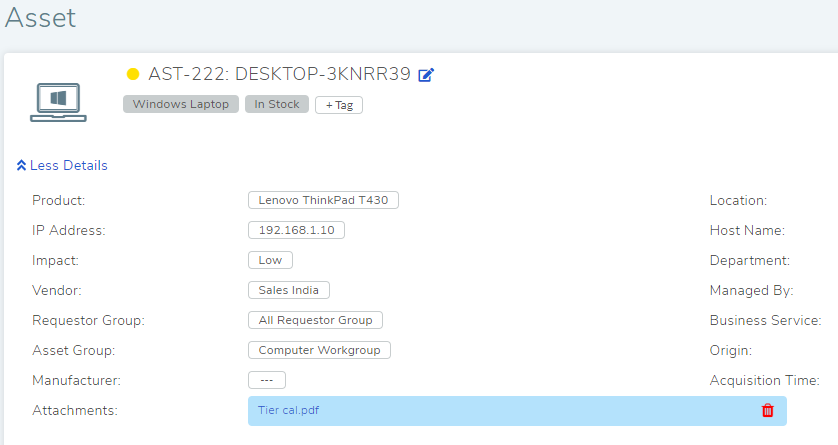
Section-A (amf-14) shows the ID and Name (by default host name in case of Hardware Asset) of the Asset. The ID
Uniquely identifies an Asset whereas the Name is a human readable Asset
identifier. You can change the Display Name, HostName (in case of a Hardware Asset) and Description of the Asset using
the Edit Icon.

11.4.2. Classifying Assets
You can classify an Asset using predefined and custom identifiers. Go to the Details View of any Asset, and you would have the following classifying options.
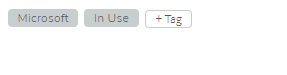
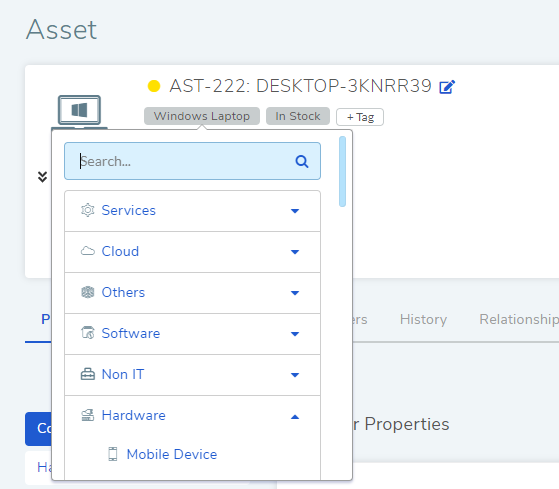
Asset Type: It is the primary form of classification of an Asset. All Asset Types are part of the Asset Type Hierarchy. Based on the Asset Type, property fields of an Asset are set. You can manually modify Asset Type of any Asset.
Status: You can classify an Asset based on usage by using the following statuses:
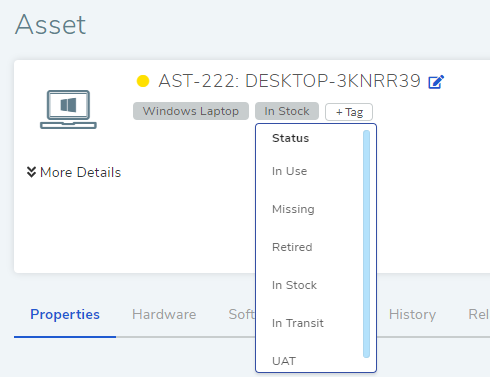
In Use: This means that the Asset is in use.
Missing: The Asset had been purchased and used, but the location of the Asset is unknown now.
Retired: The Asset is no longer in use.
In stock: The Asset has been purchased but not in use.
In Transit: The Asset has been purchased and in transit.
You can have custom statuses. Learn more about custom status.
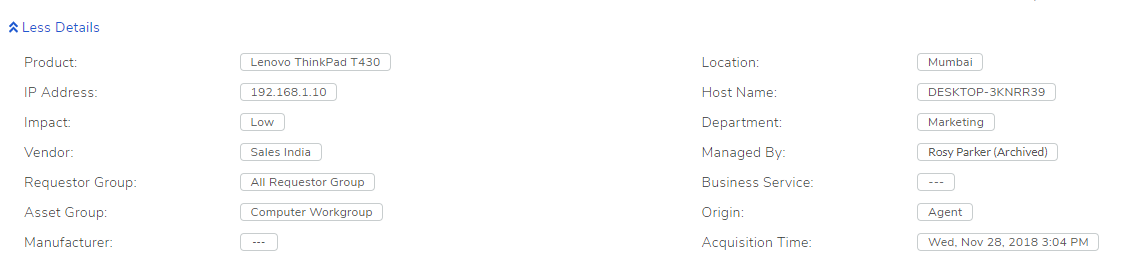
Origin (
amf-18.2): The system classifies all discovered Assets with the label Discovered. The Assets that are manually created have the Manually Created label, and assets created by an agent has the tag Agent.IP Address (
amf-18.2): You can set IP address of a manually added Asset.Hostname: You can set Hostname of a manually added Asset.
Tags (
amf-18.2): It is a convenient way to classify an Asset by Technicians when existing options are not enough.Impact (
amf-18.2): It lets Technicians to define the impact of the Asset as either low, on self, department or business.Business Service (
amf-18.2): You can associate the Asset with a predefined Business Service.Department (
amf-18.2): You can associate the Asset with a particular department by setting this field.Location (
amf-18.2): You can associate the Asset with a particular location by setting this field.Managed By (
amf-18.2): You can add the email address of the Technician who is responsible for the Asset from Technician list.Requester Group: You can put the asset in a group. Grouping the asset will allow technicians to create search queries and automatic processes.
Software Type (available only in software assets): This field is for software assets only. The field values are used for white-listing and compliance management. Learn more.
11.4.2.1. Add/Modify Asset Group:
Asset Groups help you to categorize an Asset. You can add an Asset Group
to an Asset or modify an existing one. By clicking on the Asset Group
field (amf-18.2) opens a drop-down menu where you make your selection.
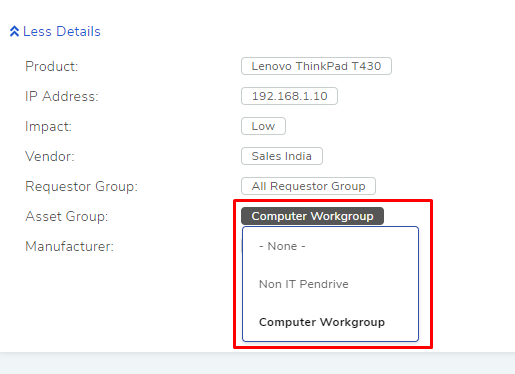
Asset Groups are important for adding subscribers to Hardware Asset related notifications. Learn more about Asset Group.
11.4.2.2. Add/Modify Product
Every Asset in the CMDB is an instance of a Product. Having a Product
unlocks additional functionalities. You can add/modify the Product field
of all Assets (amf-18.2)). By clicking on the Product field you get
access to all available Products to choose from. Learn how you can add more products.
11.4.2.3. Add/Modify Vendor
You can add/modify the Vendor field (amf-18.2) of any Asset from a
predefined list. Learn more about managing vendors in Motadata.
11.4.3. Asset Attachments
You can add attachments to an Asset. The attachment can be anything below 5 MB size.
11.4.3.1. Adding an Attachment
Go to the Asset Details View of the Asset to which you want to add an attachment.

Click on the Action Menu of the Asset, and then select Add Attachment.
You are asked to select the location of the file. Specify the location and upload the file.
11.4.3.2. Viewing the Attachments
In the Details View, you can view the attachment/attachments of the Asset in the More Details section.
11.4.4. Linked Events
The Linked Events tab gives you an option to create a link between an Asset and other Requests, Problems, Change, Knowledge, Project, Contract and Purchase. Learn to access the Linked Events tab.
The purpose of creating links is to build contextual information about an Asset; for example, a faulty cooling system in a server (CI) have generated incidents that lead to the identification of the Problem. If the events have been linked with the Asset (server) then Technicians can drill down to the root cause (faulty cooling system) by understanding the context.
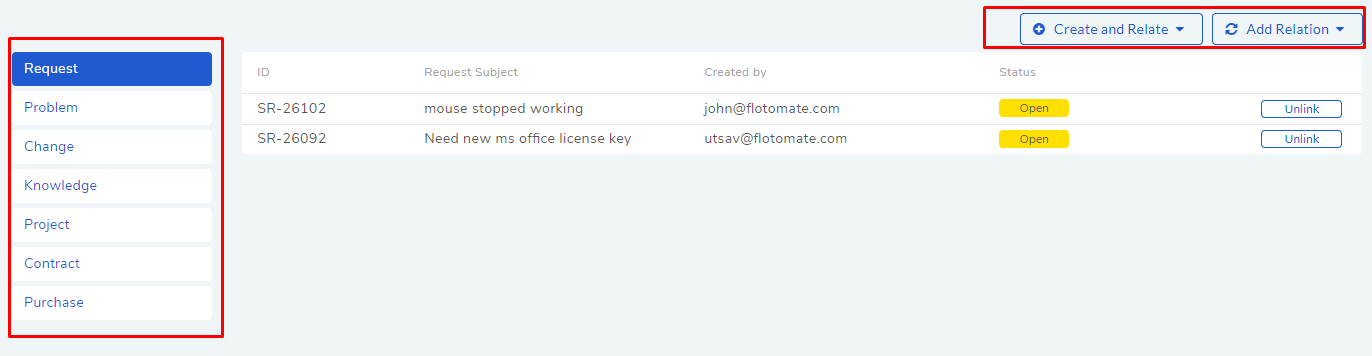
You can view the present links of an Asset from the Item list (left side of the pane). You can filter for Requests, Problems, Changes, Kbs, Projects, Purchases and Contracts.
You can create a new Request, Problem, Change, Kb, Project, Purchase Order and Contract, and link it to an existing Asset using the Create and Relate option. Using this option, you can directly access the create dialog of the new item.
The Add Relation option lets you add one or more links to existing Requests, Problems, Changes, Knowledges, Projects, Contracts and Purchases.
Clicking on Add Relation shows you a menu where you have to select either Request, Problem, Change, Knowledge, Project, Contract or Purchasee.
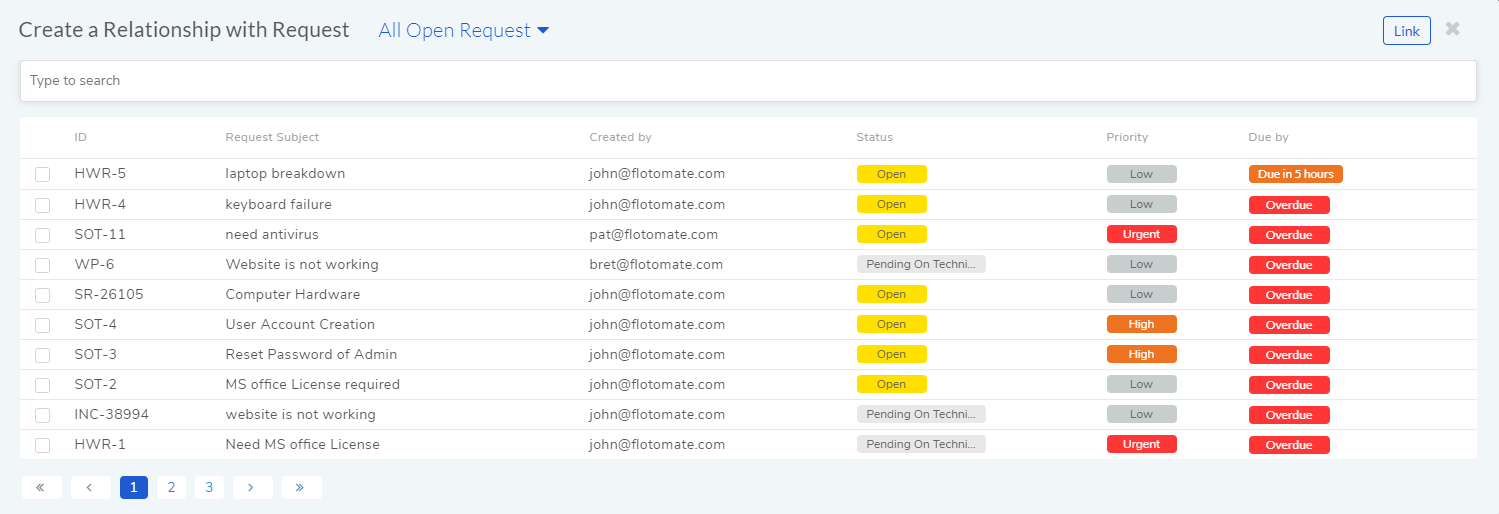
A dialog box opens with a search bar. The search bar supports Advance Search.
Search for the right entry and click Link to create a linkage with the Asset.
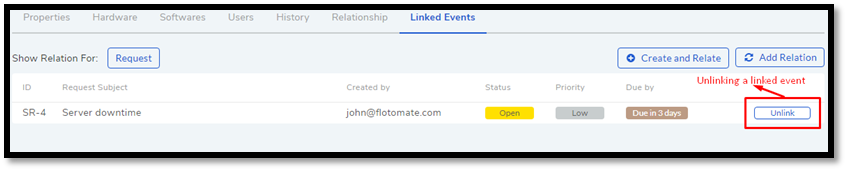
You can view all your linked events, and you can unlink them anytime you want.
11.4.5. Adding Notes
Notes are a brief record of points or ideas written down as an aid to memory. Technicians can record brief information in an Asset. One use case of this feature is that a technician can mention a possible fault in an Asset via a Note; other Technicians can view the note before working with the Asset.
To add a Note:
Go to the Details View of the Asset where you want to add a Note.
Click on the Note tab.
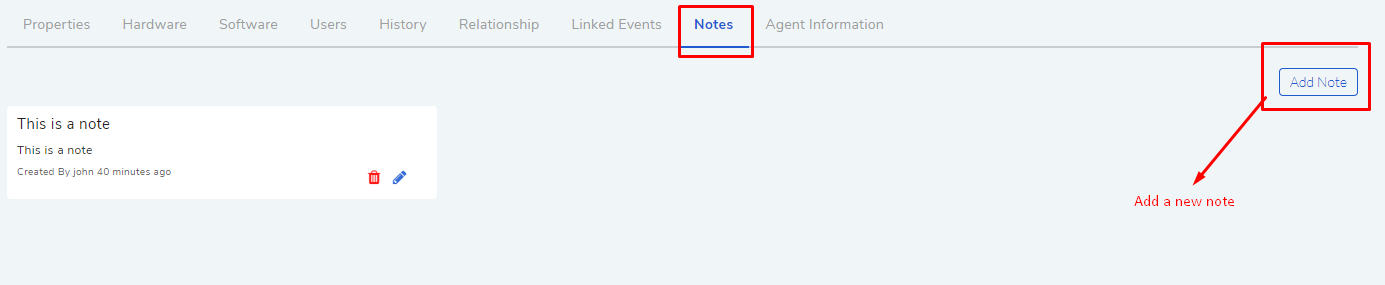
Click on Add Note to add a new note. A new dialog box opens.
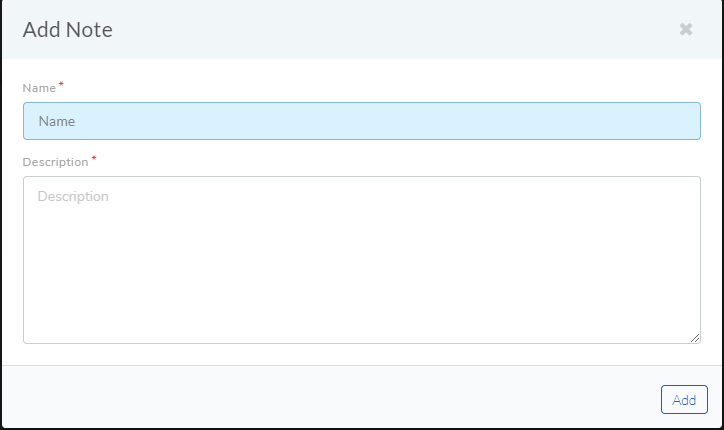
Write a name and description and then click on Add.
11.4.6. Relationships
You can create an exciting topology of Assets showing the nature of their relationship with one another. Currently, only Hardware, Services, Cloud, and Other Asset Types have the Relationship tab.
While creating a topology, the Assets are shown as nodes on a map. You start with a single node, the Asset whose Relationship tab you are using; then you add relationships; with each addition a new node is created. The relationship between two nodes can be of two types: Direct and Indirect.
The relationships created between nodes (Assets) are saved in the system and can be viewed in their respective Relationship tabs. However, such relationships have no bearing on the CMDB.
You can access the Relationship tab from the Details View of a Non-Software Asset.
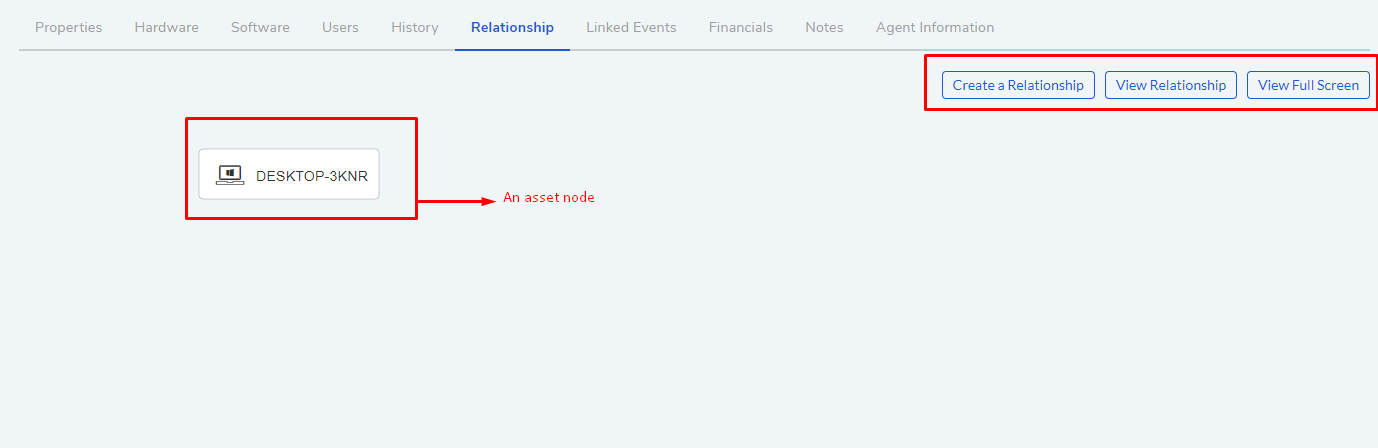
You can zoom in & out using your scroll wheel while placing the pointer on the View Area.
You have to use the Create a Relationship dialog box to create a relationship between two nodes. Click on a node to open the Create a Relationship dialog box, or you could click on Create a Relationship button while keeping a node selected.
Note
Please refer to*
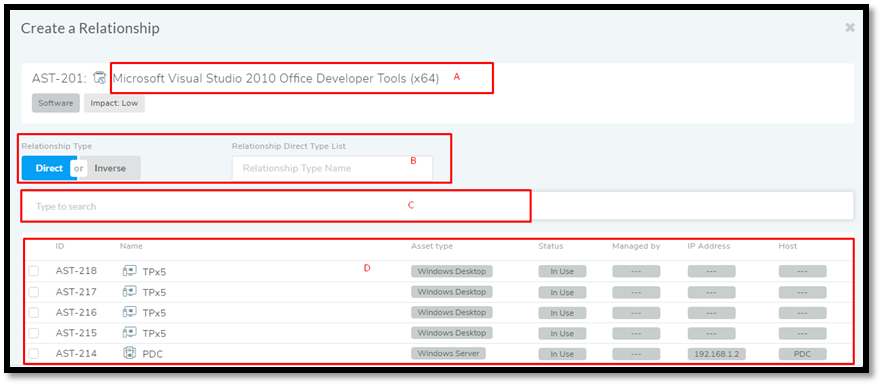
amf-28.The relationship operation happens between two nodes at a time. Section-A shows the name of the first node (Asset), and the second node you have to select.
Section-B lets you select the Relationship Type and Relationship Direct Type.
Relationship Types are two: Direct and Inverse. The two types represent two directions of a relationship.
Relationship Direct Type describes the nature of a relationship from a predefined list. There are two lists; one for the Direct and other for Inverse.
Example of a direct relationship:
A PC is dependent on a Server is a Direct relationship. We select Depends On from the Relation Direct Type List.
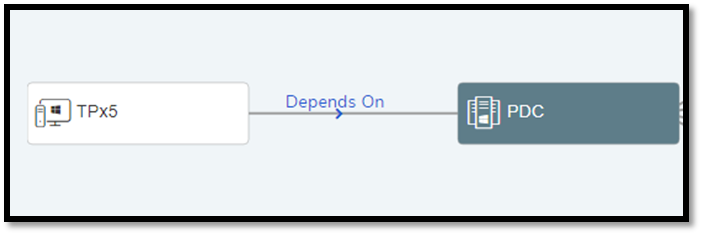
In
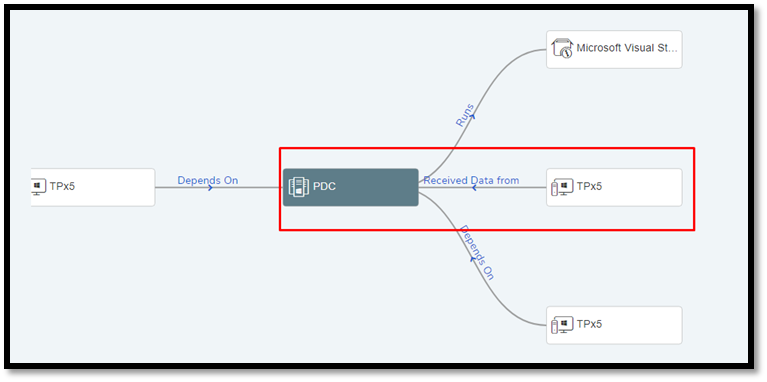
amf-29, the arrow shows the direction of the dependency.Example of an Inverse relationship:
A server receives data from a PC is an inverse relationship. We select Received Data from from the Relation Direct Type List in this case.
Section-C has the search bar for searching Assets in the CMDB. It supports the Advanced Search (refer the search bar of List View) feature.
In section-D, you can view all the Assets or the list of Assets filtered by search. Here you make the selection for the second node. You can make only one selection.
After making the selections in the Create a Relationship dialog box, clicking on Create makes the new relationship visible on the View Area.
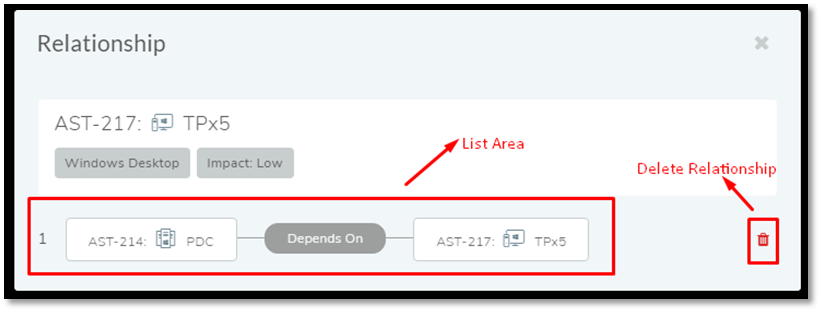
The View Relationship button lets you view all the relationships in a list form of the node whose Relationship tab you are viewing. Here you can delete a relationship using the Delete Icon.
The View Full-Screen button expands the View Area to the entire page.
11.4.7. Reconciliation of Assets
When new Assets are purchased and received, the related Purchase Order is closed. The Assets that are received are automatically added to the CMDB with the status In Stock.
When these Assets are discovered during an Asset Scanning (could be Agent-less or Agent Based), duplicate entires are created in the CMDB. A Technician has to manually reconcile each Asset with an **In Stock ** Asset. Reconciliation facilitates proper inventory management where a Technician knows exactly which Assets are available for assignment.
Only two Assets can be reconciled at a time.
Conditions for Asset Reconciliation:
Only two Assets can be reconciled at a time.
Any one of them has to have an Origin: Purchase Order.
What happens after Reconciliation of two Assets ?
The Asset with Origin: Purchase Order is deleted.
The Asset that is not deleted gets the following information added from the deleted Asset:
Product info.
Purchase Order details.
The associated Purchase Order is linked (Relation) with the Asset.
Used By and Manage By fields are updated, if any.
Learn how to perform Asset Reconciliation.