11.3. Asset List View
The Asset Management interface shows relevant data whenever required. This is achieved with the help of filters, search options, and predefined hierarchies.
The Asset List View is an essential component of the interface. It is the visual part of the CMDB, which gives a point and click interface to manage all Assets. It provides you the option to import Assets and export individual Asset details on to a local machine, and many more. The List View is divided across four class of Assets:
Hardware Assets
Software Assets
Other IT Assets
Non-IT Assets
Click on Asset, a Navigation Tab, which takes you to the Asset List View. The default filter is All Hardware IT Assets.
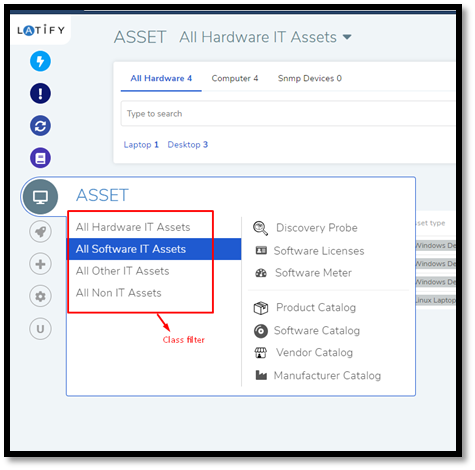
You can switch to other classes using the class filter in amf-1. The
view differ across classes in terms of filters and options.
List view
Note
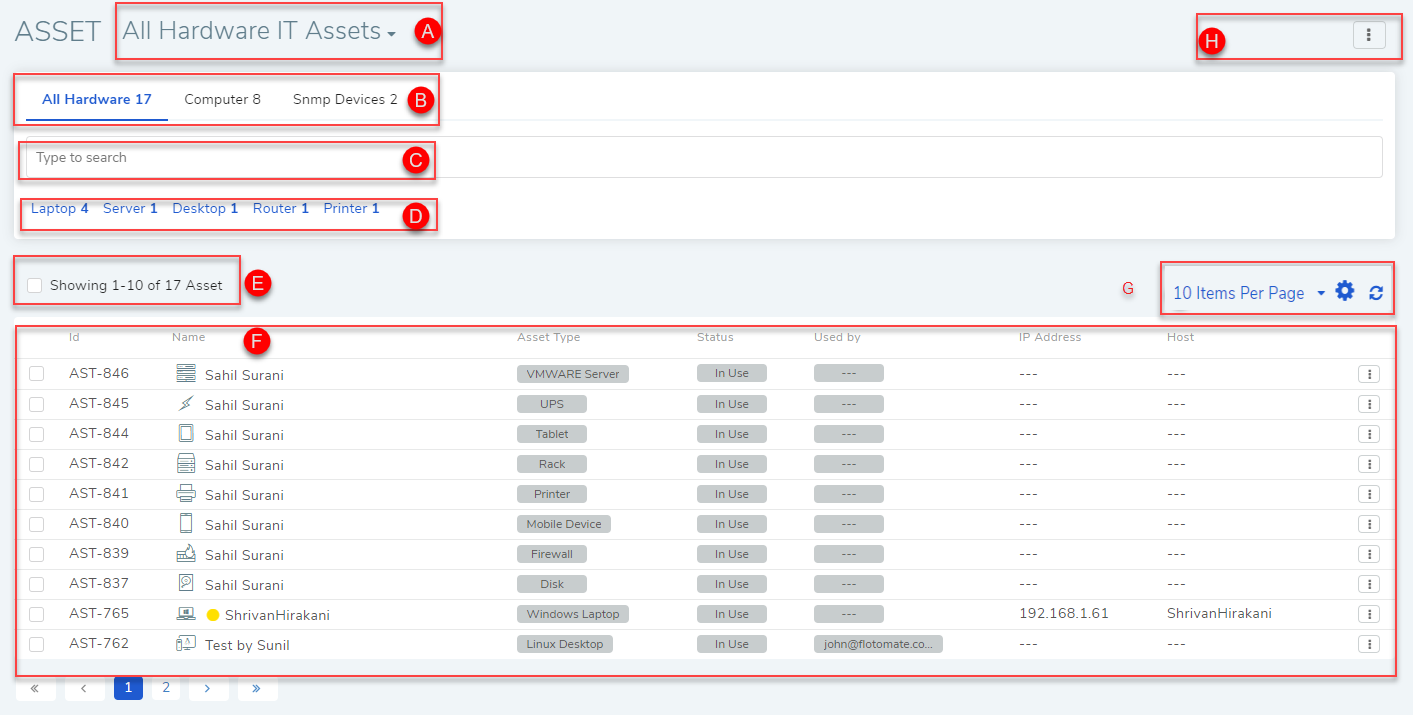
Kindly refer to amf-2.
Section A, B, C & D are the search features.
Section-E is the checkbox which you can use to select all the Assets currently viewable in the list area.
Section-F is the list area that shows all the Assets. The view is tabular in form with each line containing seven properties of an Asset. These properties are:
ID: Unique identifier of an Asset.
Name: A human given identifier of an Asset.
Asset Type: It tells us where the Asset belongs in the Asset Type Hierarchy. This field supports quick edit which means you can change the value by clicking on the field value.
Status: The current state of the Asset in terms of usability. This field supports quick edit. Learn how to add custom statuses.
Used by: It tells us about the person who uses the Asset. This field supports quick edit.
IP Address: The IP address of the device/machine. It does not support quick edit.
Host: Hostnames are human-readable nicknames that correspond to the address of a device/machine connected to a network. The field does not support quick edit.
Software Asset Specific Properties:
Version: The version of the Software Asset as stated by the vendor. When a software is upgraded, system will consider it as a new software entry. Hence, you can visualize how many times a software is upgraded and what versions were there.
Software Type: Types generally define the nature of usage. A Software Asset has either a predefined type or a custom one.
Software Category: One of the many ways of categorization.
Installation Count: It shows the total number of workstations (desktops and laptops) having the software.
Each Asset has an Action Menu (at far right) from where they can perform the following operations: Scan Now, Exclude from Scanning, Viewing Audit Trail, Export Asset, Remote Desktop, and Open Asset in new tab.
Section-G gives you the option to set the number of Assets visible per page; the highest is 100 per page. You can change the default number from your profile. Also, you can choose the columns that you want to see on Asset List.
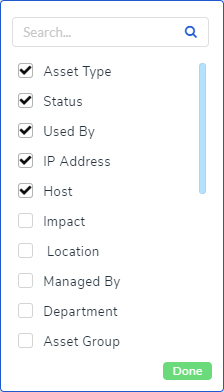
Show/Hide Asset Management List Columns
Section-H houses the following options:
Import Asset
Scan Barcode
Generate Barcode
Manage Asset Groups
Software Normalization (for software assets).
When you select one or more Assets you get the following bulk operations:
Reconcile
Generate Barcodes
Other features specifically for Software Assets are:
Mark as Prohibited
Mark as Managed Software
Mark for Notification
Consolidate
11.3.1. Searching Assets
There are two broad ways to search Assets in the product:
Using Search Bar
Using Filters
11.3.1.1. Using Search Bar
The way the search bar works is same across all the Asset Classes. The only difference being is the available search options in each class.
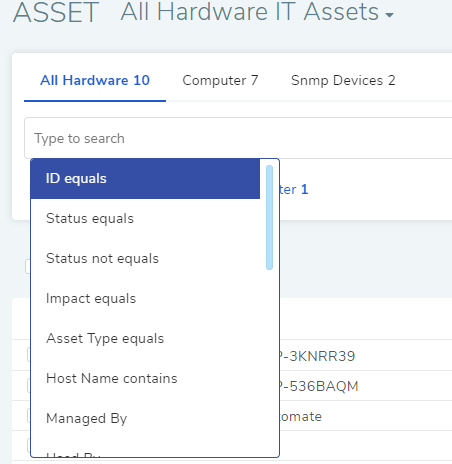
Product allows you to perform Advanced Search using various combinations of predefined search options and keywords. If you want to see the list of available options, then click on the search bar. You can select a single option or multiple options from the drop-down list.
You can search Assets with keywords in the search field. When you provide a keyword, Motadata searches all the Assets with the keyword in their ID, Description, Name, Tags, and Display Name field. An Asset has to have at least one field matched (partial or full) with the keyword; in case there are multiple keywords, the Asset has to have at least one field matched for each keyword.
A search query can be made up of search options and keywords. In any case, the output yields Assets that satisfy all the parameters of the search query.
For example, you are looking for all Assets containing the keyword Sunil in Name and have Status as In Use. You would have the following search query:
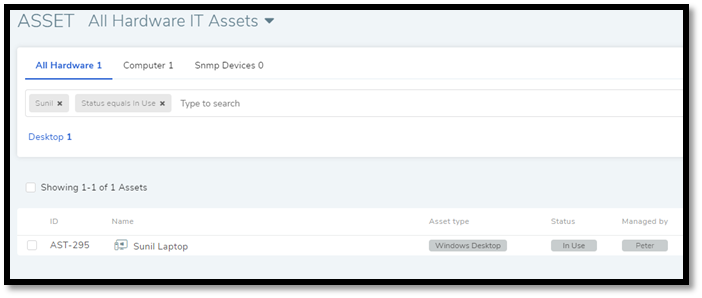
Between two different conditions of the same option type OR logic is followed. Between different option types AND logic is followed. An example of same type contradiction is Status In Use vs. Status Missing. Between inputted keywords and conditions AND logic is followed.
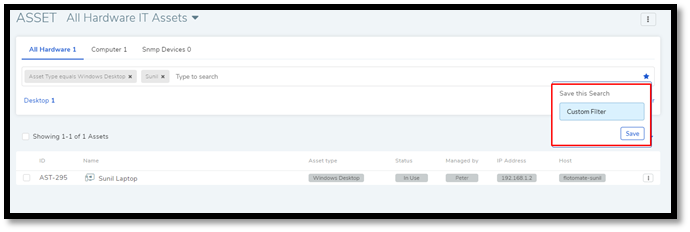
11.3.1.1.1. Custom Filter
You can make a filter using search options and keywords and save it by clicking on the star icon to the far left of the search bar. Saved searches appear as filters in the header section (section-A) of the Figure 2.
11.3.1.2. Using Filters
The available filters differ across Asset classes. Each having their own set of filters:
11.3.1.2.1. Hardware Asset
There are five predefined search filters in the header section of List View:
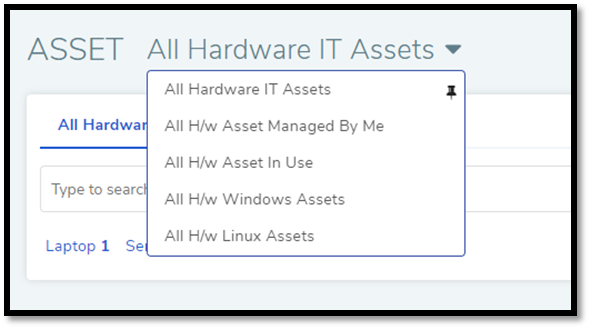
You can pin a filter using the Pin Icon. The pinned filter is applied by default whenever someone clicks on Asset (A Navigation Tab) to go to the List View.
All Hardware IT Assets: Shows you all the available Hardware Assets in the system.
All H/w Asset Managed By Me: Shows all the Hardware Assets with your name in the Managed By field.
All H/w Asset In User: All Hardware Assets with the status In Use.
All H/w Windows Assets: All Hardware Assets with the Windows OS.
All H/w Ubuntu Linux Assets: All Hardware Assets with the Ubuntu Linux OS.
There are filters based on Asset Type:
Computer:
Laptop
Server
Desktop
SNMP Devices:
Routers
Printers
Switches
11.3.1.2.2. Software Asset
There are four predefined search filters in the header section of Asset List View.

You can pin a filter using the Pin Icon. The pinned filter is applied by default whenever someone clicks on Asset (A Navigation Tab) to go to the List View.
All Software IT Assets: Shows all the available Software Assets.
All Managed Software: Shows all Software Assets with the Software Type set to Managed.
All Prohibited Software: Shows all Software Assets with the Software Type set to Prohibited.
All Software Managed By Me: Shows all Software Assets with your name in the Managed By field.
There are filters to isolate an Asset Type:
OS
Web Server
Application:
Managed
Prohibited
Database
11.3.1.2.3. Other IT Assets
There are three predefined search filters in the header section of List View:
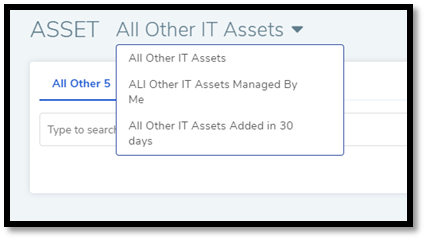
You can pin a filter using the Pin Icon. The pinned filter is applied by default whenever someone clicks on Asset (A Navigation Tab) to go to the List View.
All Other IT Assets: Shows you all the available Other IT Assets.
All Other IT Assets Managed By Me: Shows all Other IT Assets with your name in the Managed By field.
All Other IT Assets Added in 30 days: Shows you Assets added in the last 30 days.
There are filters to isolate an Asset Type:
Service
Cloud
Others
11.3.2. Bulk Update Assets
Motadata supports bulk update of Asset information of multiple Assets at once. The dialog box to perform this operation is same across all the classes. To perform the bulk update:
Go to the Asset List View of any class.
Select Assets on which you want to perform Bulk Update. The Bulk Update button appears above the pane. Click on Bulk Update.
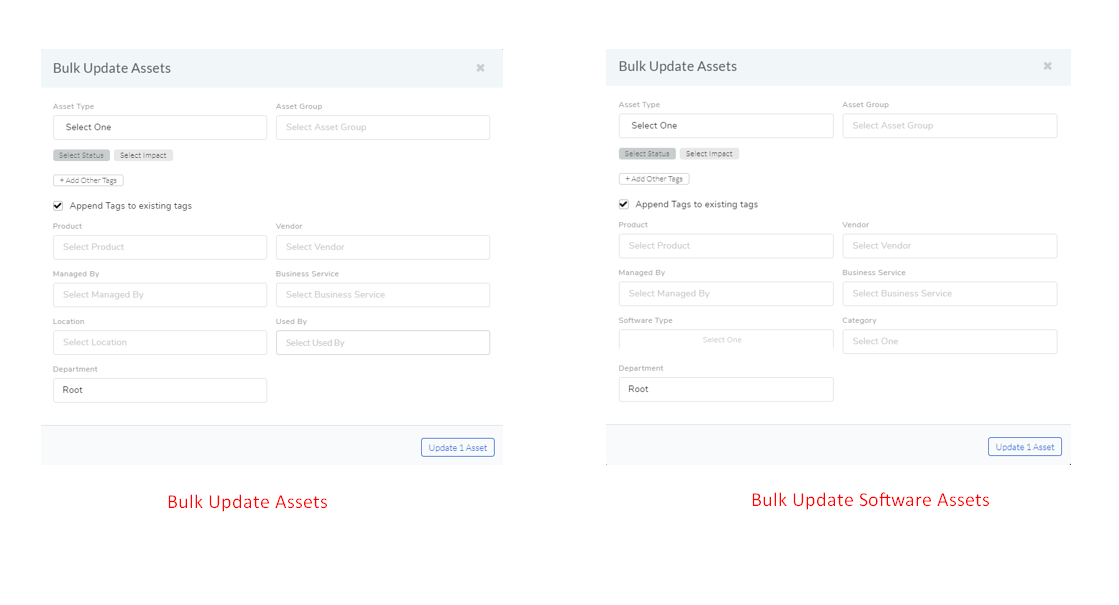
The Bulk Update Assets dialog box opens, You can update the following fields of the selected Assets:
Asset Type: Based on Asset Type hierarchy.
Asset Group; Learn how to add Asset Groups.
Status: Learn about Status
Impact: Either Low, Self, On Department or Business.
Tags: You can replace the existing tags, or append tags by selecting Append Tags to existing tags.
Product: Learn about Product.
Vendor: Learn about Vendor.
Used By: Update the user of the Assets.
Managed By: The Technician who is going to manage the Assets. The field is populated from the Technician list in the system.
Location: Locations of the Assets
Business Service: Which business services do the Assets affect?
Software Type: This field is available only for Software Assets.
Number of Assets that are going to be updated is visible in the Update button. When you are done hit Update to save your changes.
11.3.3. Delete/Stage Assets
You can delete multiple Assets from the Asset List View. Archiving permanently deletes the Assets from the CMDB. The process is same across all the classes.
If you want to remove Assets from the CMDB but don’t want to delete them permanently, then you can Stage the Assets. Staging an Asset removes it from the CMDB and puts it in isolation. Staged Assets don’t reappear after a discovery process.
To Delete/Stage Assets:
Go to the Asset List View of any class.
Select the Assets that you want to delete. The Delete button appears above the listing area.
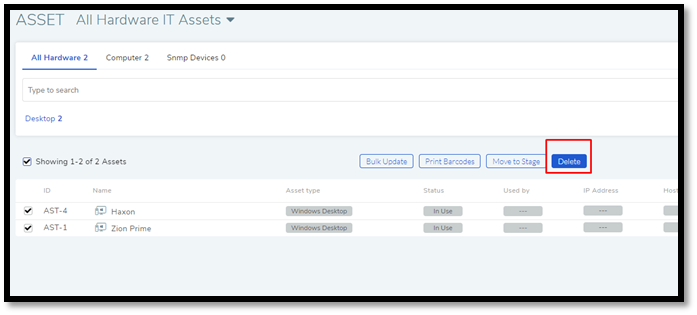
Click on the Delete button. On confirmation, the Asset/Assets are deleted from the CMDB.
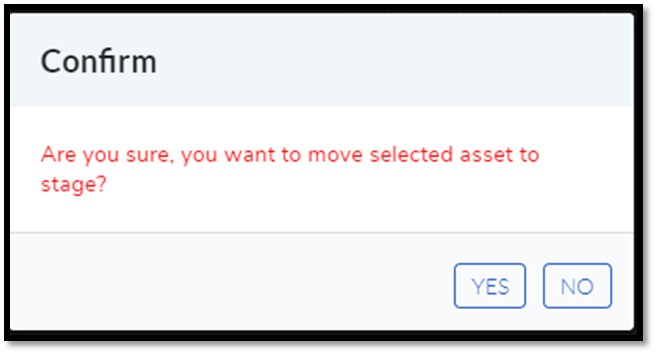
If you don’t want to delete the Asset/Assets then you can stage them. Select the Assets and click on the Move to Stage button (in Asset List View). On confirmation, the tool stages the Assets.
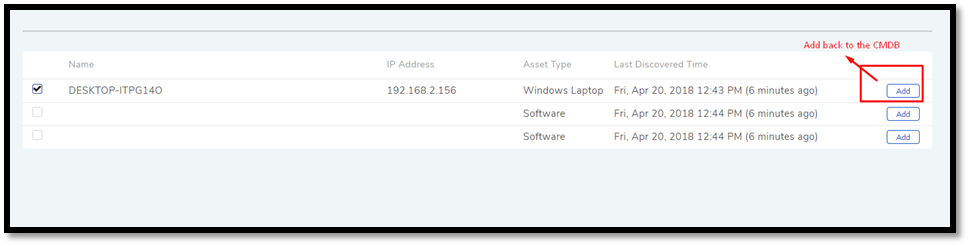
Add an Asset Back to CMDB from Stage:
Go to the Asset List View.
Click on Asset in Stage from the Action Menu.
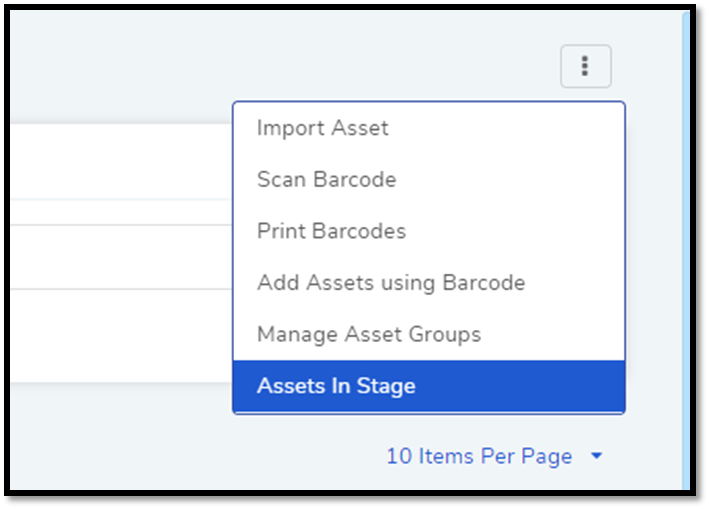
The Asset in Stage page opens; it lists all Staged Assets. You can add an Asset back to the CMDB by clicking on an Asset’s Add button.