10.4.6. LDAP Configuration
Motadata allows batch upload of Requestors through an LDAP request. LDAP is a protocol used by enterprises to access a distributed directory of their employees. It is mainly used by email clients and other contact search programs.
Motadata establishes a connection with a distributed directory information system using the provided information, and it makes queries using the LDAP protocol. It fetches the employee details from the server into Motadata ITSM.
10.4.6.1. Configure LDAP
Go to Admin >> LDAP Configuration (IT Infrastructure).
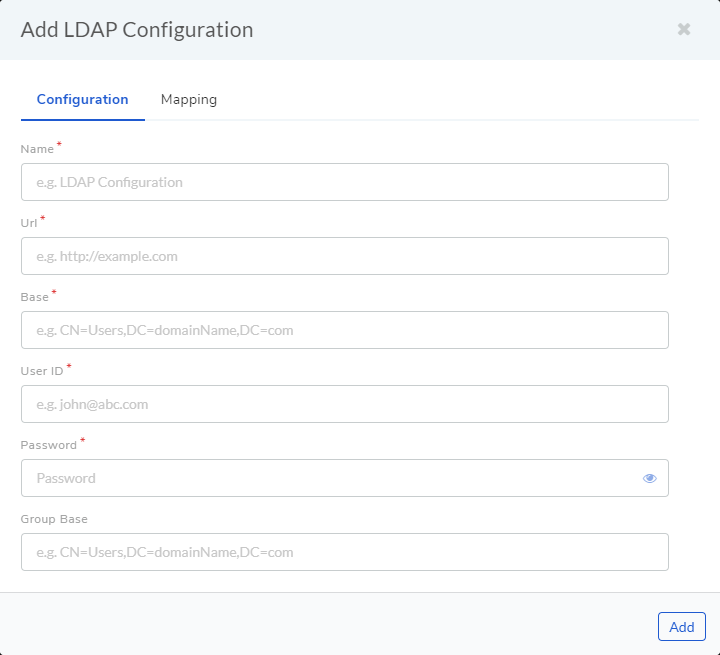
LDAP Configurations page opens. Here you can see all your existing LDAP servers if any. Click Add a LDAP Configuration situated in the top right corner. You get the following dialog box:
Ldap Server
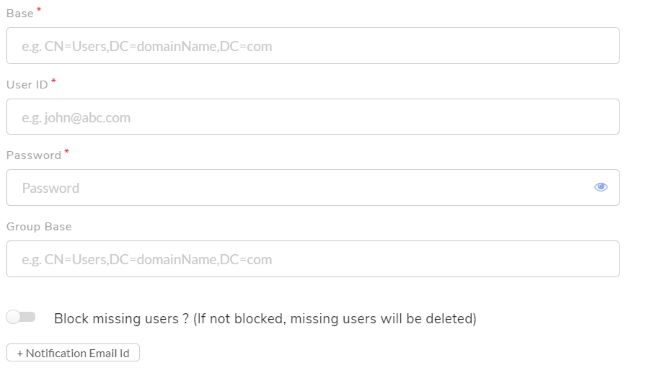
At the time of LDAP configuration, option “Block missing users? (If not blocked, missing users will be deleted)” is provided where Default value of this parameter is set as false. Based on this parameter value below behavior will be applicable to both Requesters and Technicians. If the value of this parameter is set as false then, missing users will get deleted on the next LDAP scan. If the same user is added in Active Directory then new use will be created. If the value of this parameter is set as true then, missing users will be marked as blocked on the next LDAP scan. If the same user is added in Active Directory then the user will be marked as unblocked. Now Lock/Unlock icon will be visible for technicians also.
Give a name to the server. URL (field A) is the URL of the LDAP server which begins with ldap:// (ldaps:// if the connection is secured) followed by protocol components (IP address, and port number). A valid URL should look something like ldap://111.111.0.11:920. A base dn is the point from where a server will start searching; basically, it tells us from where to start our search for a user in the AD. Put you LDAP credentials in the User ID (field C) and Password (field D).
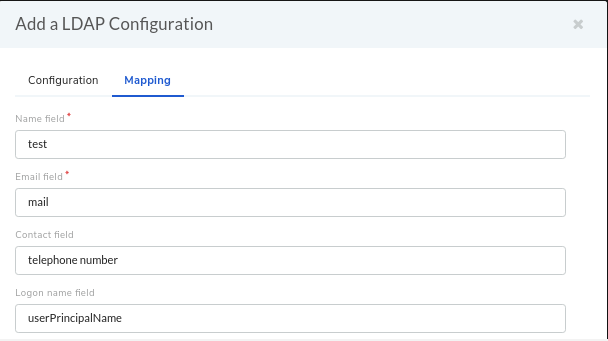
Switch to the Mapping section of the dialog box. Here you have to enter the LDAP object attributes. There are foue pre-defined fields (Name, Email, Contact and Logon name). You can add more fields using the User Custom Field option. You can edit and delete a custom field from the Custom Field page in Admin.
Below is the list of fields names that you can add along with their LDAP name.
Name in AD |
LDAP Name |
First Name |
givenName |
Middle Name / Initials |
initials |
Last Name |
sn |
Logon Name |
userPrincipalName |
Logon Name (Pre Windows 2000) |
sAMAccountName |
Display Name |
displayName |
Full Name |
name/cn |
Description |
description |
Office |
physicalDeliveryOfficeName |
Telephone Number |
telephoneNumber |
Web Page |
wWWHomePage |
Password |
password |
Street |
streetAddress |
PO Box |
postOfficeBox |
City |
l |
State/Province |
st |
Zip/Postal Code |
postalCode |
Country |
co |
Country 2 Digit Code - eg. US |
c |
Country code -eg. for US country code is 840 |
countryCode |
Group |
memberOf |
Account Expires (use same date format as server) |
accountExpires |
User Account Control |
userAccountControl |
User Photo |
thumbnailPhoto / exchangePhoto (Supports high resolution photo) / jpegPhoto / photo / thumbnailLogo |
Profile Path |
profilePath |
Login Script |
scriptPath |
Home Folder |
homeDirectory |
Home Drive |
homeDrive |
Log on to |
userWorkstations |
Home |
homePhone |
Pager |
pager |
Mobile |
mobile |
Fax |
facsimileTelephoneNumber |
IP Phone |
ipPhone |
Notes |
info |
Title |
title |
Department |
department |
Company |
company |
Manager |
manager |
Mail Alias |
mailNickName |
Simple Display Name |
displayNamePrintable |
Hide from Exchange address lists |
msExchHideFromAddressLists |
Sending Message Size (KB) |
submissionContLength |
Receiving Message Size (KB) |
delivContLength |
Accept messages from Authenticated Users only |
msExchRequireAuthToSendTo |
Reject Messages From |
unauthOrig |
Accept Messages From |
authOrig |
Send on Behalf |
publicDelegates |
Forward To |
altRecipient |
Deliver and Redirect |
deliverAndRedirect |
Reciepient Limits |
msExchRecipLimit |
Use mailbox store defaults |
mDBuseDefaults |
Issue Warning at (KB) |
mDBStorageQuota |
Prohibit Send at (KB) |
mDBOverQuotaLimit |
Prohibit Send and receive at (KB) |
mDBOverHardQuotaLimit |
Do not permanaently delete messages until the store has been backed up |
deletedItemFlags |
keep deleted items for (days) |
garbageCollPeriod |
Outlook Mobile Access |
msExchOmaAdminWirelessEnable |
Outlook Web Access |
protocolSettings |
Allow Terminal Server Logon |
tsAllowLogon |
Terminal Services Profile Path |
tsProfilePath |
Terminal Services Home Directory |
tsHomeDir |
Terminal Services Home Drive |
tsHomeDirDrive |
Start the following program at logon |
tsInheritInitialProgram |
Starting Program file name |
tsIntialProgram |
Start in |
tsWorkingDir |
Connect client drive at logon |
tsDeviceClientDrives |
Connect client printer at logon |
tsDeviceClientPrinters |
Default to main client printer |
tsDeviceClientDefaultPrinter |
End disconnected session |
tsTimeOutSettingsDisConnections |
Active Session limit |
tsTimeOutSettingsConnections |
Idle session limit |
tsTimeOutSettingsIdle |
When session limit reached or connection broken |
tsBrokenTimeOutSettings |
Allow reconnection |
tsReConnectSettings |
Remote Control |
tsShadowSettings |
Protect accidental deletion |
preventDeletion |
Manager can update members |
managerCanUpdateMembers |
Primary Group ID |
primaryGroupID |
Administrative Group |
msExchAdminGroup |
Exchange Server Name |
msExchHomeServerName |
Managed By |
managedBy |
Target Address |
targetAddress |
Proxy-Addresses |
proxyAddresses |
Automatically Update Email-address based on Recipient Policy |
msExchPoliciesExcluded |
Office 365 Group Membership |
GroupMemberObjectId |
Enable Litigation Hold for Mailbox |
LitigationHoldEnabled |
Litigation Hold Duration for Exchange Mailbox |
LitigationHoldDuration |
Enable in-place Archive for User Mailbox |
InPlaceArchive |
Archive Name for User’s Mailbox Archive |
ArchiveName |
User Principal Name of Office 365 user account |
O365userPrincipalName |
Hit Add to save your LDAP server.
The credentials required for LDAP configuration are of the LDAP Admin. In case, credentials are not available then a new user can be created in their Active Directory. Please refer the document LDAP Configuration by Creating New User.
10.4.6.2. Edit LDAP Server
Open LDAP Configurations page and select the server that you want to edit.
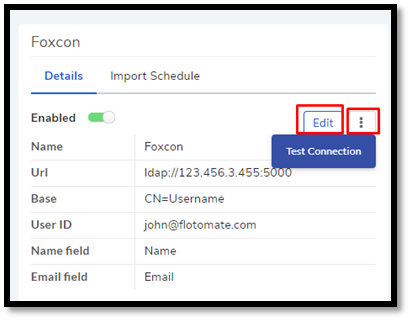
Click Edit from the right-side details pane. The Edit LDAP Configuration dialog box opens. Make the changes and hit Update.
Go to the LDAP Configurations page and select the server name that you want to delete and click on Action Menu. Click on Delete from the pop-up menu. On confirmation, the server gets deleted.
10.4.6.3. Import LDAP Users
LDAP list page offers an option of importing the LDAP users as well.
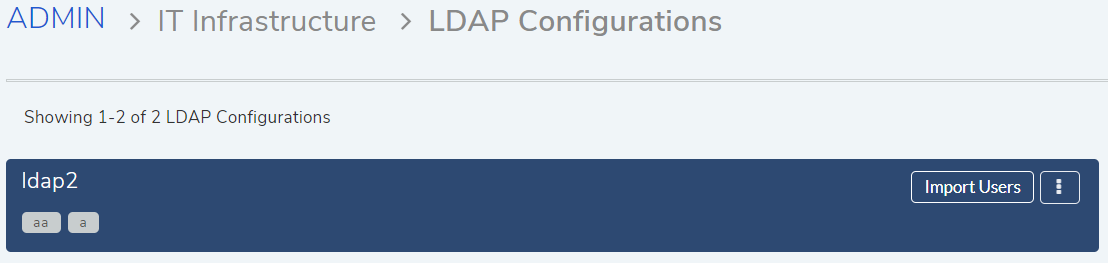
Import LDAP users
LDAP Server
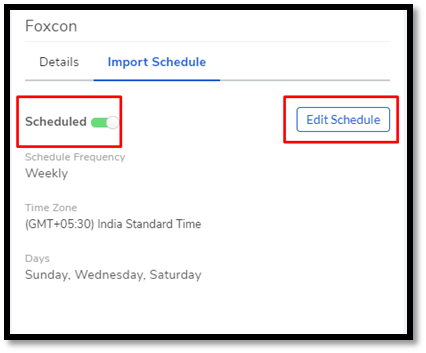
10.4.6.4. Setting LDAP Import Schedule
Scheduling allows you to periodically import employee details from the server. This feature helps you to keep the Requestor list up to date.
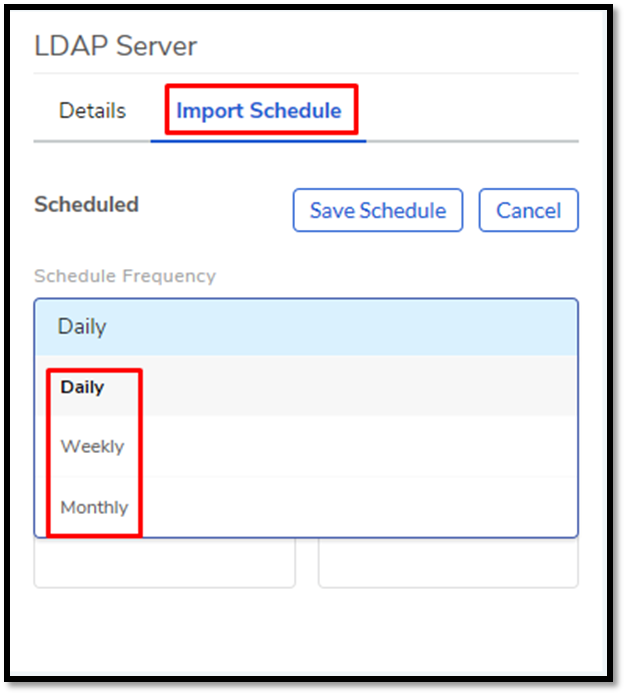
Open LDAP Configurations page and select the server that you want to schedule an import. Under Import Schedule, set a schedule cycle for importing the Requestors. Motadata offers three options: Daily, Weekly, and Monthly.
Importing daily requires a start date and time; after that, the importing happens every day at the set time.
Importing weekly requires you to set the days in a week on which the importing happens.
Importing monthly requires you to set a day of the month and the months in which the importing happens.
After setting the schedule, hit Save Schedule to save your changes.
10.4.6.5. Edit/ Disable LDAP Schedule
You can later edit the schedule using the Edit Schedule option. The Scheduled toggle turns on/off a schedule.