10.10. System
10.10.1. Agent Self Upgrade
Developing our Agent application is an ongoing process, which is why we release a new version periodically. In every version, the application is better compared to the previous either in terms of performance, capabilities or both.
The Agent Self Upgrade feature allows for a smooth transition from one version of the Agent to another. Using this feature, an admin can centrally deploy an Agent.msi/exe from the main server, which is received by all the (active) computers having Remote Monitoring.
Some of the benefits of using the latest version of the Agent application:
Newer versions of the Agent are more stable and give better performance.
Upgrading gives you more capabilities/features.
Upgrading to a newer version eliminates possible security flaws.
10.10.1.1. Uploading a New Agent Application File (Step 1)
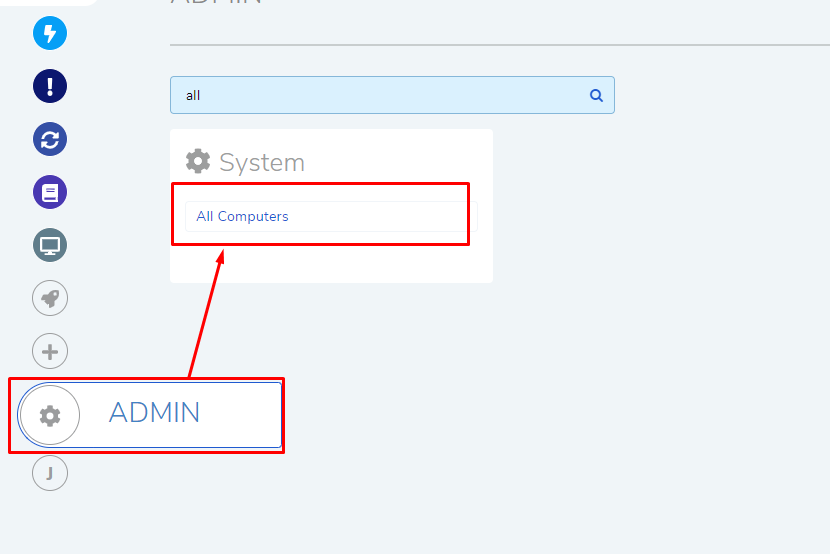
Go to the Admin (A Navigation Tab) >> All Computers (Systems).
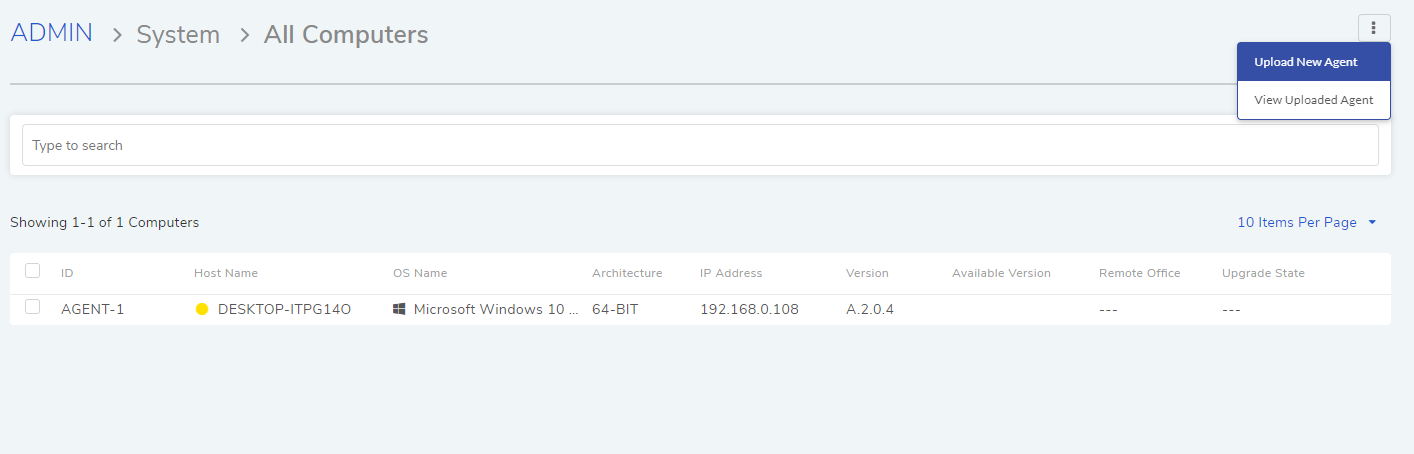
The All Computers page opens. Here you can view all your existing Computers (with the Agent application) along with their active status. Step one is to upload the new Agent application file; click on Upload New Agent from the Action Menu.
A new dialog box opens where you have to enter the following inputs:

Name of the upgrade.
Version of the Agent installation file.
Supported OS platform of the Application file (either Windows or Ubuntu).
Supported architecture either 32bit or 64bit.
Lastly, attache the installation file of the latest Agent.
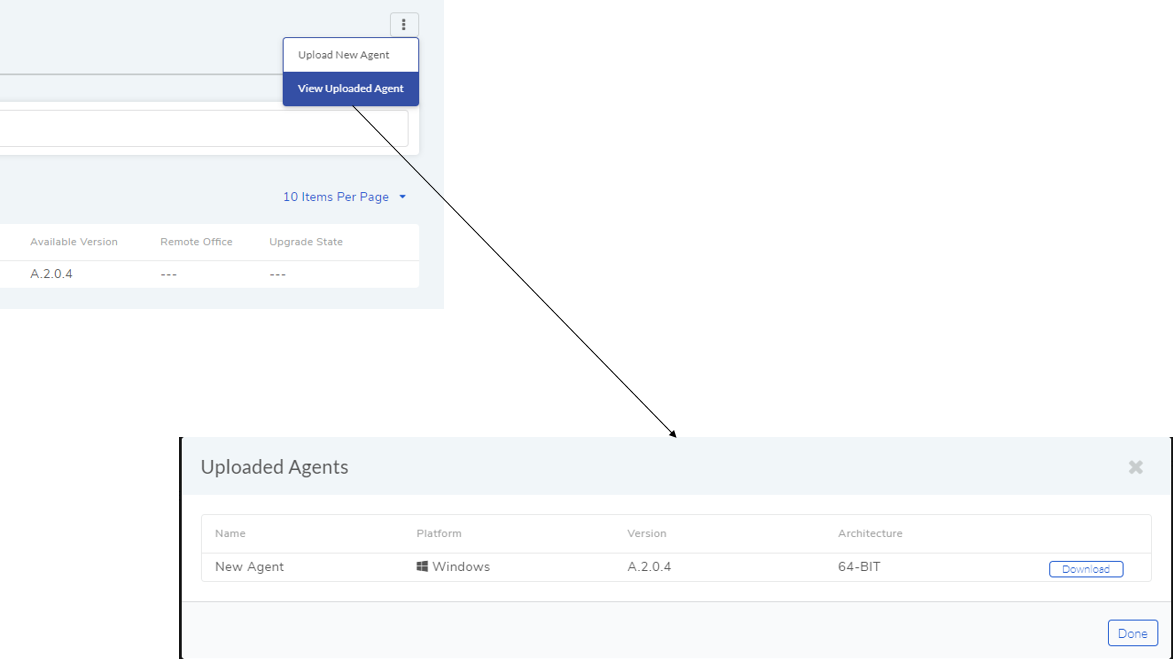
When you are done, click on Create. This updates the uploaded agent list.
10.10.1.2. Initiating an Upgrade (Step 2)
Go to the Admin (A Navigation Tab) >> All Computers (Systems).
Search and select the computers that you want to upgrade, and click the Upgrade button.
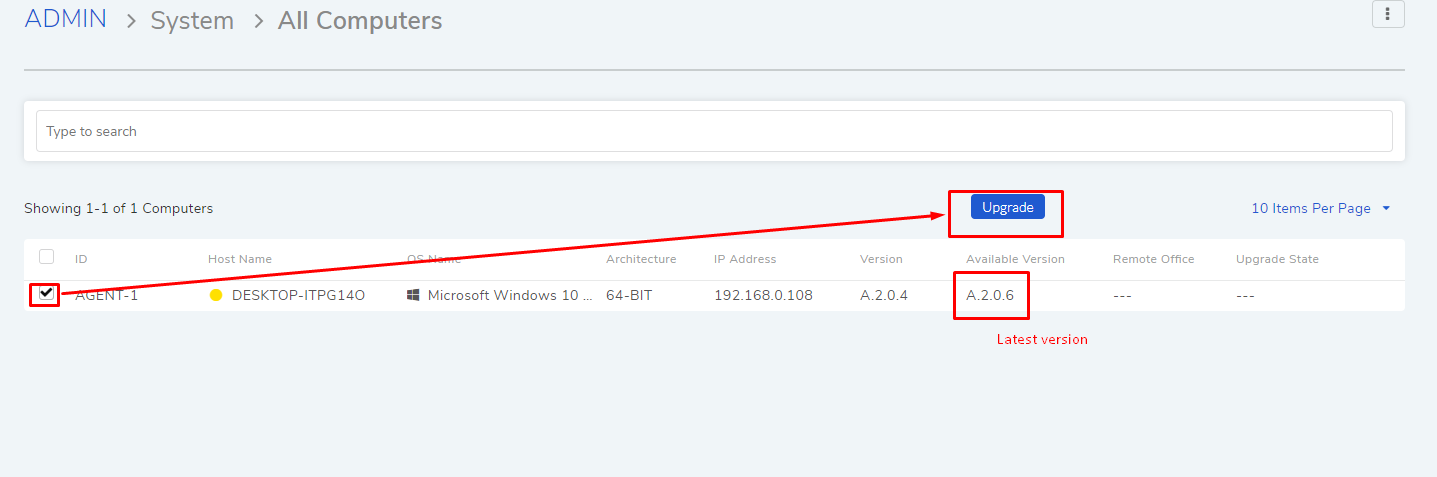
On confirmation, the server will deploy the latest version of the Agent from the uploaded agent list.
10.10.2. Periodic DB Backup
Users can create backups of the database of the Main (Product) Server. The database contains all the user generated data from all the modules. Once a backup is created, a (Admin) user can download the backup to his local machine.
A backup can be initiated manually and scheduled for automatic creation.
Some benefits of doing Periodic Backups:
Backups give protection against data lose incase of product failure or corruption.
Backups provide flexibility in data migration.
Ability to hold data for a longer period of time.
Ability to give legal response related to compliance.
10.10.3. Manually Initiate & Download a backup
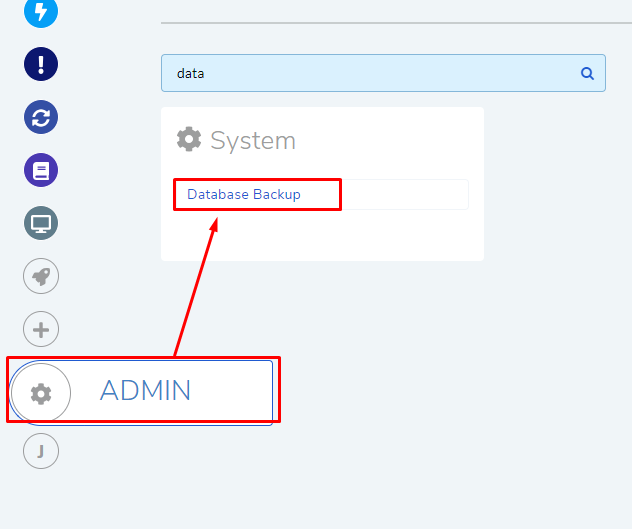
Go to Admin >> Database Backup (under System).
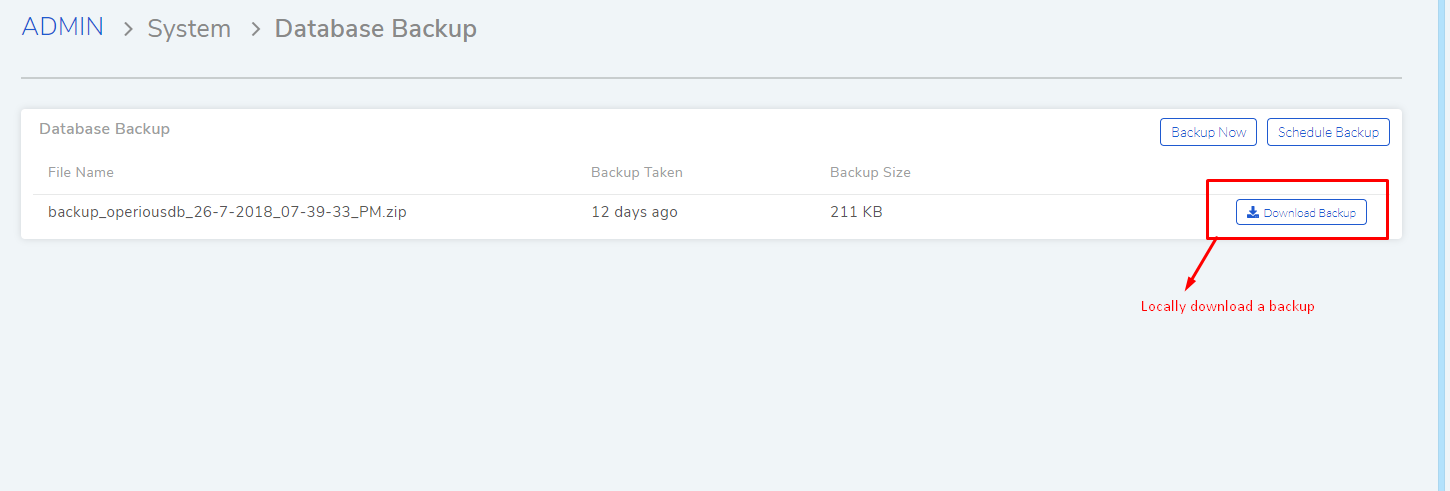
The Database Backup page opens. Here you can view all your current backups. Click on Backup Now to create a new backup.
Once backup is created, click on Download Backup which will locally install the backup.
10.10.4. Scheduling a Backup
A schedule will automatically create a backup at a specified interval.
Go to Admin >> Database Backup (under System).
Click on Schedule Backup to specify a interval.
A dialog box opens where you set a schedule Frequency and configure email notification.

Once a backup happens, you can download it locally.
10.10.5. Support Console
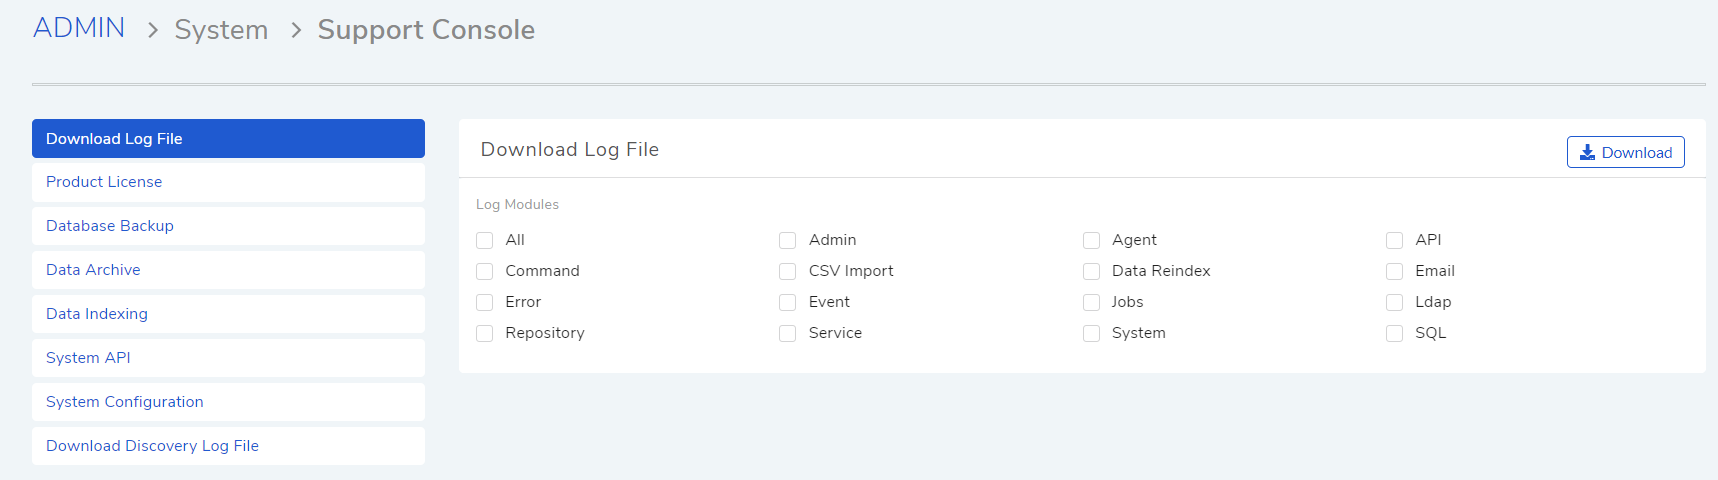
Support Console allows you to perform the following:
Download Log files and Discovery log files.
Upload product License
Download database backup
Data indexing for search
API validation
Data Archive and Purging
This feature allows auto Archiving and purging of the data of Requests.
Request Archiving
In this section you can configure the Request Archiving of data.
You can schedule the archival Daily, Weekly or Monthly
By default the Status will always be Disabled. You need to Enable it to work.
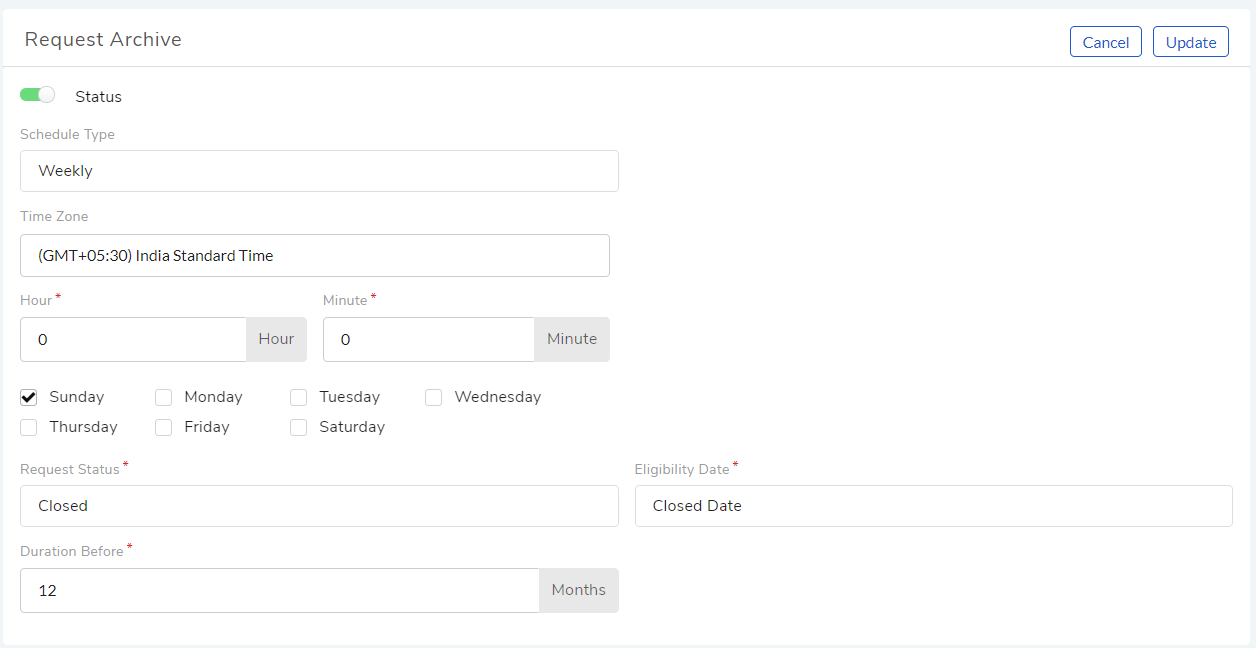
Request Archive
You can schedule the archival on any one day of the week or all days of week.
You can select the Status of the request after which you wish the archival.
Request Purging
In this section you can configure the Purging of Request data.
By default the Status will always be Disabled. You need to Enable it to work.
You can schedule the purging Daily, Weekly or Monthly
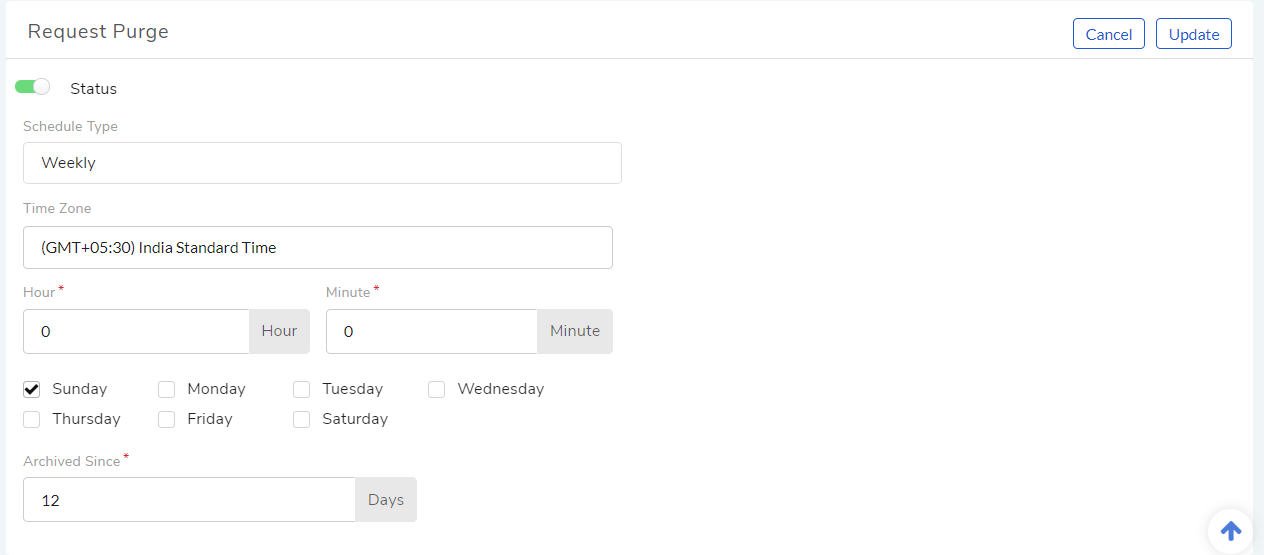
Request Purging
You can select the days of since the Data has been archived.