10.4.1. Network
Adding a Network allows the product to perform the following things:
Asset discovery and monitoring.
Remote deployment of Patches and Packages.
Note
Managing Networks requires administrative rights.
10.4.1.1. Add a Network
Log in to your Dashboard and head to Admin >> Networks (IT Infrastructure).
Click the Create a Network icon situated in the top right corner of the page. Create a Network dialog box opens.
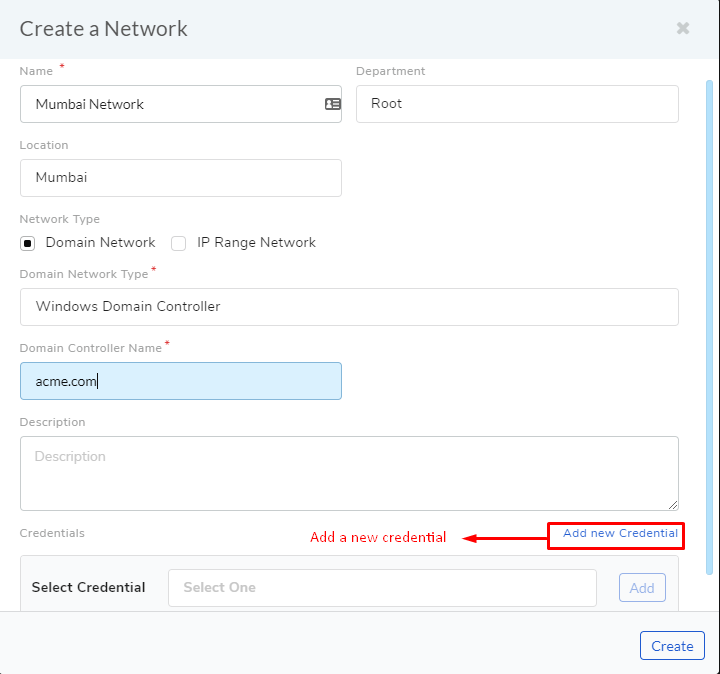
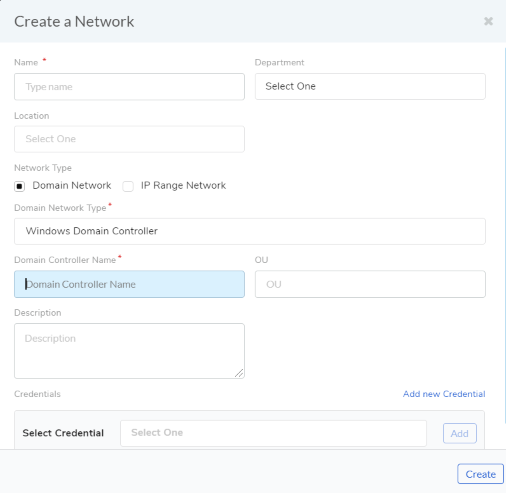
Create network
Give a name to the network.
You can associate the Network to a department.
You can associate the Network (works with IP range only) with a location. When an asset is discovered, if the IP of the asset falls in a network associated with a location, then the asset also inherits the location details. An asset assigned to a location will be visible to the technicians assigned to that location. Learn more.
Add a Domain Network Type: We have two Domain Network Types to select from:
Domain Network:
Windows Domain Controller
.Windows Workgroup
Type the Domain Controller Name, something like company.com.
Select the appropriate credential from Credential list.
It is a peer-to-peer network of computers running Windows OS. Type in the common name of the Workgroup.
Select the credential of a remote computer in the network from Credential list.
Note
When the domain network type is selected, OU(Operational Unit) support is provided which helps in defining the asset discovery for a particular Operational Unit as Location preference.
IP Range Network:
Entire Network
This option uniquely identifies an entire network with IP Range Start (example: 192.168.27.0) and Subnet Mask (example: 255.255.255.0).
Specific Range
You can specify an IP Range with a start and end IP, and a Subnet Mask.
Comma Separate IP List
As the name suggests, you can add a comma-separated list of all the IPs.
Type in a description and protocol type (if IP Range is selected).
We have two protocols to select from:
DHCP
STATIC
In this protocol, IP is centrally allocated and resolved in your network.
You have to configure your DNS for asset Discovery to work.
Using static IP addresses to identify devices in the network.
Add the necessary credentials from the credential list, or you can create new credentials using the Add New Credential option in
adf-69. When you are done hit Create.
Multiple credentials are also allowed with single Discovery Type. For example, if different credentials for SSH discovery are to be created, it can be done using the above same step.
Edit/Delete Network
Log in to your Dashboard and head to Admin >> Networks (IT Infrastructure).

All your networks are listed on this page. Click the Edit Icon adjacent to the network that you want to edit.
Edit the network in the Edit Network dialog box and save your change before exiting.
You can delete any network by clicking the Delete Icon adjacent to the network that you want to delete.