Creating a Purchase Order
You can create a new purchase order directly into the system when you are logged in. To create a purchase order,
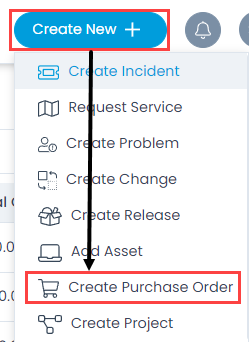
- Click Create New + button and select the Create Purchase Order option. The following page appears.

- Enter the following details:
- Requester: Select the name of the person who is requesting to create a purchase order. By default, the system takes your name as the requester.
- Name: Enter the name of the purchase order. A subject should be short self-descriptive text to understand the purchase.
- Order Number: Enter the number of the placed order.
- Required By: Select the date when the ordered item is required.
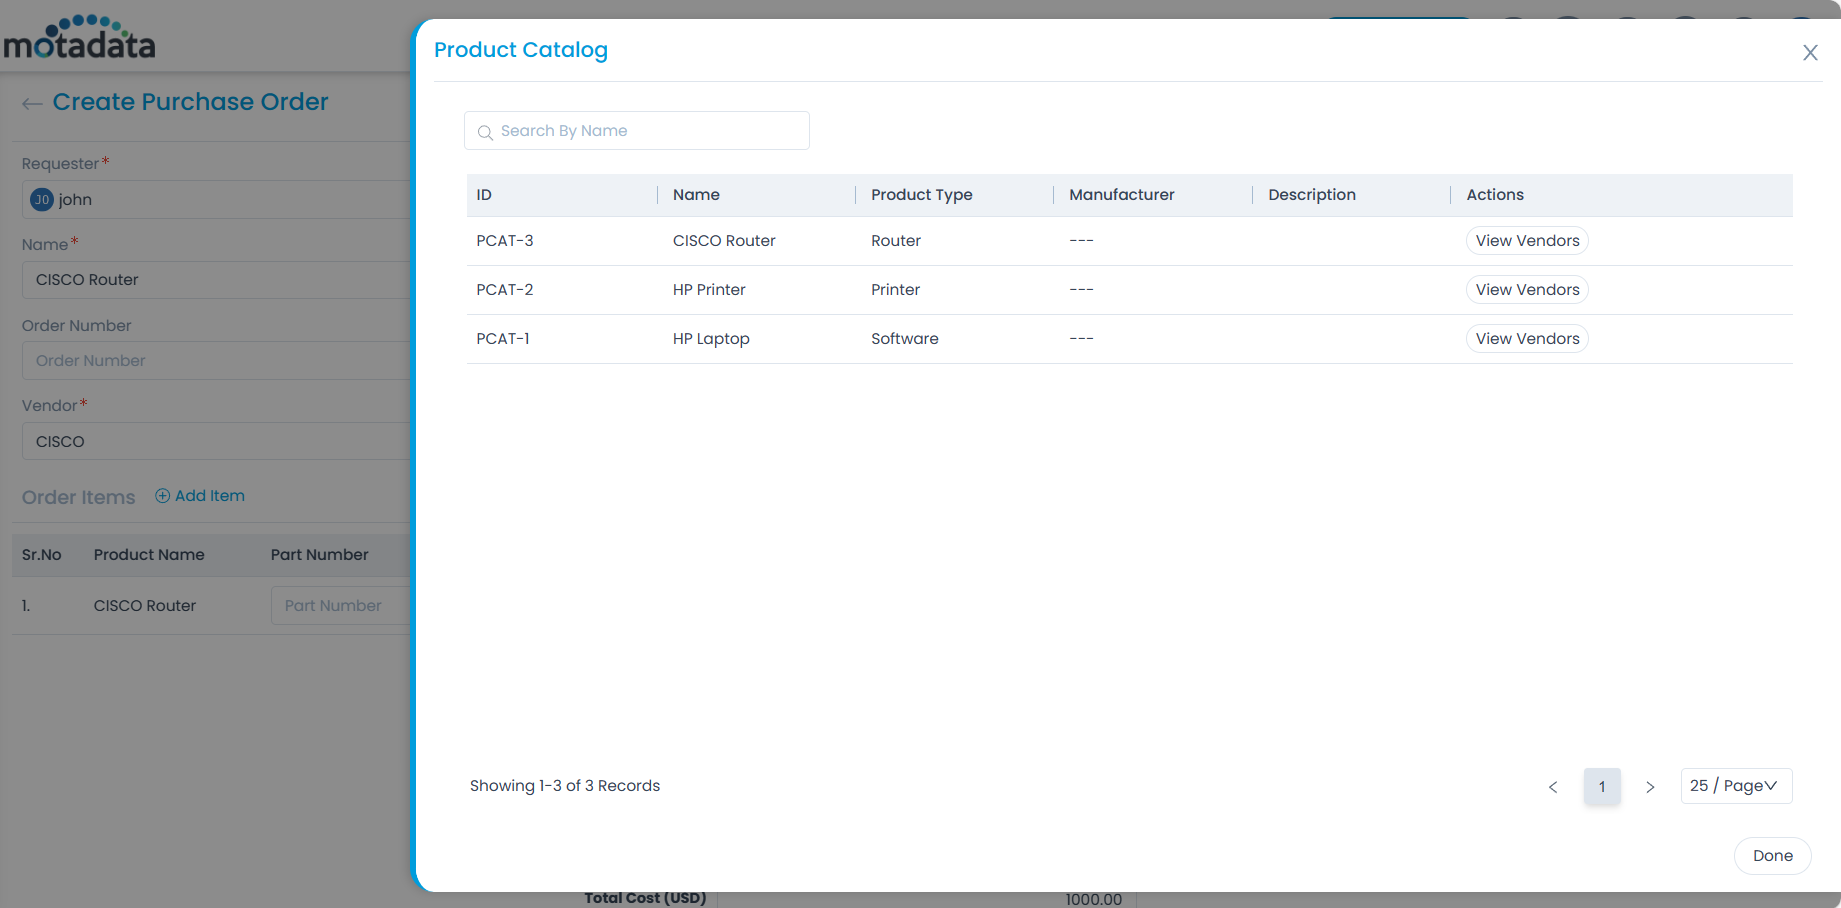
- Vendor: Select the vendor from the dropdown list. You can add them from the Vendor Catalog page. You can also view the Product Catalog details by clicking on the Info icon.
- Currency: Select the currency of the amount.
- Add Item: Add items as per the vendor and currency selected by clicking the link and a popup appears as shown below. The list displays the products that are linked with the vendor from The Product Catalog page.
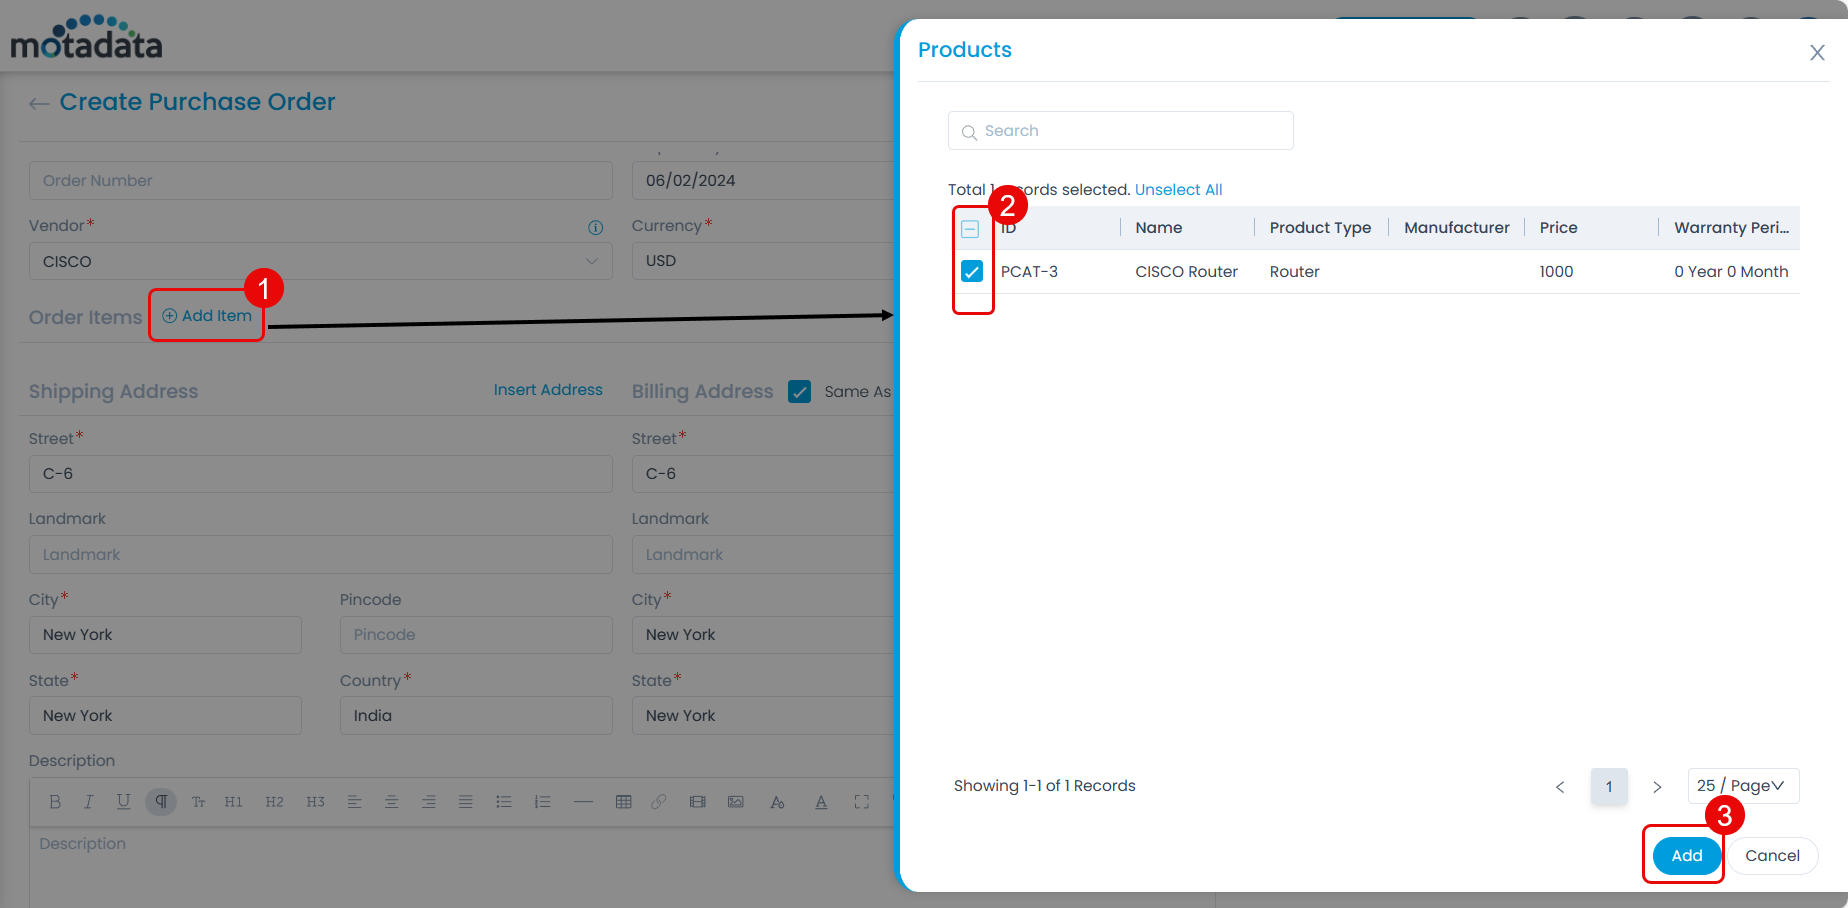
Select the items to be ordered and click Add. At a time you can add a maximum of 100 items to the Purchase Order. Once added, the details of the products like part number, price, tax rate, quantity, amount, discount, shipping charges, and total cost appear as shown below.

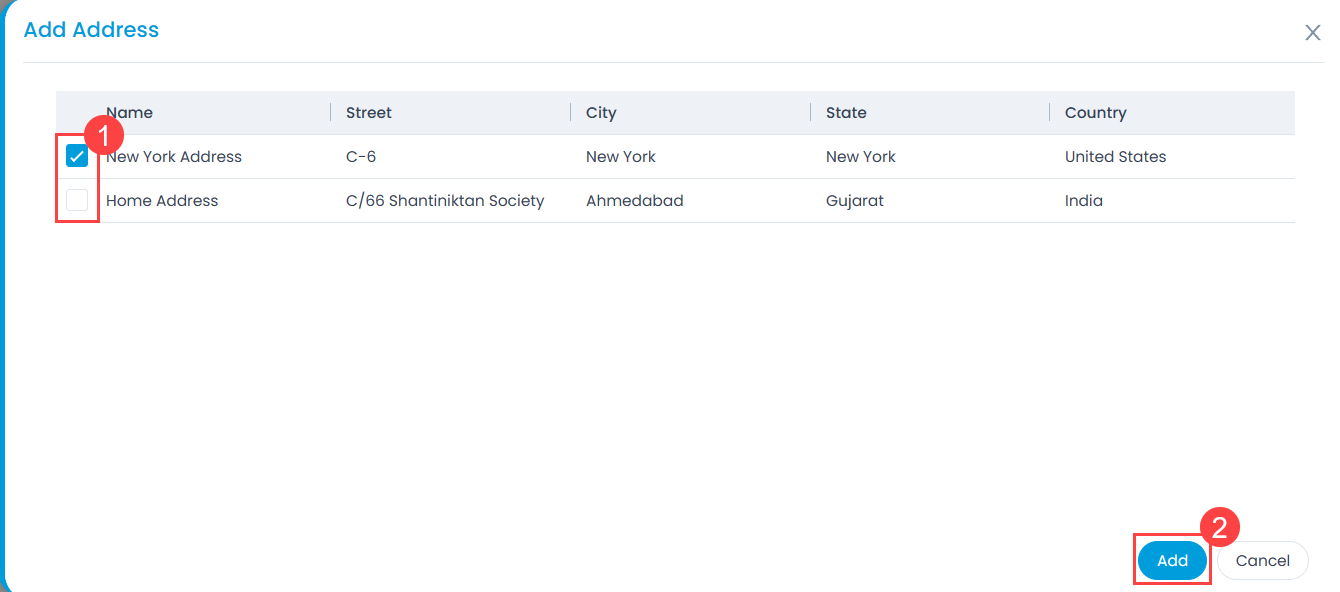
Shipping and Billing Address: Click the Insert Address link to select the pre-configured addresses or enter the details manually. If the Billing Address is the same as the Shipping Address you can enable the option Same As Shipping Address next to the Billing Address label.
To select the pre-configured address, click Insert Address and a popup appears. Select the required address and click Add as shown below.
- Description: Enter the details of the purchase order.
- Terms: Enter the terms and conditions of the order if any.
- Owner: Enter the owner of the purchase order.
- Cost Center: Select the desired cost center from the dropdown list. For more details on its addition, refer to the Cost Center link.
- GL Code: Select the desired GL code from the dropdown list. For more details on its addition, refer to the GL Code link.
- Tags: Add tags if you want. It helps in identifying similar purchase orders. It is optional.
- Attachments: Attach the relevant files that will help the technician with the purchase. Once attached, you can preview or even delete it using the respective icons.
- Print Template: Select the print template that you want to use for printing the Purchase Order. For more details on it creation, refer to the Print Template link.
- Signing Authority: Enter the place and signing authority of the purchase. You can add multiple signing authorities using the Add Signing Authority link. You can add a maximum of 5 signing authorities.
- Once all the details are entered, click Create, and a purchase order gets created. Also, a confirmation message appears and an email is sent to you acknowledging the purchase. A purchase starts with the suffix "PO". For example: PO-1.