Create Automatic Patch Deployment
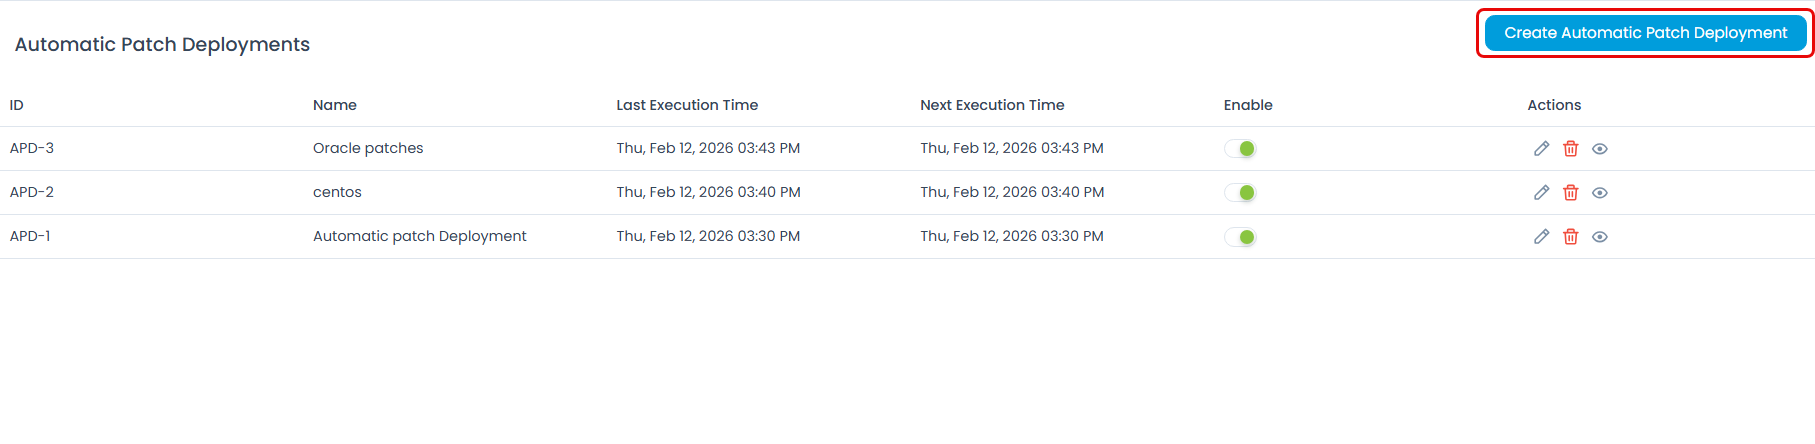
You can create a new Automatic Patch Deployment directly into the system when you are logged in from the list page.
To do so, Click the Create Automatic Patch Deployment button on the top-right corner of the list page. A popup appears as shown below:
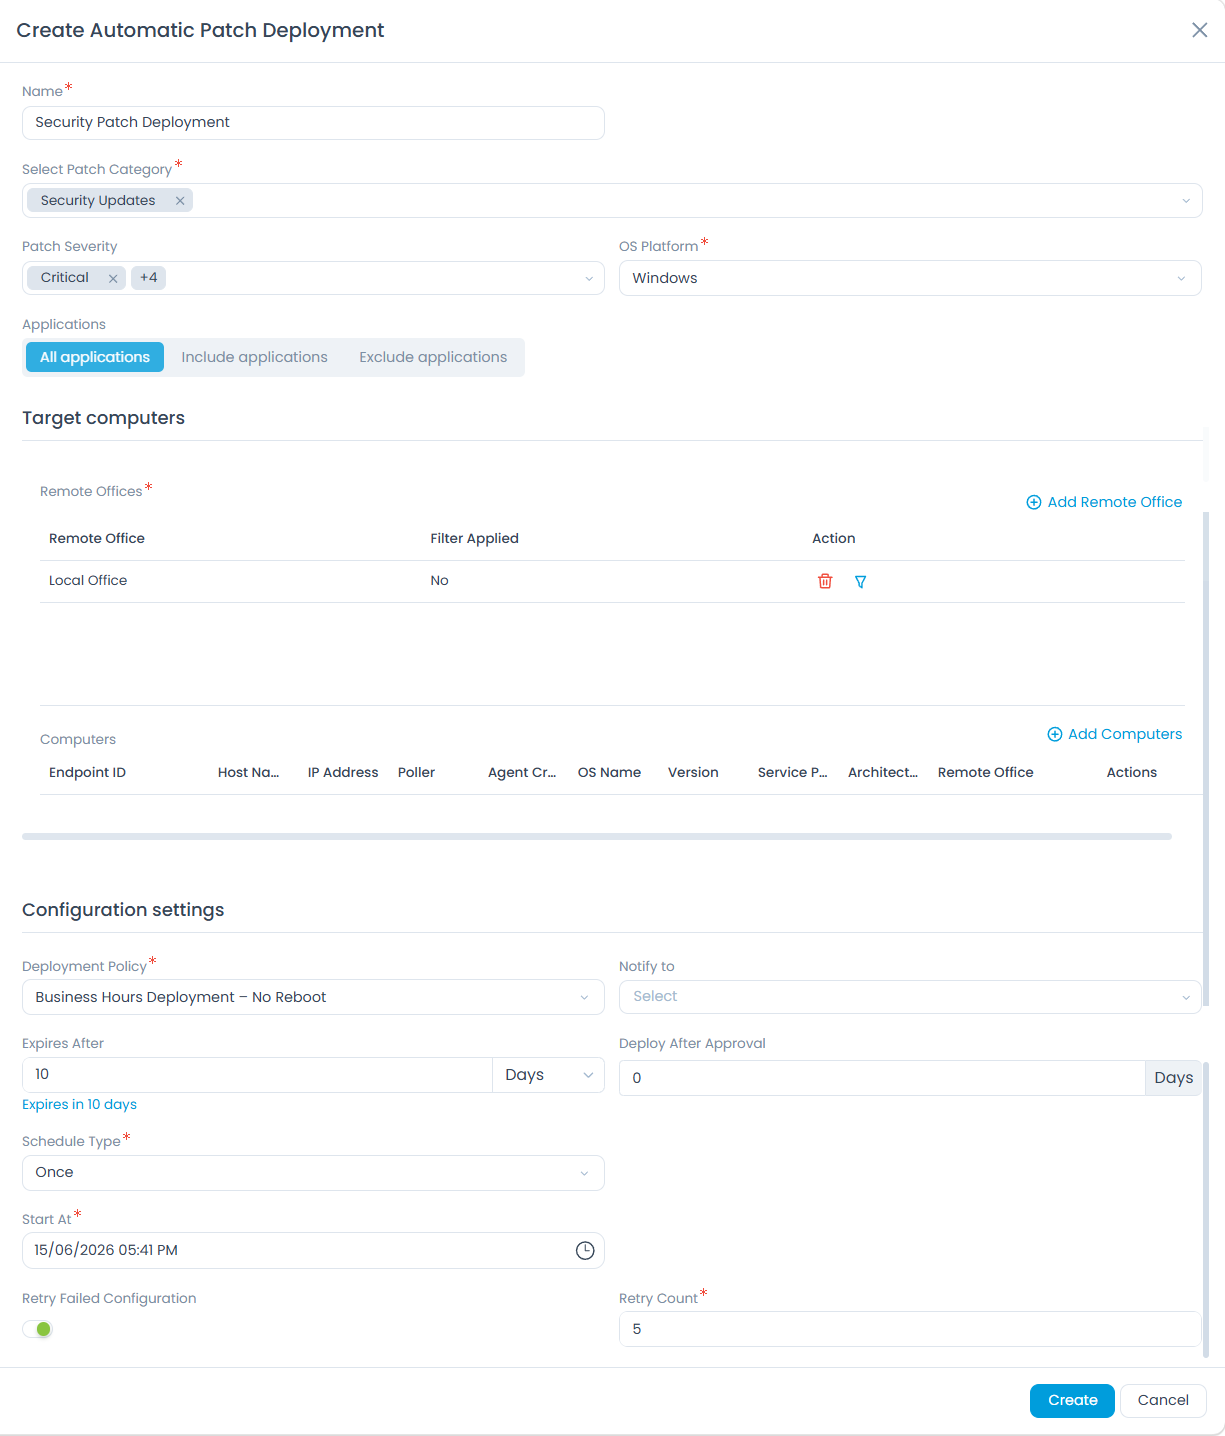
Enter the following details:
- Name: Enter the name of the patch deployment.
- Select Patch Category: Select the category from the dropdown.
- Patch Severity: Select the severity of the patch deployment from the dropdown.
- OS Platform: Select the desired OS from the dropdown. Based on the selected OS, the Computers will be available for selection.
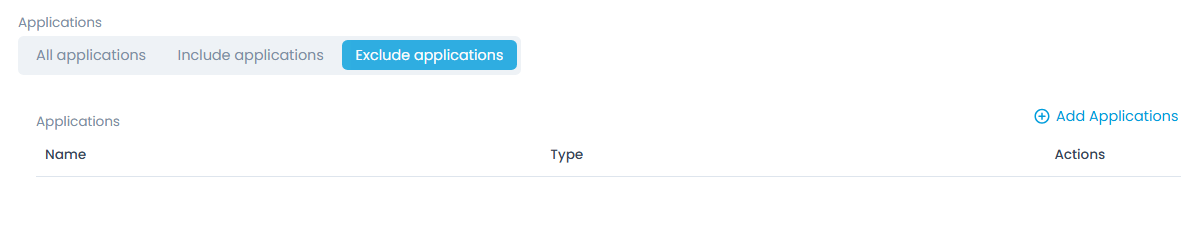
- Applications: Select the applications on which the Automatic Patch Deployment is to be performed.
The options are:
- All Applications: It will include all the applications in the system.
- Include Applications: It will include all the applications selected using the Add Applications link on the right corner as shown below.


- Exclude Applications: It will exclude the applications selected using the Add Applications link on the right corner as shown below.
Target Computers
- Remote Offices: Add the Remote Offices using the Add Remote Office link on the right corner as shown below. For more details, click Remote Offices.


- Computer: Add the Computers using the Add Computers link on the right corner as shown below. For more details, click End Points Scope.


Configuration Settings
- Deployment Policy: Select the deployment policy from the dropdown. You can also create a new policy. For more details, click the link Deployment Policies page.
- Notify to: Select the users from the dropdown to whom you wish to notify about the Automatic Patch Deployment.
- Expires After: The system automatically sets this to 10 days from the creation timestamp. A pill tag below the field shows "Expires in x days" and updates dynamically when you change the value. You can modify it if required.
- Deploy After Approval: Enter the number of days after which the patch is to be deployed, once approved.
- Schedule Type: Select the type of schedule. The options are:
- Once: The schedule will run only once on the selected start date.
- Daily: The schedule will run daily starting from the selected start date and time.
- Weekly: The schedule will run once a week as per the selected day and time. Also, provide the start date from which the schedule will be applicable.
- Monthly: If selected choose when the scheduler should run:
- On Specific Date: Allows you to select the Date and Month for the schedule to run.
- On Specific Day: Allows you to select the Occurrence (e.g., first, second) and Weekday (e.g., Monday, Tuesday) for the schedule to run, along with the Month.
- Interval: Set the interval in hours or days within which the schedule should run. Also, provide the start date from which the schedule will be applicable.
- Time: Select the time at which the deployment should start.
- Retry Failed Configuration: Enable the parameter and specify the number of times the configuration should be retried in case it is failed. By default, it is disabled.
Once you are done, click Create, and the Automatic Patch Deployment gets created. It will run as per the scheduled time.