How to Configure Memory and Connection Pool?
Overview
In today's fast-paced digital environment, the performance of your applications hinges on proper resource management. One of the key aspects of this management involves configuring memory and connection pools to ensure your systems are optimized for efficiency, scalability, and reliability. Whether you are running enterprise-grade applications or handling heavy transactional workloads, configuring these parameters correctly can be the difference between smooth operations and frequent downtime.
This guide is designed to help IT professionals and system administrators optimize memory and connection pool settings, ensuring that applications meet current demands and are prepared to scale in the future. Following this comprehensive guide will teach you how to allocate memory, configure connection pools based on workload requirements, and ensure system stability even during high-traffic periods.
Prerequisites
- The elasticsearch service must be up and running for the main-server and analytics-server
- To update the memory size of all services, first update the elastic search service and later the other services.
- Before updating any file, a backup must be taken.
- Ensure the minimum memory value is always less than the maximum value assigned.
Memory Configuration
Memory configuration refers to setting parameters for how much memory is allocated for various operations within an application or service, including heap size, stack size, and memory limits for threads and processes.
Set JAVA Heap Sizes
Java heap sizes should be adjusted based on the workload, data size, and expected concurrency. Below are the two important settings:
-Xms: Initial heap size
-Xmx: Maximum heap size
Memory Matrix
| Memory Martix | ||||||
|---|---|---|---|---|---|---|
| ServiceOps Services | 16 GB | 32 GB | 64 GB | |||
| Minimum | Maximum | Minimum | Maximum | Minimum | Maximum | |
| Main Server | 1024 | 4096 | 4096 | 10240 | 1024 | 24576 |
| Analytics Server | 1024 | 4096 | 4096 | 8192 | 1024 | 16384 |
| Plugin Server | 512 | 1024 | 512 | 1024 | 512 | 2048 |
| Elasticsearch | 512 | 1024 | 512 | 1024 | 512 | 2048 |
Main Server
To configure memory in the main server,
Login to the terminal server using the root user.
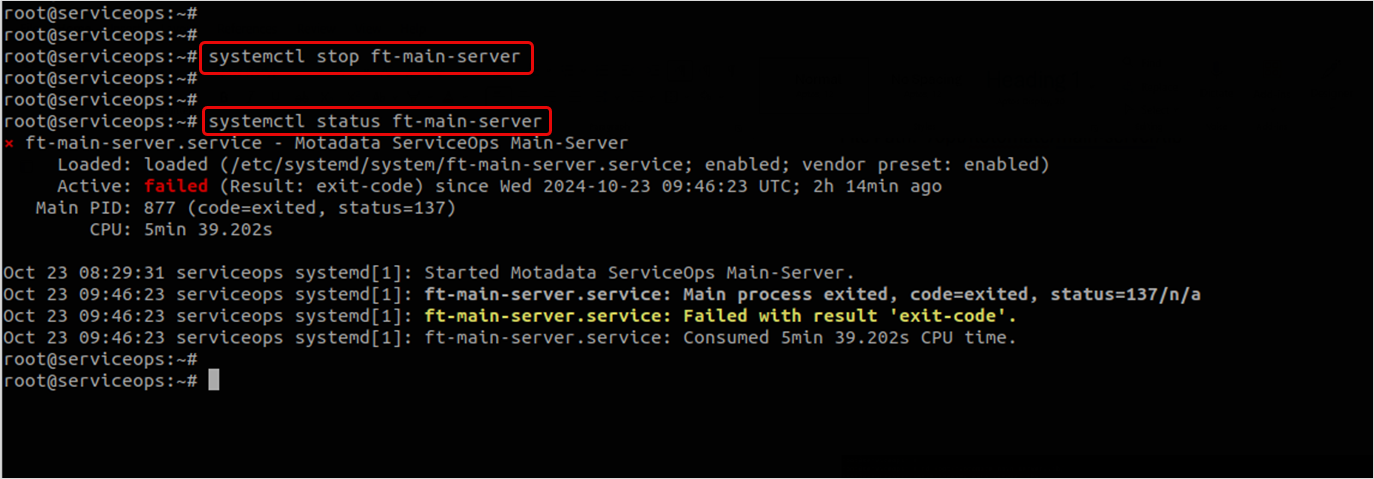
Stop the main-server service and check its status using the below commands:
systemctl stop ft-main-server
systemctl status ft-main-server
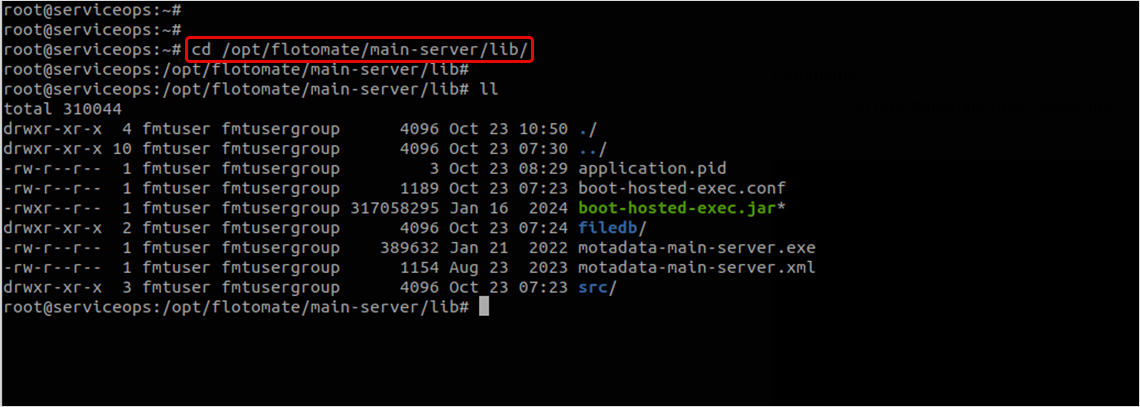
- Go to the main-server folder and edit the "boot-hosted-exec.conf" file using the below commands:
cd /opt/flotomate/main-server/lib/
vim boot-hosted-exec.conf
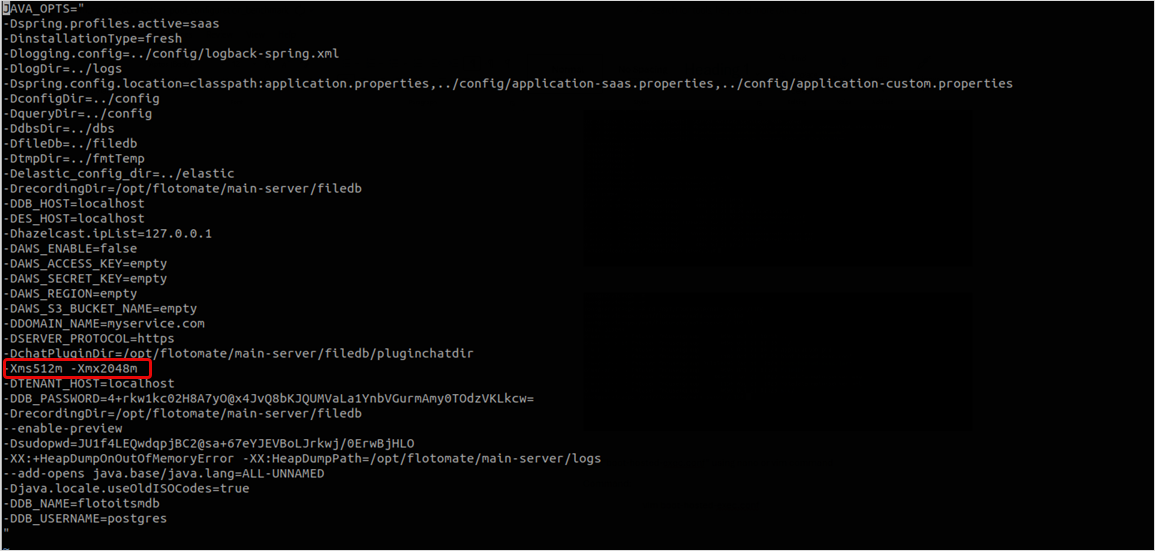
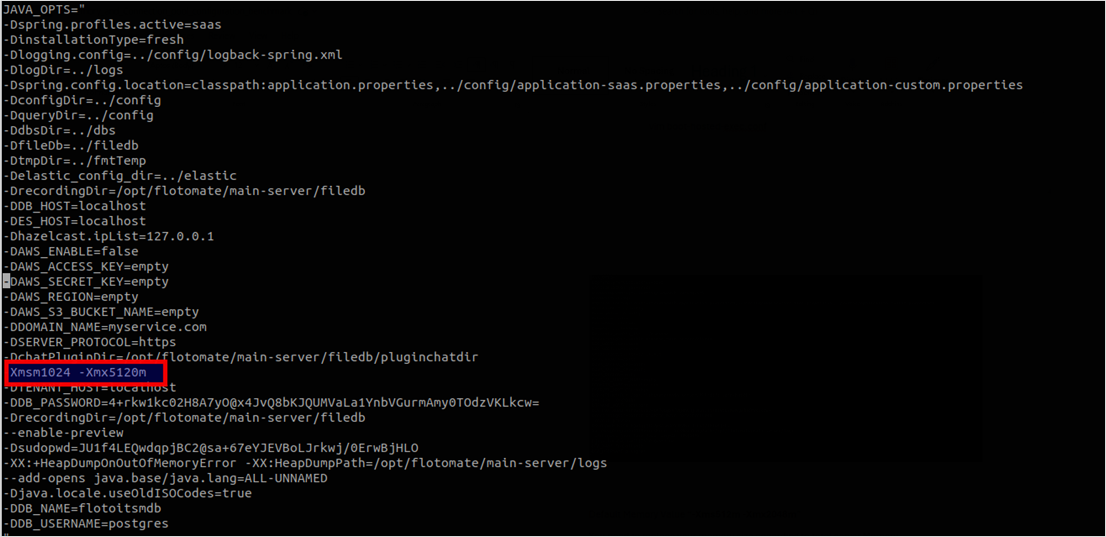
4. The default memory value is -Xms512m -Xms2048m. Replace it with a new value based on the total server memory. To allocate memory, use the above memory matrix table. For example, If the Total Server Memory is 16 GB, you can assign the main-server with min 1024 and max 5120 memory.
Example: -Xms1024m -Xms5120m
- Once done, save the file.
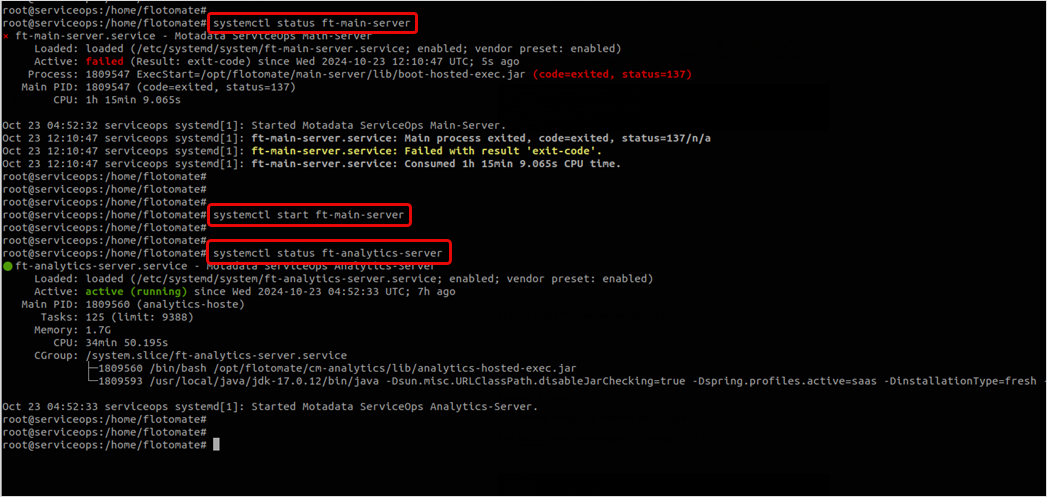
- Check the main-server service status, start its service, and again verify its status using the below commands:
systemctl status ft-main-server
systemctl start ft-main-server
systemctl status ft-main-server
Analytics Server
To configure memory in the analytics server,
- Login to the terminal server using the root user.
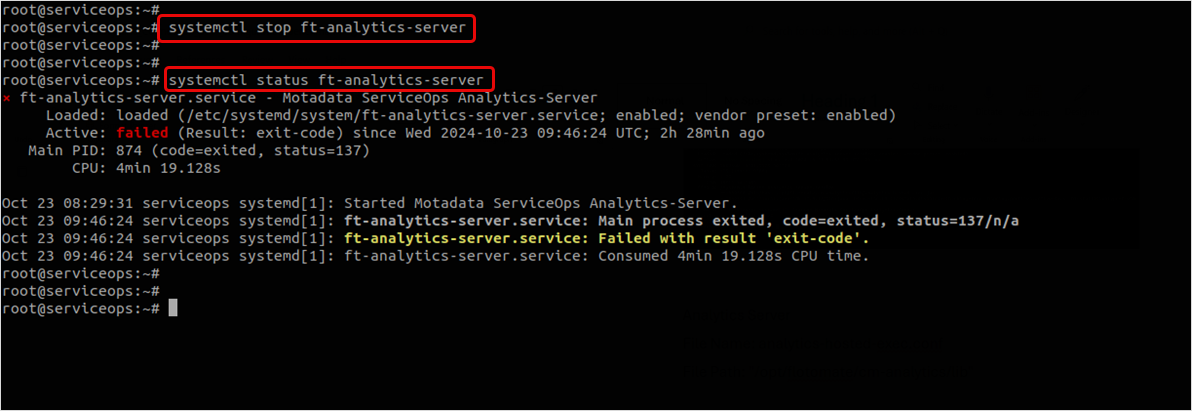
- Stop the analytics-server service and check its status using the below commands:
systemctl stop ft-analytics-server
systemctl status ft-analytics-server
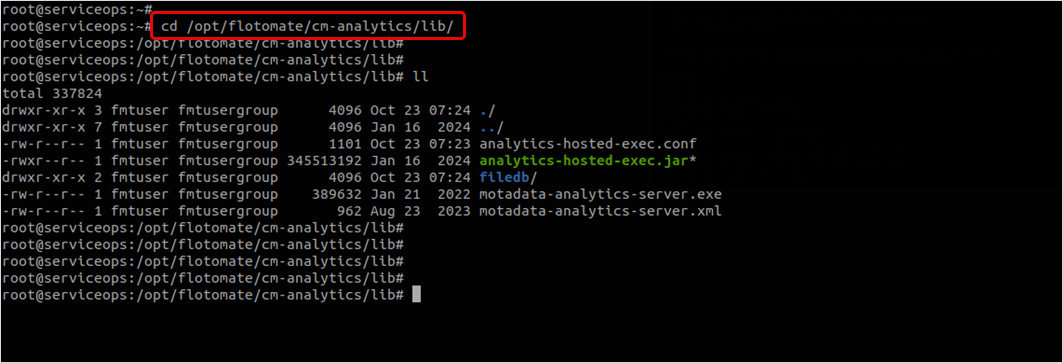
- Go to the analytics server folder and edit the "analytics-hosted-exec.conf" file using the below commands:
cd /opt/flotomate/analytics/lib/
vim analytics-hosted-exec.conf

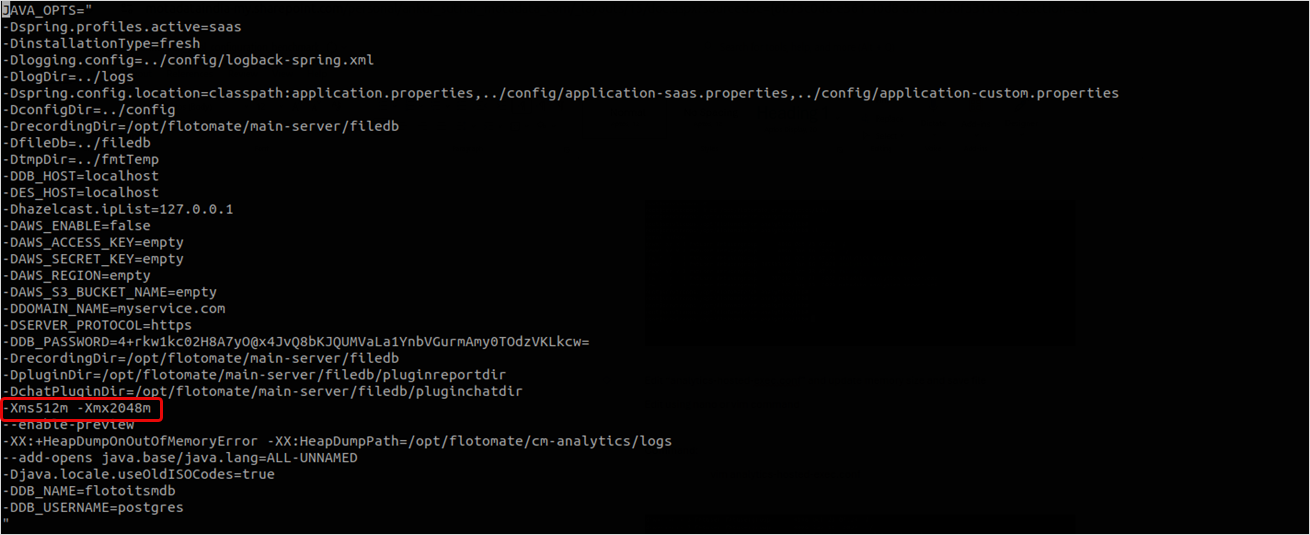
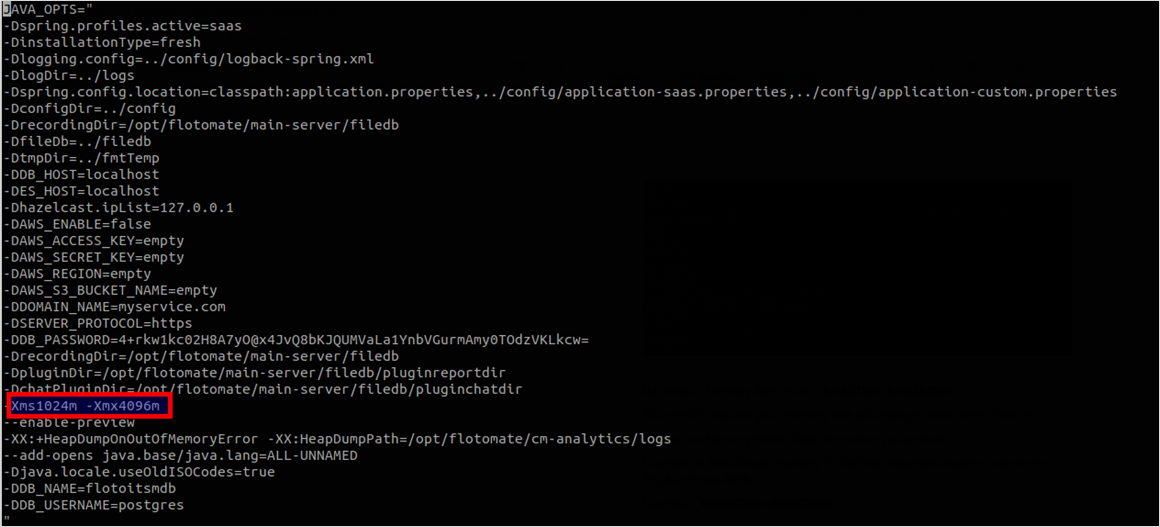
The default memory value which is -Xms512m -Xms2048m. Replace it with a new value based on the total server memory. To allocate memory, use the above memory matrix table. For example, If the Total Server Memory is 16 GB, you can assign the analytics-server with min 1024 and max 4096 memory.
Example: -Xms1024m -Xms4096m
- Once done, save the file.
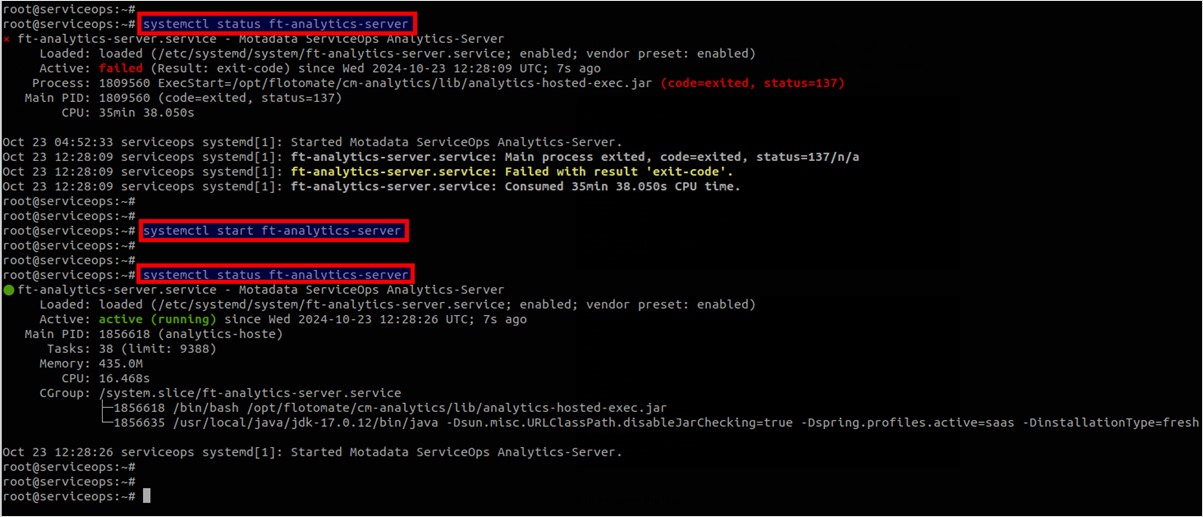
- Check the analytics server service status, start its service, and again verify its status using the below commands:
systemctl status ft-analytics-server
systemctl start ft-analytics-server
systemctl status ft-analytics-server
Plugin Server
To configure memory in the plugin server,
- Login to the terminal server using the root user.
- Stop the plugin-server service and check its status using the below commands:
systemctl stop ft-plugins-server
systemctl status ft-plugins-server

3. Go to the plugins server folder and edit the "pluginserver-hosted-exec.conf" file using the below commands:
cd /opt/flotomate/plugin-server/lib/
vim analytics-hosted-exec.conf
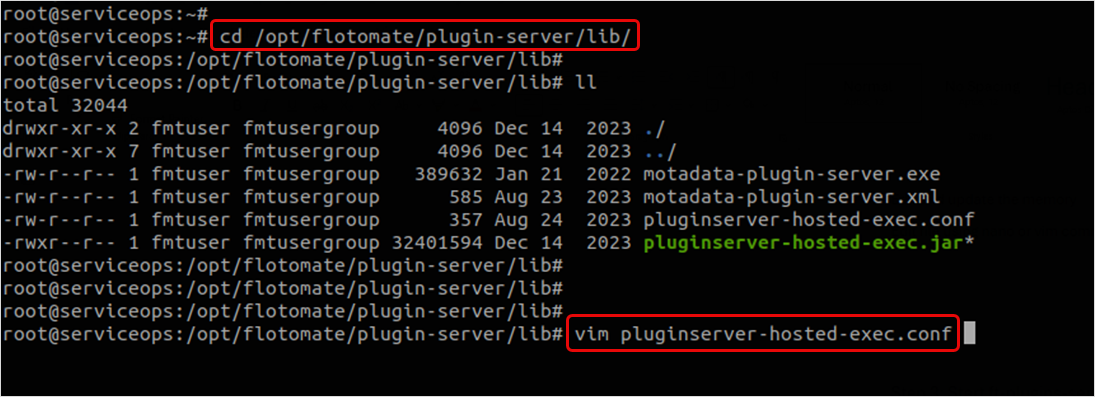

The default memory value which is -Xms512m -Xms1024m. Replace it with a new value based on the total server memory. To allocate memory, use the above memory matrix table. For example, if the Total Server Memory is 64 GB, you can assign the plugin-server with min 512 and max 2048 memory.
Example: -Xms512m -Xms2048m

- Once done, save the file.
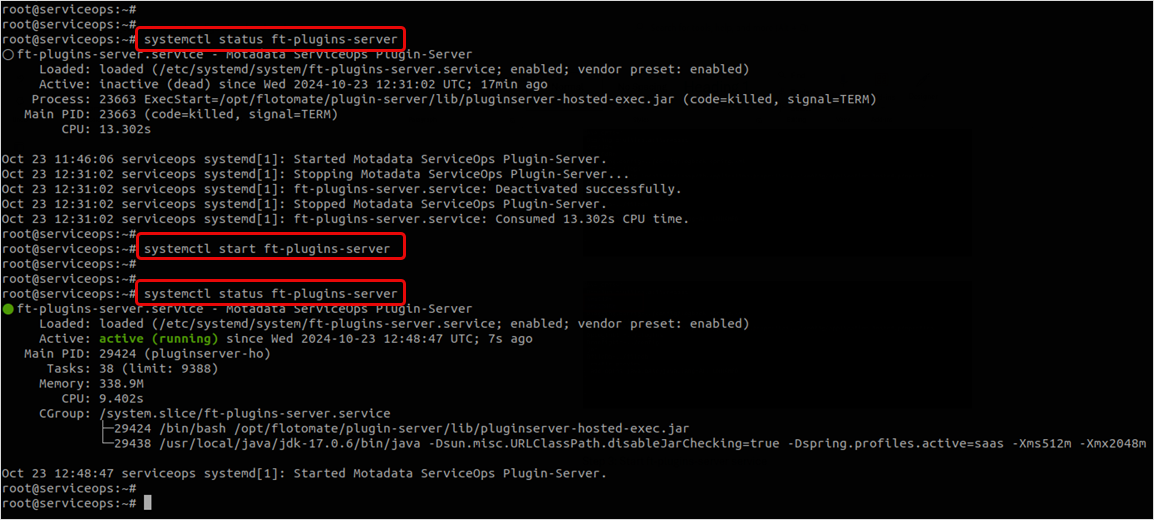
- Check the plugins-server service status, start its service, and again verify its status using the below commands:
systemctl status ft-plugins-server
systemctl start ft-plugins-server
systemctl status ft-plugins-server
Elastic Search
To configure memory in the analytics server,
- Login to the terminal server using the root user.
- Stop the elasticsearch service and check its status using the below commands:
systemctl stop elasticsearch
systemctl status elasticsearch

3. Go to the elastic search folder and edit the "jvm.options" config file using the below commands:
cd /usr/share/elasticsearch-7.3.2/config
vim jvm.options
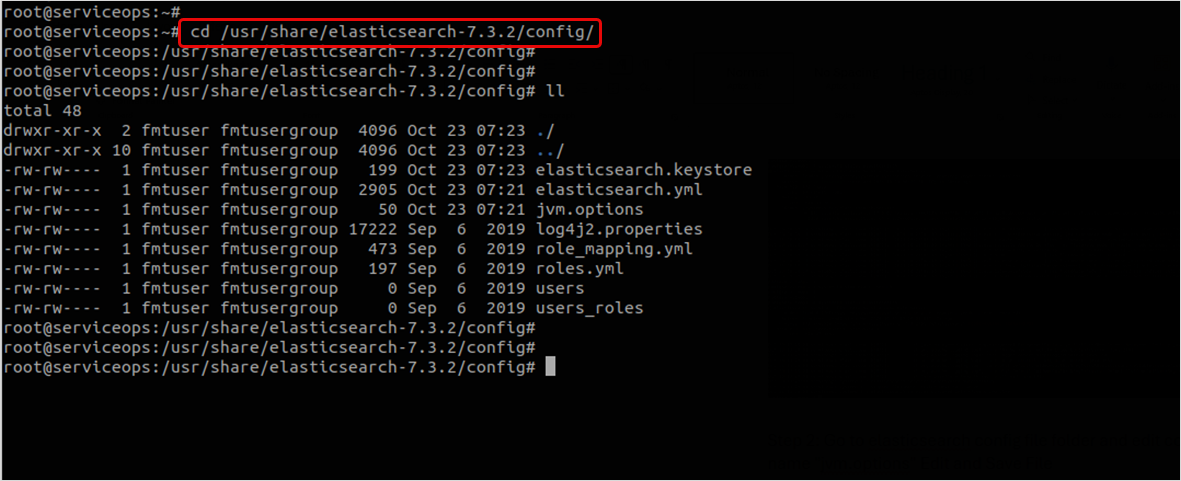

The default memory value which is -Xms512m -Xms768m. Replace it with a new value based on the total server memory. To allocate memory, use the above memory matrix table. For example, if the total server memory is 64 GB, you can assign the elasticsearch with min 1024 and max 4096 memory.
Example: -Xms512m -Xms2048m

Once done, save the file.
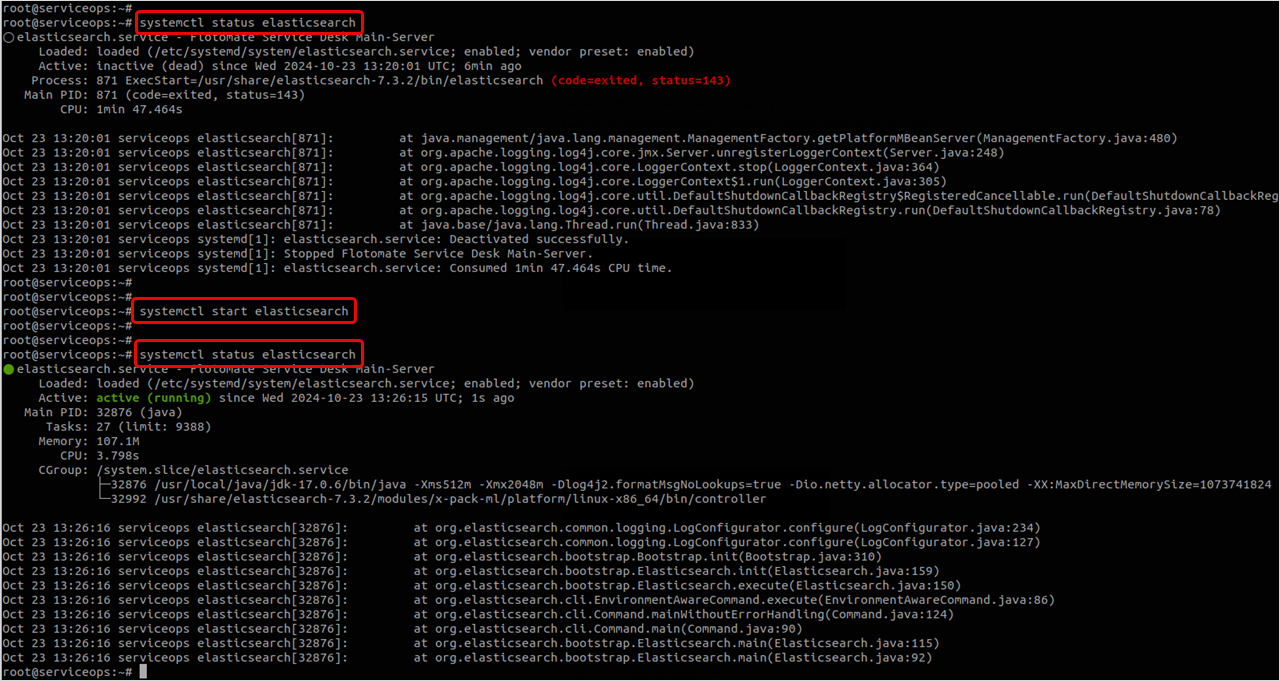
Check the elastic search service status, start its service, and again verify its status using the below commands:
systemctl status elasticsearch
systemctl start elasticsearch
systemctl status elasticsearch
Connection Pool Configuration
Connection pooling is a technique used to manage and reuse database connections, reducing the overhead of establishing new connections for each request.
Terms:
- Maximum Pool Size: The maximum number of connections that can be opened simultaneously. It must be configured based on the expected peak load and database capacity.
- Minimum Pool Size: The minimum number of connections to keep open in the pool to reduce latency during peak times.
| Connection Martix | ||||||||||
|---|---|---|---|---|---|---|---|---|---|---|
| ServiceOps Database Connection | Technicians | IT Assets | ||||||||
| 20 | 50 | 100 | 150 | 200 | 2000 | 5000 | 10000 | 15000 | 20000 | |
| Main Service - Min | 10 | 20 | 20 | 20 | 20 | 10 | 20 | 20 | 20 | 20 |
| Main Service - Max | 50 | 100 | 150 | 200 | 250 | 50 | 100 | 150 | 200 | 300 |
| Analytics Service - Min | 5 | 10 | 20 | 20 | 20 | 5 | 10 | 20 | 20 | 20 |
| Analytics Service - Max | 40 | 50 | 100 | 150 | 200 | 40 | 50 | 100 | 100 | 150 |
- In case of fresh installation, the application-custom.properties file will be blank. You need to update it manually.
- Verify the file after ServiceOps upgrade.
- Kindly take the config backup before making any changes.
Main Server
To configure connections in the main server,
Please back up the config files before making any changes.
- Login to the terminal server using the root user.
- Go to the main-server config folder and edit the "application-custom.properties" file using the below commands:
cd /opt/flotomate/main-server/config/
vim application-custom.properties
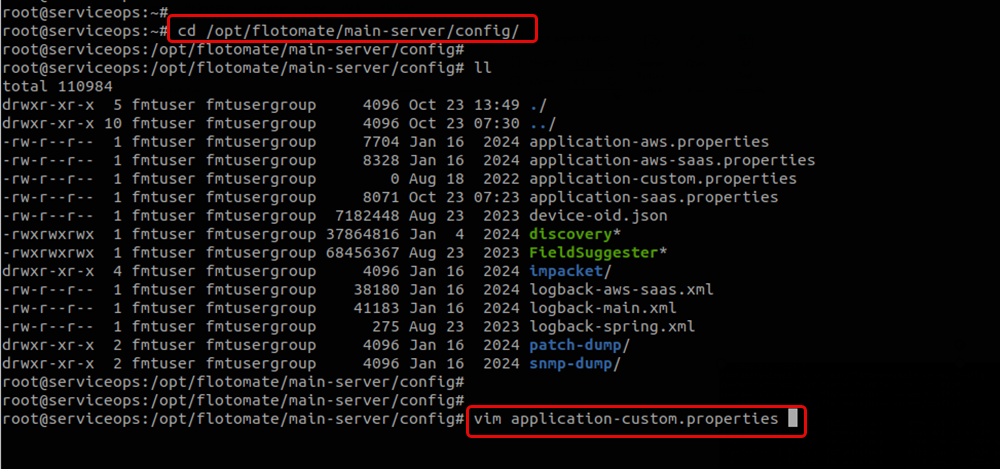

- Here, update the DB connection value. By default, the db connection values are:
- com.flotomate.db.minConnPool=20
- com.flotomate.db.maxConnPool=30
Update them based on the technician count and using the database connection matrix table.
Example: If the total Technician Count is 20, you need to update the values as follows:
- com.flotomate.db.minConnPool=10
- com.flotomate.db.maxConnPool=50

Update the required custom changes and once done, save the file.
Restart the main-server service using the below commands:
systemctl stop ft-main-server
systemctl start ft-main-server
Analytics Server
To configure connections in the analytics server,
Please back up the config files before making any changes.
- Login to the terminal server using the root user.
- Go to the analytics-server config folder and edit the "application-custom.properties" file using the below commands:
cd /opt/flotomate/cm-analytics/config/
vim application-custom.properties
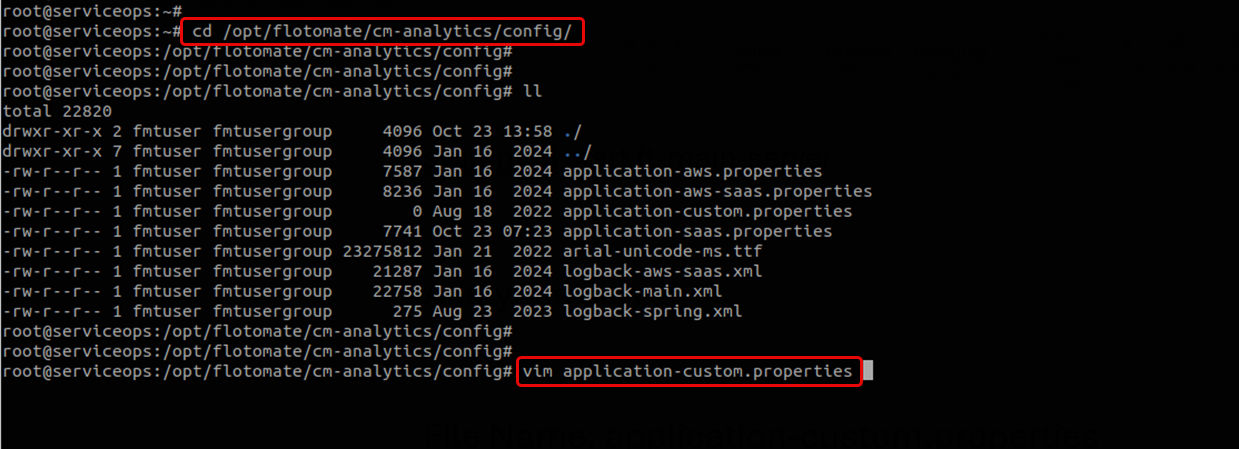

3. Here, update the DB connection value. By default, the db connection values are:
- com.flotomate.db.minConnPool=10
- com.flotomate.db.maxConnPool=25
Update them based on the technician count and using the database connection matrix table.
Example: If the total Technician Count is 20, you need to update the values as follows:
- com.flotomate.db.minConnPool=5
- com.flotomate.db.maxConnPool=40

- Update the required custom changes and once done, save the file.
- Restart the main-server service using the below commands:
systemctl stop ft-analytics-server
systemctl start ft-analytics-server
Conclusion
This guide has provided a step-by-step approach to configuring memory and connection pools for optimal performance. By following the outlined procedures, you can ensure efficient resource allocation, improve application responsiveness, and maintain system stability under varying loads. Regular monitoring, proper benchmarking, and making adjustments based on system demands will further enhance performance and scalability. Always take backups before making any changes to ensure a seamless configuration process.