Project List View
The Project List View allows Technicians and Requesters to track and manage all the projects at one place. Here, you can view all the available projects in the system and act upon them.
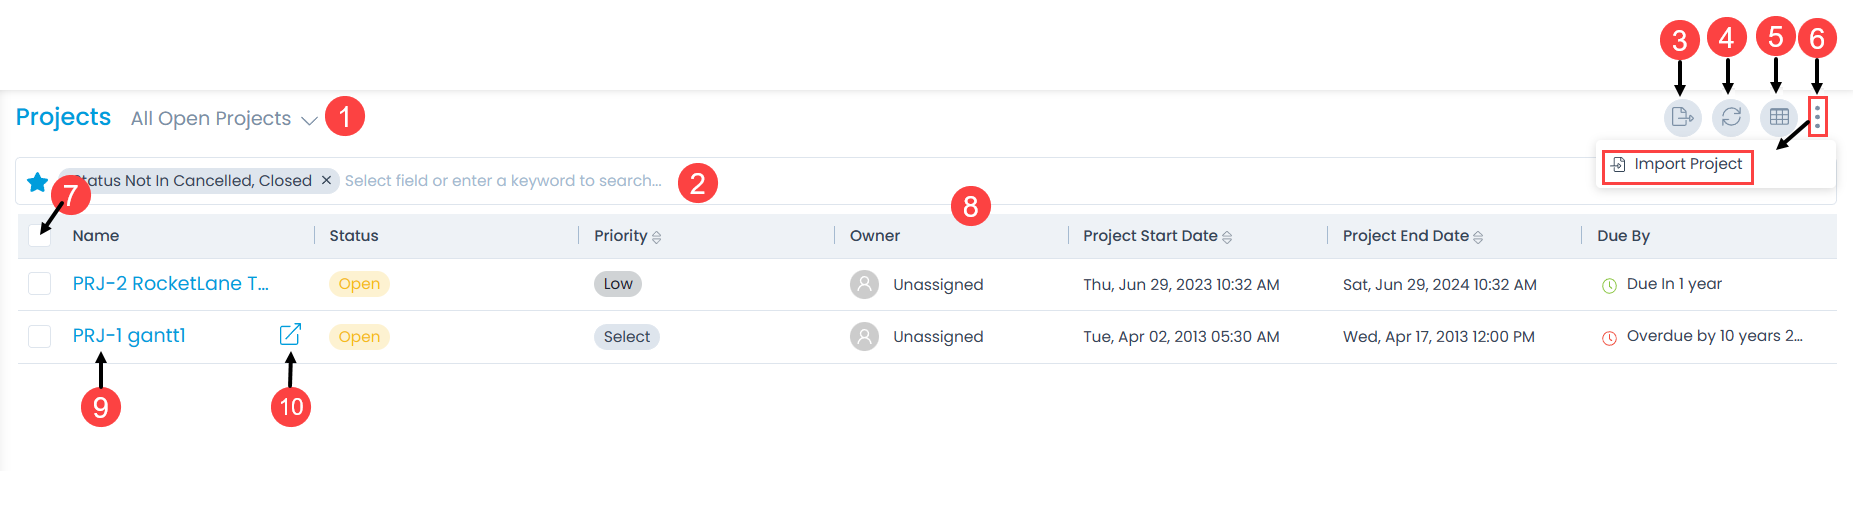
The page provides the following features:
- Filter: You can filter the project list by clicking the desired option. E.g.: If ‘All Open Projects’ is selected, the grid displays all the projects with open status.
- Search: You can look for a specific project by searching them. The search is a faceted search and allows you to find with specific criteria. You can find more details in the search section.
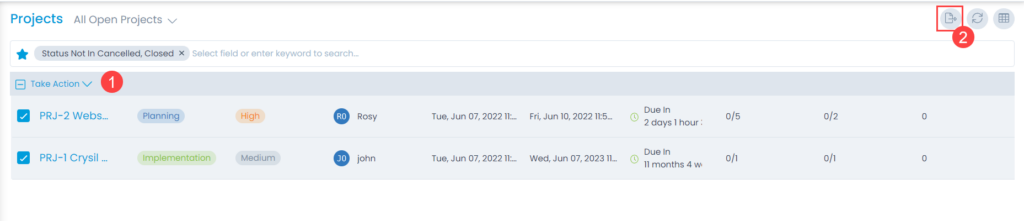
- Export: You can export the projects list.
- Refresh: You can refresh the project list. This is useful when multiple people are working on the project and contents are updated frequently.
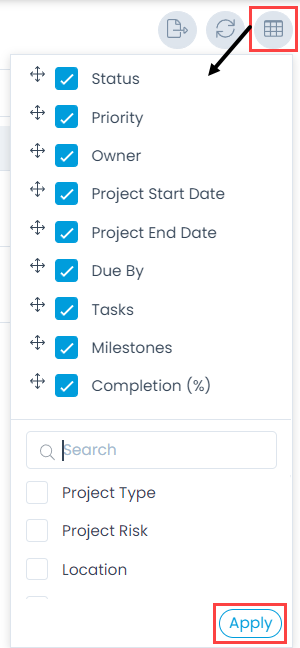
- Column Selection: You can personalize the columns of the list page. The unselected columns will remain hidden in the grid.
- More Options: You can import projects. At a time you can import a single project of .mpp format.
- Bulk Actions: You can update and archive multiple projects in one go.
- Grid: You can view the details of the projects. Also, you can change certain details from here.
- View Details Page: You can click the Name to view the Project Details page.
- View Details Page in a new tab: You can click the arrow icon next to the Name to view the details page in a new tab.
The Grid
The Grid displays the details as per the columns selected using the Column Selection button as shown below.
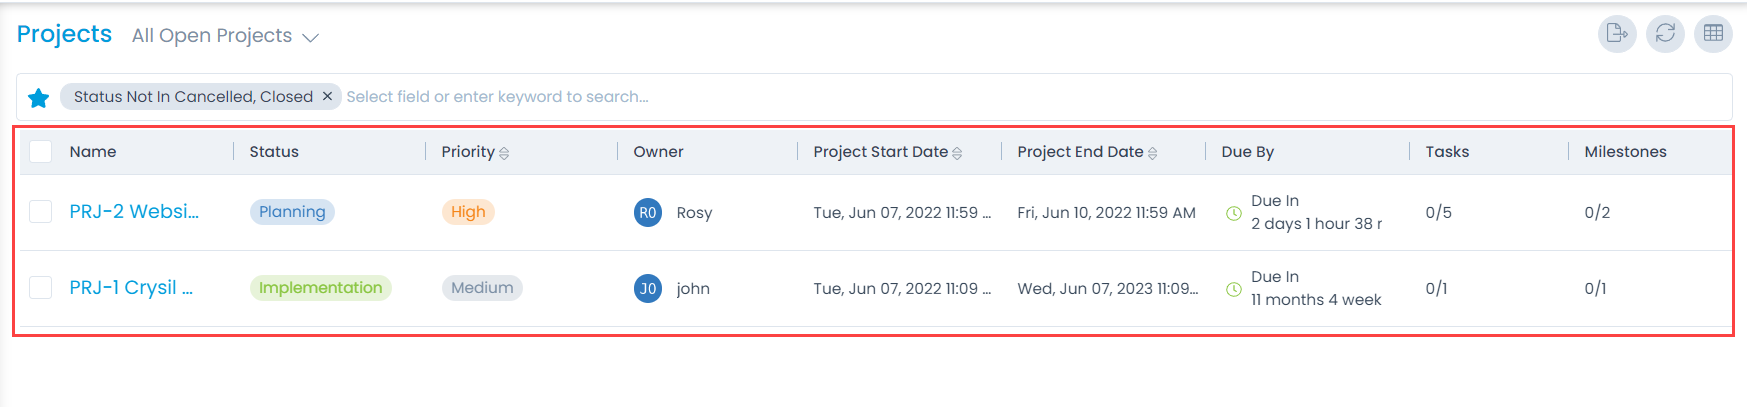
The default details are:
- Name: The name of the project.
- Status: The current status of the project. The values are: Open, In Planning, Implementation, and Closed.
- Priority: The priority of the project. The values are Low, Medium, High, and Urgent.
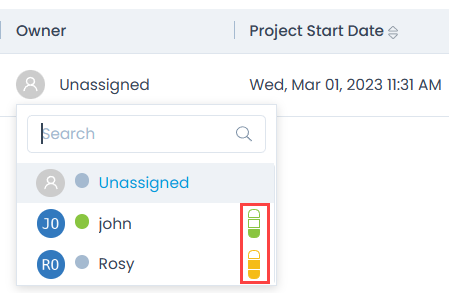
- Owner: The project owner name. If the project is not assigned to anyone, the column will show ‘Unassigned’. The owner with the Green icon indicates the owner is Online while Grey indicates Offline. You can also know the load of a particular owner based on the color of the load indicator (bar) as shown below. The color indicates the following:
- Green - Low
- Yellow - Medium
- Red - High
- Project Start Date: The date on which the project started.
- Project End Date: The date on which the project will end.
- Assigned to: Name of the person to which the project is assigned.
You can also select other columns to be viewed in the grid later and set their values.
Export Projects
You can export the details of any project in CSV and Excel format.
To do so,
- Select the desired projects to be exported.
- Click the Export button and a popup appears. If no project is selected, all the added project details would be included.
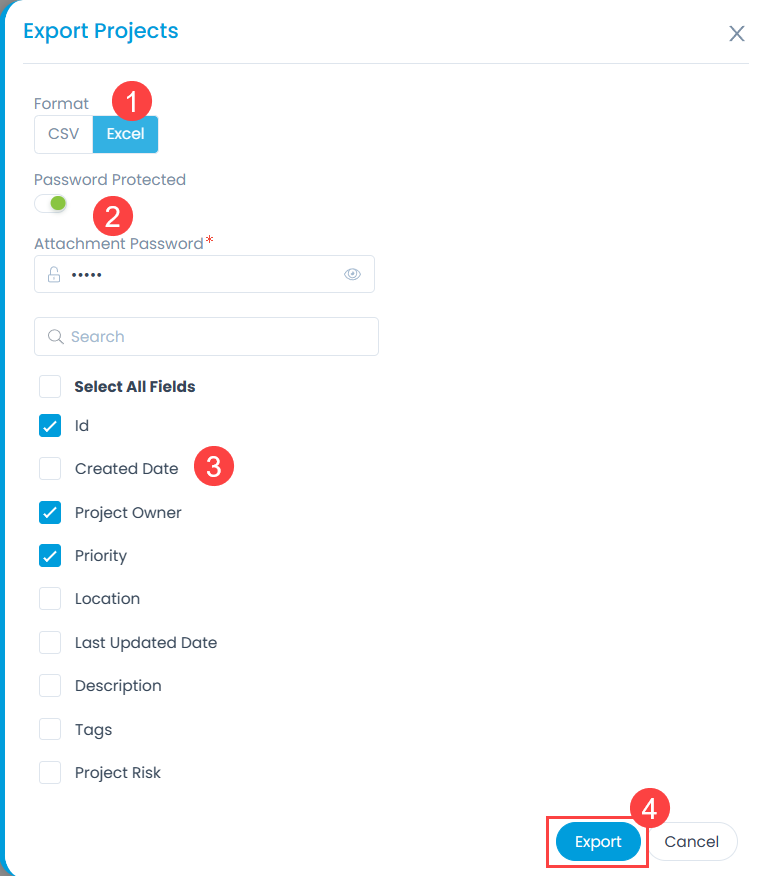
- Select the format as CSV or Excel.
- If Excel is selected, you can enable the Password Protected option to secure the file. If enabled enter the Attachment Password. If not provided, the common password set from Edit User Profile page will be used.
- Select the desired fields to be included in the file.
- Click Export and the link to download the file is sent via an email.
Import Project
This option enables you to import the project in the ServiceOps portal. To do so,
For .mpp (Microsoft Project Plan) project file,
- If required you can view the contents of the file using any online tool like View MPP Online, where you can upload the file and view it.
- While importing the project details, the fields that will be fetched are: Project Name, Description, Start Date, End Date, and Owner.
- The owner and technician available in the .mpp file should be present in the ServiceOps as a Technician.
- The task details that can be fetched from the .mpp file are: Subject, Technician, Start Date, Duration, and Description.
- The predecessor and successor of the tasks will be fetched ignoring the validations while importing.
- If multiple technicians are assigned in a single task in the .mpp file, only the first user will be considered for assignment in ServiceOps.
- The successor/predecessor assigned for the Summary Task in .mpp file will be ignored.
- Duration of the Task will not be fetched directly from .mpp file instead it will be calculated as per the start date and end date of the Task.
- Project with the same name as already existing in ServiceOps will not be uploaded.
- If a task is having the End Date greater than the Project End Date, then it will be uploaded and the Project End date will be updated as per the Task End Date.
- Click the More Options (vertical three dots) and select the Import Project option. The Project Batches page appears.
- Click the Import Batch button.

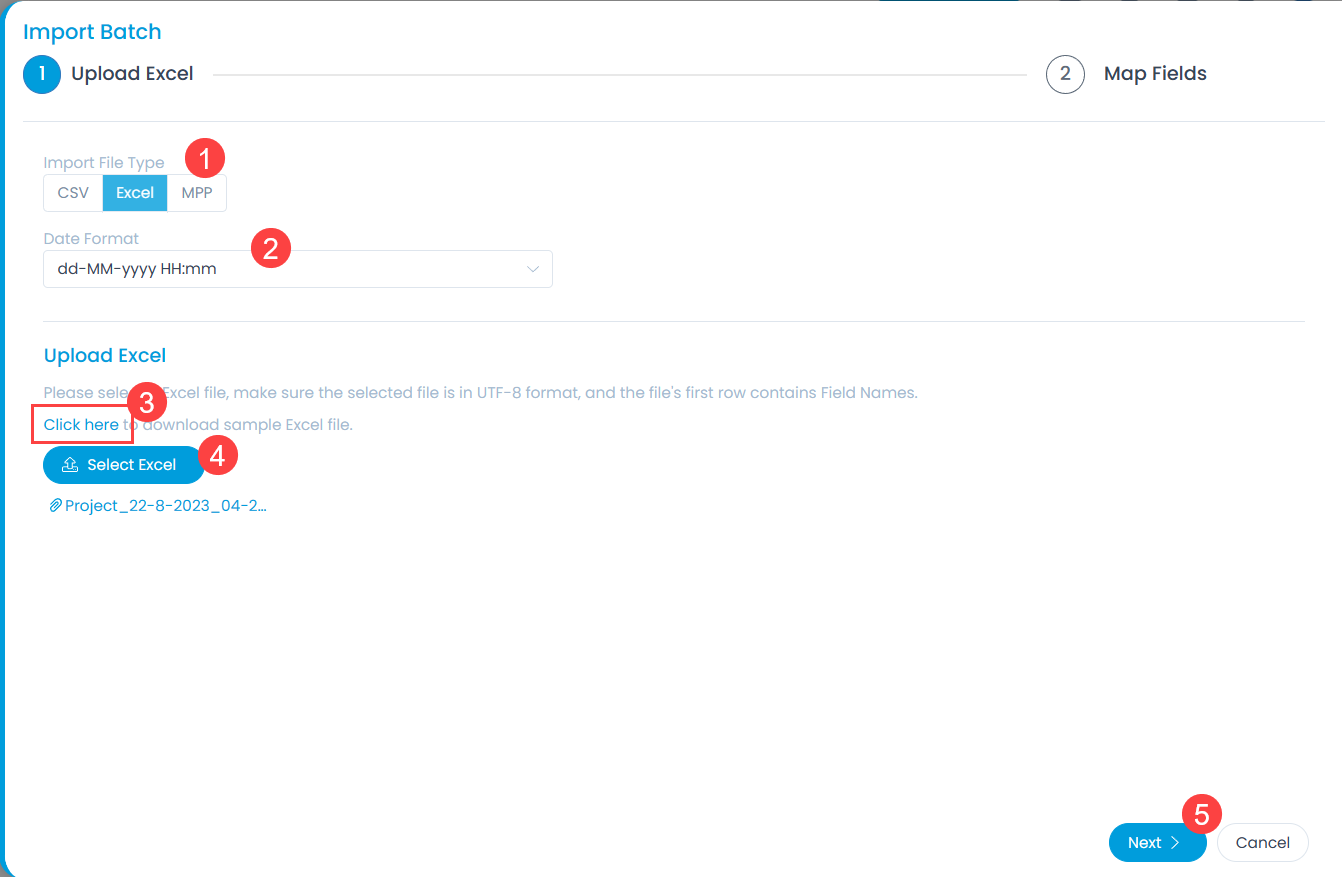
Select the Import File Type. The options are:
- CSV
- Excel
- MPP
Select the Date Format if you want to specify any different format for date. The default value is dd-MM-yyyy HH:mm.
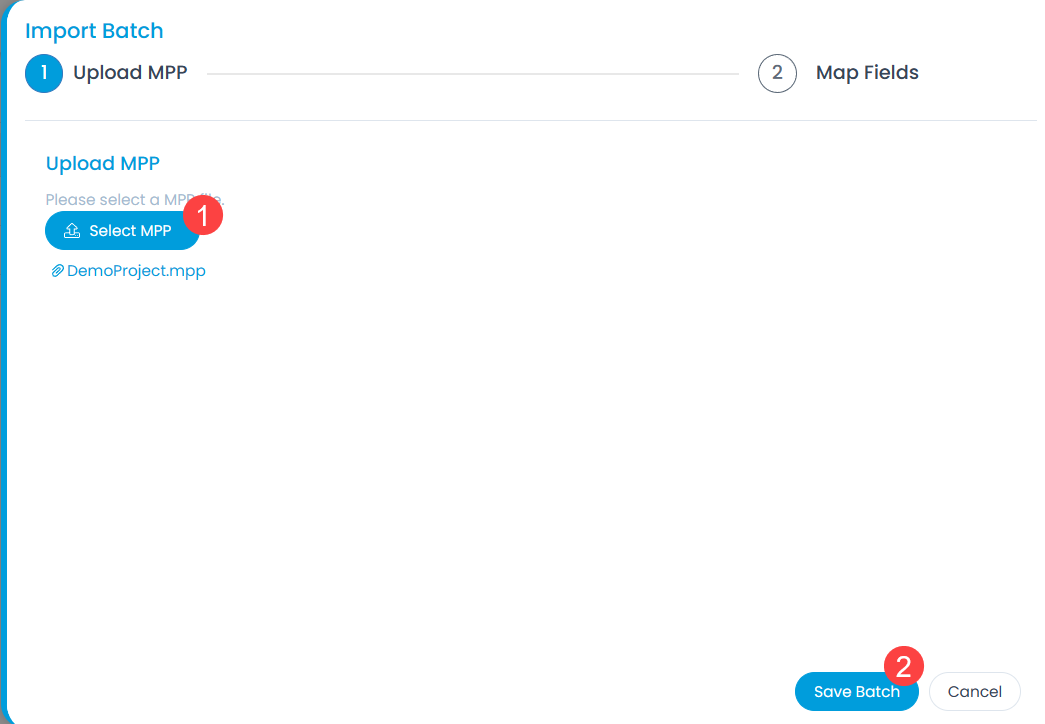
Once done, select the pre-filled file using the Select button. If not, download the sample file using the "Click Here" link, fill in the details, and upload it. The sample file will be available based on the selected file type. For example, if the selected file type is Excel, the sample download file will also be of Excel type. Once the file is uploaded, click Next.
MPP File
Sample Excel/CSV File

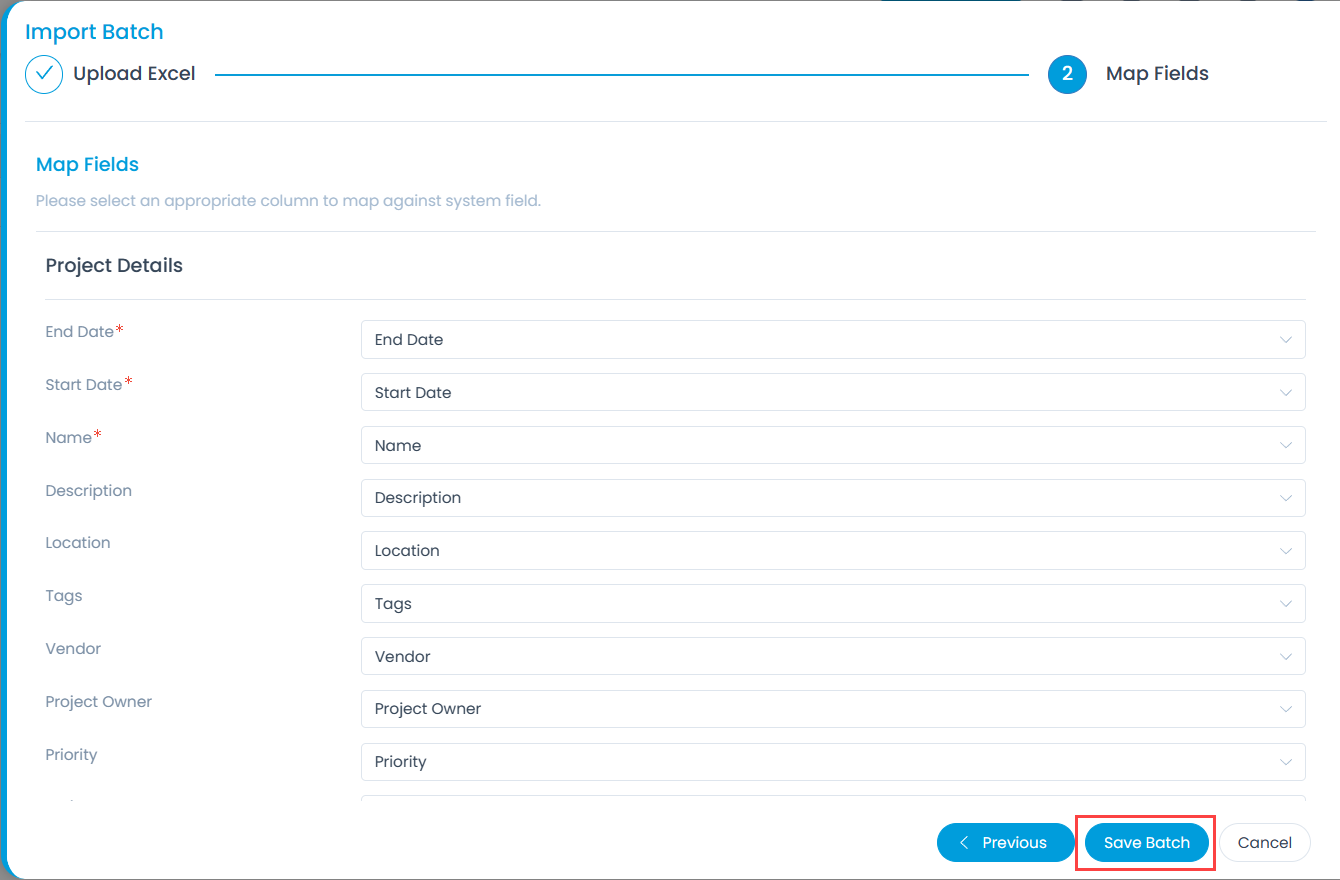
- Map the fields as per the requirement. By default, it is already mapped; only in case of removal/change of some parameters mapping is necessary, and click Save Batch.
- The Project Batches page appears. It displays the status of the import along with the details like processing time, total records, success records, failed records, etc. as shown below. Once successful, the imported project will appear in the project list page. If the import CSV/Excel process is failed, download the file from "Actions" column, to view the errors, and troubleshoot accordingly. In case of MPP file, the View icon is available to view the errors.

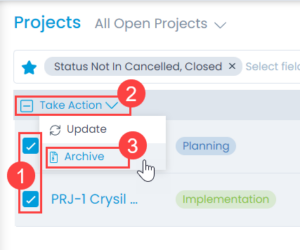
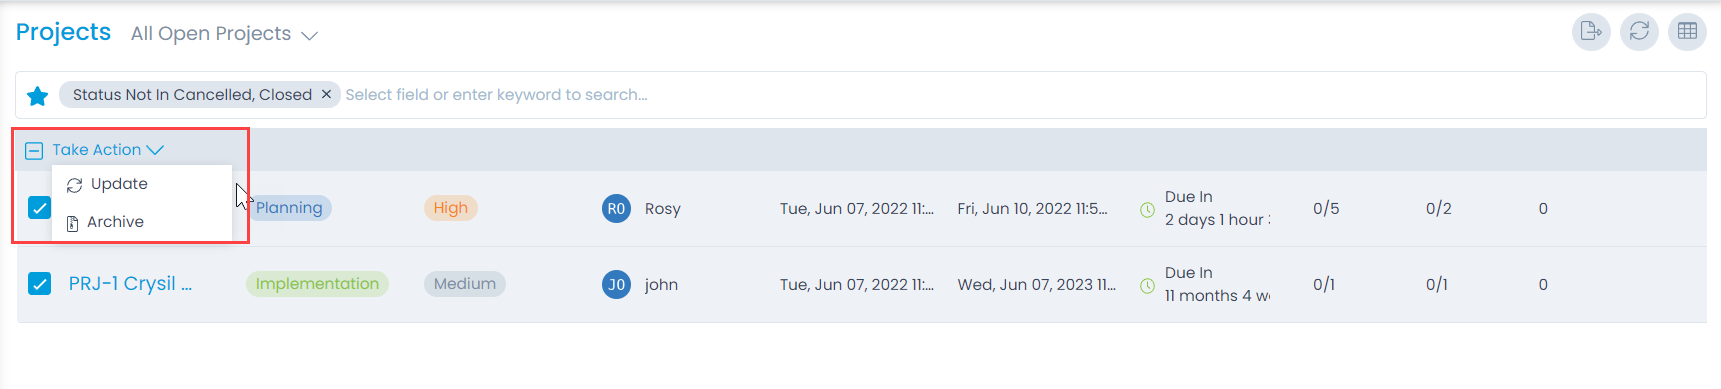
Bulk Actions
You can quickly perform the same action for multiple projects using the Take Action dropdown on the List Page as shown below. The multiple actions available are Update and Archive.
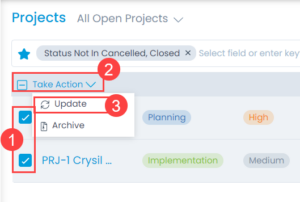
- Update: This option helps you to make changes to any of the field associated with the project directly. If you want to update the same field for multiple projects,
- Select the desired projects.
- Click on the Take Action dropdown.
- Select the Update option. A popup appears. It displays all the common fields that can be updated in one go.
- Edit the required fields.
- Click Update.

- Archive: This option allows you to archive multiple projects on a single go. All the archived projects can be seen using the pre-defined filters available and restored too in future.