Create Project
This page enables you to create a new project when planned. To create a project, follow the below steps:
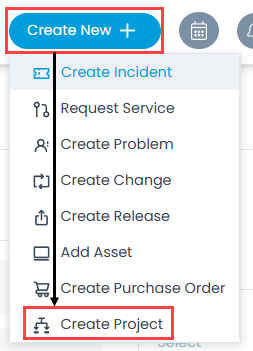
- Click the Create New + button and select the option Create Project. The following page appears as shown below.
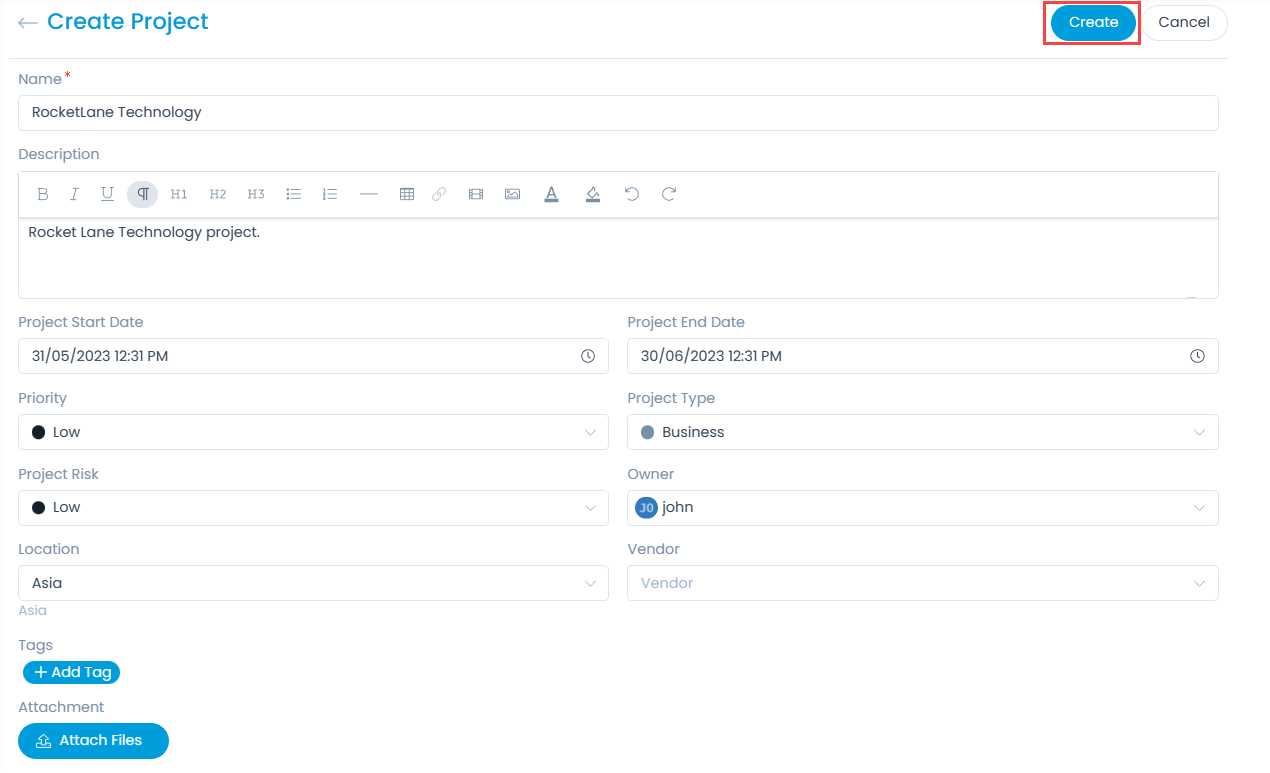
- Enter the following details:
| Parameter | Description |
|---|---|
| Name | Enter the name of the project. |
| Description | Enter the description of the project. |
| Project Start Date | Select the start date of the project. |
| Project End Date | Select the end date of the project. |
| Priority | Select the priority. |
| Project Type | Select the type of project. |
| Project Risk | Select the risk associated with the project. The default value is Low. |
| Owner | Select the owner of the project. |
| Location | Select the location of the project. |
| Vendor | Select the vendor from the dropdown list. |
| Tags | You can add tags if required. These help in identifying the similar projects. |
| Attachment | Attach the relevant files that help the technician in resolving the ticket. |
Once done, click Create and the project gets created successfully. Also, an email is sent to you acknowledging the project. A project starts with a suffix "PRJ". For example: PRJ-1.