Planning a Project
In the planning stage, you store the high level details about the project. For example: the project schedule, tasks, different milestones achieved, list of activities, and summary of tasks. Also, one should be aware about the plans and the impact before initiating the project.
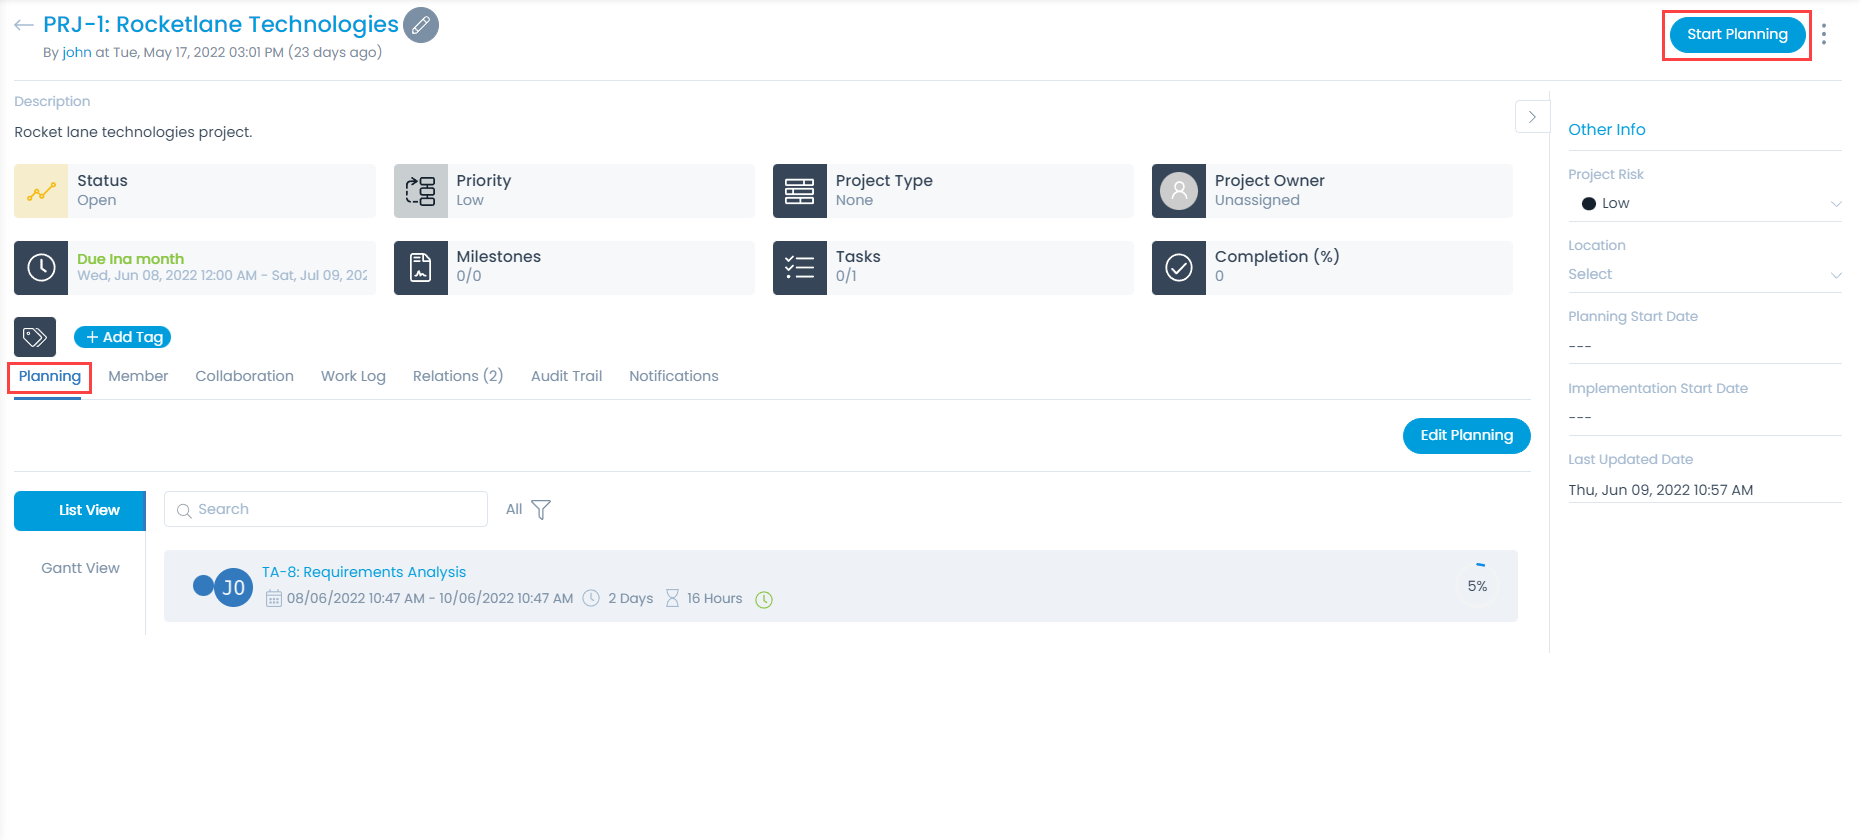
In the system, you can store the planning details to record schedule and plans. When planning is complete, no one can edit these details. Before initiating the planning process, the assignment of a Project Owner is mandatory. Only when you assign an owner, the process of planning can be taken ahead.
Here, before planning for a project, first you need to assign the respective members associated for the project for faster process. For more details, refer to the link Manage Project Members.
Once you are done with creating a project, editing of a plan can be initiated.
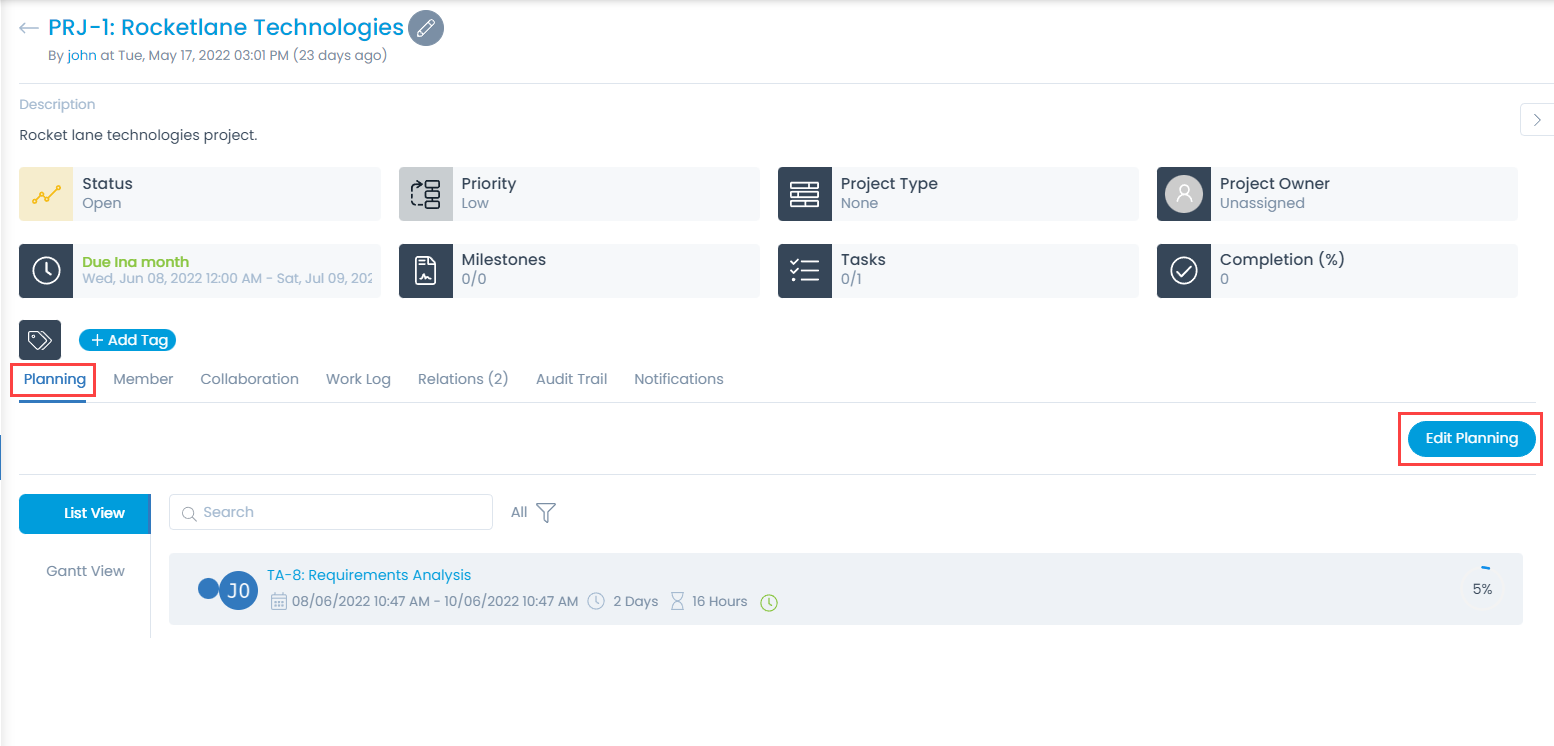
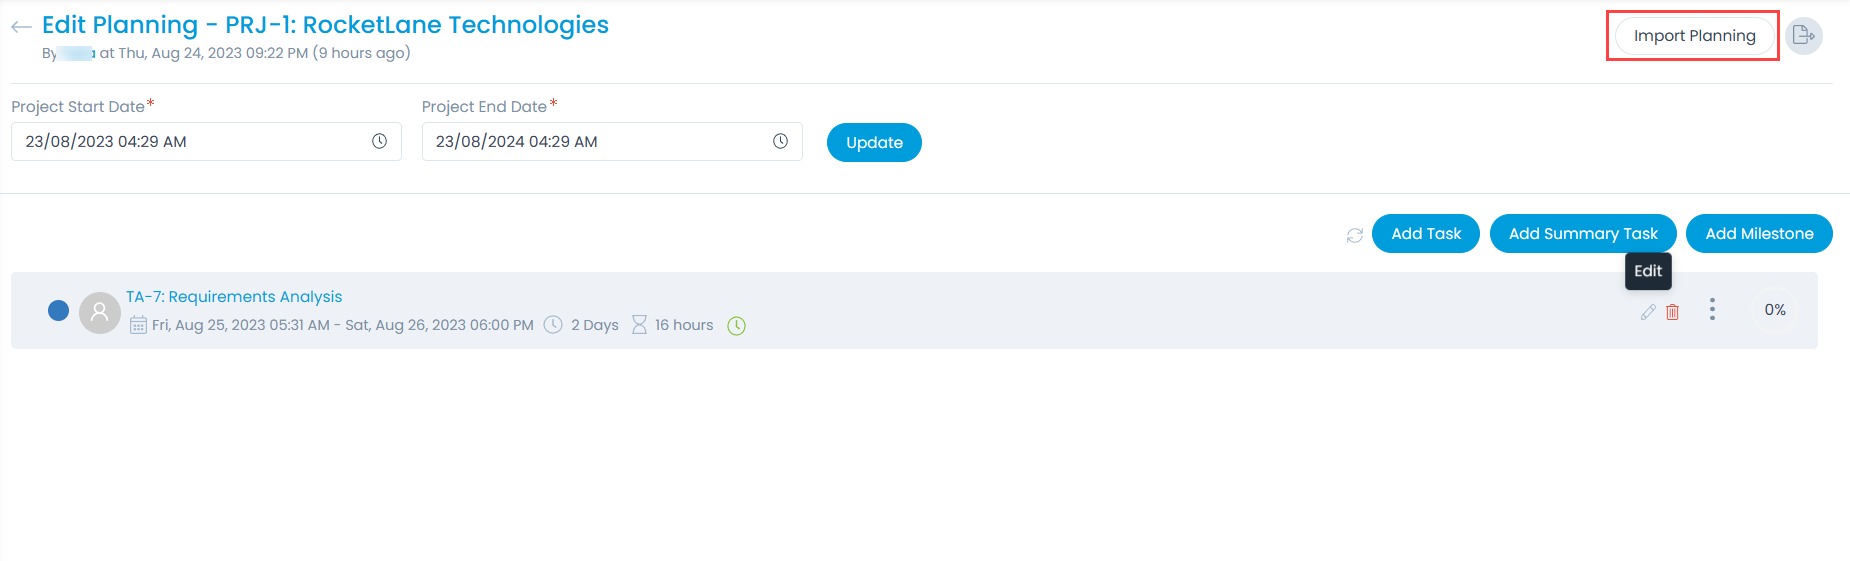
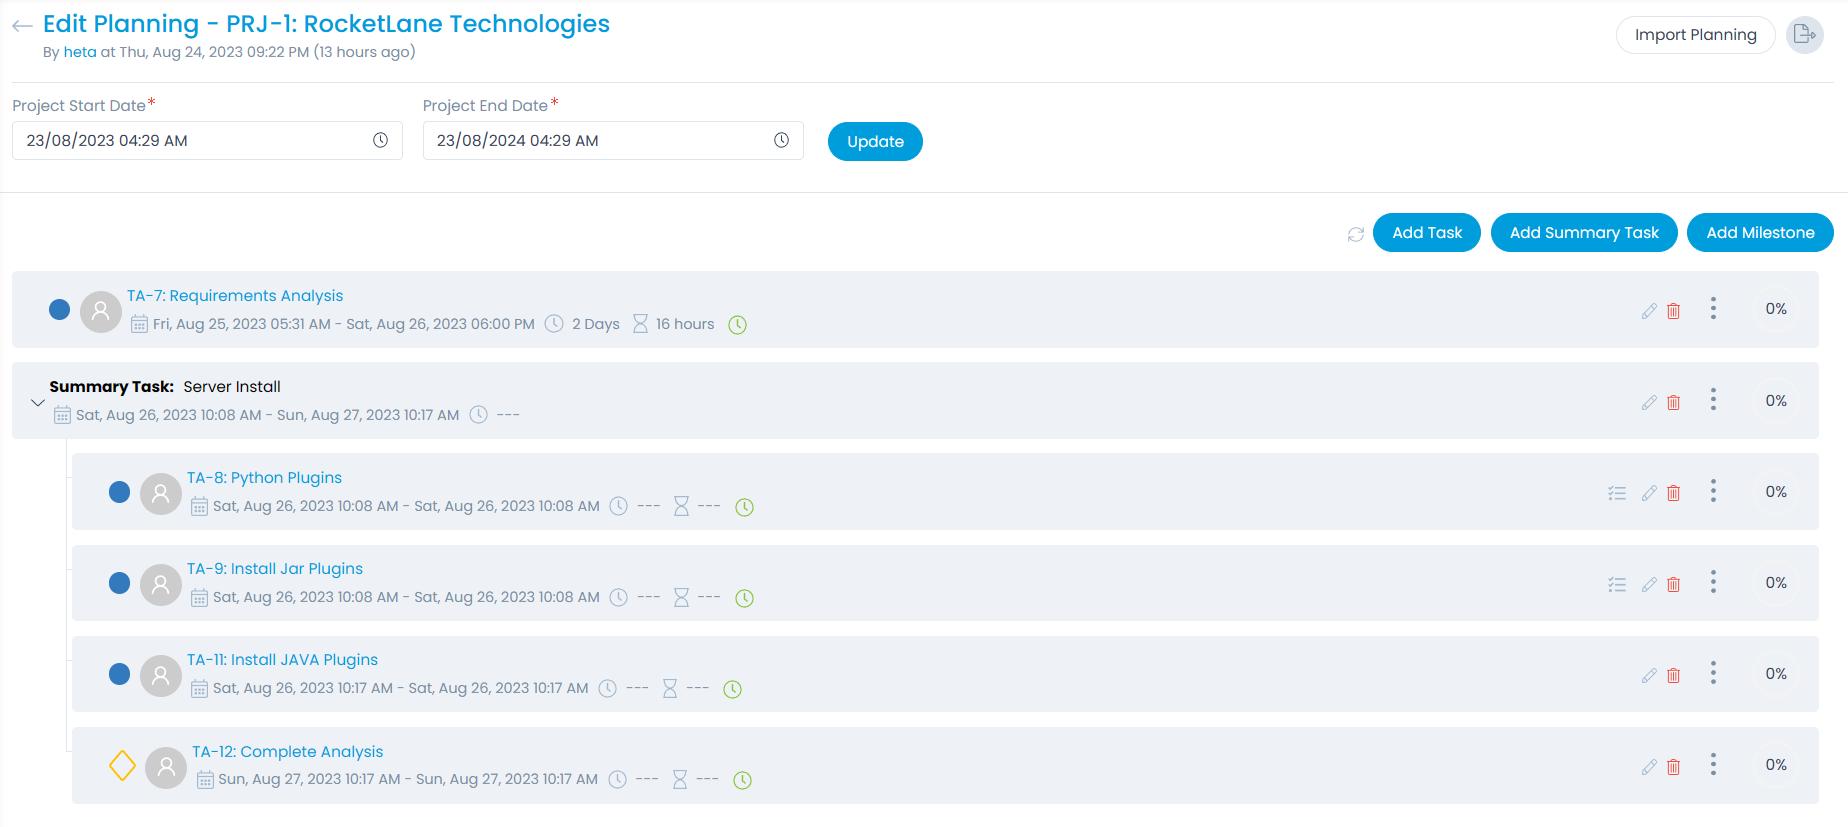
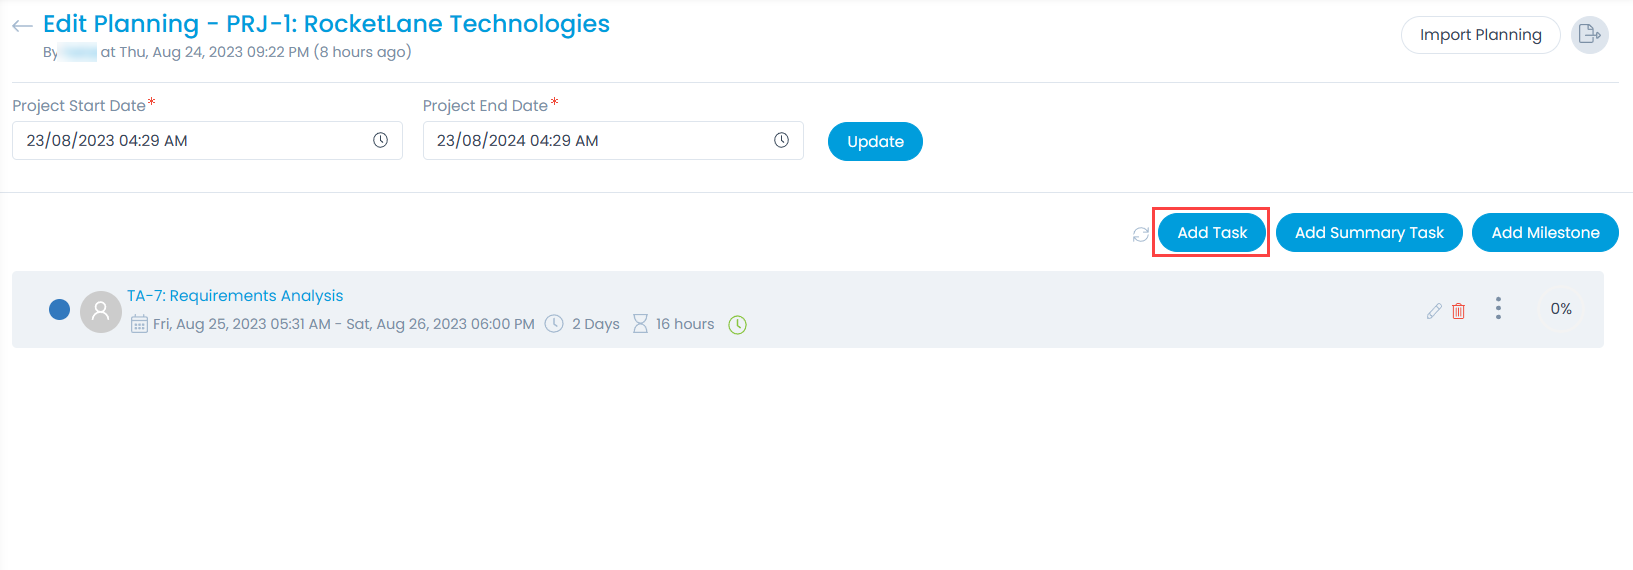
To edit the plan, click the Edit Planning button, and the below page appears. Here, you can update the project start and end date, import, export, and manage various Tasks, Summary Tasks, Milestones, and successive activities related to the project. Once added, you can also re-arrange the tasks by dragging and dropping them at the desired places.

Import Planning
You can import Tasks, Summary tasks, and Milestones using this option.
To import,
- Click the Import Planning button and the Task Batches page appears.
- Click Import Batch, and the Import Batch popup appears.
- To add a Summary Task, type "TRUE" in the "Is Summary" column.
- For Summary Task, the user must define the "Task Type", "Is Summary", and "Subject" columns in the file.
- The user must define the Summary Task name in the "Parent Task" column in case a Task/Milestone is to be created under it.
- If a separate Task is to be created, leave the "Parent Task" column blank.
- A maximum of 3 predecessors can be added against each task in the file through import. The Task name is to be entered in the "Predecessor" Column.
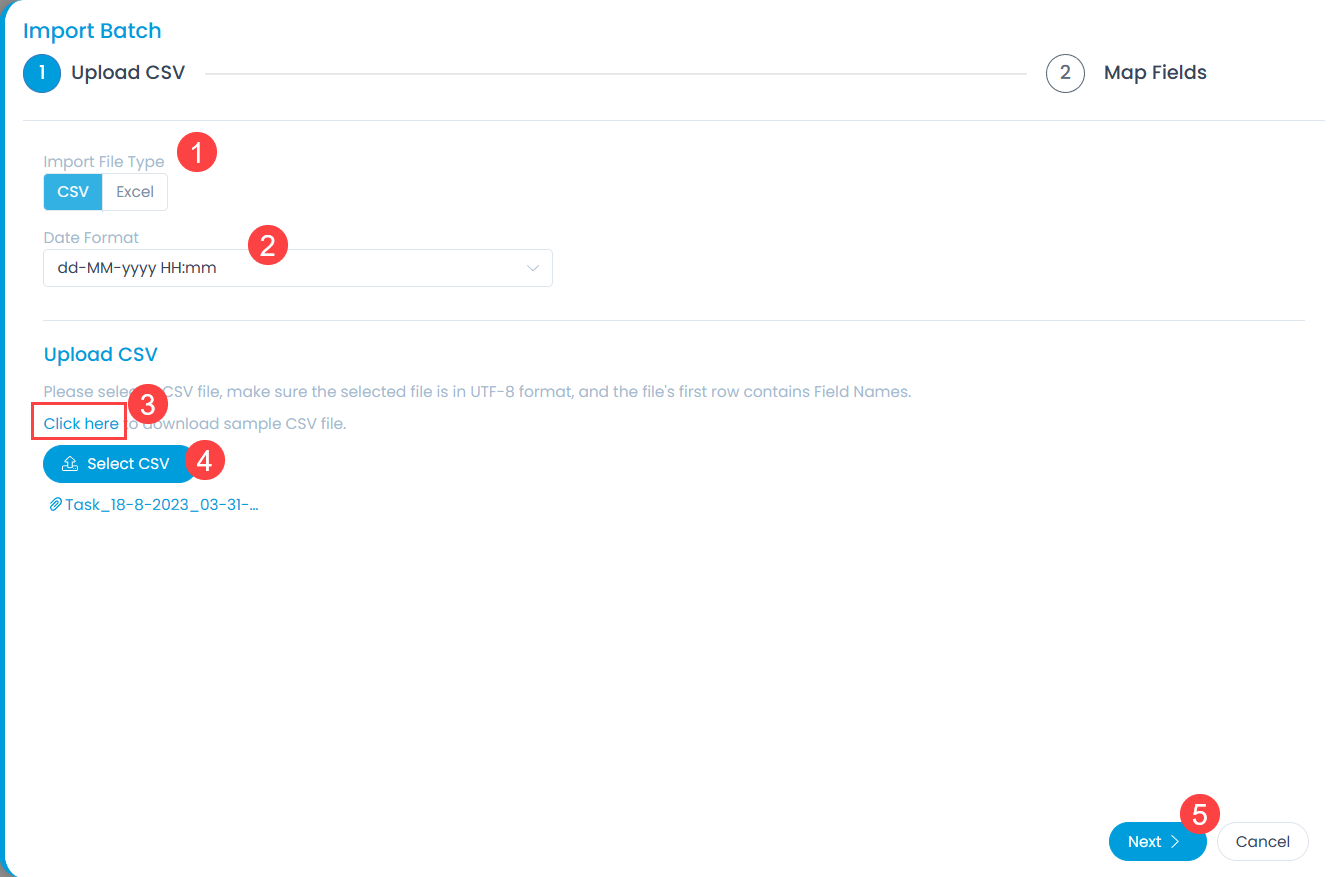
- Select the "Import File Type" and Date Format (optional) in which the date must be entered in the file. The components can be imported using CSV or Excel file types.
- Once done, select the pre-filled file using the Select button. If not, download the sample file using the "Click Here" link, fill in the details, and upload it. The sample file is downloaded based on the selected file type. Once the file is uploaded, click Next.
Sample CSV file

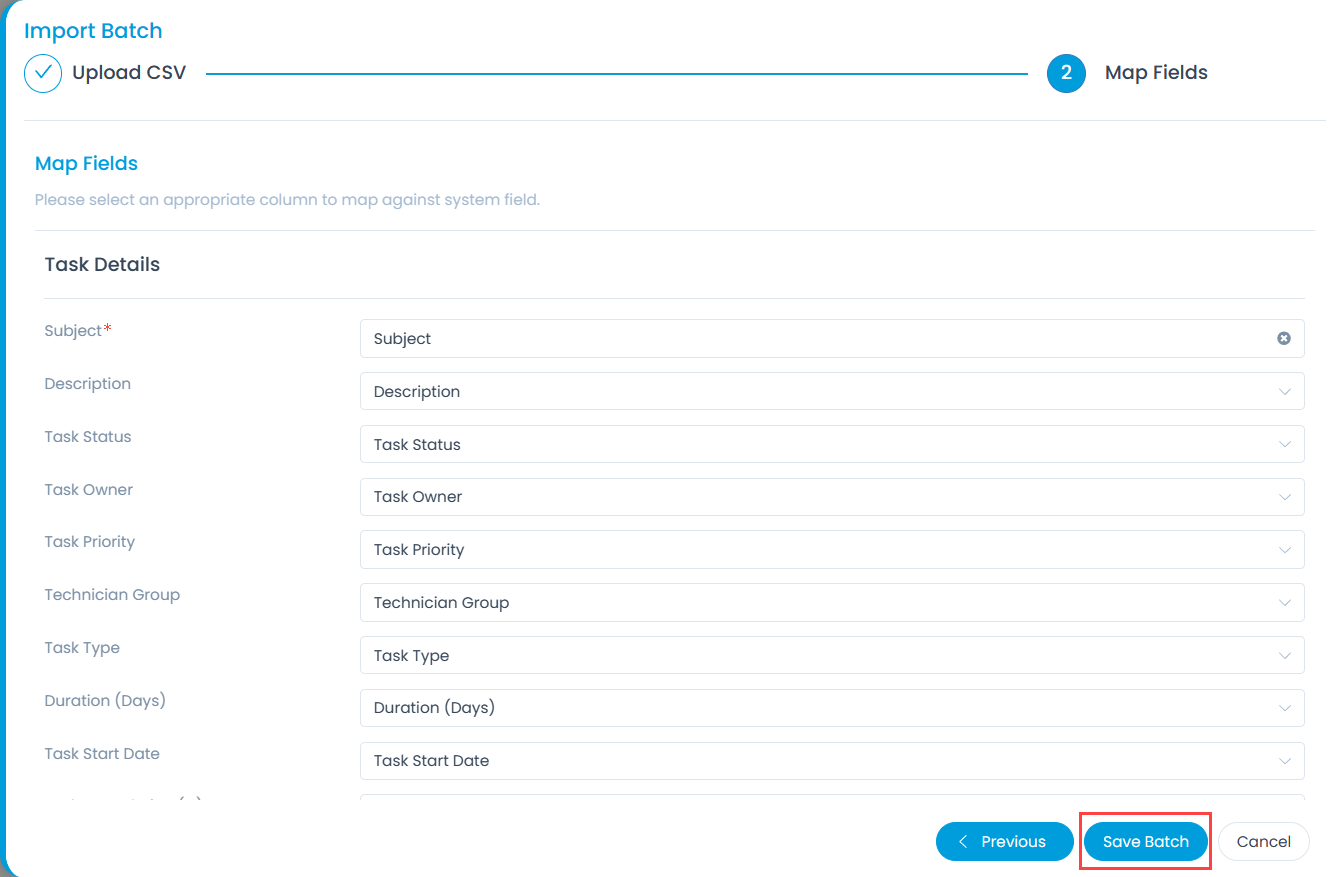
- Map the fields as per the requirement. By default, it is already mapped; only in case of removal/change of some parameters mapping is necessary, and click Save Batch.
- The import process status will appear on the Task Batches page along with the details like Batch Number, Created By, Status, Created Date, End Date, Processing Time, Total Records, Success Records, Failed Records, File Type, and Actions. The errors can be viewed using the "Download" icon in the "Actions" column.

The below figure displays the imported Summary Task, Tasks, and Milestone.
- Once done, only those predecessor tasks will be created that fulfill the prerequisites for a task to be created as a Predecessor.note
If more than 2 tasks are added as a Predecessor with the same name, then the system will check the date and time of the tasks and assign them accordingly.
Export Tasks
To export the tasks locally in the form of CSV or Excel,
- Click on the Export icon and a popup appears.
- Select the Format as CSV or Excel.
- If Excel is selected, you can enable the Password Protected option to secure the file. If enabled enter the Attachment Password. If not provided, the common password set from Edit User Profile page will be used.
- Select the desired fields to be exported.
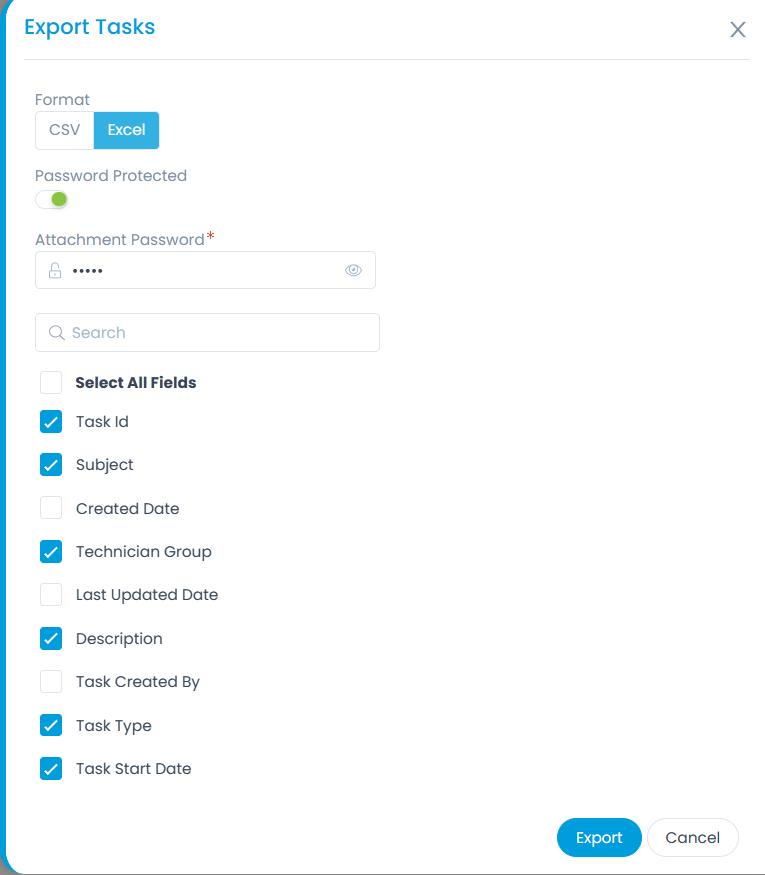
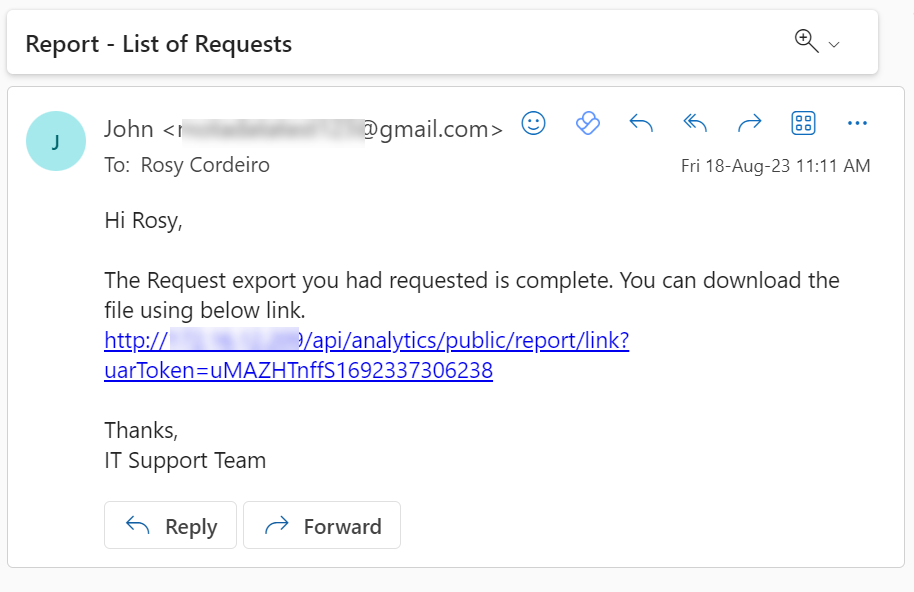
- Click Export and an email is sent to the Administrator's email address with the link to download the list in the selected format. The sample email is as shown below:
Add Task
Adding tasks provide a basis for estimating, scheduling, executing, and controlling the project work. Also, the ordering is very critical, which is basically driven by date, duration, and dependency.
To add a task, follow the below steps:
- Click the Edit Planning button and the Edit Planning page appears.
- Click the Add Task button and a popup appears.
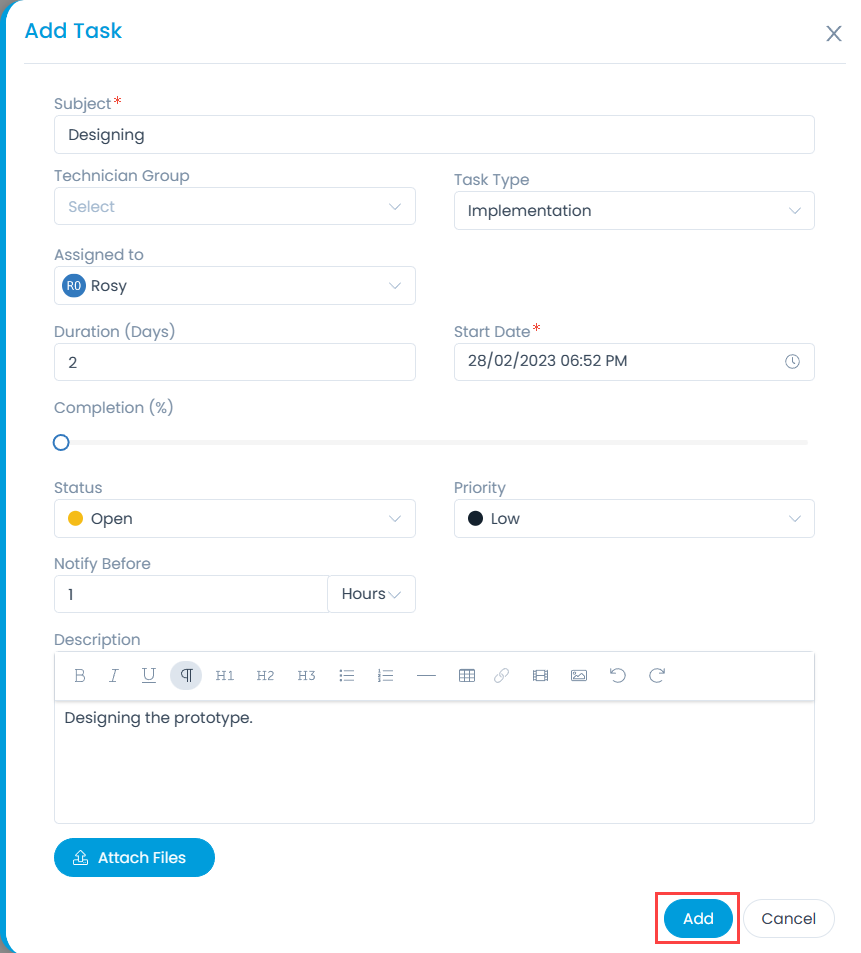
- Enter the following details:
- Subject: Enter the desired task name.
- Assigned to: Select the technician to whom the task is to be assigned.
- Task Type: Select the task type.
- Technician Group: Select the group to associate with the task.
- Duration (days): Mention the duration of the task in days.
- Start Date: Select the start date of the task.
- Completion: Set the completion percentage for the task using the slider.
- Status: Select the current status of the task. The values are Open, In Progress, Pending, Resolved, and Closed.
- Priority: Select the priority of the task. The values are Low, Medium, High, and Urgent.
- Notify Before: Enter the number of days, hours, or minutes before which a notification should be sent for the task. The minimum value is 15 minutes. For example, if you wish to get notified before 6 hours of the task completion, a notification will be sent for the same.
- Description: Enter the description about the task.
- Attach Files: Attach the reference files if any for the task.
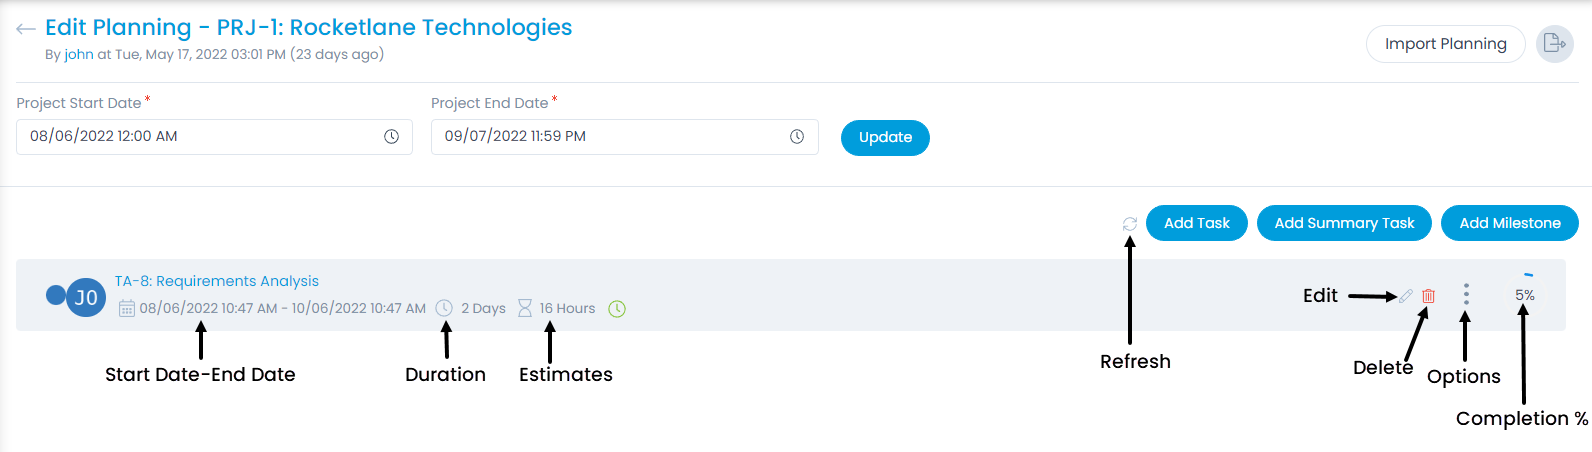
- Once all the details are filled, click Add, and the task gets added. You can also view other details like start date, end date, duration, estimates, due in, etc. from the list as shown below.
- To edit the task, click the Edit icon, and a popup appears as shown below.
- Make the required changes and click Update.

Update Task
To update the task,
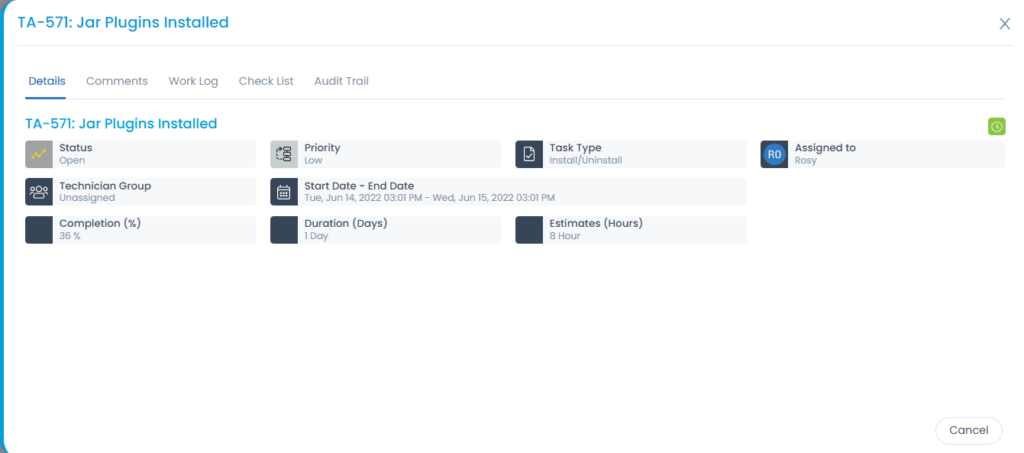
- Click on the task name and a popup appears.
- In the Details tab, you can update the Status, Priority, Task Type, Assigned to, and Technician Group.
- The green clock symbol at the right-hand side corner displays the total time left to due in. When the duration exceeds the end date, the symbol turns into red color, and displays the total time the task is overdue by.
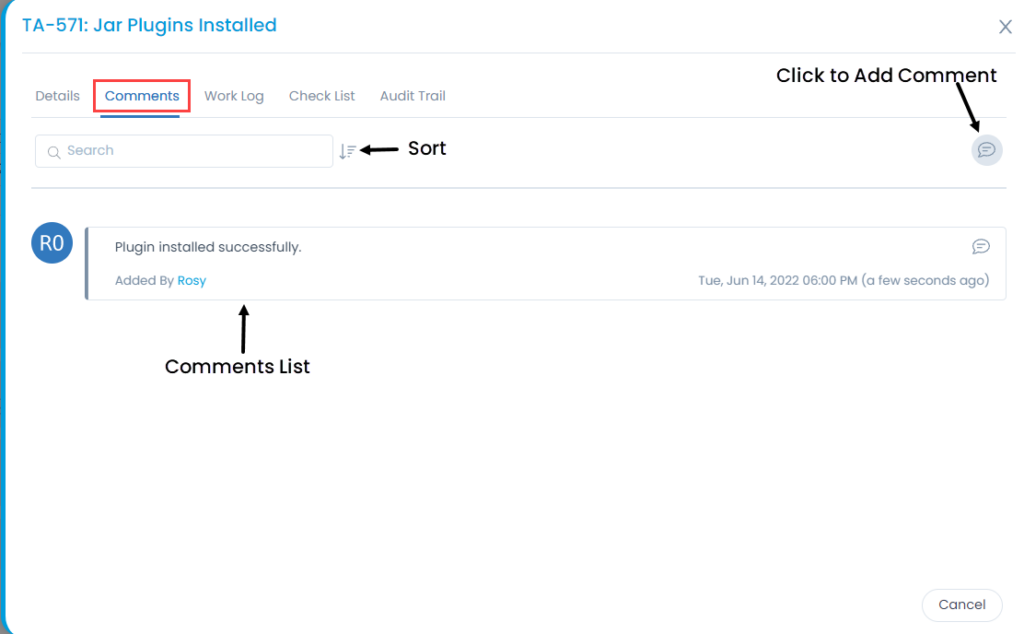
- In the Comments tab, you can add comments if any. Also, you can search or sort the comments if large in number.
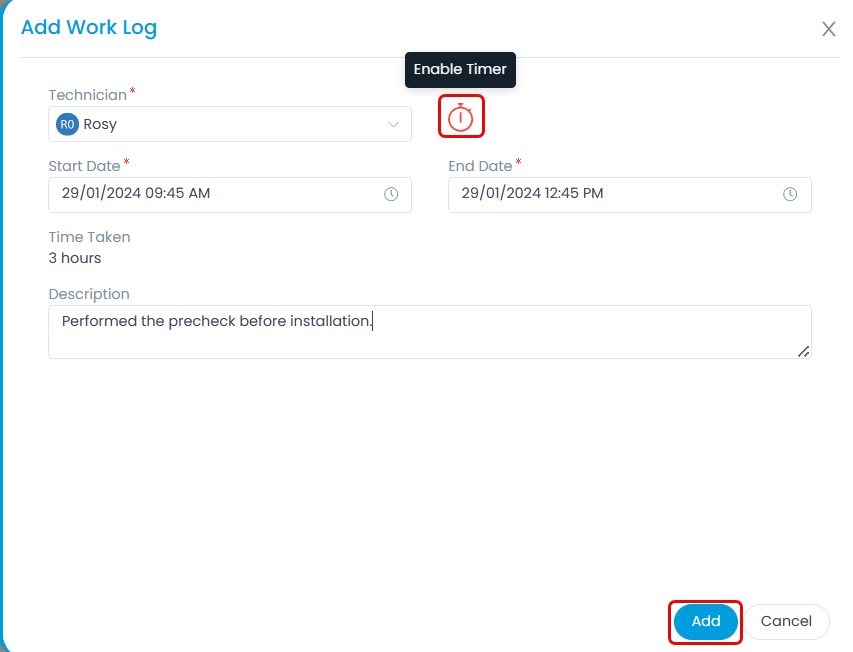
- In the Work Log tab, you can log your work details. To add Work Log, click the Add Work Log button, and a popup appears.
Enter the following details:
- Technician: Select the technician for whom the work is to be logged.
- Select the option based on which you want to log time.
- Manually: Manually add the time taken by setting the Start Date and End Date.
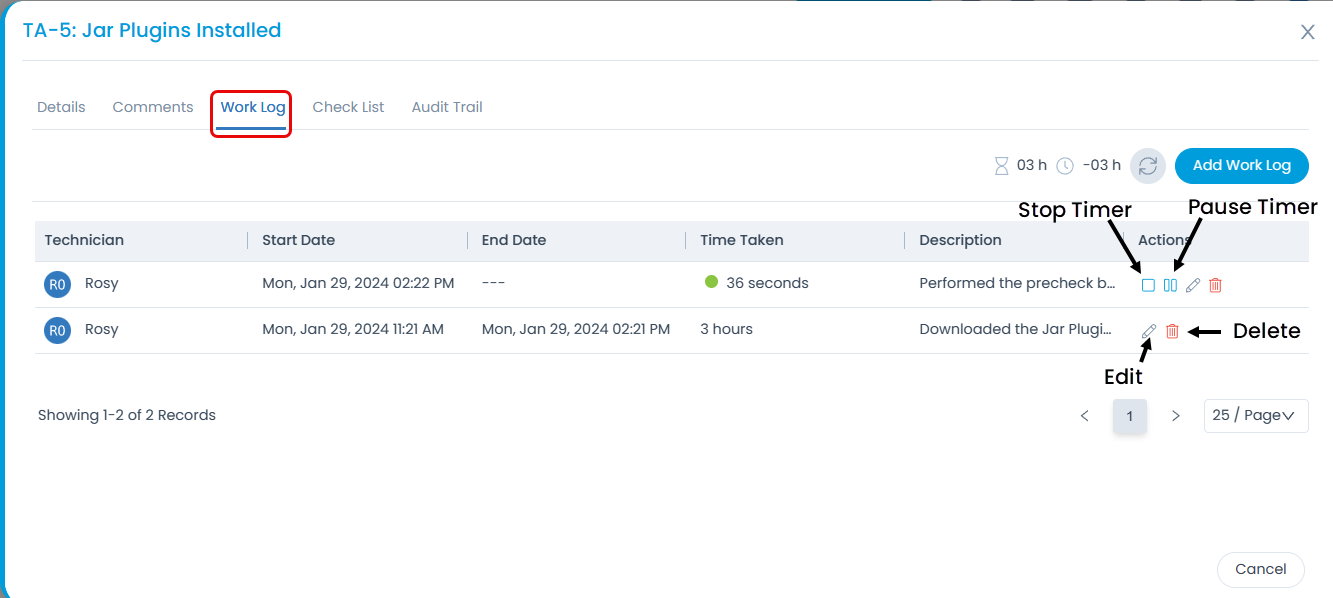
- Timer: Enable the timer to add a work log based on it. If enabled, the Start Date, End Date, and Time Taken fields will get hidden and the clock icon will appear. With Timer, the Work Log will be calculated based on the start and current time. Once the Timer is started, it will appear on the list page. You can click the Stop icon to stop the Timer or pause it if required. Also, its audit entry will appear in the Audit Trail tab.
- Description: Enter the details of the work done.
Once all the details are filled, click Add, and the entry appears in the list as shown in the below-right figure. Here, you can edit or delete the entry using their respective icons.
- In the Check List tab, you can manage the checklists for tasks.
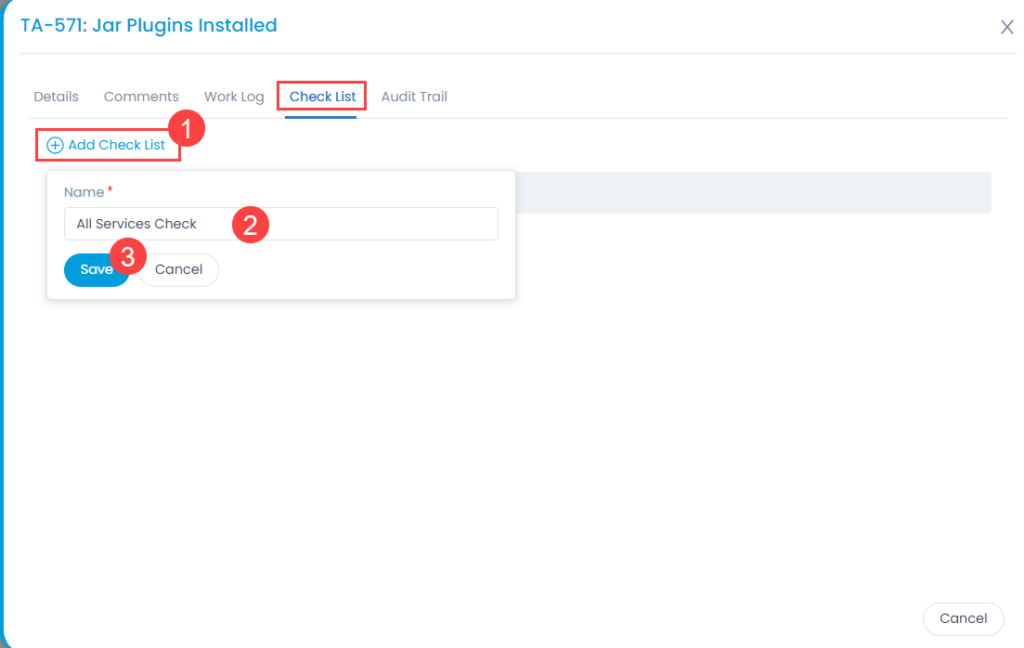
To add a checklist,
- Click the Add Check List link.
- Specify the name.
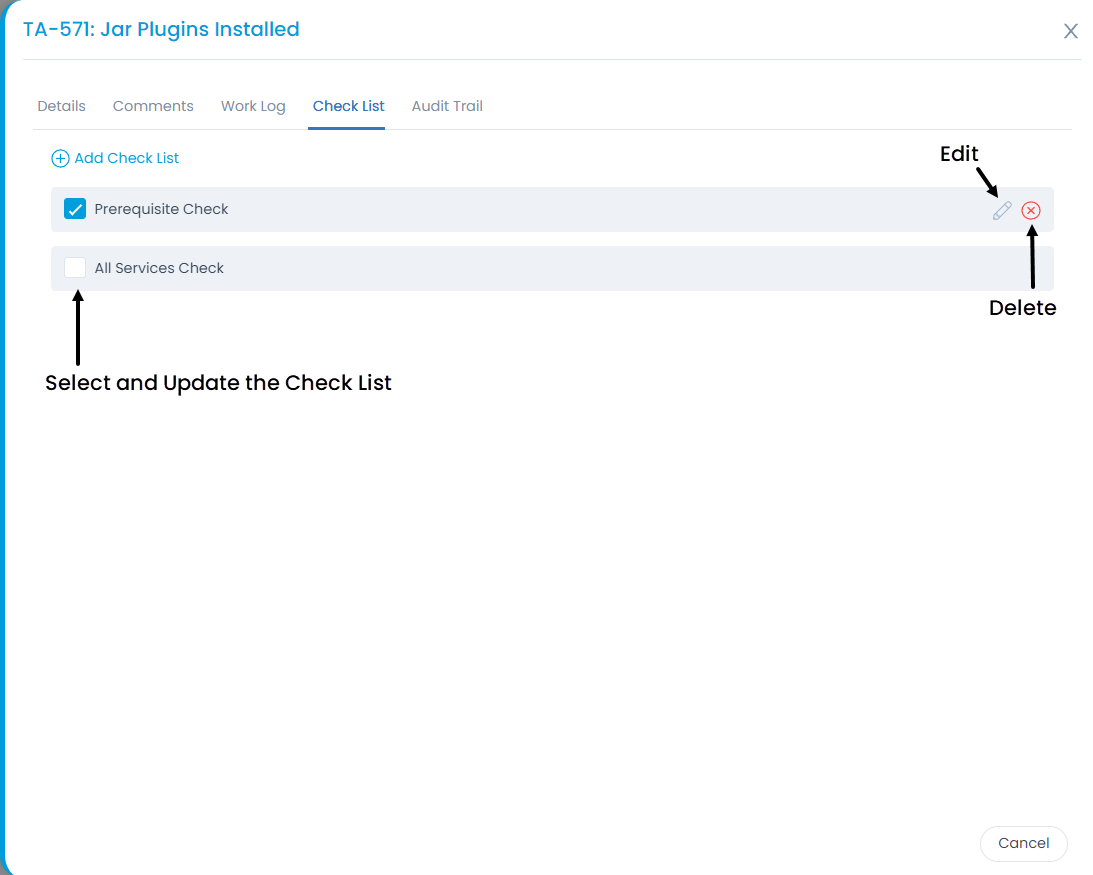
- Click Save and the checklist appears in the list. Here, you can edit and delete the required checklists using their respective icons. Also, you can select, and update it to the tasks.
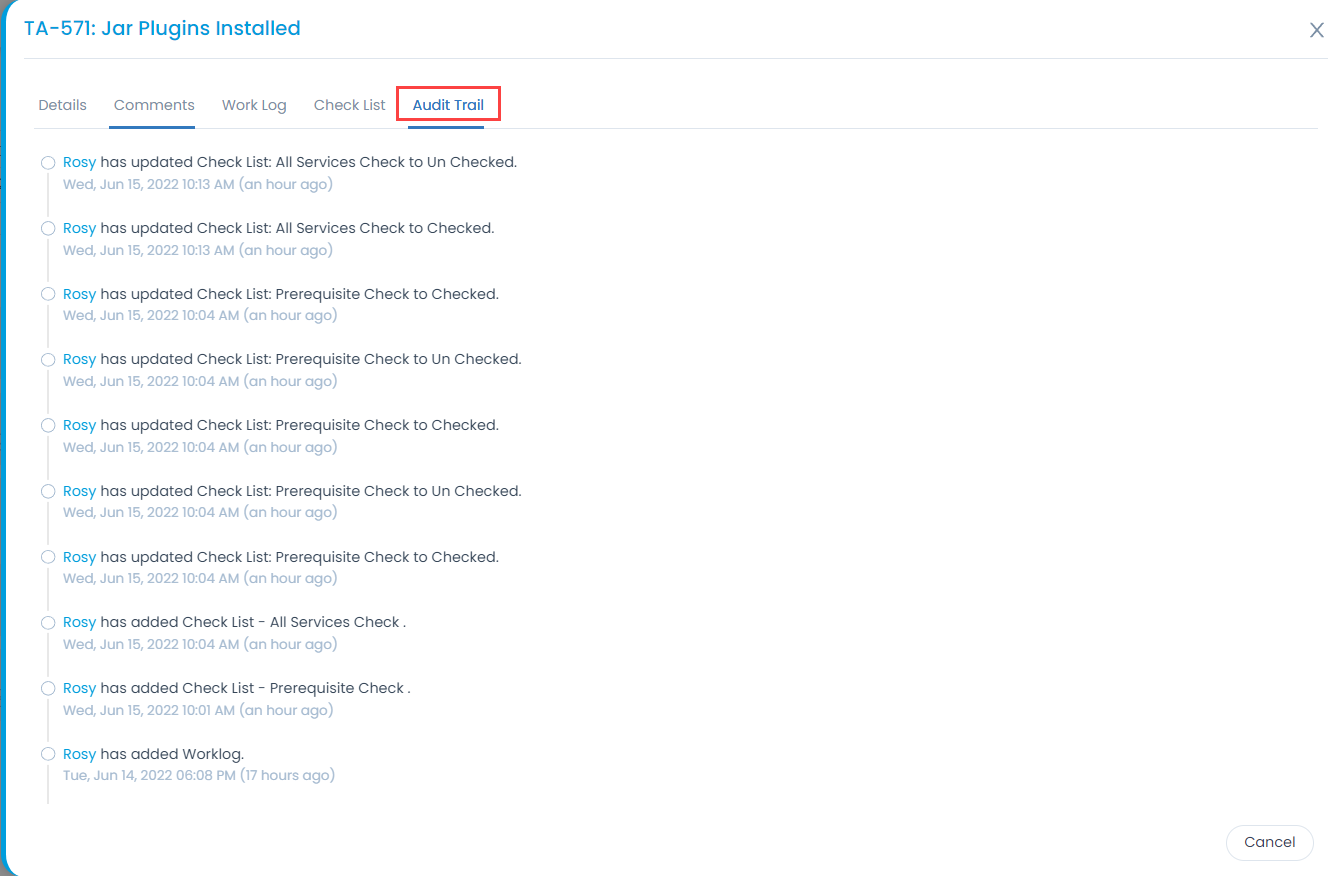
- The Audit Trail tab displays the activity logs related to the task.
Adding Predecessors or Successors
Predecessor is the first task, and it controls the start or end date for all the related successor tasks. Where as, a successor is the task whose start or end date is controlled by the predecessor.
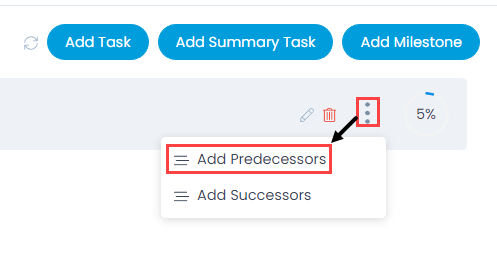
These both the tasks are basically the dependency tasks for the particular milestone or task. To add a Predecessor,
- Click the Options icon.
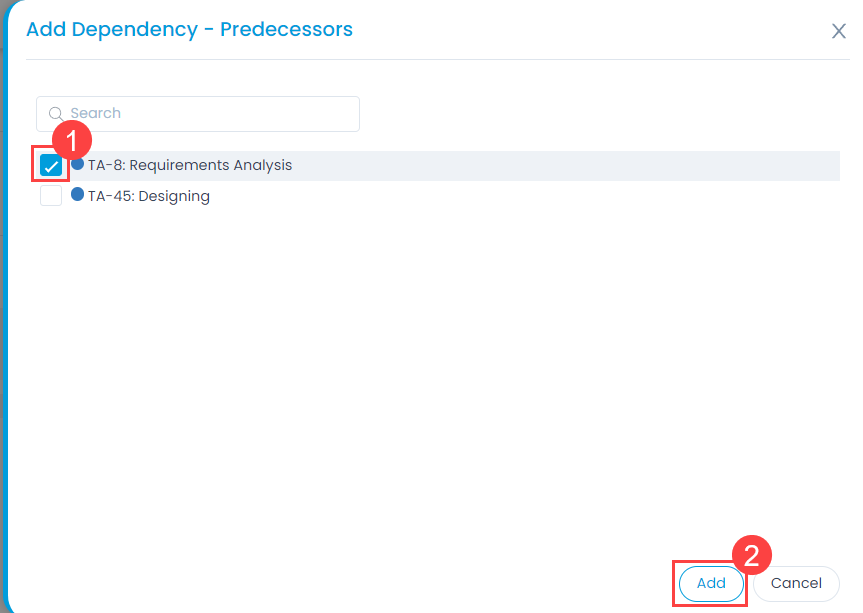
- Select Add Predecessors and a popup appears.
- Select the task(s) to add as a predecessor.
- Click Add.
Until the Predecessor task is completed, the Successor task cannot be started. i.e Till the status of the successor does not change, you cannot close the Predecessor task.
To add a Successor,
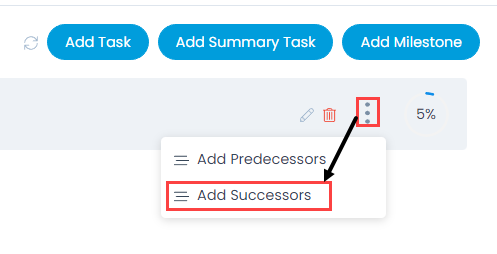
- Click the Options icon.
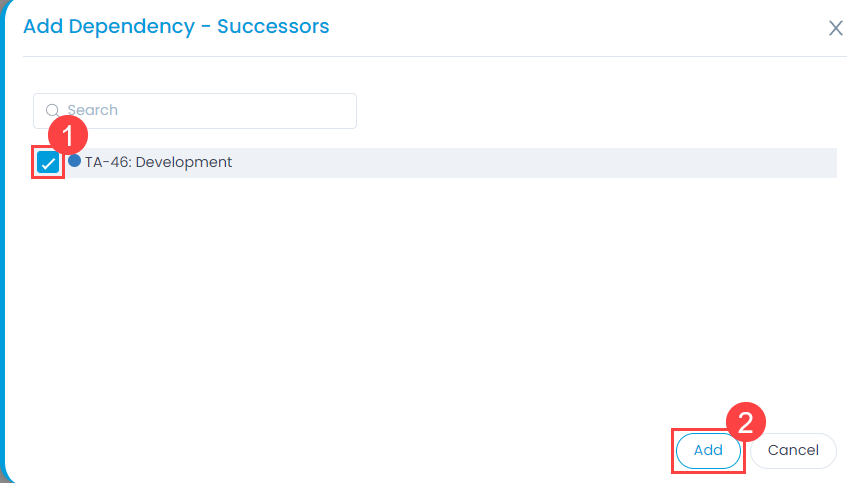
- Select Add Successors and a popup appears.
- Select the task(s) to add as a successor.
- Click Add.
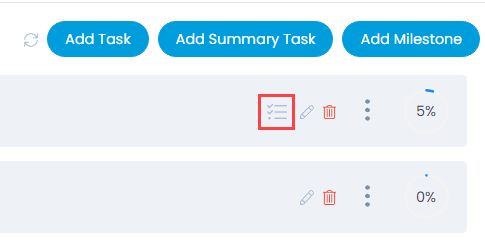
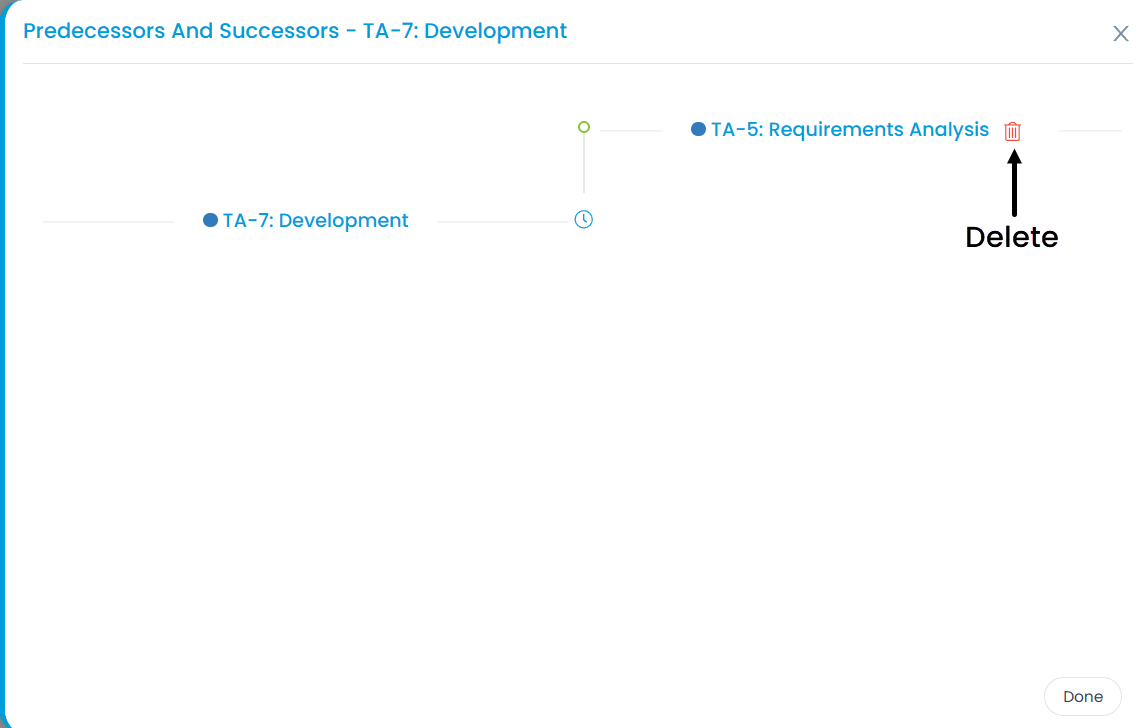
Once the predecessors and successors are added, you can view them from the tasks list by clicking the Predecessors and Successors icon as shown below. Also, you can delete them by clicking the Delete icon.
Set Color Code for Tasks
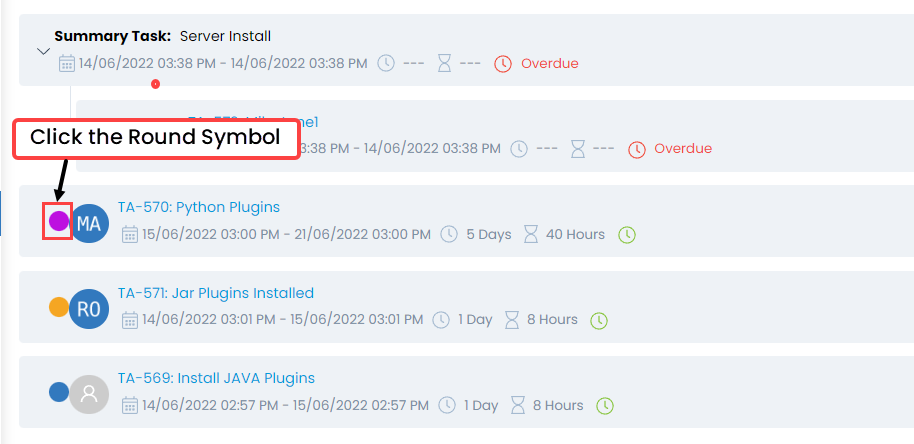
You can set different colors for tasks. These colors are visible in the Gantt Chart for classification. To set the color:
- Click on the round symbol at the left-side of the Assignee name and a color pallet appears.
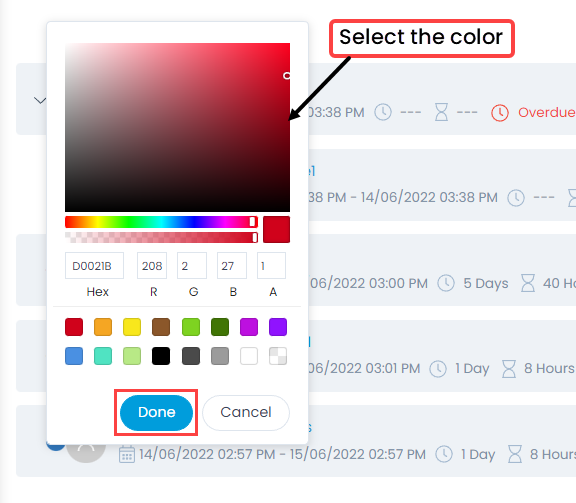
- Select the desired color or enter the color code.
- Click Done.
Add Summary Task
Project summary tasks are used when the nature of the work to be performed is unique to a portion of a project and are typically linked to the development of a specific major deliverables. It includes tasks that are grouped by sequence in the timeline, by functional, or business area which is performing the tasks, or any other method that suits the project needs. Total duration, timeline, and completion of summary task is derived based on the underlying tasks.
To add a Summary Task:
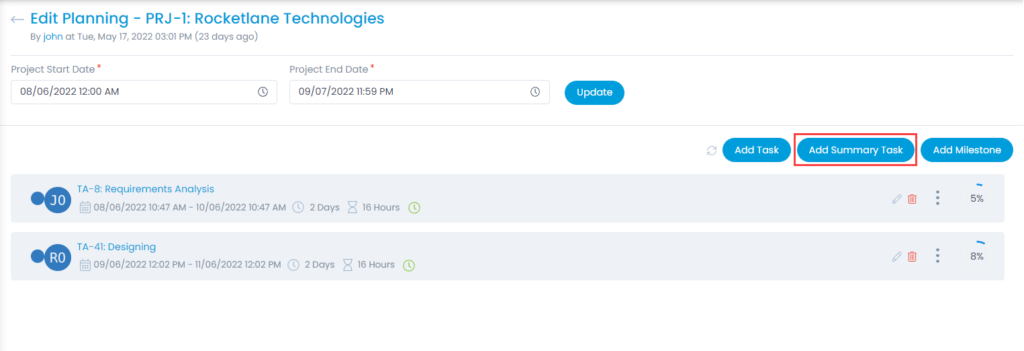
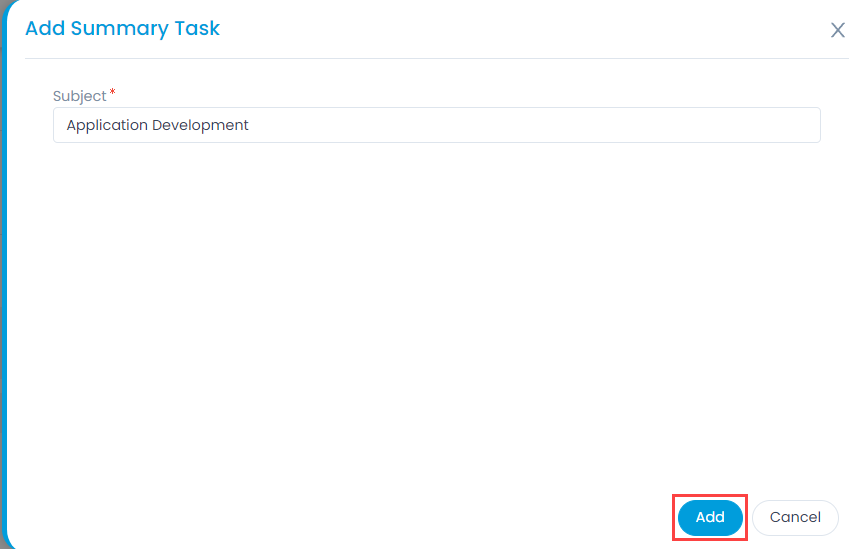
- Click the Add Summary Task button and a popup appears as shown below.
- Enter the subject and click Add. The Summary Task gets added.
- If required, you can also edit or delete the task using their respective icons.
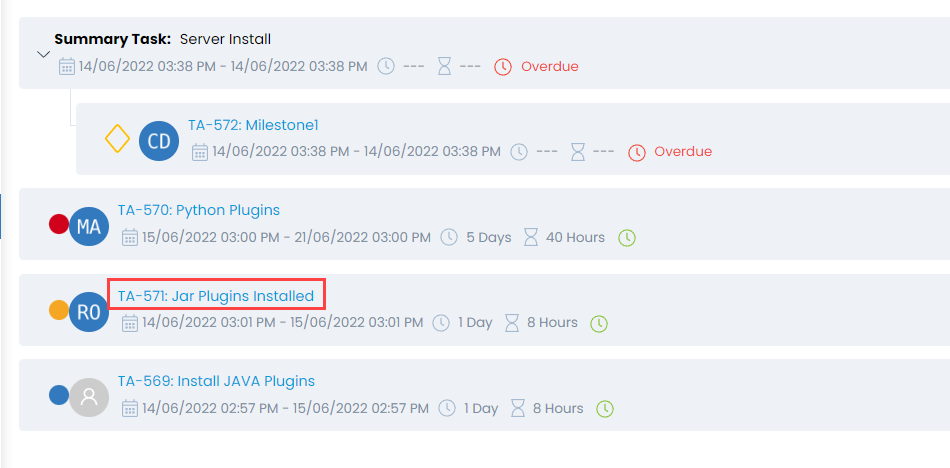
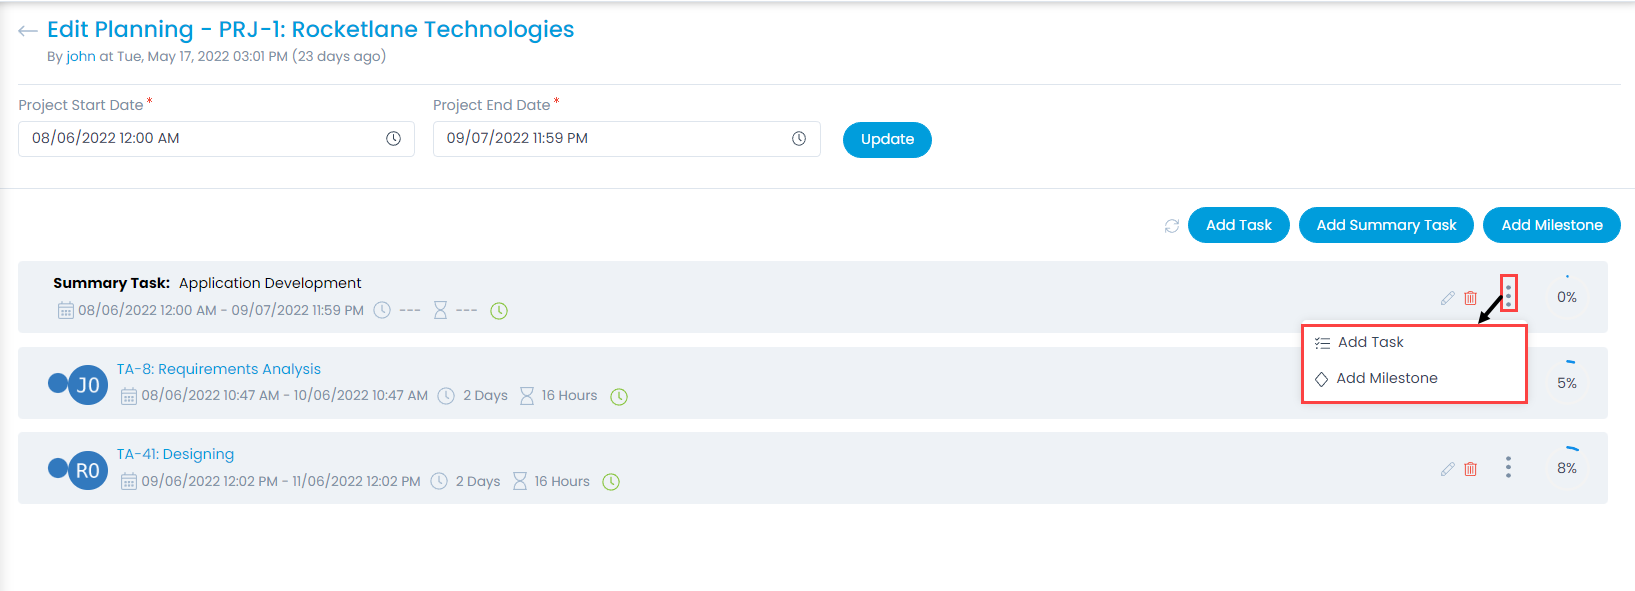
Once a Summary Task is added, you can add a task or milestone to it as shown below. The task will be dependent on the Summary Task, i.e. if a Summary Task is deleted, all the related tasks and milestones will also get deleted.
To add a task, refer to the above Add Task section.
Add Milestone
Milestones are used to represent major points, goals, or important deadlines in the project. They are like tasks but have only 2 statuses either open or completed. They can be independent or grouped in a Summary Task. Milestones highlight important deadlines or stage in the project execution. They provide an overview to the management team about the progress of the project.
To add a Milestone,
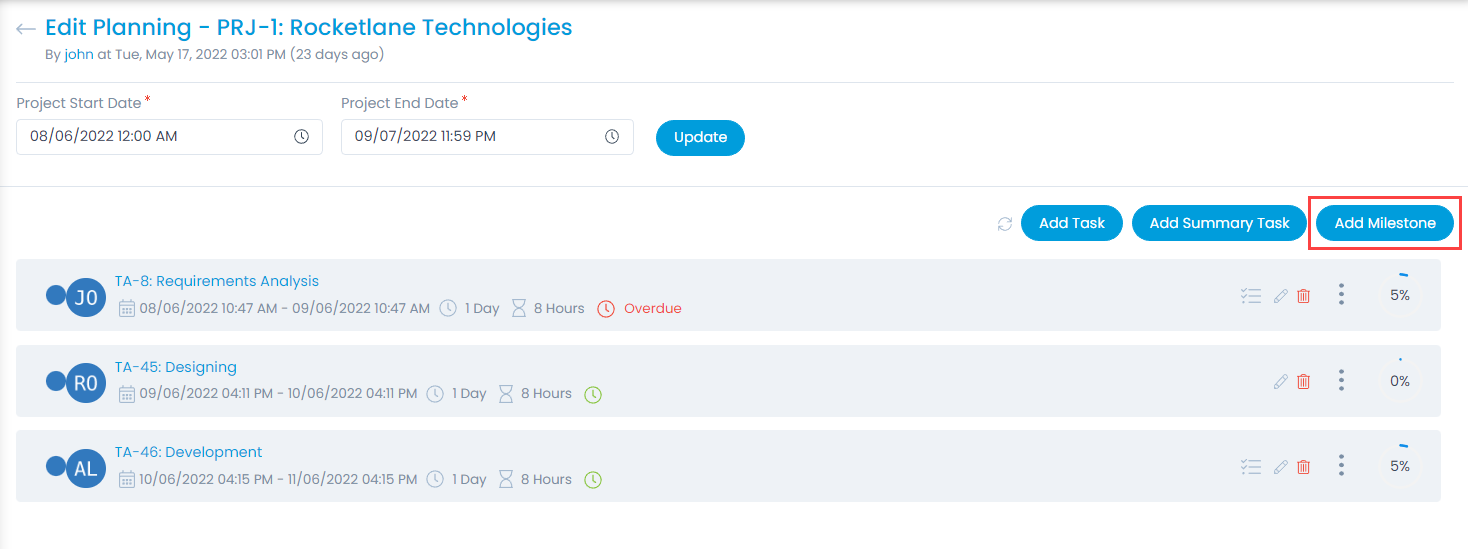
- Click the Milestone button at the top-right corner and a popup appears.

- Enter the following details:
- Subject: Enter the desired task name.
- Assigned to: Select the technician.
- Task Type: Displays the task type as Milestone.
- Technician Group: Select the desired technician group.
- Duration (days): Enter the number of days till which the milestone is to be achieved.
- Start Date: Select the start date for the Milestone.
- Completion: Set the completion percentage for the Milestone using the slider.
- Status: Select the current status of the milestone.
- Priority: Select the priority of the milestone.
- Notify Before: Set the time, when a notification should be sent for the Milestone. For example, if you wish to get notified before 6 hours of the Milestone achieved, a notification will be sent for the same.
- Description: Enter a short description about the Milestone.
- Attach Files: Attach the reference files if any for the Milestone.
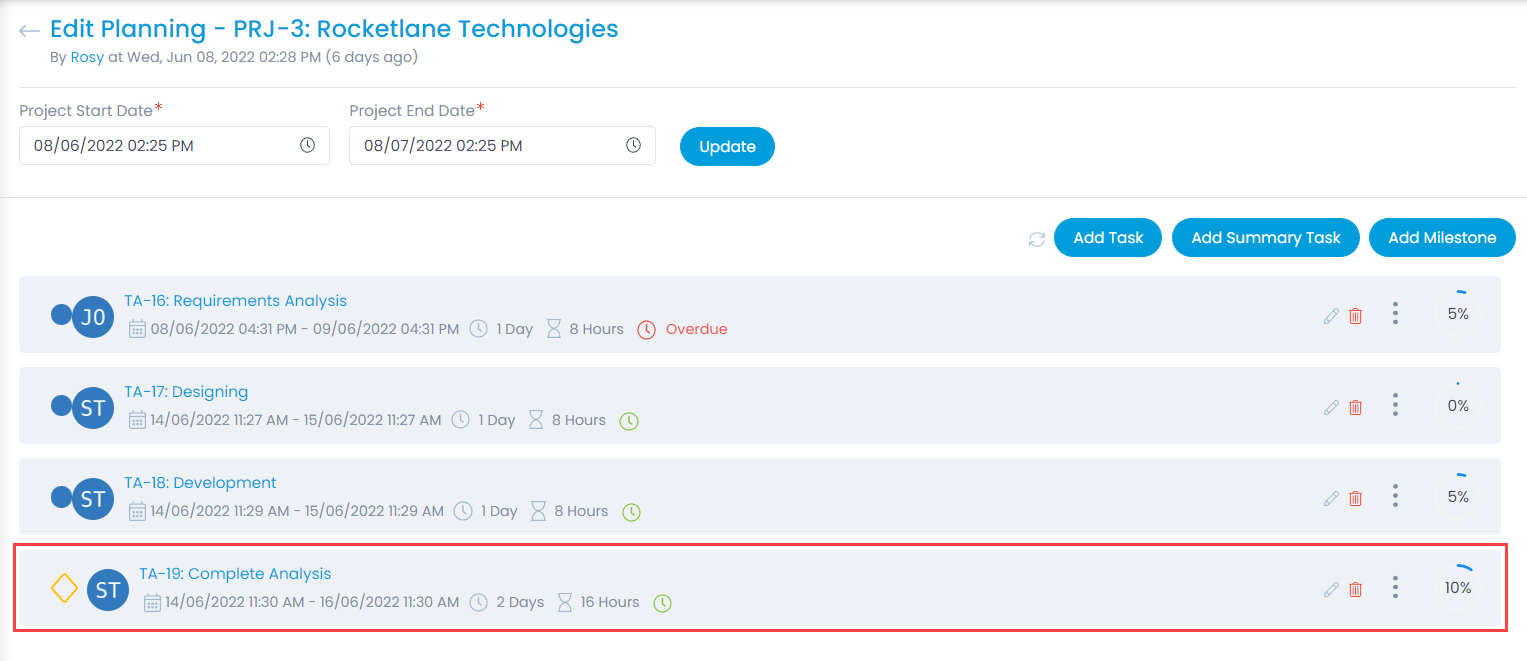
- Once you are done with filling up the details, click Add, and the new Milestone appears in the tasks list.
- Once a Milestone is added, similar to tasks you can also add predecessors or successors to it.
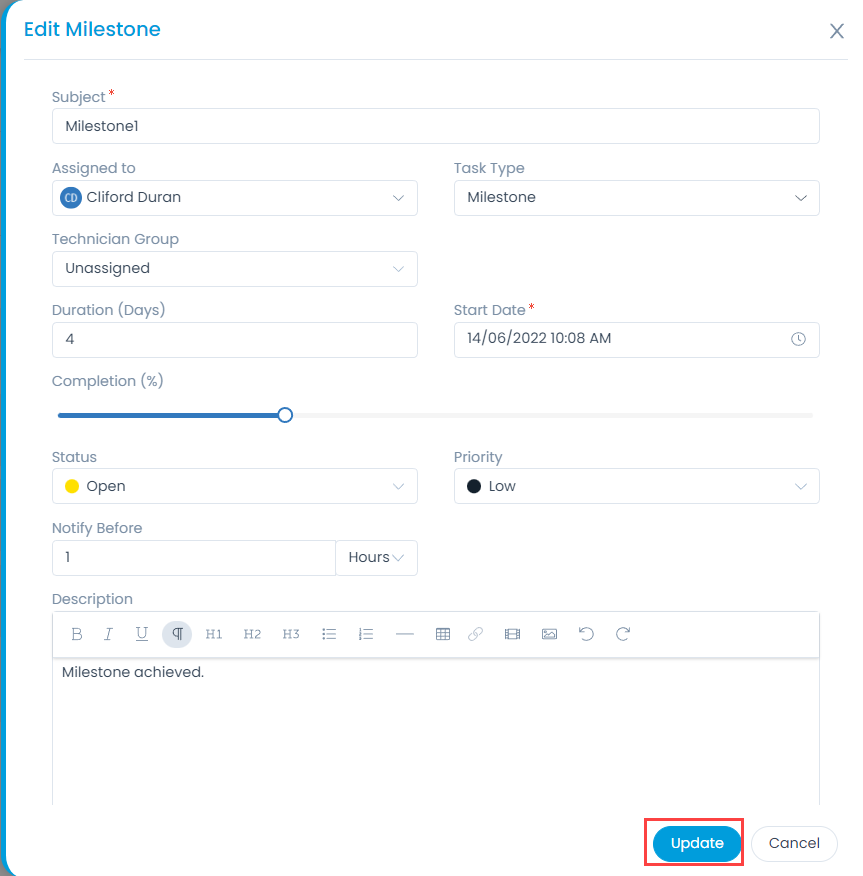
- To edit the Milestone, click the Edit icon and a popup appears as shown below.
- Make the required changes and click Update.
- To view and update the Milestone details, click on the Milestone name, and a popup appears. Similar to tasks, it displays the following tabs: Details, Comments, Work Log, Check List, and Audit Trail. For more details, refer to the above Update Task section.