10.2.1. Manage Requestors
The Requestors are people who are seeking information, change or solution to a problem through our platform. They are the users of the product, and almost all of the product features are geared towards delivering IT services to Requestors. So it is important to manage their information in the product.
Motadata allows you to add Requestors individually and bulk upload through LDAP server synchronization. Once uploaded, you can manage them from the Admin section.
Note
All Technician are Requestors by default and enjoy their rights and permissions, and even more.
10.2.1.1. Open Requestors Page
The Requestors page is where you can add, view, update and delete Requestors in the product.
Note
You need to have admin rights or be a Super User to add and modify Requestors.
Log in to Motadata, and go to Admin from the Navigation Tabs

Search Requestors in the search bar or you can directly go to Requestors under Users. Clicking on Requestors opens the Requestors page.
Here you see all the Requestors in the product if any.
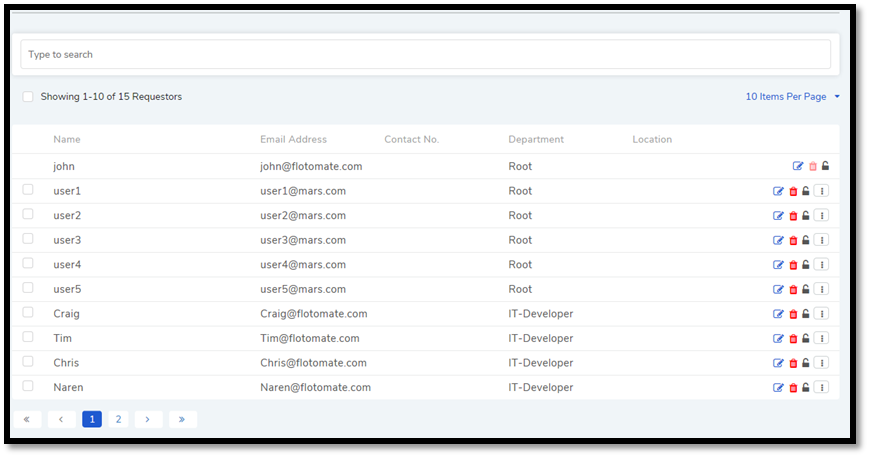
You see only the Super User in the Requestor list when you log in for the first time; new names get populated in the list as you add more Requestors.
10.2.1.2. Add Requestors Individually
You can add Requestors individually by entering their details.
Who are Requestors?
Go to Admin >> Requestors (Users).
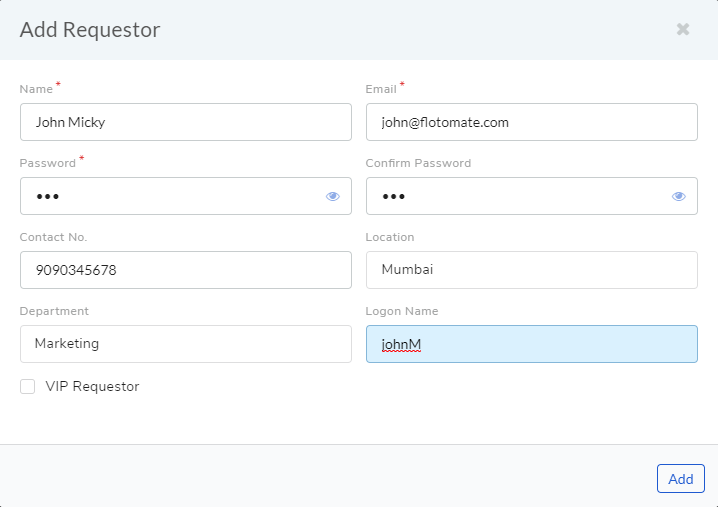
On the Requestors page, click Add Requestor situated in the top right corner of the page. You get the Add Requestor dialog box.
Fill in the details of the new Requestor along with a password. You can mark a Requestor as VIP if he/she is a critical person in the organization. This gives him/her the following benefits:
Tickets created with the VIP label can be treated with priority by the Technicians.
Specific Workflows, SLAs, and Reports can be created for VIPs.
The Logon Name is the Workstation user-name of the Requester. The field value is used for auto-assigning the Requester’s workstation to his/her name. The assignment happens during asset discovery. Learn more.
Note
A requester can use the logon name instead of the email for portal login.
You can create custom fields that allow you to store additional information. Learn More (see Custom Fields)
When you are done filling in the details, hit Add.
You can edit the details of Requestors created manually or imported through CSV and LDAP. You cannot edit email address of Requestors imported via LDAP.
In the Requestors page, Search for the Requestor that you want to edit.
Click on the Edit Icon adjacent to the Requestor. The Edit Requestor dialog box opens.

Perform your edits and hit Update.
You can delete Requestors created manually, imported through CSV or imported via LDAP.
Search for the Requestor that you want to delete.
Click on the Delete Icon adjacent to the Requestor. On Confirmation, the Requestor is deleted.

10.2.1.3. Import Requestors Using CSV
In an organization there could be hundreds or thousands of Requestors; in that case, adding them individually is not feasible. The tool allows you to import Requestors from a CSV (Comma Separated Values) file into the system; this makes the uploading process much faster.
To upload Requestors from a CSV follow the below steps:
Create a CSV file with the following property names in the first row (heading).
Department
Location
Name
Contact No.
Email
Password
If you do not use the property names mentioned above, then you have to manually match your names with the system property names mentioned above.
Name, Email, and Password are required columns.
In the CSV file, input the Requestor details under their respective heads. Each row should represent a single Requestor.
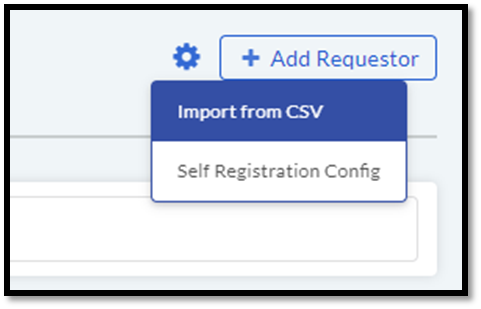
Go to the Requestors page. Click on settings and select Import from CSV.
Import page opens. Upload the CSV file and click Next.
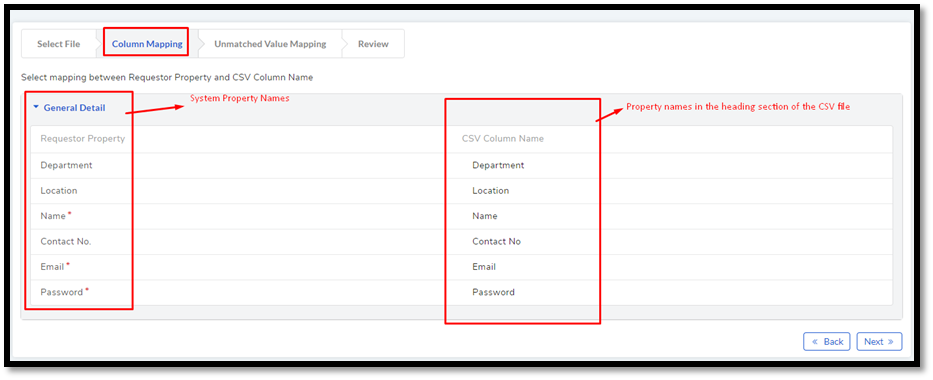
Now you are in the Column Mapping stage. Every item in the first row (heading) is a name of a property. The system automatically matches the names in the file heading with the property names in the system.
In
adf-9, the left side column has the system property names and right side column has the property names in the CSV file.In case a property name does not have a match, the right-hand side field of the name remains empty. Here you have to manually select the matching name from a drop-down list by clicking on the field.
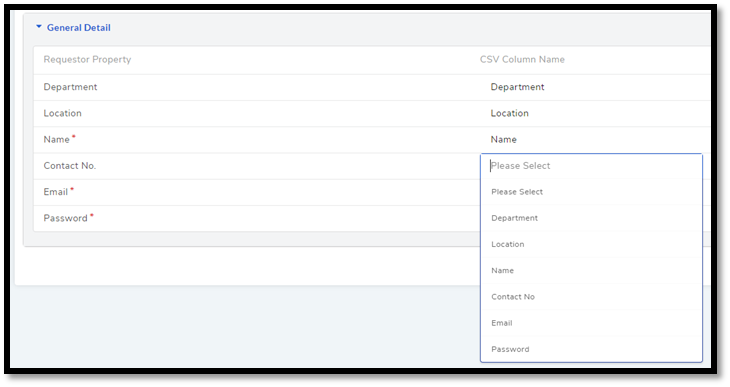
It is not necessary that all the property names have to have a match; you can still upload your Requestors as long as required fields are taken care off. Click Next to continue to the next stage.
You can create custom property names using Custom Fields. You can create n number of such fields, and they appear along side the default ones. Learn more (head to Custom Fields).
Now you are in the Unmatched Value Mapping stage. The given property names in the header have values (rows). The system checks for property values that aren’t in the system.
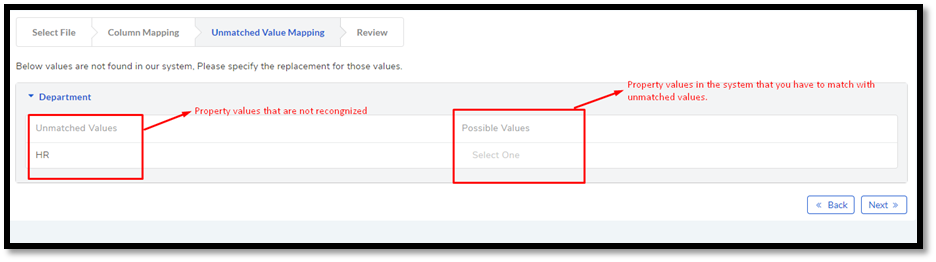
You can manually assign a value from the Possible Values (system values) to an Unmatched Value (value in the file). Click Next to continue to the next step.
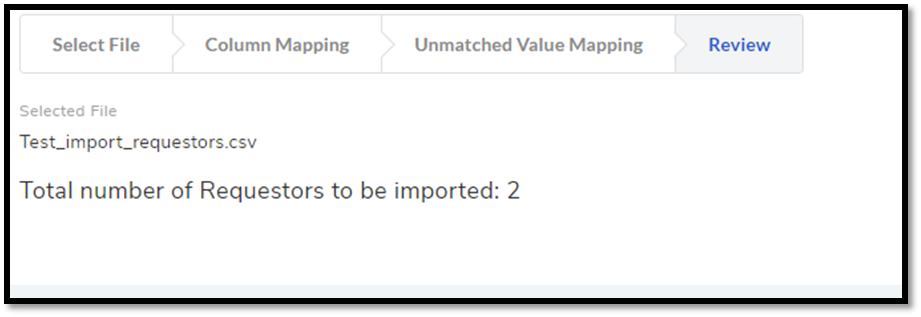
Now you are in the Review stage. Here you see the number of Requestors being uploaded. Click Import to finish the import process.
10.2.1.4. Self-Registration of Requesters
An admin can allow a user to create a Requester account from the Customer Portal. Enabling Self-Registration adds a button on the Customer Portal that can be used by anyone (who has access to the customer portal) to create a Requester account.
Note
Self-Registration can be enabled from Admin >> Requestors (under Users) >> Self Registration Config.
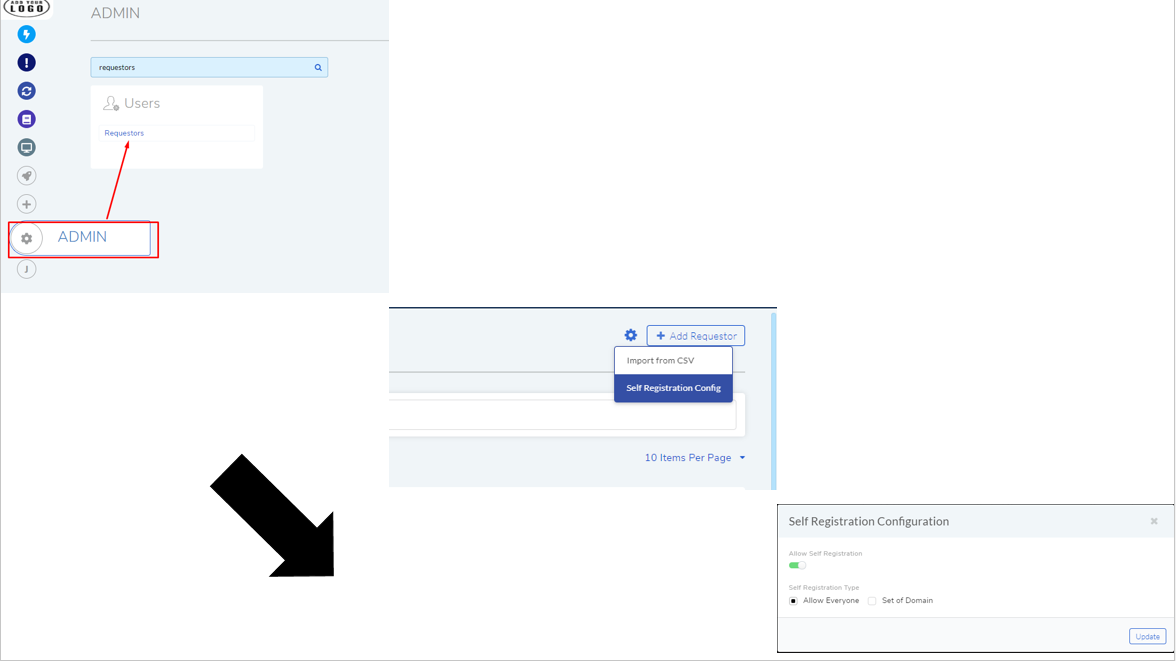
While enabling Self-Registration you have two options:
Allow Everyone: A Sign Up button appears on the Customer Portal. Anyone who has access to the Customer Portal can create a Requester account. User will get the email verification link in email. Without verifying the email through link, user cannot access the system.
Set of Domain: A Sign Up button appears on the Customer Portal. But an admin can restrict who can register by defining domains. By adding a domain, only people with an email id belonging to that domain (or any other domain already being added) can register.

When you done configuring, click on Update to start Self-Registration.
10.2.1.5. Import Requestors Using LDAP
Some organizations maintain their employee information in a distributed directory information service. Microsoft Active Directory. If your organization uses one, then you can import Requestors directly into the product using the LDAP protocol.
Note
You need admin rights to add Requestors using LDAP.
Once LDAP server is configured, you can start importing Requestors:
Go to Admin >> LDAP Configuration (IT Infrastructure).
Select the LDAP server from where you want to import. You see an option called Import Users, click it.

On clicking Import Users, you get a confirmation dialog box stating whether the import was successful or not.
10.2.1.6. Search for a Requestor
The Requestors page has a search box for searching Requestors. The search box uses Advanced Search features.
Go to Requestors.
In the search box, you can search for a Requestor using five search options. Click on the search box to access the search options.
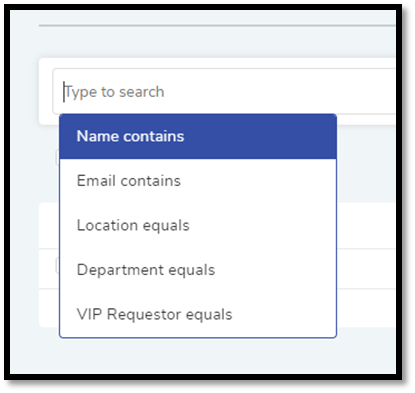
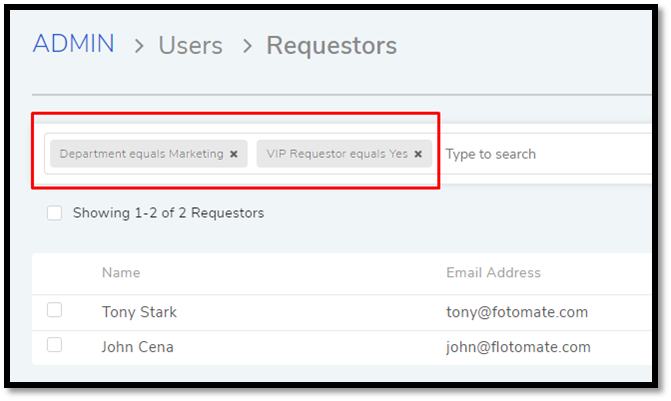
You can create a filter using multiple search options. For example, we have the following search query for finding all the VIP Requestors in the marketing department.
Some search options have predefined values to choose from.
10.2.1.7. Convert a Requestor to Technician
You can convert an existing Requestor into a Technician; this is the fastest way to add Technicians into the product. It works on Requestors created manually, imported through CSV or imported via LDAP. In case of Requestors from LDAP, you cannot edit their details after converting them to Technicians.
Go to Admin >> Requestor (Users).
Search for the Requestor that you want to convert.
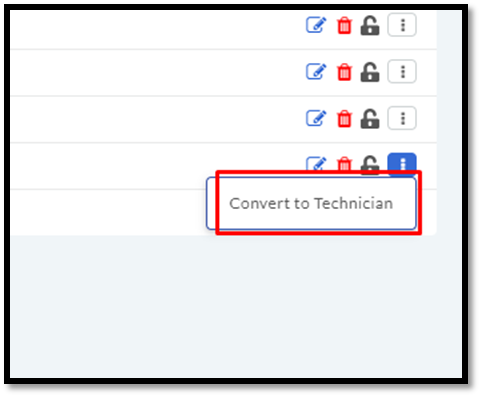
Click on the Action Menu adjacent to the Requestor. Select Convert to Technician from the pop-up menu. Add Technician dialog box opens.
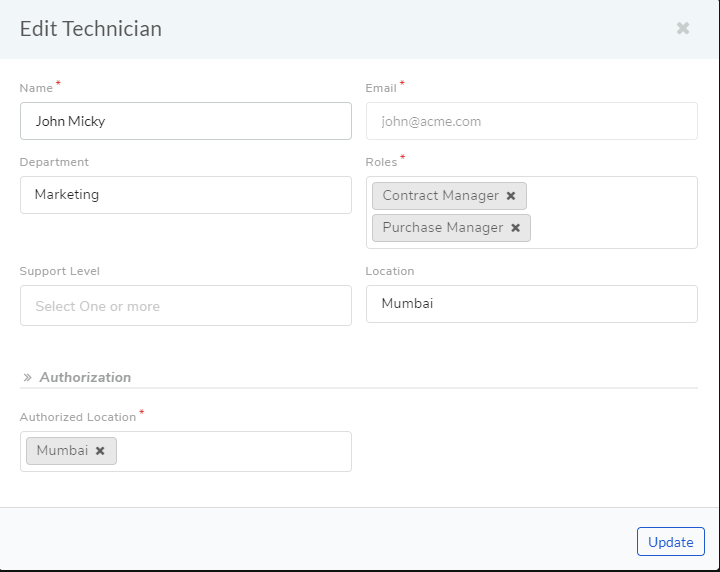
In the Add Technician dialog box, the Technician details are pre-populated in their respective fields (Name, Email, and Department); apart from these fields, you have to enter the following information:
Role/Roles as a Technician. This determines the rights and permissions of the Technician. Learn more about Roles of a Technician.
You can explicitly mention the support level. Technicians are grouped into four levels (tiers) based on their degree of expertise.
Location of the Technician. This is different from the Authorized Location field.
The Authorized Location field grants the permission to view the data of the selected location only. The feature is called ref:Location Scope <Data Segregation with Location Scope>.
When you are done, hit Add.
10.2.1.8. Block a Requestor
Sometimes it may happen that you want to prevent certain Requestors from accessing the product. You can block a Requestor and also who is a Technician.
You can block Requestors created manually, imported through CSV or imported via LDAP. Blocked Requestors cannot log in to the system.
Go to Admin >> Requestor (Users)
Search for the Requestor that you want to block.
Click on the Block Icon adjacent to the Requestor. On Confirmation, the Requestor is blocked.
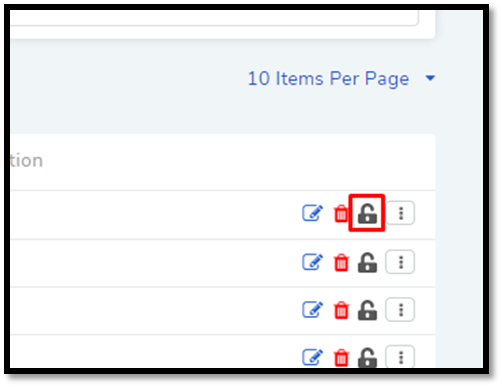
Manual Unlock Requestor
In the Requestor page, you know a Requestor is blocked when you see that the Block Icon is red.
Click on the red Block Icon. On confirmation, the Requestor is unblocked.
10.2.1.9. Delete Requestors in Bulk
You can delete multiple Requestors at once from the Requestors page. Select one or more Requestors. The Archive button appears above the display pane.

Clicking on Archive deletes the selected Requestors after confirmation.
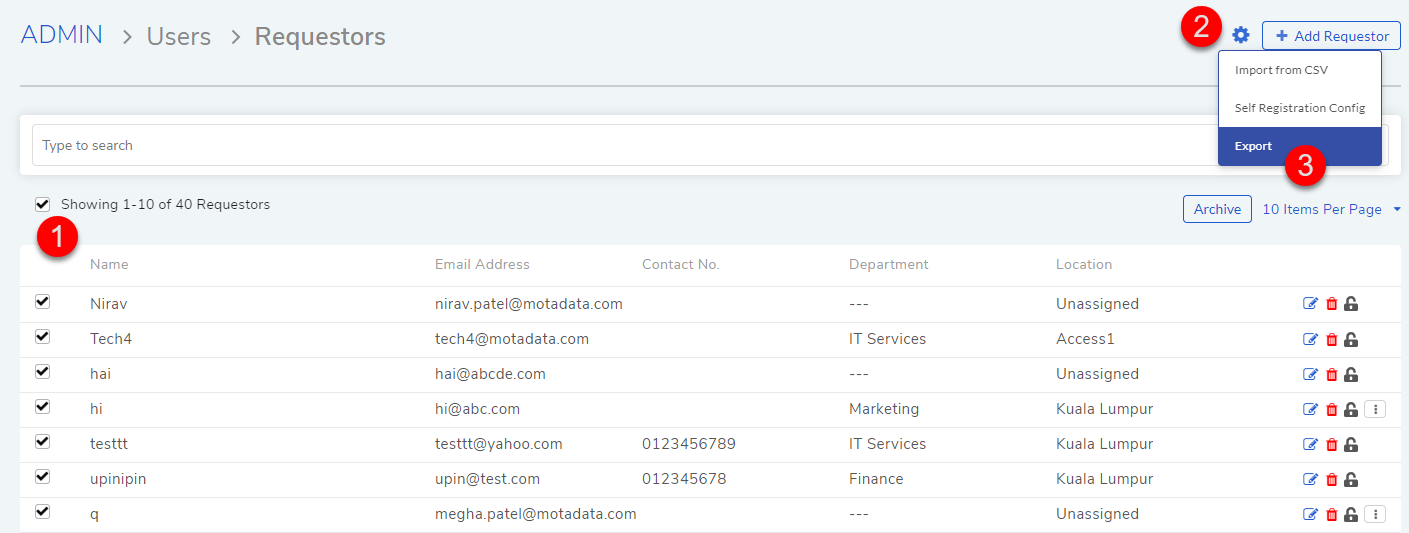
10.2.1.10. Export
You can export the details of the requesters into a CSV/Excel file and send it as an attachment to yourself. The system uses the email address attached with logged in user and sends the requesters in email to it. Here, are the steps to export the ticket.
Select the requesters you want to send.
Click on the three vertical dots on top right corner.
Click on Export button. A popup will open for you to select file type and request fields.
Select the file type. You can choose either CSV or Excel.
Select the fields you want to export.
Click Export.
