10.2.3. Managing Technician
A Technician is a person who delivers IT services by having certain rights to perform activities spanning across product administration, request handling, knowledge management, problem handling, change management, reporting, remote deployment, project management and asset monitoring. The extent of activities depends on the role/roles of a Technician. Once the roles are fixed, the workload of the technician gets decided based on the incoming tickets. Here, the workload is showed using different colour codes.
Note
Managing Technician requires you to have admin rights.
10.2.3.1. Add/View Technicians
Log in to your Dashboard and click Admin from the Navigation tabs.
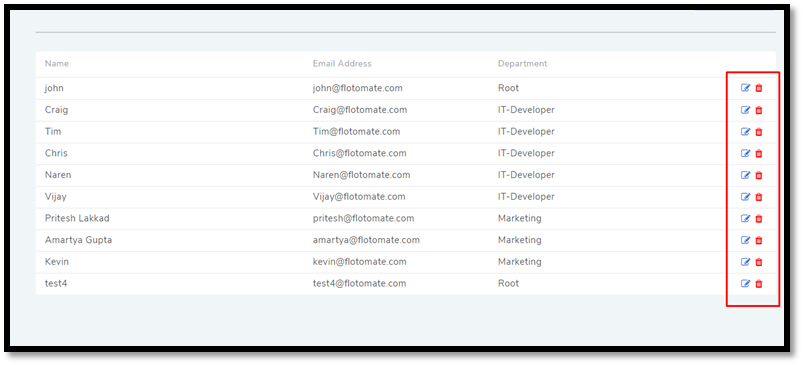
Click on Technicians in Users. You are directed to the Technicians page. Here you can view all current Technicians in the system if any. By default, the superuser is on the list before you even start adding anyone.
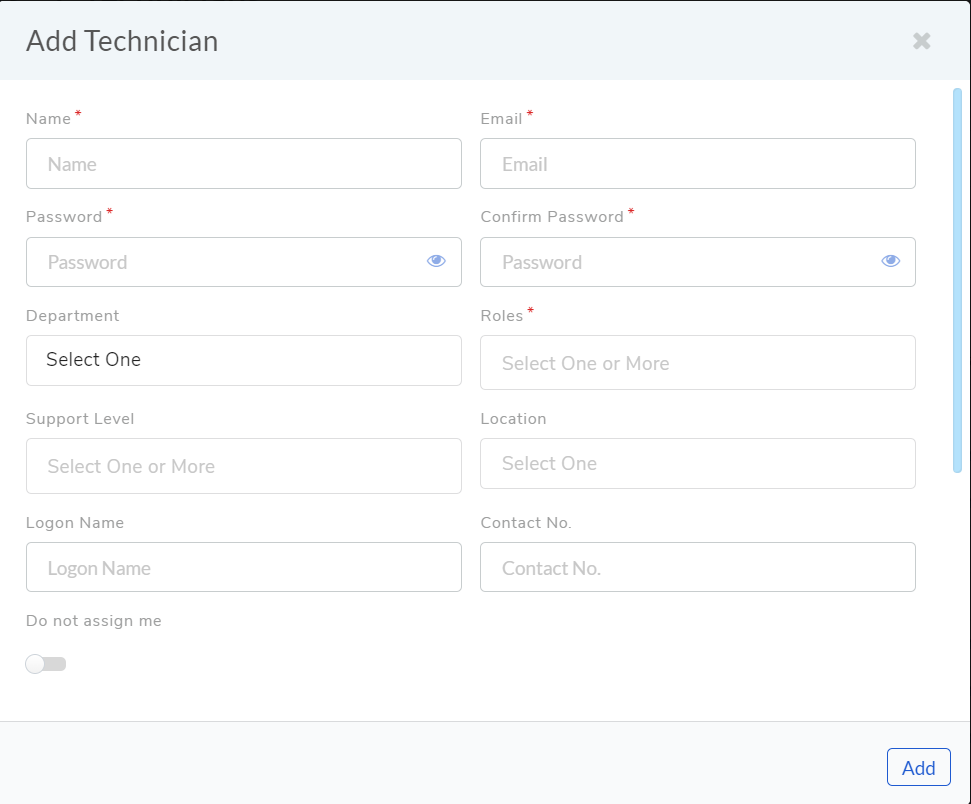
Click Add Technician button situated in the top right corner of the page. The Add Technician dialog box opens.
Add technician
In the Add Technician dialog box you have to input the following information:
Name of the Technician.
Email ID of the Technician.
Password for the Technician to log in to the system.
The department to which the Technician is associated. This is not a mandatory field. Departments are added from a drop-down menu. Learn how to add a department to the product.
Roles of the Technician. This defines the rights and permissions of the Technician. Learn how to create custom roles.
There are four support levels to choose from; you can select all four. Defining the levels of a Technician is a way to quantify his/her capabilities. Some tickets have a defined tier which tells that only a Technician of that tier (level) should handle it. This is not a mandatory field.
Add the location of the Technician. Learn how to add a location to the product. Adding location here will put the technician in a location scope as a requester.
Important
(Note that Location Authorization and Location are two different concept.)
Logon Name: Logon Name is the Workstation user-name of the Requester. The field value is used for auto-assigning the Requester’s workstation to his/her name. The assignment happens during asset discovery.
Note
Logon name can be used instead of the email for login in to the system.
Contact Number: Technician’s contact details can be updated for further communication in case of required.
Do no assign me: This flag can be enabled by the technician if he/she doesn’t want to work on a ticket due to any specific reason. For example, when a technician is on a planned leave, this flag can be enabled so that ticket cannot be assigned to him in case of his/her absence.
Here, the Admin can enable/disable this feature from Admin >> Users >> Preferences >> Technical Portal Reference

Admin rights
Designation: The technician’s Designation can be specified here for reference.
The Authorization Location puts the technician in the location scope. The field is populated from the location list, but unlike the location field above, the Authorization Location only allows the technicians to view objects (tickets, Assets, etc) for the selected location and those with no location details. Learn more about Location Scope.
You can further filter what the technician can view using the Access Level control. You can assign three types of access level.
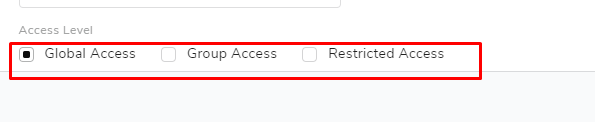
Global Access: Assigns location specific rights as per Location Scope.
Group Access: This puts an additional restriction on top of Global Access. A technician with Group Access permission will be able to see only Requests tickets with unassigned Technician Group, and if assigned, then he/she has to be part of the group in order to see the tickets.
Restricted Access: This puts an additional restriction on top of Global Access. Technicians with this permission won’t be able to view and create Request tickets.
Learn about a use case on using Authorization for technicians.
Hit Add to register a new Technician.
10.2.3.2. Update a Technician’s Info
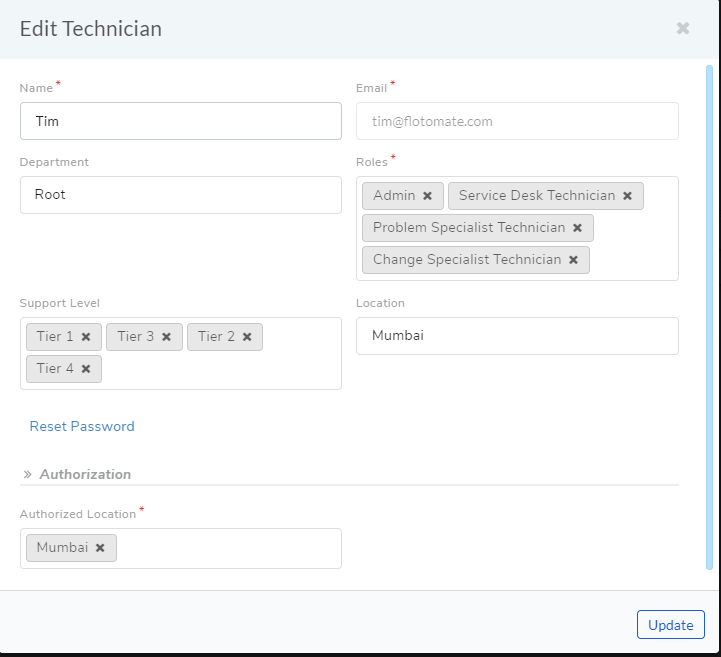
Motadata provides the Edit Technician dialog box for easy modification of a Technician’s info.
Learn who is Technician?
Note
You need to have administrative rights to view and modify Technician details.
.Go to Admin (A Navigation tab) >> Technicians (Users)
Click the Edit Icon (refer
adf-23) adjacent to the Technician, or click on the name, that you want to edit. The Edit Technician dialog box opens.In the Edit Technician dialog box, edit the fields that you want to change. Update your changes before closing the dialog box.
10.2.3.2.1. Convert a Technician into Super-User
A superuser is a user with privilege levels far beyond those of most user accounts. Superuser account is necessary for the platform management functions but also to control and oversee them.
A superuser can convert an existing Technician into a superuser after giving up his/her rights.
To Convert a Technician into Superuser
He goes to Admin (A Navigation Tab) >> Technician (under User).
In the Technician page, an Action Menu Icon is visible against people who are not superusers. This Action Menu Icon is visible to the superuser only.
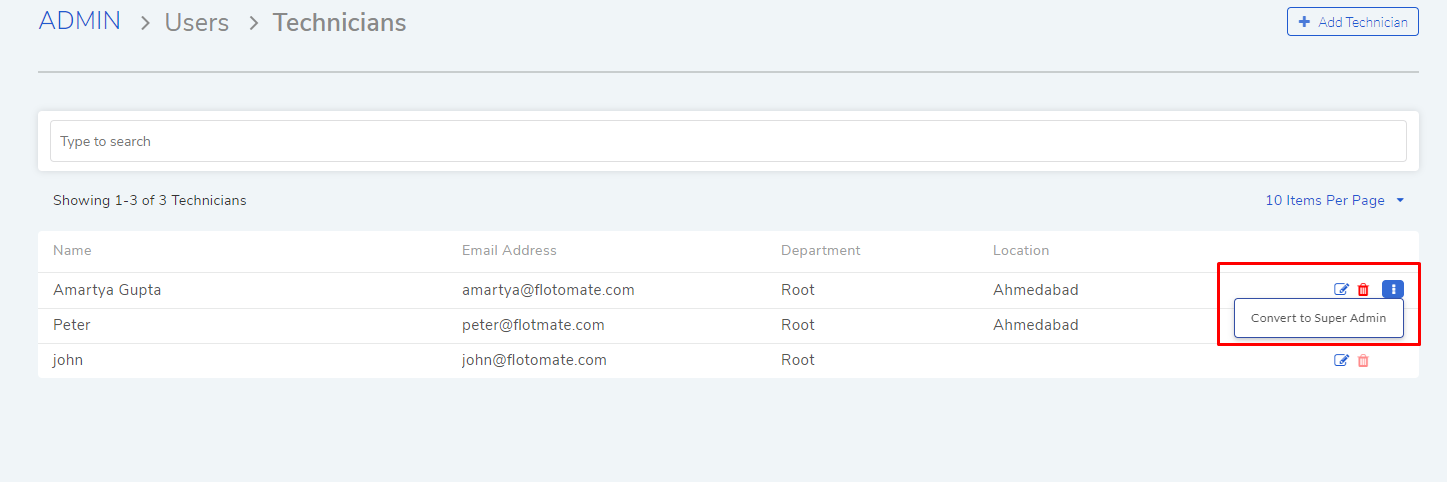
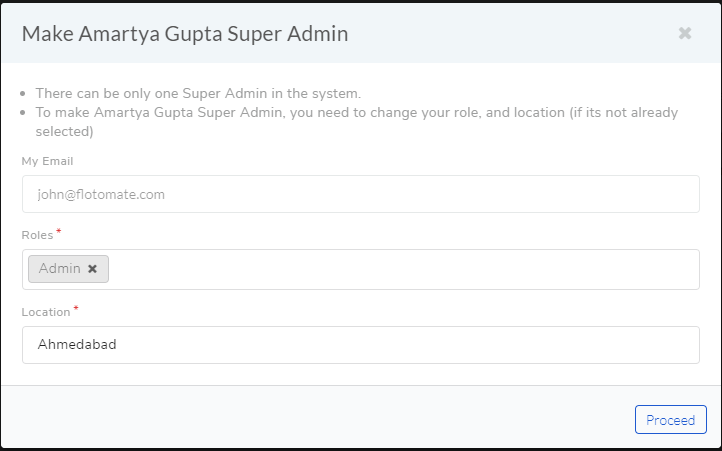
Superuser clicks on the option Convert to Super Admin in the Action Menu of a Technician. This opens a dialog box with the following fields:
My Email: The email ID of the existing superuser.
Roles: The roles of the existing superuser when he/she is no longer the superuser.
Location: The location of the existing superuser when he/she is no longer the superuser.
He clicks on Proceed that takes him to another dialog box where he has to confirm the migration by entering his account password.
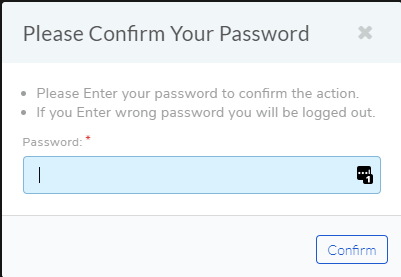
On success, the existing superuser is logged out, and he is no longer the superuser.
10.2.3.2.2. Convert a Technician to Requester
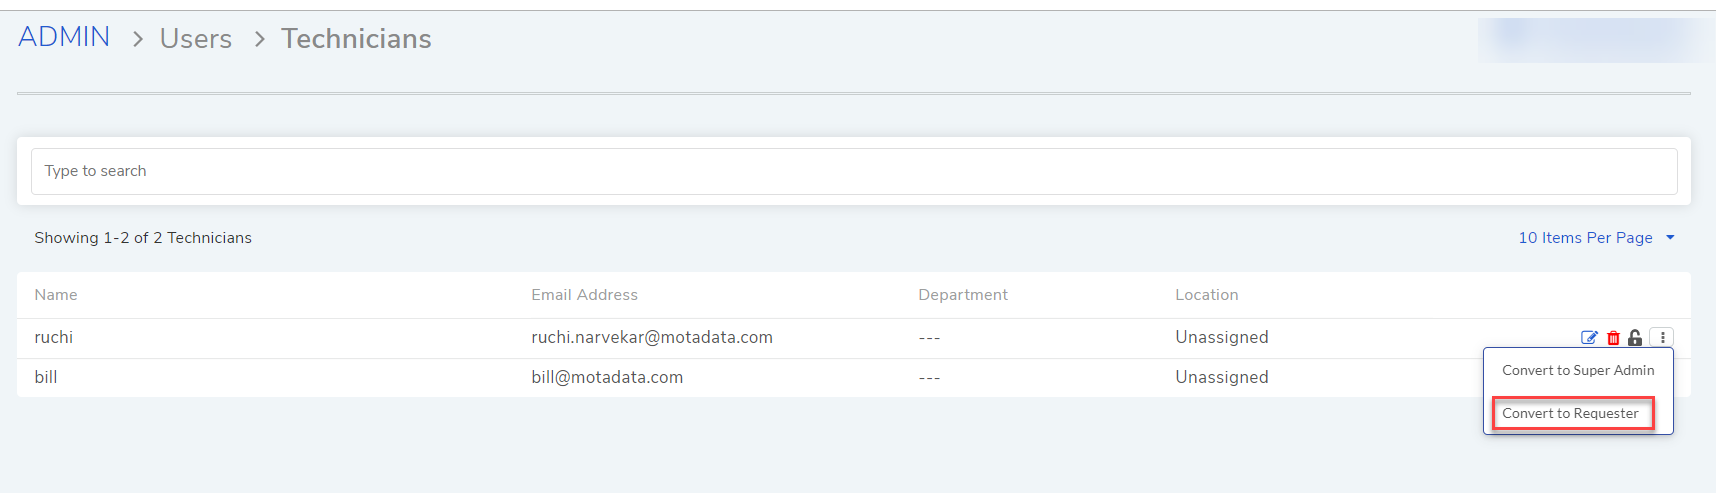
A feature is available which allows converting a Technician to a Requester. Go to Admin (A Navigation Tab) >> Technician (under User).
In the Technician page, an Action Menu Icon is visible against people who are not superusers and are just technicians.
Convert to Requester
10.2.3.2.3. Role of a Technician
A Technician can have multiple roles. Each role has its rights. Click
the Roles field in Edit Technician dialog box (adf-25); select
the roles applicable to the person and hit Update to make the
changes.
Learn how to add new roles.
10.2.3.2.4. Change Support Level
There are four support levels to choose from; you can select all four. Defining the levels of a Technician is a way to quantify his/her capabilities. Some tickets have a defined tier which tells that only a Technician of that tier (level) should handle it.
A Technician can have support levels. Click the Support Level field in
Edit Technician dialog box (adf-25); select the tiers
applicable to the person and hit Update.
10.2.3.2.5. Reset Password of a Technician
Resetting the password of a Technician is very easy. Click the Reset Password button (refer adf-25).
Click yes to confirm; a password reset link is sent to the Technician’s email address.
10.2.3.3. Export
You can export the details of the technician into a CSV/Excel file and send it as an attachment to yourself. The system uses the email address attached with logged in user and sends the technician in email to it. Here, are the steps to export the ticket.
Click on the three vertical dots on top right corner.
Click on Export button. A popup will open for you to select file type and request fields.

Export Technician
Select the file type. You can choose either CSV or Excel.
Select the fields you want to export.
Click Export.
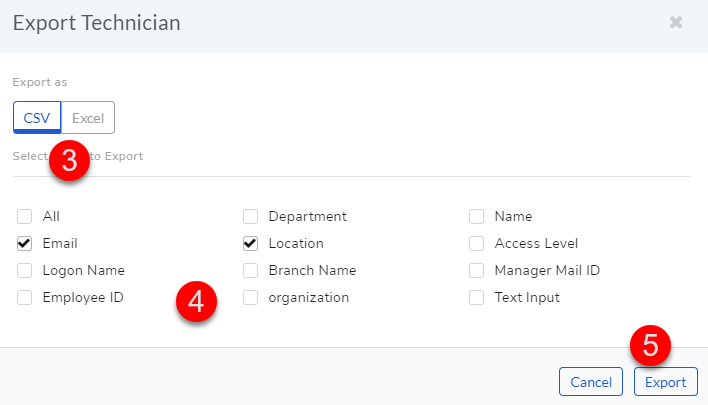
Export Technician