Calendar View
The Calendar View in ServiceOps provides a comprehensive overview of pending requests, tasks, and technician availability, streamlining workload management and ensuring timely ticket resolution.
The Calendar View is a powerful tool designed to enhance operational efficiency for IT staff and technicians by providing a centralized dashboard for managing daily tasks and tracking team availability. It presents two distinct calendar types: one for monitoring service requests and tasks, and another for managing technician leaves. This dual functionality ensures that technicians can prioritize their work effectively while administrators gain insights into team capacity.
Calendar
This helps the technicians to get a quick view of the requests, tasks, and work accordingly to close or accomplish them. Thus, it acts as an alert for the technicians to resolve the tickets on or before the due date. You can view the list day wise, week wise, and month wise. By default, the calendar displays data of the Current Week.
To view the calendar, click the Calendar icon located next to the Create New button.
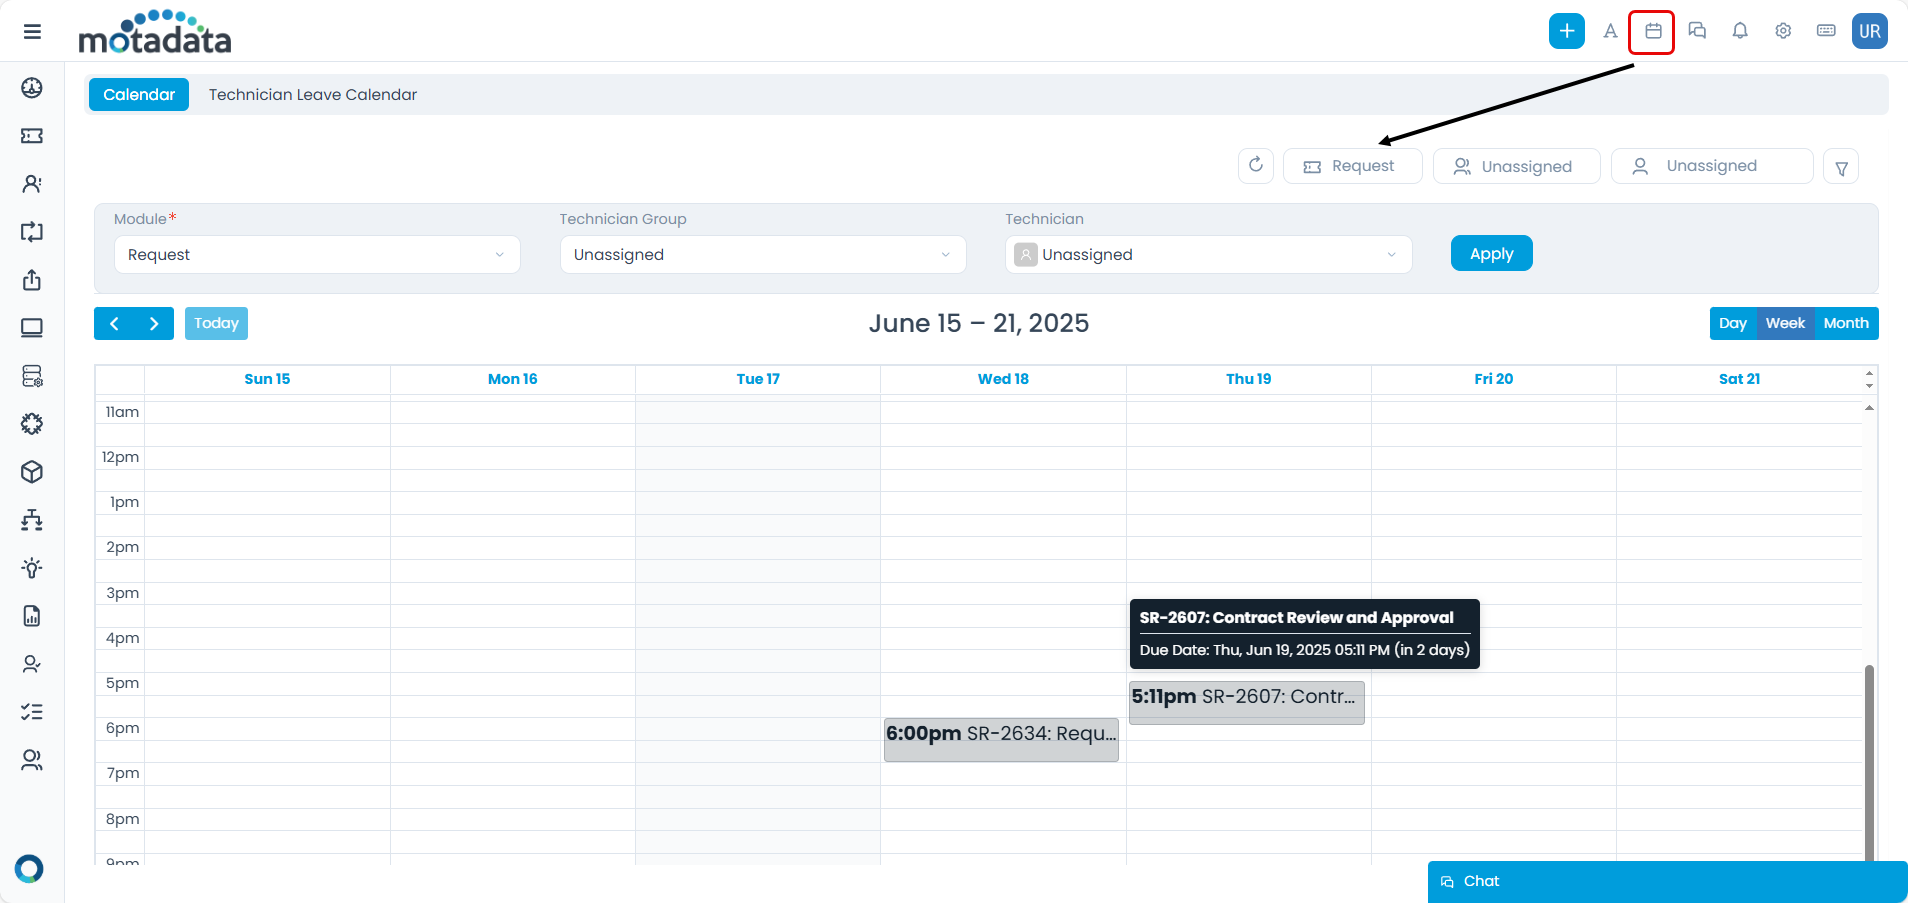
The calendar view provides several options to help manage your workload:
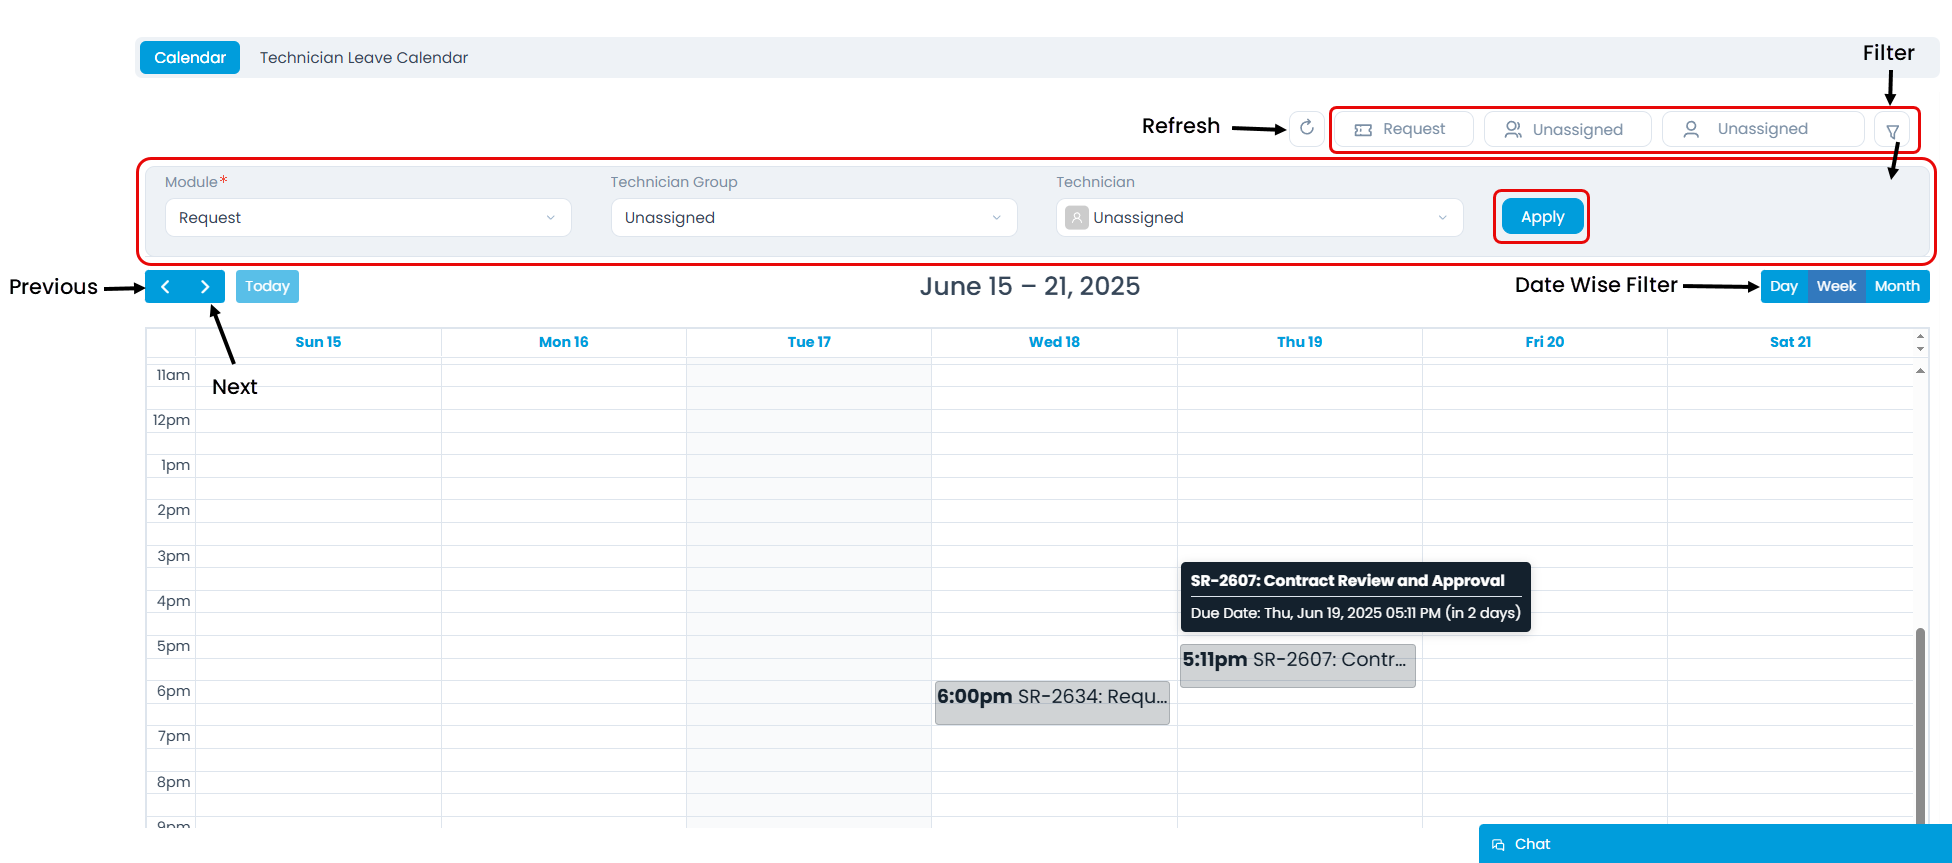
- Refresh: Update the calendar entries to see the latest data.
- Filter: Customize the displayed data based on specific criteria.
- Click the filter icon to reveal a section where you can refine data by:
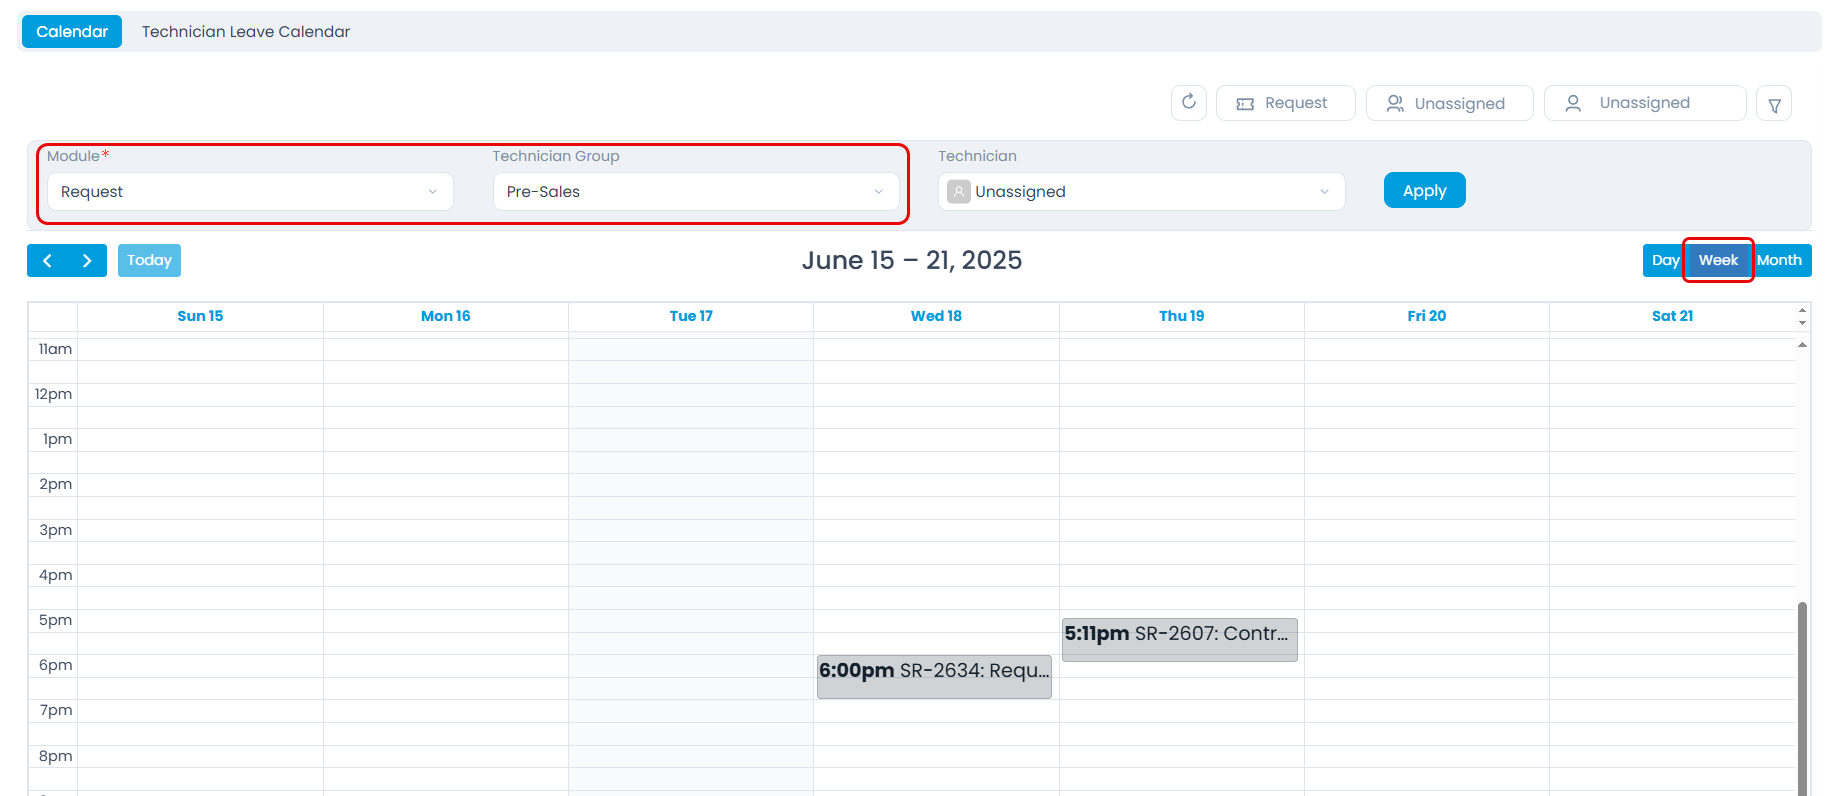
- Modules: Select
Request,Task,Problem,Change,Release, orProject. - Technician Group: Filter by specific technician groups.
- Technician: Filter by individual technicians.
- Modules: Select
- After making your selections, click Apply.
- You can also choose to display data Day-wise, Week-wise, or Month-wise. By default, the calendar displays the Current Week's data.
- Click the filter icon to reveal a section where you can refine data by:
- Global or Global Restricted Access: Technicians with these access levels will see requests and tasks across all Technician Groups and Technicians (based on selected groups).
- Group Access: Technicians with group access will only see requests and tasks related to their own group and assigned technicians.
- Restricted Scope: If a technician has a restricted scope, the Technician Group and Technician filters will not be available.
- Previous / Next: Navigate through past or future days, weeks, or months to view relevant details.
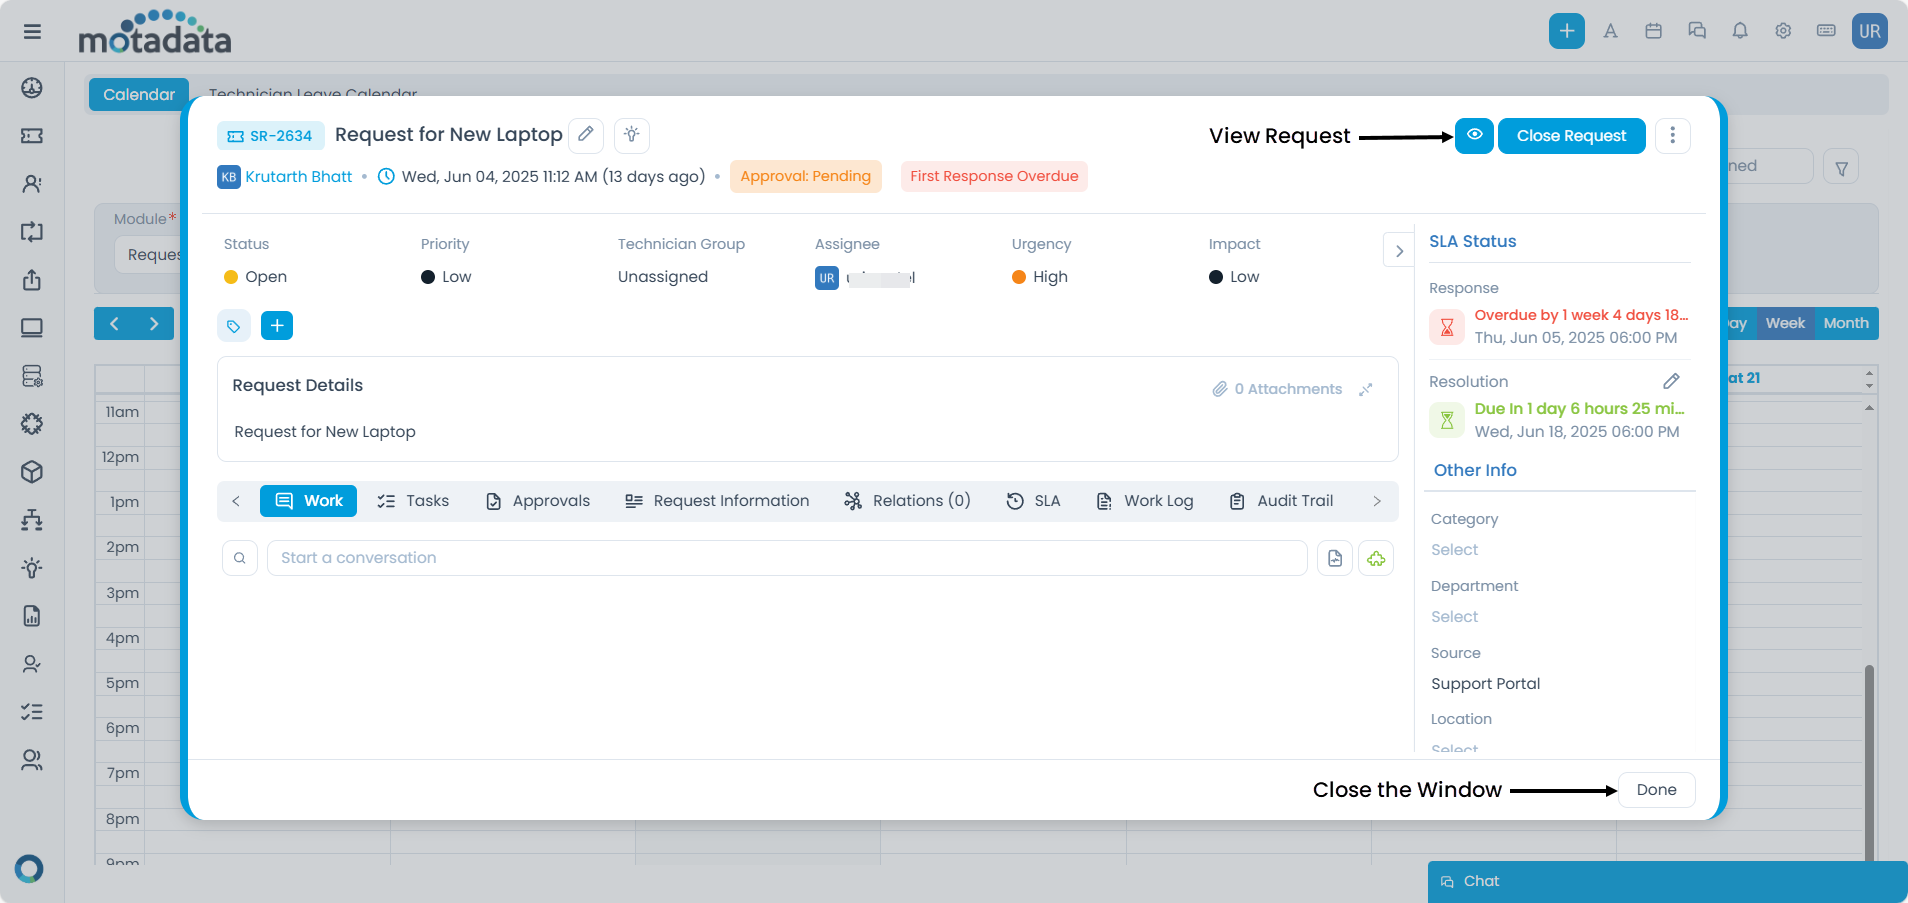
- View Individual Ticket: Click on any displayed ticket to open a pop-up window showing detailed information. From this window, you can also edit the request details.
Technician Leave Calendar
The Technician Leave Calendar is essential for IT Admins and Team Leads to track technician availability and manage leave schedules, ensuring adequate staffing and efficient work delegation. Technicians can also use this to view, mark, edit, and delete their own leaves. Notifications can be configured to inform relevant personnel when a technician is on leave.
Accessing the Technician Leave Calendar
- Click the Calendar icon on the Home page. This will initially display requests and tasks.
- Click the Technician Leave Calendar tab to switch to the leave view.

Key Features of the Technician Leave Calendar
The Technician Leave Calendar offers the following functionalities:
- Refresh: Update the list to see the most current leave information for technicians.
- Filters: Refine the displayed leave list using these options:
- Technician: View leave details for a selected technician based on their defined scope.
- Technician Group: Filter leave information by a specific technician group and its defined scope.
- Company: Available only if MSP functionality is enabled. Displays leave lists based on the selected company.
- Date Filter: Adjust the view to display technician leaves Week-wise or Month-wise. By default, it shows Today's leave list.
- Mark Leave: Technicians can mark their leave directly by clicking on a date in the calendar or by using the Mark Leave button.
- Edit or Cancel Leave: Once a leave is marked, it can be edited or canceled using the respective icons on the calendar. Super Admin and Tenant Super Admin users have the privilege to modify and delete past leaves of technicians.
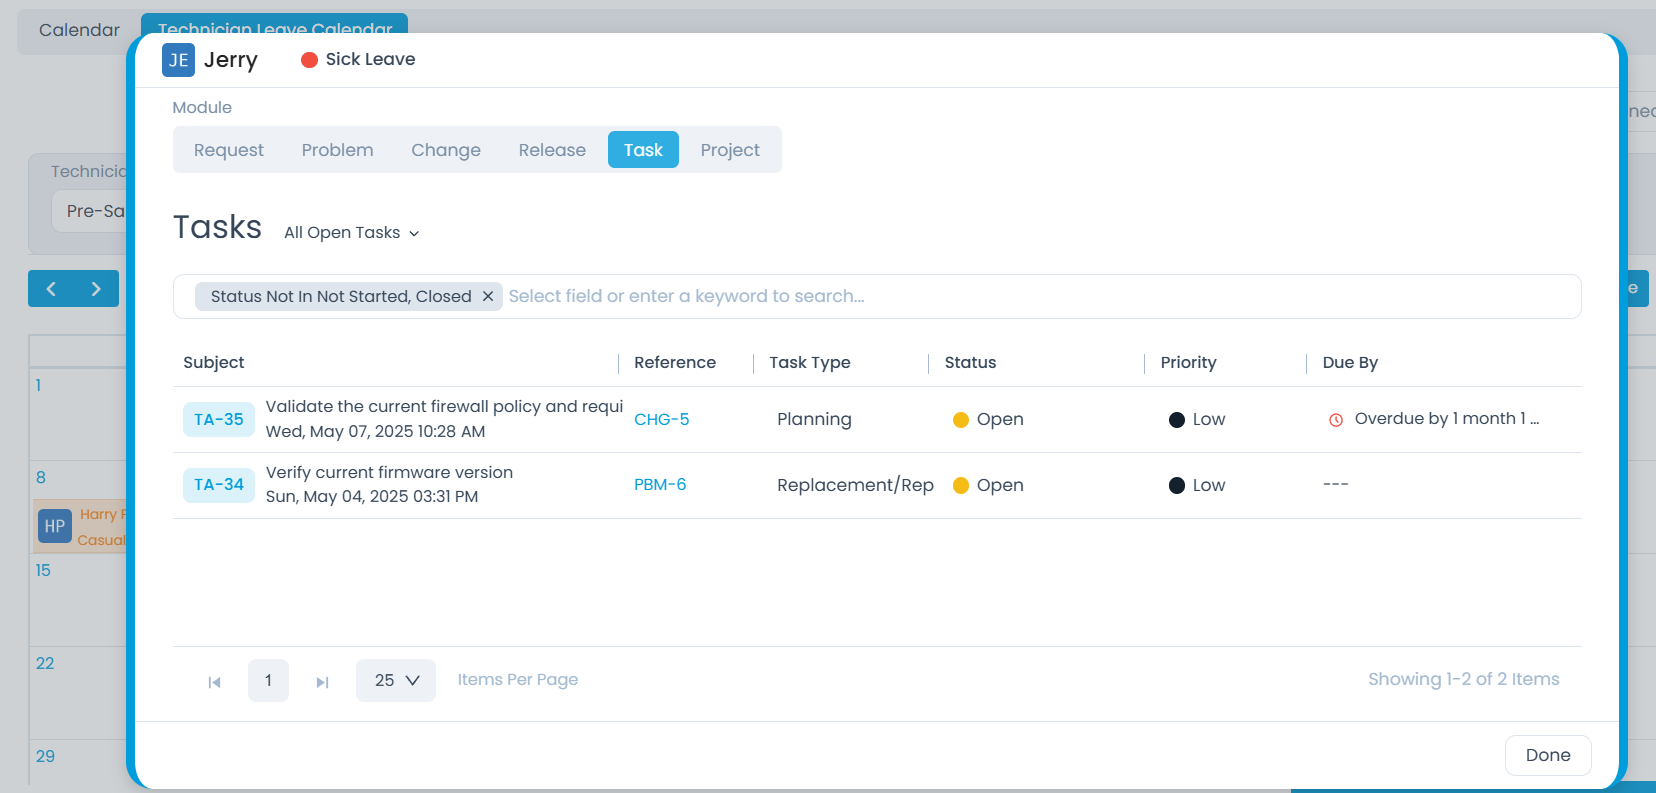
- View Tasks: Click on a technician's name to view their assigned
Requests,Problems,Changes,Releases,Tasks, andProjects.
Marking Leave and Work Delegation
This section guides technicians and IT Admins through the process of marking leave and configuring work delegation, ensuring continuity of service during absences.
Step-by-Step: Mark Leave
To mark a leave:
- Click on a date in the Technician Leave Calendar or use the Mark Leave button.

Fill in the required details in the Mark Leave form:
- Technician: Select the technician for whom the leave is being applied.
- Leave Type: Choose the appropriate leave type.
- Start Date: Select the beginning date of the leave.
- End Date: Select the end date of the leave.
- Remarks: Provide a description or reason for the leave.
- Enable Work Delegation: Select this option to delegate work to another technician during the leave period.
- This field is only available if Allow to Configure Work Delegation for Self/Team is enabled for the delegator when adding a technician.
- If enabled, provide the following details:
- Delegates To: Select the technician group and the specific assignee who will take over the delegated work.
- Delegation Start Date: Specify when the work delegation should begin.
- Delegation End Date: Specify when the work delegation should conclude.
- Delegated Work: Choose the types of work to delegate (e.g.,
Request,Change).
Click Save. The leave will be marked on the calendar, and work delegation will be configured as specified.

Post-Leave Marking Behavior
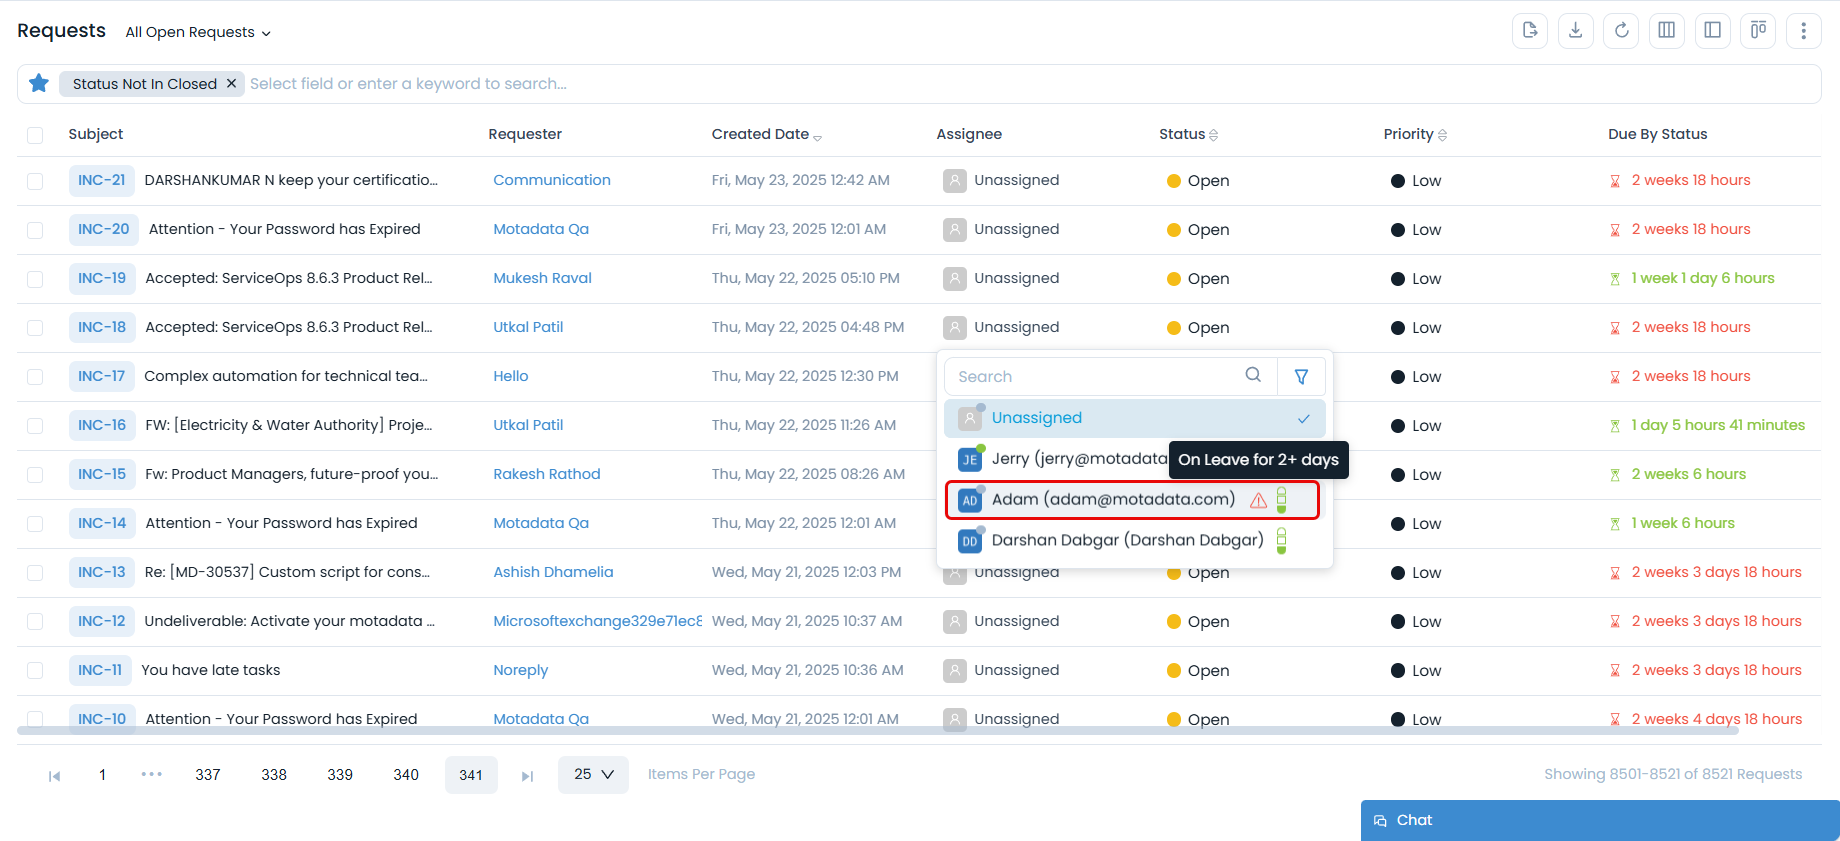
- Tickets will not be auto-assigned to technicians on leave, based on their threshold leave balance.
- Manual assignment of tickets to a technician on leave is possible, but a triangle warning icon will appear next to their name, indicating their absence (e.g., "On Leave for 2+ days").
- Technicians receive notifications in the following scenarios:
- When assigned as a delegated technician.
- When removed from being a delegated technician.
- When their work delegation ends.
- About the delegated technician during their absence.