Installation Guide for File Server
Enables patch and package management capabilities in SaaS deployments by providing on-premise file storage that connects securely to your cloud-based ServiceOps instance.
This hybrid architecture allows you to maintain control over file storage while leveraging the benefits of cloud-based ServiceOps. This guide provides step-by-step instructions for installing and configuring the File Server for SaaS deployments.
Key Benefits
- Hybrid Architecture: Combines cloud-based ServiceOps with on-premise file storage.
- Security Control: Maintains sensitive patch and package files within your network.
- Network Efficiency: Reduces bandwidth usage by storing files locally.
- Compliance: Meets regulatory requirements for data residency.

Prerequisites
System and Network Requirements
System Requirements
- Operating System: Windows Server 2016+ or Linux (Ubuntu 22.04+, RHEL 9.2+).
- Hardware: Minimum 4GB RAM, 100GB available disk space recommended.
- Software: .NET Framework 3.5 for Windows.
Network Requirements
- Public IP Address: The File Server must have a public IP address accessible from the internet.
- Connectivity: Bidirectional connectivity between the File Server and the ServiceOps SaaS instance.
- Firewall: Ports 80 (HTTP) and 443 (HTTPS) must be open.
SaaS Instance Requirements
- An active ServiceOps SaaS subscription with the Patch Management module enabled.
- Administrative access to the SaaS portal.
Installation and Configuration
Step 1: Install the File Server
- Download: Get the installer for your OS from the Download Links.
- Install: Follow the Windows File Server Installation Guide.
- Configure SaaS Connection: During installation, provide your SaaS instance URL and the Secure Auth Code.
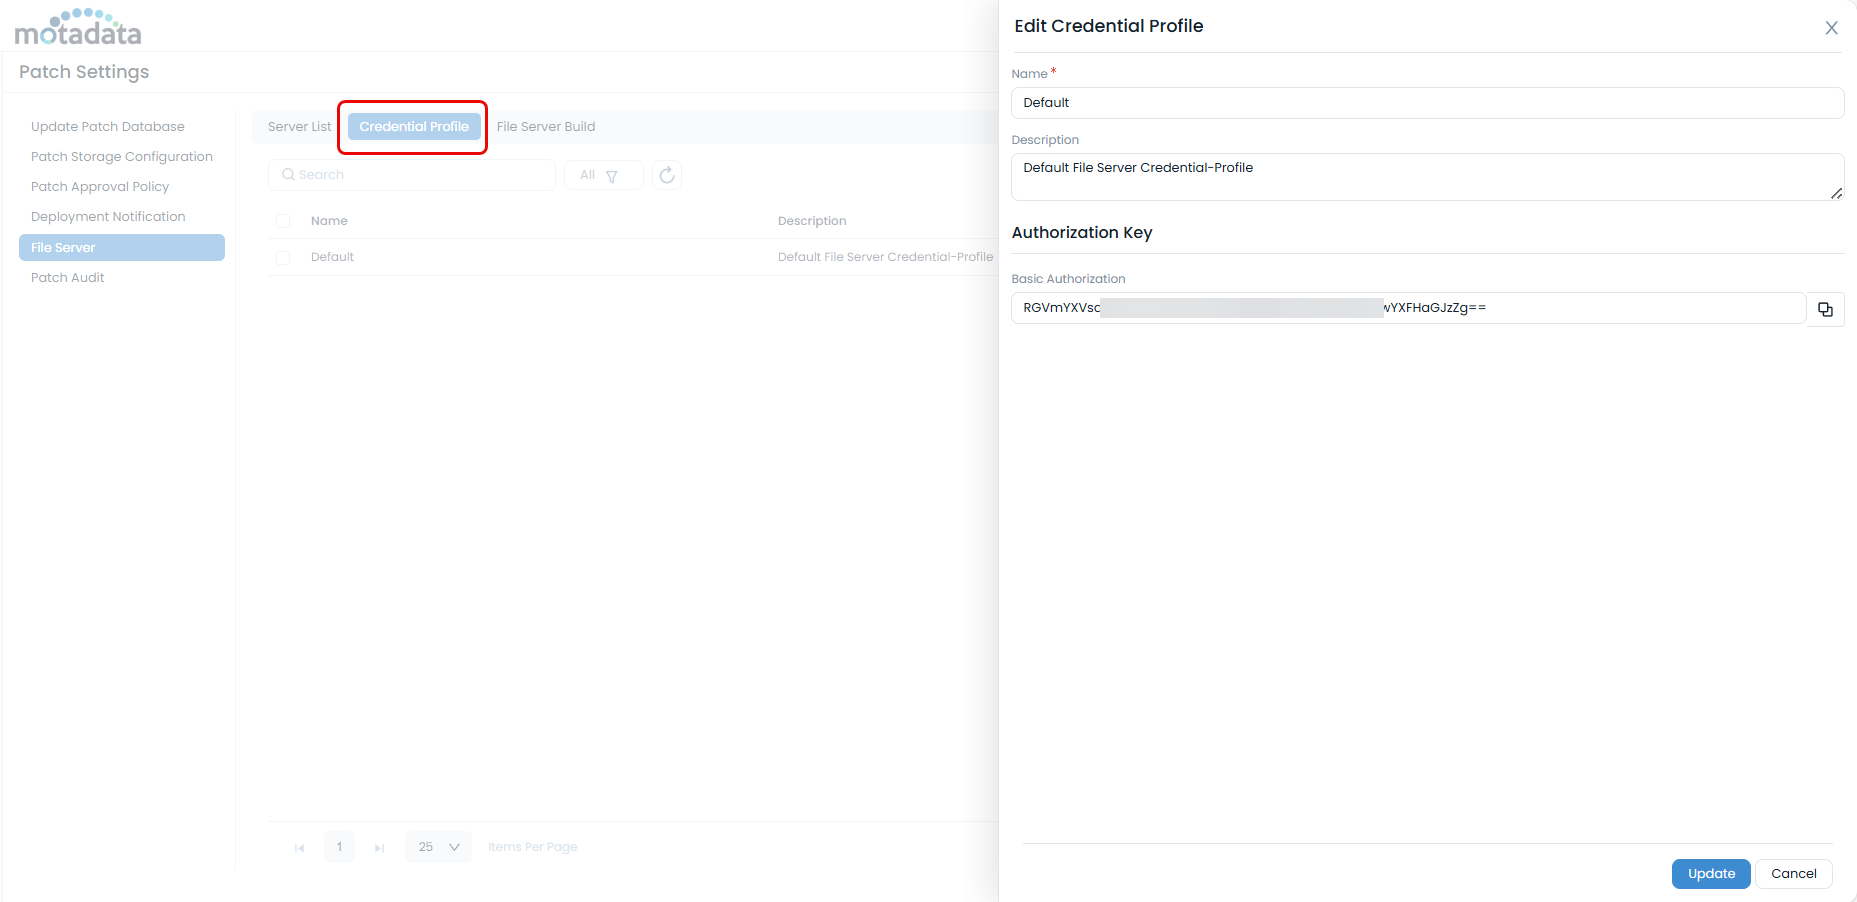
How to obtain the Secure Auth Code
Log in to your ServiceOps SaaS portal.
Navigate to Admin > Patch Management > Patch Settings > Credential Profile.
Copy the code from an existing profile or create a new one.
Step 2: Post-Installation and Verification
Verify Registration: In your SaaS portal, navigate to Admin > Patch Management > Patch Administration > File Server> Server List and confirm your server appears in the list.
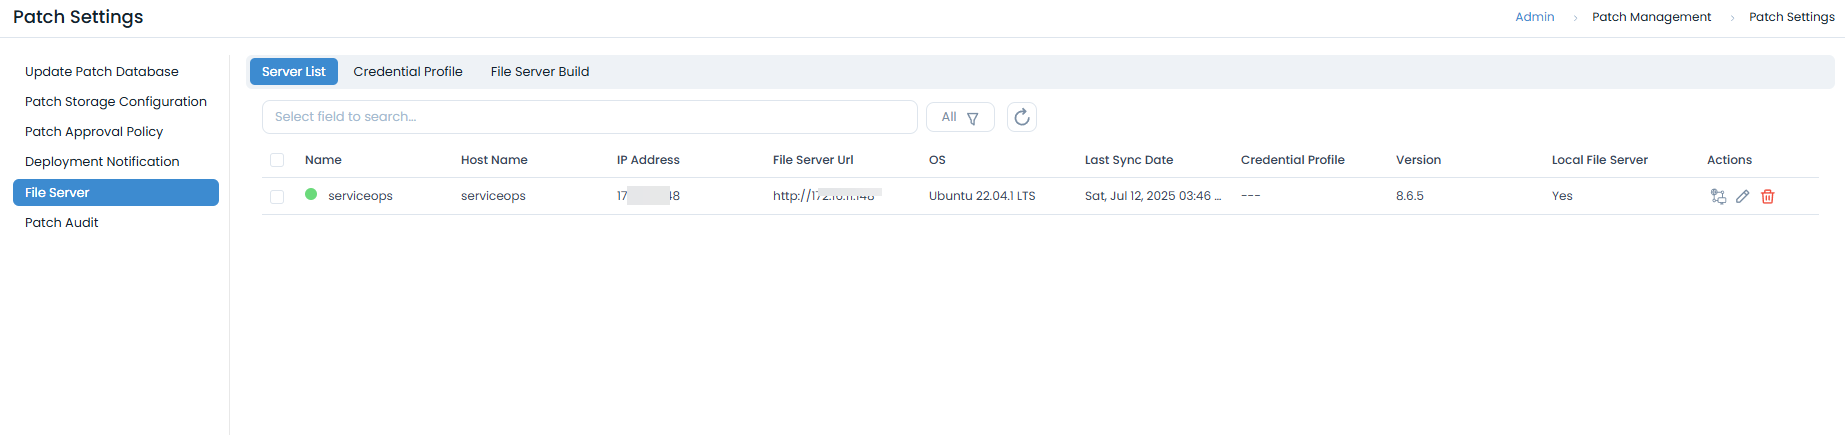
Configure Public URL: Click Edit on the file server and update the File Server URL with its public IP address or domain name (e.g.,
https://your-public-ip:443).infoThis URL must be accessible from the internet.
Test Connection: Click Test Connection to verify that the SaaS instance can reach your on-premise file server.

Operations and Maintenance
Network and Security
Firewall Configuration
- Windows: Use
netsh advfirewallto create rules allowing inbound traffic on ports 80/443 and outbound traffic to your SaaS instance. - Linux: Use
ufworfirewall-cmdto allow inbound traffic on ports 80/443 and outbound traffic.
SSL/TLS (Recommended)
For production environments, install a valid SSL certificate on your file server and configure it to use HTTPS. Update the File Server URL in ServiceOps to reflect the change.
Service Management
- Windows: Manage the "Motadata File Server" service via
services.msc,net start/stop, or PowerShell. - Linux: Manage the
ft-file-serverservice viasystemctl start/stop/restart. - Ensure the service is configured to start automatically on boot.
Troubleshooting
- SaaS Connection Fails: Verify internet connectivity from the file server using
pingandtelnetto your SaaS domain. Check firewall rules and the Secure Auth Code. - Public IP Not Accessible: Ensure your public IP is correct, and check port forwarding rules on your router/firewall if behind NAT.
- SSL Issues: Verify your certificate is valid and correctly installed.
Performance and Maintenance
- Optimization: Use SSD storage for better performance and monitor network bandwidth.
- Maintenance: Implement regular log rotation, certificate renewal alerts, and security updates.