Creating a Change
To create a change,
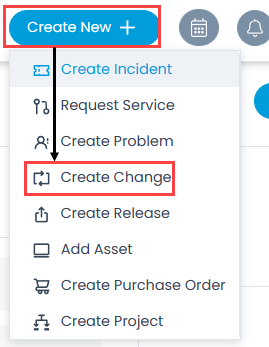
- Click the Create New + button and select the Create Change option. The following page appears.
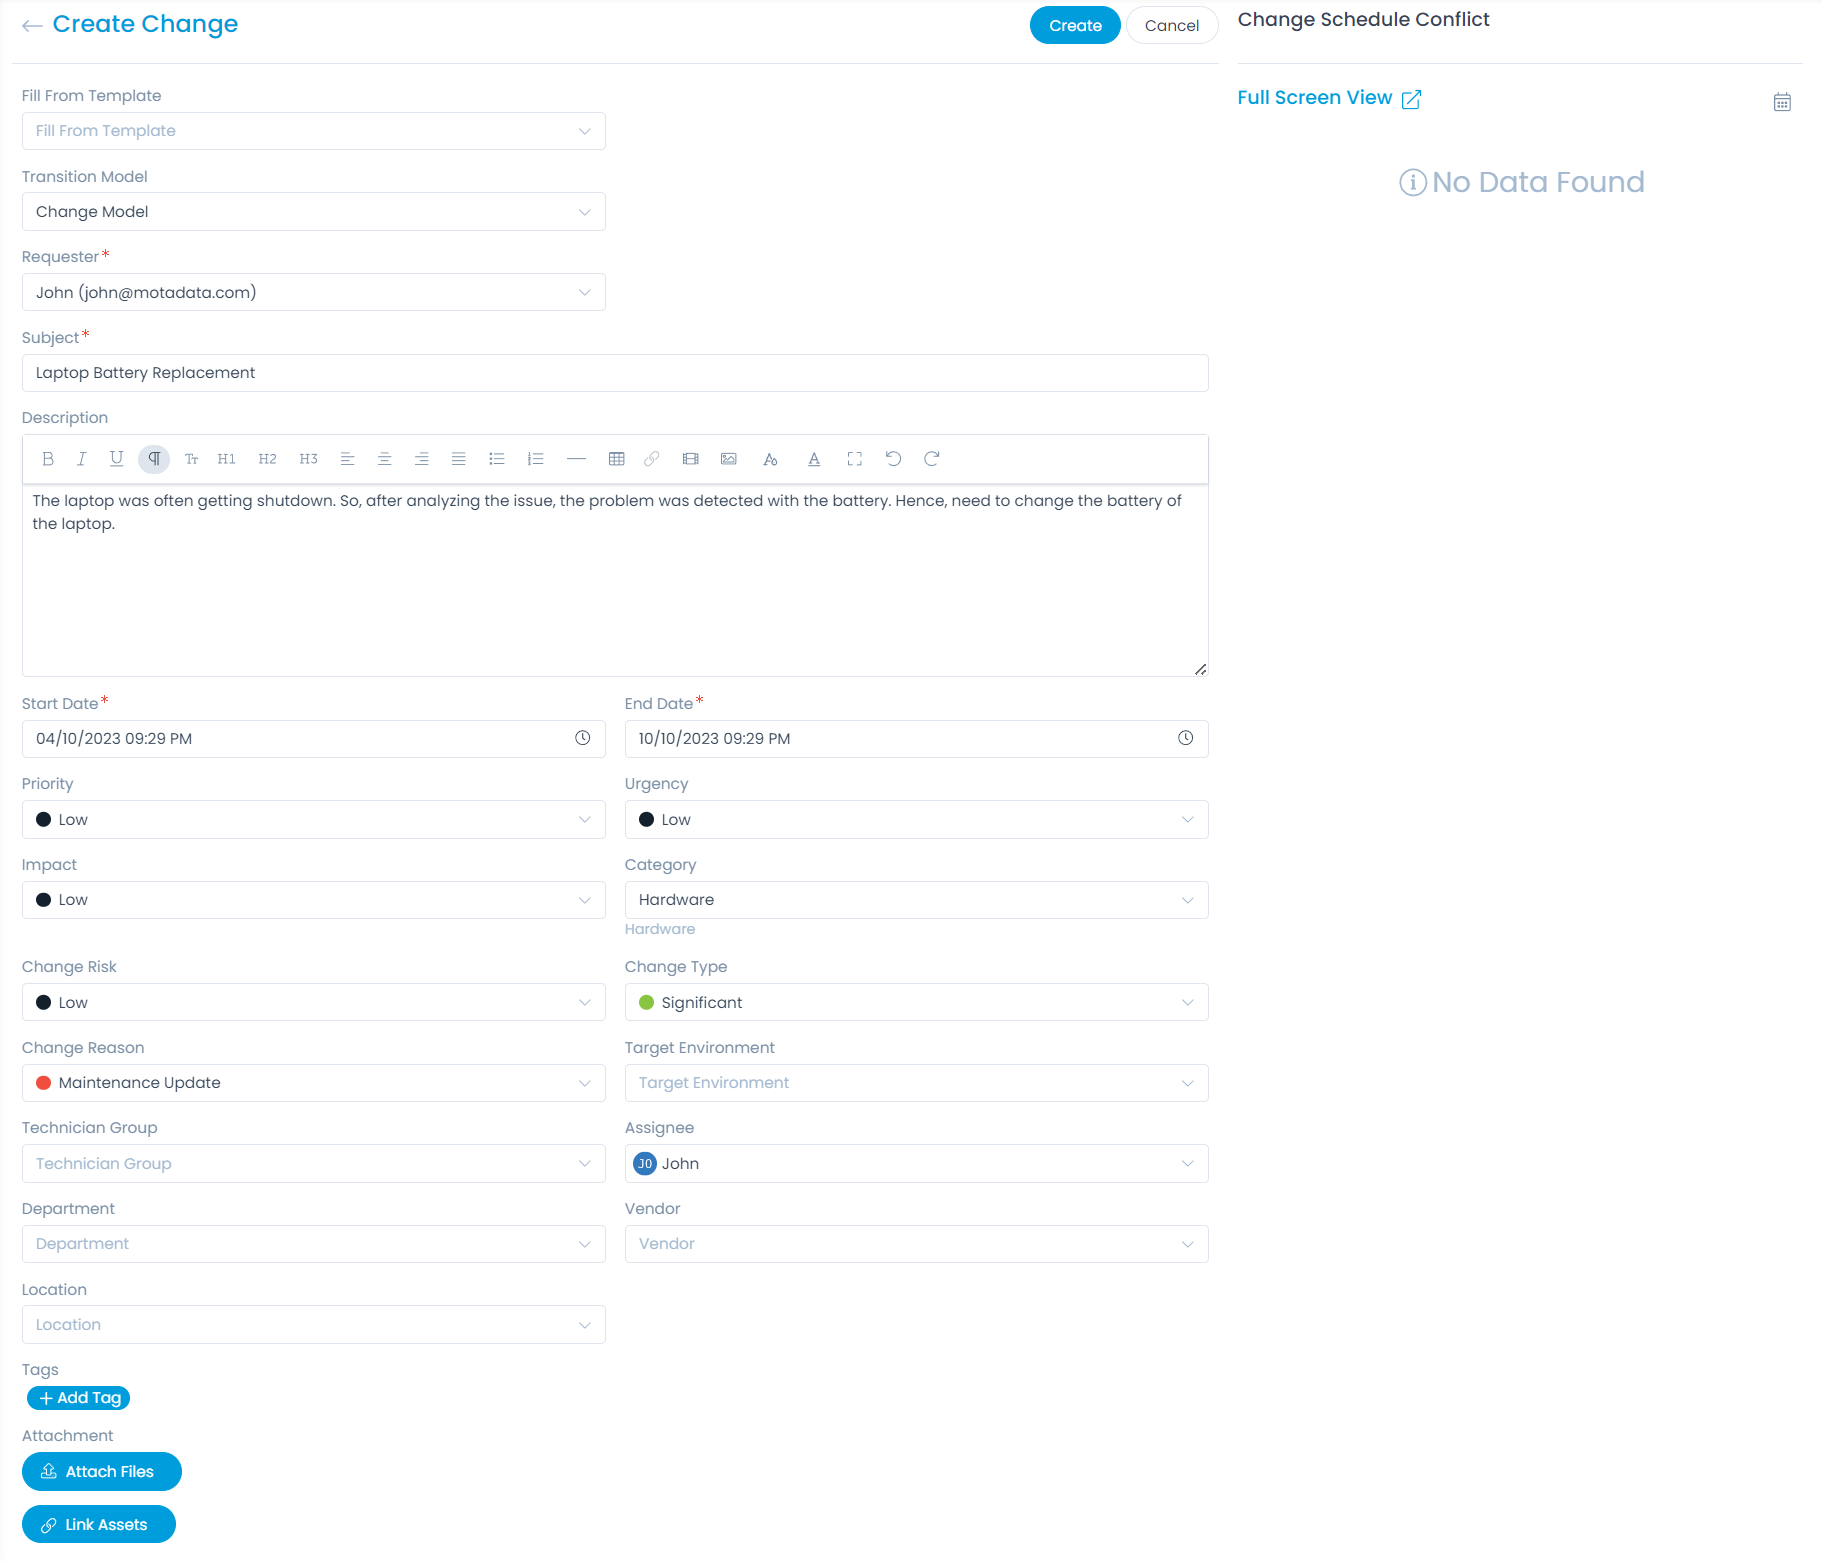
- Enter the following details:
| Parameter | Description |
|---|---|
| Fill From Template | Select a template for the change. Once selected, it will automatically fill the entire form. You can check if the pre-filled details match your needs, else you can create the change manually. Once selected, you can also reset it to default using the Reset to Default link. For more details on template creation, refer to the link Change Templates. |
| Transition Model | Select the transition model based on which the status of the change request will change automatically when the set condition is met. For example, if a Change model is set as From Status: Open, To Status: Pending, and Priority Condition as "Low". So when the Change is set with Low Priority its status will automatically change to Pending. |
| Requester | Select the name of the person who is requesting to open the change. By default, system takes your name as the requester. You can also create a change on behalf of another requester. For example: If you are signed-in with name Jerry, you can create a change from another name i.e. Mary. Once a change is created, you can view its creator from the Audit Trail tab of the Change Details page. |
| Subject | Type the subject of the change. A subject should be short self-descriptive text to understand the change. This field can be disabled using the Change Form Rule. |
| Description | Type the detailed description about the change. The description should contain sufficient details about the nature of the change and what do you expect from a technician. This field can be disabled using the Change Form Rule. |
| Start Date | Select the start date and time when the change was initiated. |
| End Date | Select the end date to resolve/close the change. |
| Priority | Select the priority of the change. The default value is Low. The options are: Low, Medium, High, and Urgent. |
| Urgency | Select the urgency of the problem. The default value is Low. The options are: Low, Medium, High, and Urgent. |
| Impact | Select the impact of the problem. The default value is low. The options are: On Users, On Department, and On Business. |
| Category | Select the category of the problem. It is optional. |
| Change Risk | Select the risk associated with the change. The default value is Low. The options are: Low, Medium, High, and Critical. |
| Change Type | Select the type of the change. The default value is Minor. The options are: Minor, Standard, Significant, Major, and Emergency. |
| Change Reason | Select the reason for the change. It is optional. |
| Target Environment | Select the environment that will be affected by the change. |
| Technician Group | Select the technician group to whom the change is to be assigned. |
| Assignee | Select the assignee to whom the change should be assigned. It is optional. |
| Department | Select the department to whom the change is to be assigned. |
| Company | Select the company to associate with the change. This field is available only if the Managed Services Provider feature is enabled. |
| Vendor | Select the vendor from the dropdown list. |
| Location | Select the location. |
| Tags | Add the tags if required. These are useful in identifying the similar changes. It is optional. |
| Attachment | Attach the relevant files that will help the technician in resolving the change ticket. |
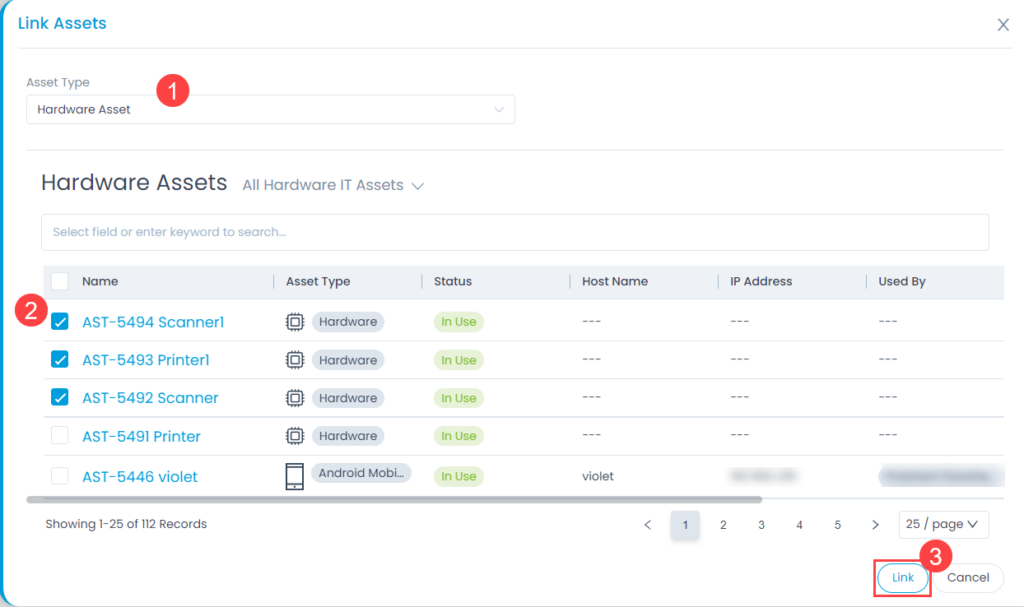
| Link Assets | Click to link the associated assets if any with the newly created change. If clicked, a popup appears displaying the list of assets. Select the asset type, the relevant required assets, and click the Link button as shown below. |
- Once done, click Create. The change gets created and appears on the Change list page. Also, an email is sent to you acknowledging the change. A change starts with a prefix "CHG". For example: CHG-1.
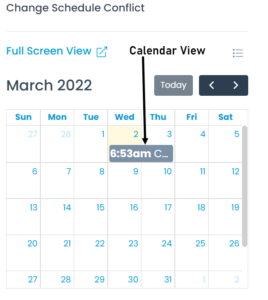
Change Schedule Conflict
When you create any new change and select the Start Date and End Date, a tab Change Schedule Conflict appears. It displays all the open changes which falls in the current change schedule based on which you can change the date if required. To view all the changes click the option Full Screen View. Also, you can view all the changes directly in the Calendar View as well as in List View. By default, the changes appear in List View.