Configuring Geo Map Integration in ObserveOps
Overview
The Geo Map Integration in Motadata ObserveOps enables you to visualize monitored devices, log sources, and network-flow endpoints on an interactive geographical map. This helps IT and operations teams to see where infrastructure is deployed, identify site-specific health at a glance, and search for locations directly from within ObserveOps.
The Geo Map supports two map providers:
- Open Street Map: the default open-source map service. No API key or external account is required.
- Google Map: the Google Maps Platform. Requires a valid API key generated from the Google Cloud Console.
Navigation
Go to Menu. Select Settings  . After that, go to Integration
  and select Geo Map. The Geo Map integration configuration screen is displayed.
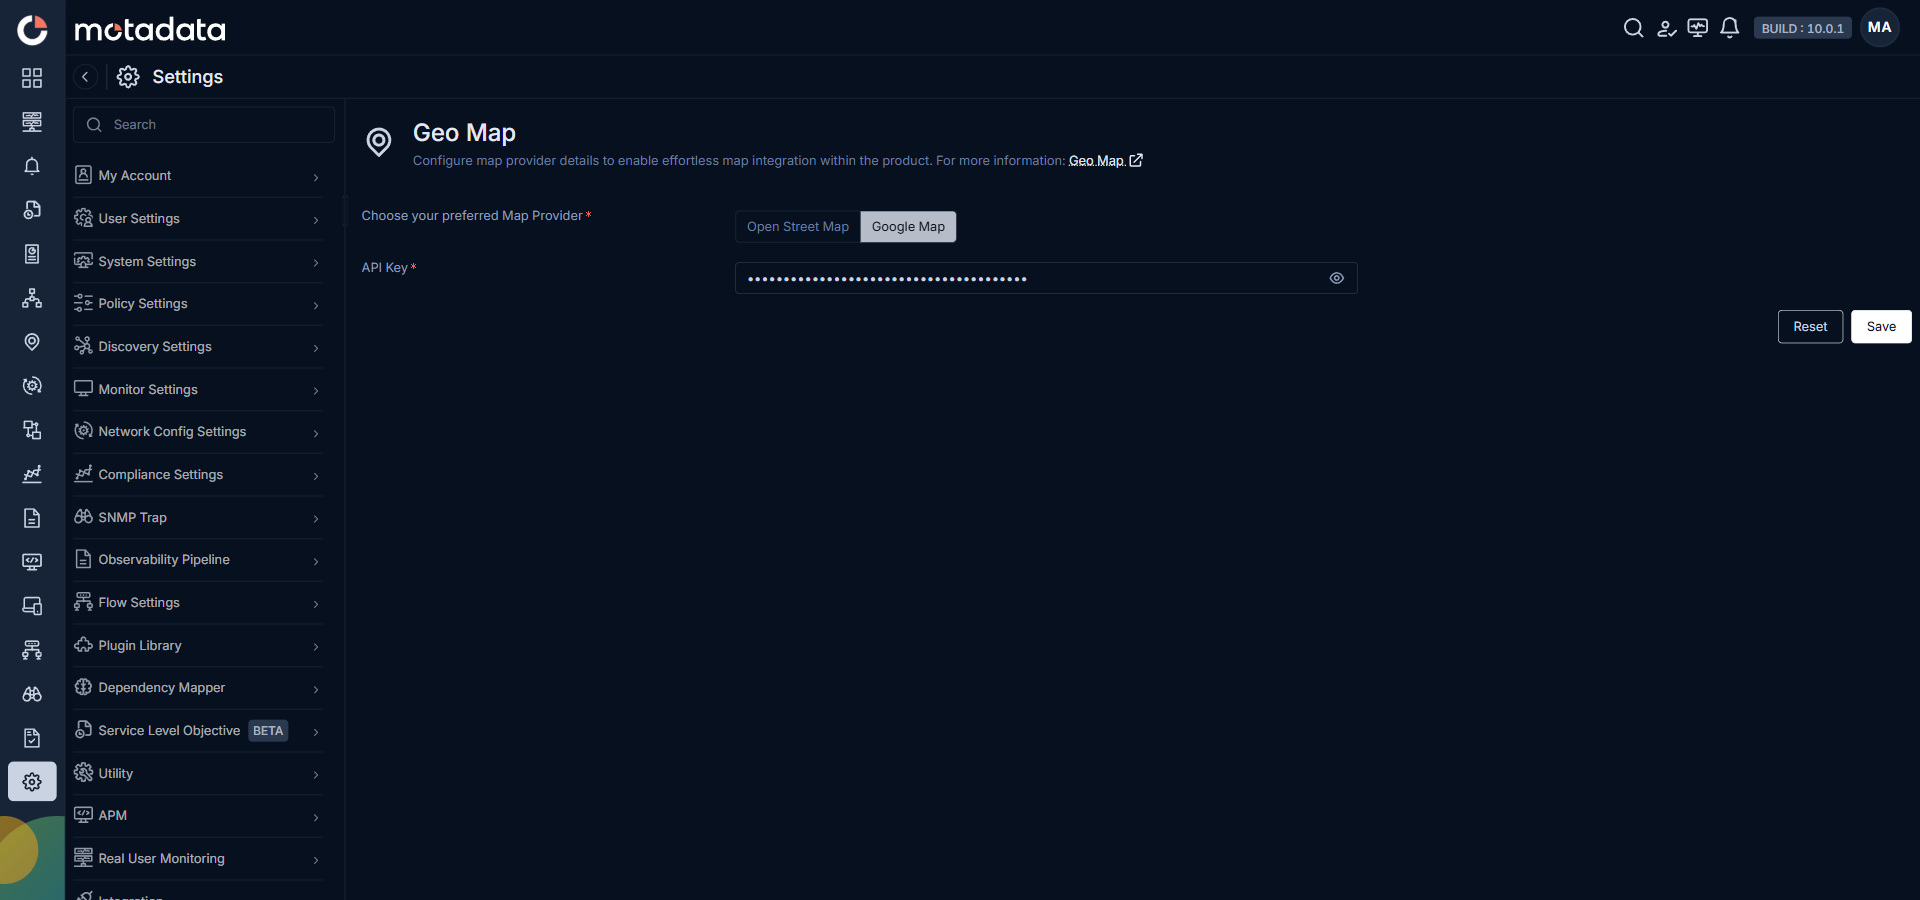
Geo Map Integration Configuration
On the Geo Map Integration screen, configure the map provider that ObserveOps will use to render the map view and perform location lookups.
| Field | Description |
|---|---|
| Choose your preferred Map Provider | Select the map service to use inside ObserveOps. Two providers are supported: Open Street Map and Google Map. |
| API Key | Displayed only when Google Map is selected. Paste the Google Maps Platform API key generated from Google Cloud Console. Use the eye icon to reveal / hide the key value. |
Select Save to apply the configuration. Select Reset to clear the entered values.
Map Provider Options
- Open Street Map
- Google Map
Configuring Open Street Map
Open Street Map (OSM) is the default, free, open-source map provider used by ObserveOps. It renders the map tiles from the OpenStreetMap community project and requires no key, no billing account, and no external setup.
Steps to configure:
- Go to Menu → Settings → Integration → Geo Map.
- Under Choose your preferred Map Provider, select Open Street Map.
- Click Save.
That is all. No API key or additional configuration is required. Open the Geo Map from the main menu to verify the map loads.
When to use Open Street Map:
- You do not have a Google Cloud account or an active billing profile.
- You want a quick, no-configuration map that works out of the box.
- Your deployment operates in an air-gapped environment that can still reach OSM tile servers, but not the Google Maps Platform.
Address autocomplete and Places-style location details are limited in Open Street Map compared to Google Map. For rich address search and autocomplete, use Google Map with the Places API enabled.
Configuring Google Map
Google Map uses the Google Maps Platform to render map tiles and to power features such as address search, autocomplete, and geocoding. It requires a valid Google Maps Platform API key generated under a billing-enabled Google Cloud project.
Steps to configure:
- Generate the API key by following the step-by-step procedure in Generating the Google Maps API Key.
- Copy the generated API key from the Google Cloud Console.
- Go to Menu → Settings → Integration → Geo Map.
- Under Choose your preferred Map Provider, select Google Map.
- Paste the API key into the API Key field.
- Click Save.
When to use Google Map:
- You need address autocomplete and rich place-details suggestions (Places API).
- Your users are more familiar with Google Maps visuals.
- You already operate a Google Cloud project with billing enabled.
For the initial GeoMap validation, keep Application restrictions in Google Cloud set to None so the key can be tested without domain / IP / origin filters. Enable the restriction only after functionality is confirmed to be working in your Motadata deployment.
Without a properly configured (and correctly restricted) key, the map tiles, search, and autocomplete will not work.
Related Topics
- Generating the Google Maps API Key: end-to-end SOP for generating, restricting, and rotating the Google Maps Platform key.
- Using the Geo Map: how to use the Geo Map screen from the main menu after configuration.