12.4. Remote Office
Modern organizations are geographically dispersed. They have offices at different locations all controlled from a main office. Offices that are away from the main office are termed as Remote Offices. It may happen that all the offices of an organization form part of a single network. Individual offices may have a relay server: A relay server is used to allow communications from outside a company’s firewall to the internal Servers.
In order to accommodate such situations, we have the following Remote Automation features:
A user can create a group of computers for a location and save it as a Remote Office.
A user can add a Remote Office in a scope (Endpoint Scope) instead of individual computers for Patch/Package/Registry Management.
Users can point a Remote Office to a Relay Server. This is useful when there are multiple offices, and the admin doesn’t want them to hog the central File Server for Patch/Package download. This is why we have the feature that allows a Remote Office to download Patches/Packages from a Relay Server rather than the central File Server.
To Add and Configure a Remote Office:
Go to Admin (a Navigation Tab) >> Remote Office (Patch/Package Management).
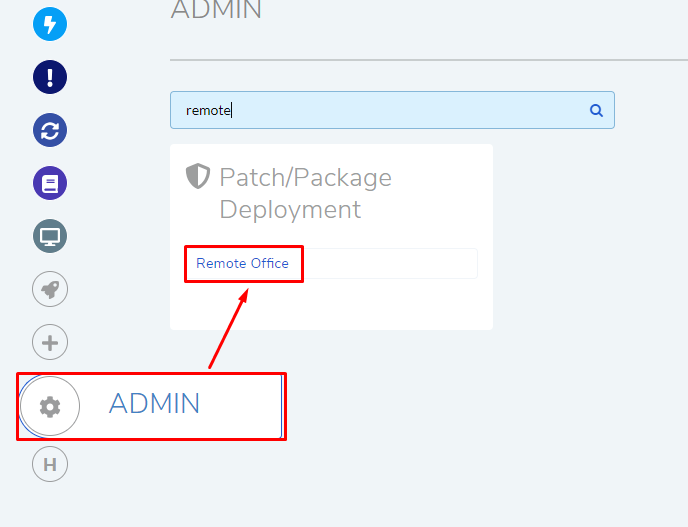
The Remote Office page opens. Here you can search and view your existing Remote Offices.

Click on Add Remote Office in the top right corner. You are redirected to a new page. Here you enter the following information:
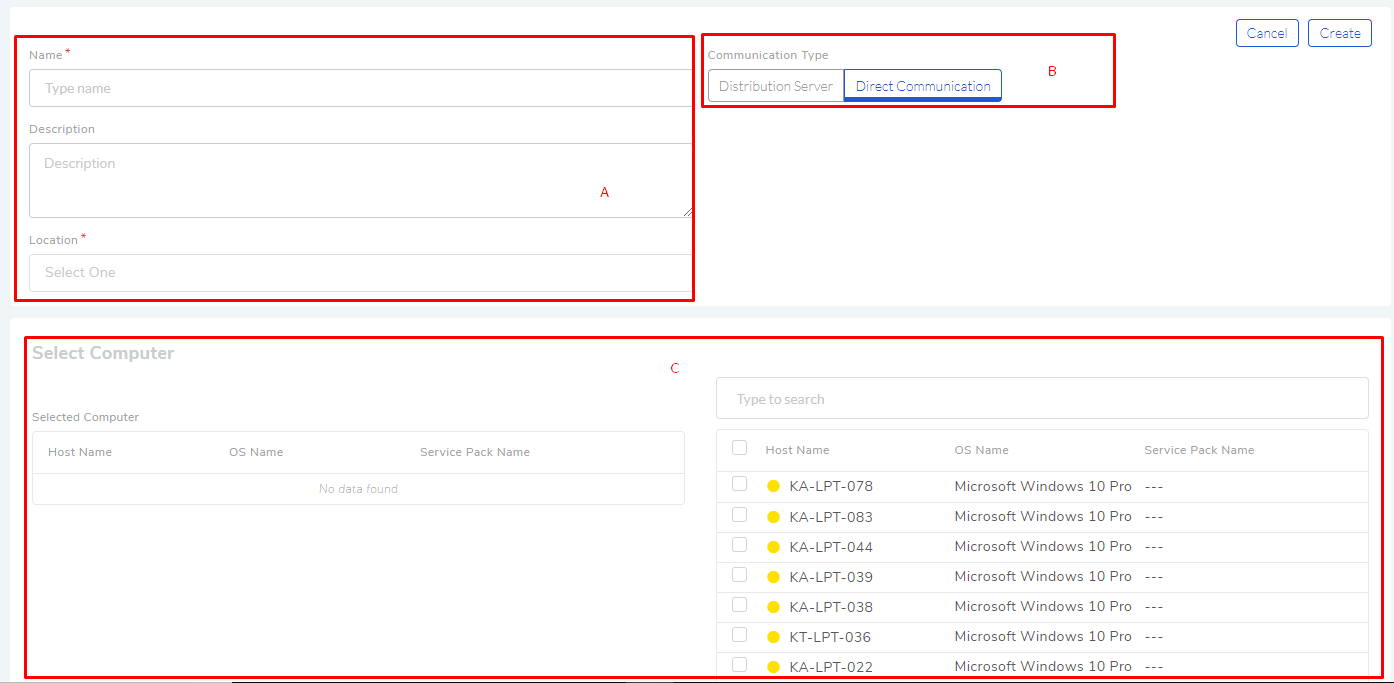
Section A is where you enter the Name, Description and Location of the Remote Office.
Note
Related Topic: Location
Section B is where you configure for a relay server. Select Direct Communication when you are creating a remote office locally within your base network.
If your remote office is outside your local network at a remote location then select Distribution Server. Enter a IP and a Port number so that the main server can route the Patches/Packages to the Remote Office’s relay server. You can check the connection to the relay server using the Test Connection button.

Section C is where you add computers to the Remote Office. Learn how to add computers to Patch Management.
When done, click on Create to save your remote office.

12.4.1. Relay Server Clean Up Settings
A relay server allows a remote office’s computers to download Patches/Packages, which is why it becomes important for an admin to make sure there is sufficient space in the relay server. We now have the Clean Up Settings which performs two functions:
Clean the relay server.
Generate a notification when the relay server reaches a certain storage limit.
Using Clean Up Settings:
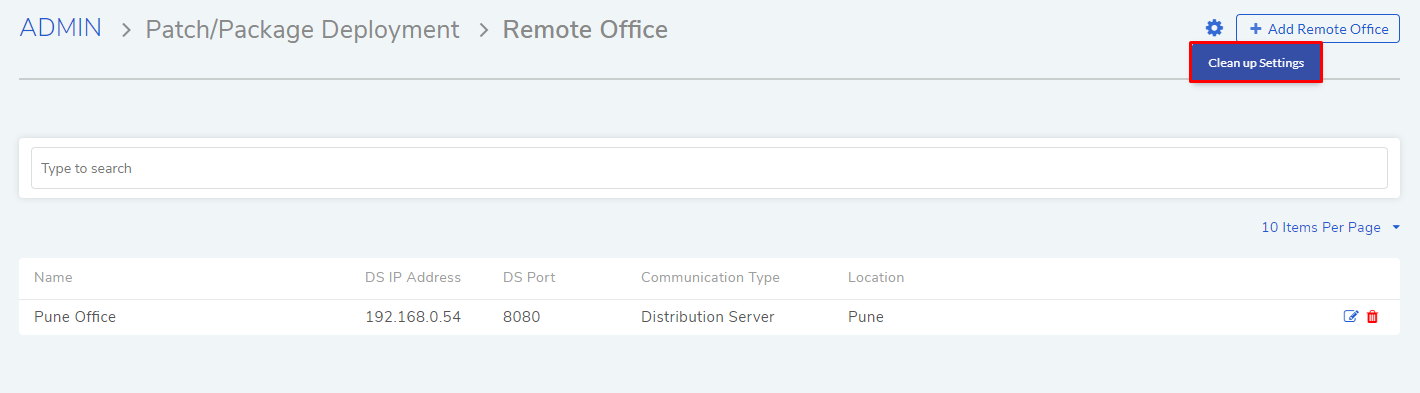
Go to Admin >> Remote Office (under Patch/Package Deployment).
The Remote Office page will open. Click on Clean up Settings button.
Here you can toggle-on two functions:
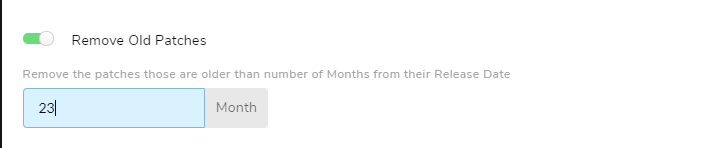
Remove Old Patches: Turning this option allows you to delete patches older than a specified number of months considering only the release date of a patch. Toggle the option on and set a number of months.
Notify on size exceed: You can set the system to generate a notification when the storage in the relay server reaches a certain limit. The recipient of the notification can be a Requester Group or All Requester Groups, and individual emails. You can specify the storage limit in terms of GB.
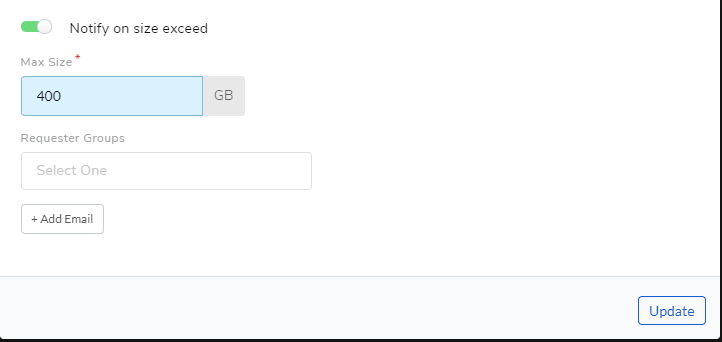
When done click on Update to save your changes.