12.12. Patch Approval
The idea of Patch Management revolves around security, enhancement, and compliance. Sometimes it may happen that specific Patches don’t comply with the idea of Patch Management. It becomes necessary to keep these Patches out from the IT infrastructure which might cause more trouble than any good.
The tool has the provision to seek Approval for each and every Patch before they can be deployed. There are two methods for Approval: Manual Approval and Automatic Approval (Automatic Patch Test). Which method to choose is decided from the Patch Approval Setting in Admin.
12.12.1. Patch Approval Setting (Selecting an Approval Method)
Note
Configuring Patch Approval Settings requires Admin rights.
Go to Admin (A Navigation tab) >> Patch Approval Setting (Patch/Package Deployment).
The Patch Approval Setting page opens. There you get three options (Approval Types). Click on Edit to make the page editable.
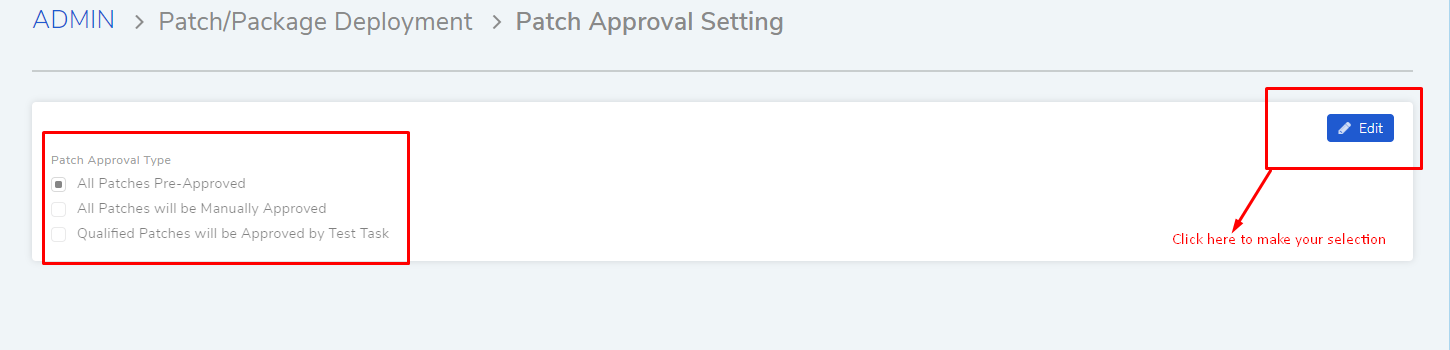
All Patches Pre-Approved: As the name suggests, all incoming Patches (both new and missing Patches) are Pre-Approved by default. A user can manually change the Approval status of Patch to Reject or Approved. The Automatic Patch Test doesn’t work with this selection.
This selection comes into effect for incoming future Patches, and it doesn’t affect Patches that are already in the product.
All Patches will be Manually Approved: All new incoming Patches have the Approval status Not Approved by default. A user has to change the status manually to either Approved or Reject.
Qualified Patches will be Approved by Test Task: All new incoming Patches have the status Not Approved by default. A user can manually set the status. He also has the option to create a Test Task.
A Test Task, also known as Automatic Patch Test, deploys a selected set of Patches to a specific set of Computers; if deployment is successful in all of the Computers, then the Patches are auto-approved after a set number of days. Test Task only works in this setting.
Select an Approval Type and hit Update.
12.12.2. Automatic Patch Test (Auto-Approval of Patches)
Sometimes it may happen that certain types of Patches may cause issues when deployed. Our product allows you to create a Test Task that deploys a select set of Patches to a specific set of Computers (test environment) and review for any issues to test this hypothesis. In the product, this feature is called Automatic Patch Test.
In a Test Task, you specify criteria based on which Patches are selected (you can set it to select all Patches) and select Computer group/groups (control environment). A Test Task is a cyclic process; in every cycle, it creates a Deployment Request when it finds new Patches satisfying the selection criteria.
You have to set a review period that starts whenever a Deployment Request is created by a Test Task (each request has its own start and end period). At the end of a period, the selected Patches in a Deployment Request are auto-approved if the installations have been unanimously successful. The purpose of a review period is to give Technicians the time to scrutinize a deployment done by a Test Task and Reject Patches that have caused issues.
Add an Automatic Patch Test
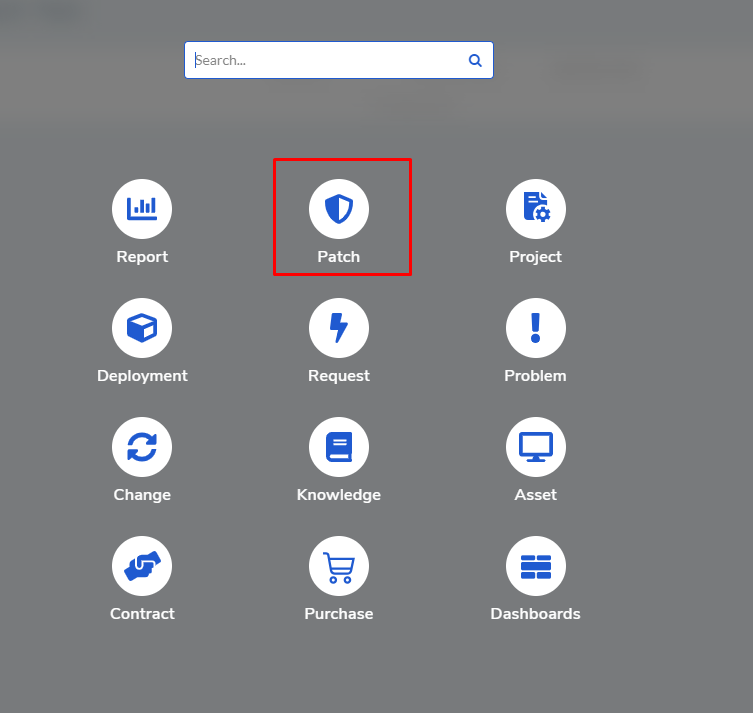
Go to Patch from the Launcher.
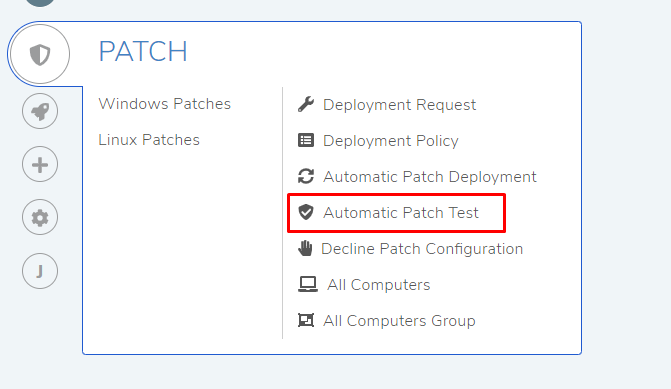
Select Automatic Patch Test from the Patch menu.
The Automatic Patch Test page opens. Here you can view all your Test Tasks if any. Click on Create Patch Test Task situated in the top right corner of the page.
The Create page opens with the following fields:
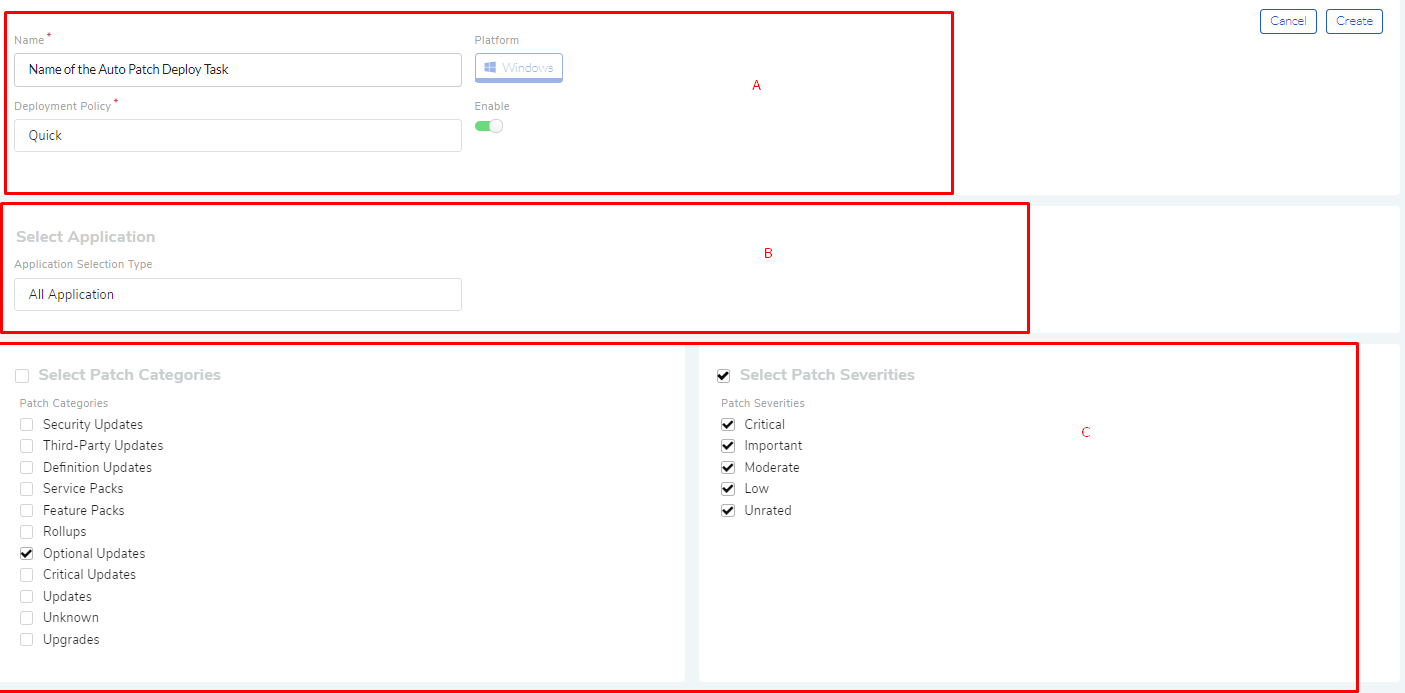

Section A (
pf-45) is where you enter a name for the Task, and select a Deployment Policy (Learn more). You also get a toggle to turn/off the Task anytime later.Section B is where you decide from which applications to select the Patches. You get three options:
All Application: As the name suggests, this includes all available applications for searching Patches.
Include Application: You include applications from which Patches are selected.
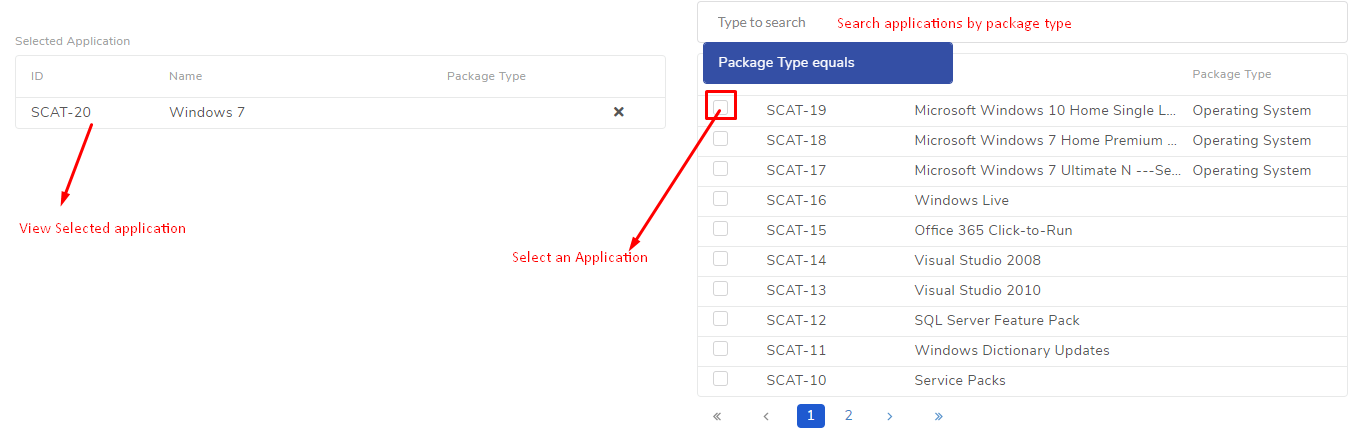
Exclude Application: You exclude applications that are ignored when searching for Patches.
There is a search bar for Application that supports filtering using Package Type.
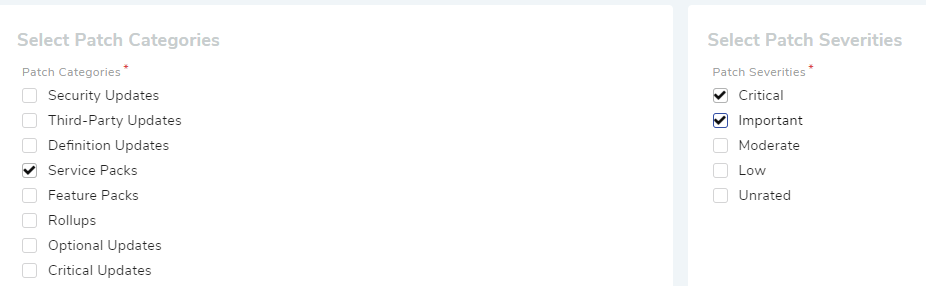
Section C is where you set the criteria based on which Patches are selected. You can set Categories and Severities; for example, you can make the Test Task select Patches with the Category Service Packs and Severity, Critical and Important.
- ::
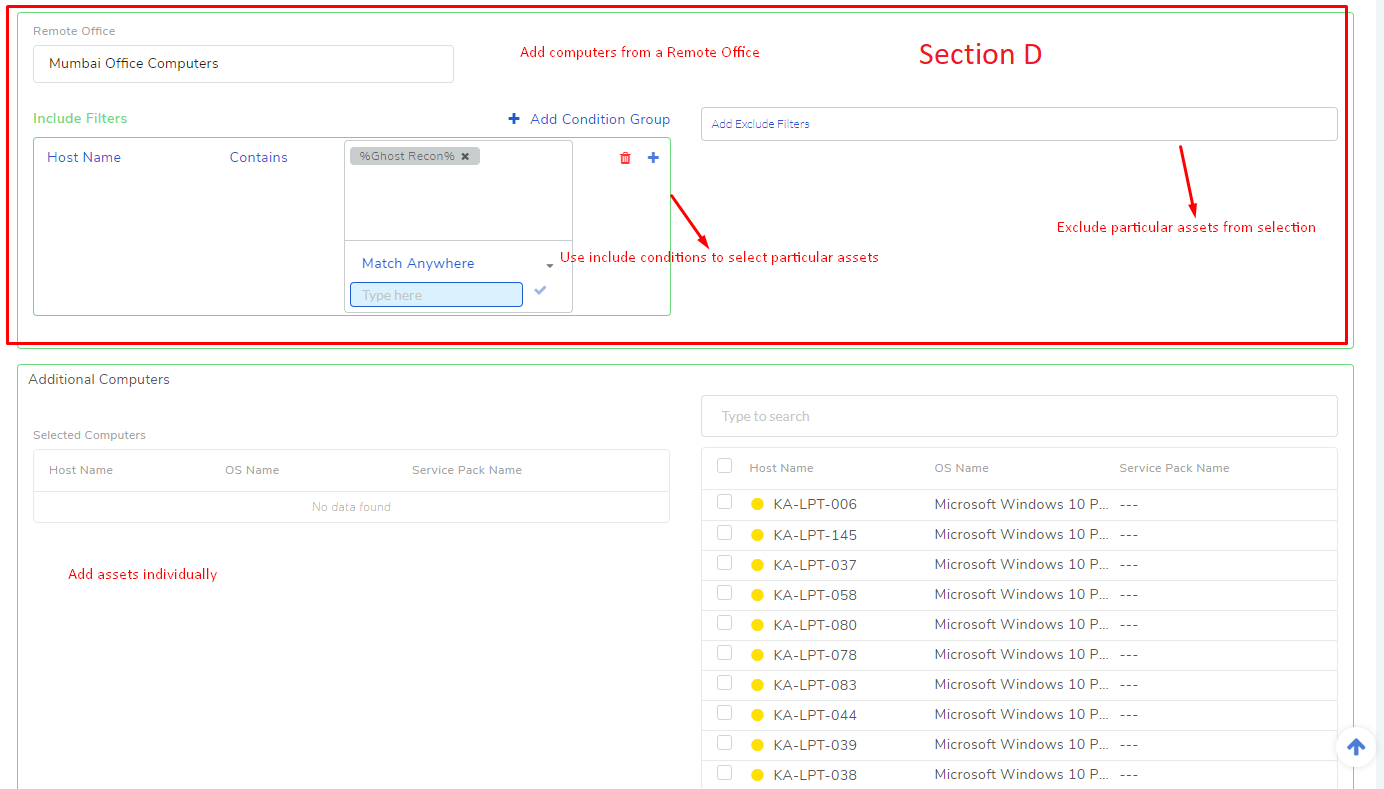
Section D is where you set your target computers. Patch will be deployed in the target computers. Here you can set the following things:
Remote Office: This will allow auto selection of multiple computers from a Remote Office’s network which may or may not be based on include and exclude conditions.
Individual computers from Additional Computers.
Multiple targets (Scope) if there are multiple Remote Offices.
One can preview all computers in a target using the Preview button.
Section E is where you set the review period (in days) for Auto-Approval. A review period starts whenever a Deployment Request is created by the Test Task (a Test Task can create multiple Requests each one with its own review period). At the end of a period, the selected Patches in a Deployment Request are auto-approved if the installations have been unanimously successful.
When you are done with the fields and options, click on Create to start the Test Task.
12.12.2.1. View Status of Test Task
Once you create a Test Task, you can view how many Deployment Requests the Test Task has created and the status of each deployment. The system also shows which Patches are pending decision (in their Details View) from an Automatic Patch Test:

Go to the Automatic Patch Test page.
Click on View Status adjacent to the Test Task.
A new page opens with the Deployment Requests tab. All requests are shown under this tab.
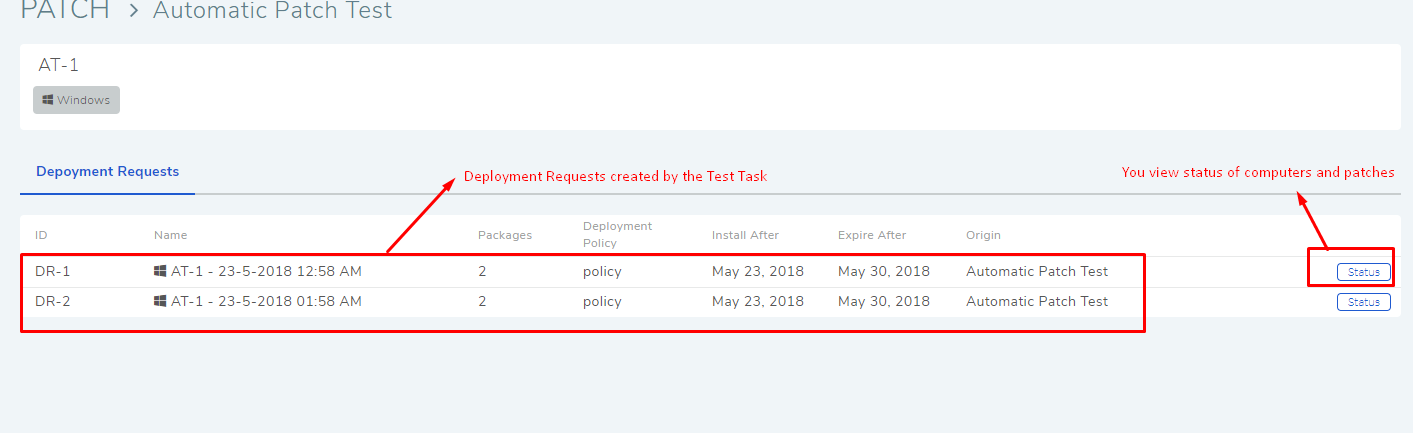
You can further drill down and view statuses with respect to what Patches and Computers are involved with the request using the Status button. Learn More about Deployment Request status.
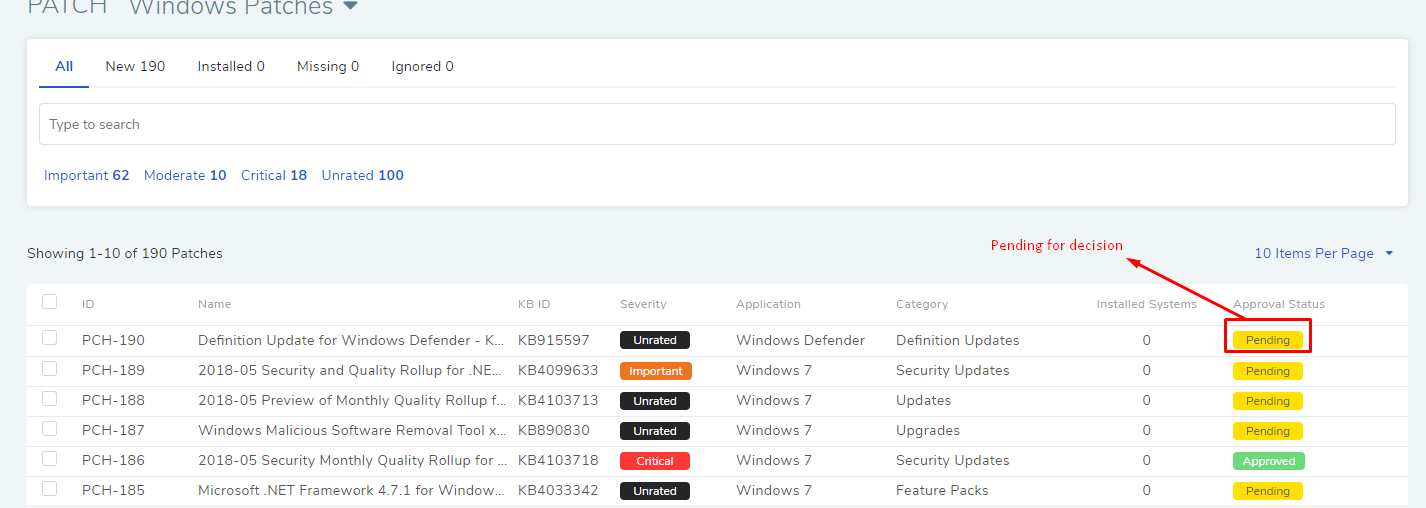
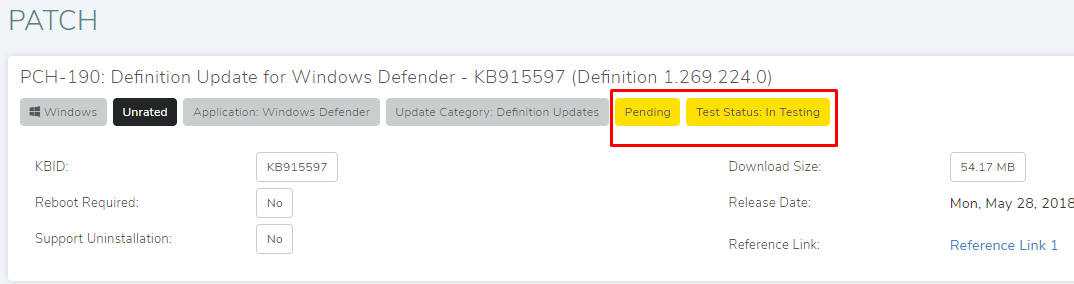
Patches involved in an Automatic Patch Test are shown as having the status Pending in Patch List View and Details View.
12.12.2.2. Configure Notification for a Test Task
The product can send an email notification whenever a Deployment Request is created by a Test Task. You have to add recipients in a Test Task to enable this feature.
To enable email notification:
Go to the Automatic Patch Test page.
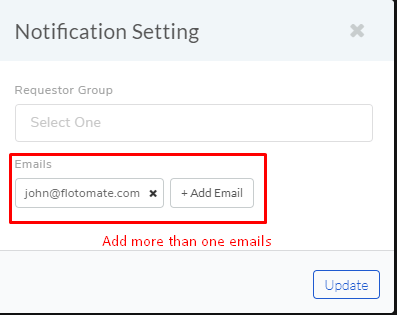
Click on the Action Menu adjacent to the Test Task and select Notification Setting.
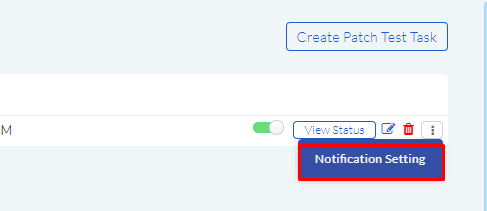
The Notification Setting dialog box opens. There you can add Requestor Groups and individual email addresses. Click Update to save your selections.