12.6. Working with Patches
12.6.1. Patch List View
The UI is divided across Patches and Computers. The Patch aspect lets you view patches (of Windows) and perform related operations, and the Computer aspect lets you view Computers and perform related operations.
The Patch aspect is made up of two types of views: the Patch List View and Details View. The Patch List View gives a point & click interface to manage all patches from a single place. Currently Windows Patches are supported. You can view Patches of any one platform at a time.
To open Patch List View
Log in to your Dashboard.
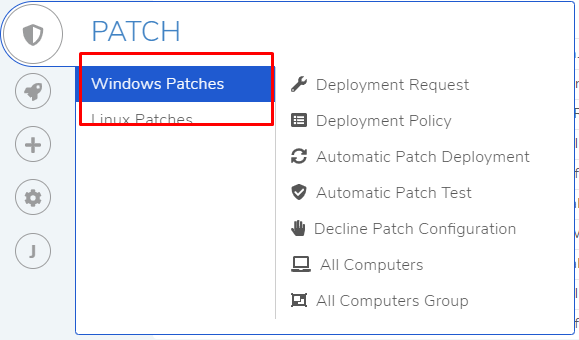
Click on the Launcher icon and select Patch.
You are directly taken to the Patch List View (depends on which filter is set as default).


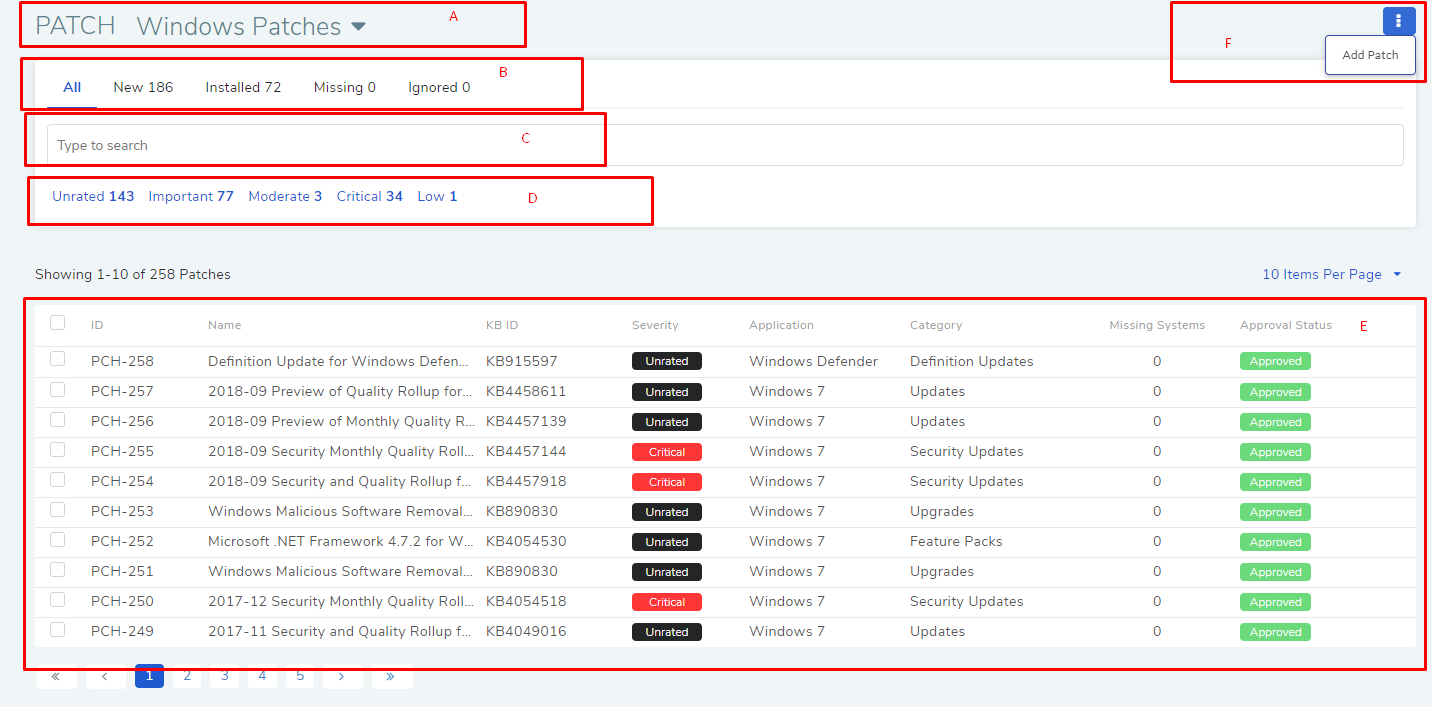
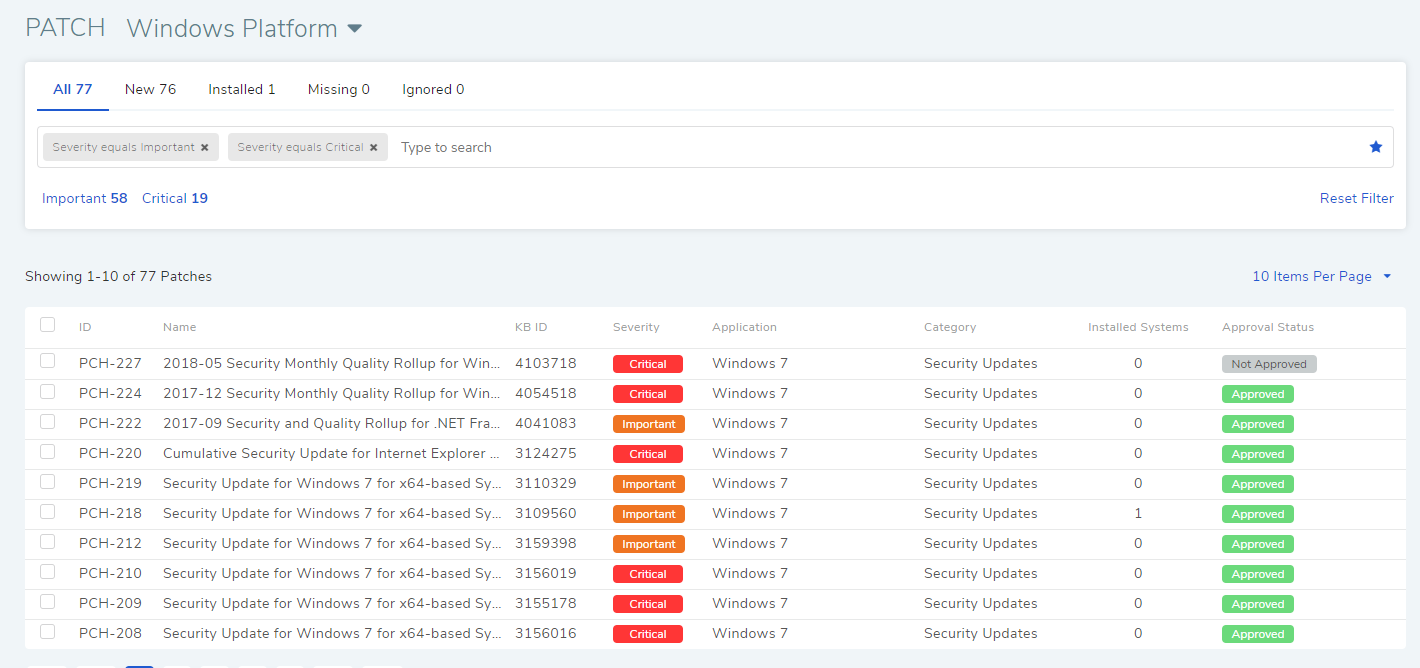
On the Patch List View (pf-16), you get the following options:
Section A, B, C & D are the Search Features.
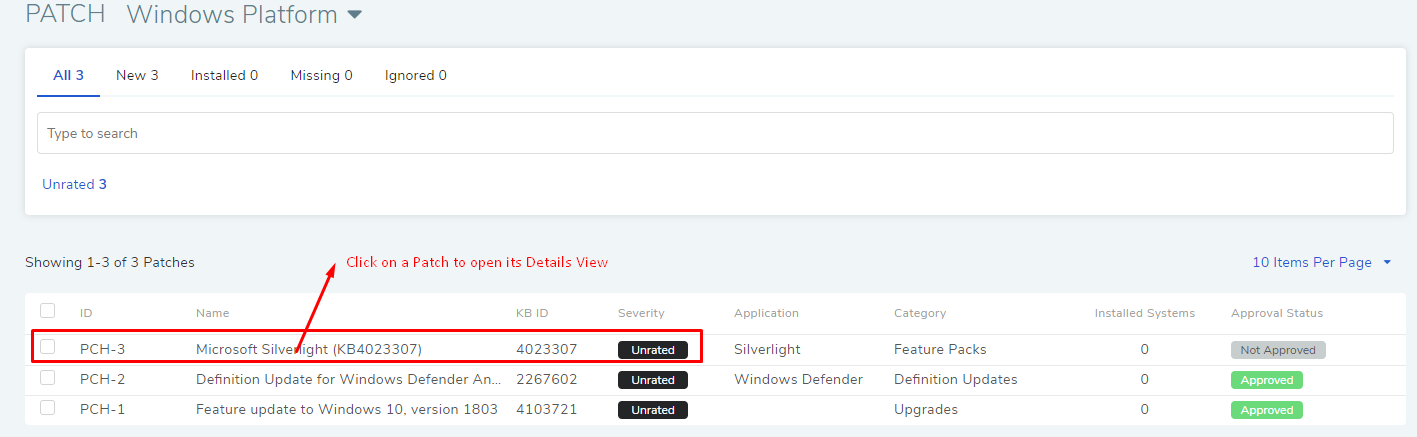
Section-E is the list area where you can view all the Patches in the system. You can see the following information about a Patch here:
Patch ID: This is a system generated ID by Motadata.
Name: The name of the Patch.
KB ID: This is a unique ID given by the Software Vendor.
Severity: This signifies the importance of a Patch, and the Software Vendor provides it.
Application: Refers to the application/OS for which a Patch is meant.
Category: These are pre-defined categories done by the Software Vendor.
Missing System: The total number of machines not having the Patch.
Approval Status: It could be either Approved, Pending, Reject or Not-Approved.
On this page, you can perform Deployment, Approval, Ignore of Patches and Download as bulk operations. In the list area, selecting one or more Patches makes the options visible.
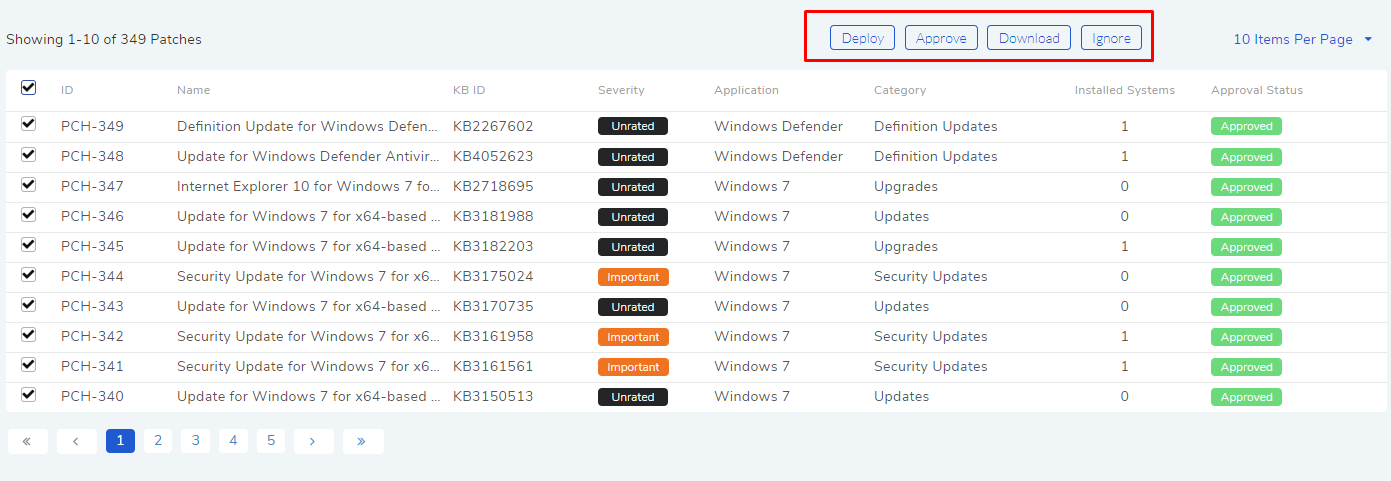
The Deploy button lets you create a Deployment Request for the chosen Patches.
The Approve button approves the selected Patches. Only approved Patches can be deployed.
The Ignore button marks the selected Patches as Ignored, which means it is excluded from all the processes in the system, and they appear only under the Ignored tab. Learn more about Ignored Patches.
The Download button downloads the selected Patches to the File Server.
12.6.2. Quick Glance of Patch Details
The Patch List View allows you to quickly glance the details of a Patch in the following way:
Open the Patch List View.
You can open the Patch Details dialog box of any Patch by clicking on the view icon adjacent to a Patch.
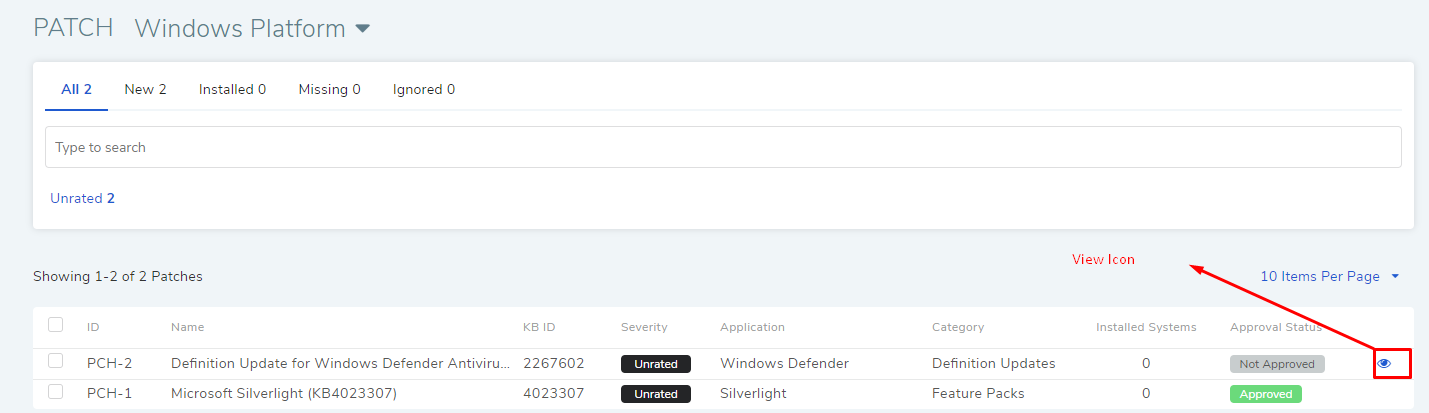
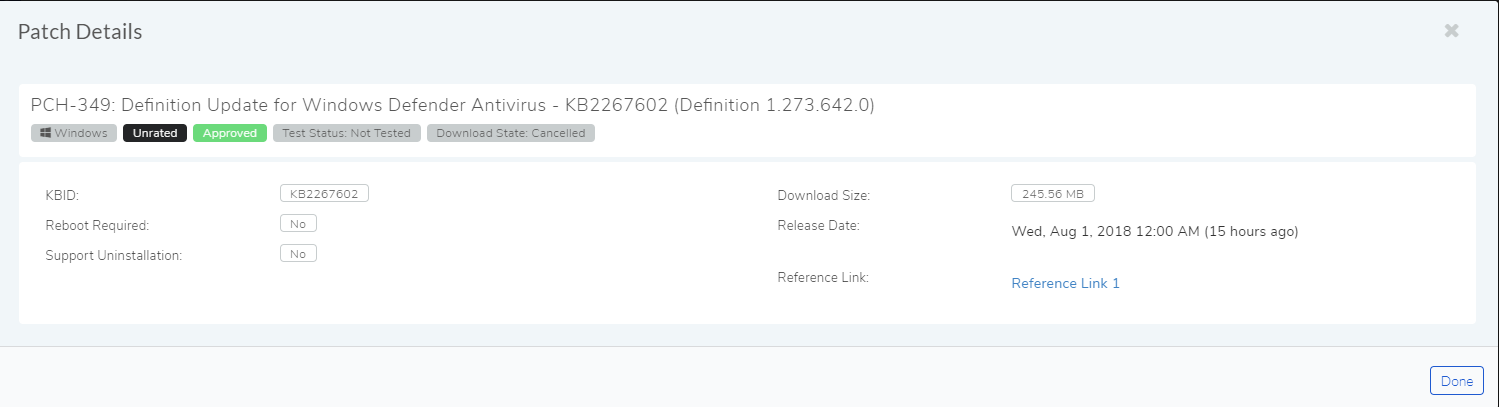
The Patch Details dialog box is a concise version of the Details View. You get all the information minus the features and description.
12.6.3. Search for a Patch
There are two broad ways to search Patches in the product’s List View:
Using Search Bar
Using Filters
12.6.3.1. Search Bar
You can use a search bar to search Patches in the List View. The search bar supports the Advanced Search feature where you get a set of predefined search options to narrow down your searches. If you want to see all the available options, then click on the search box. You can select a single option or multiple options from the drop-down list.

You can also search Patches with keywords in the search field. When you provide a keyword, Motadata explores all the Patches with the keyword in their Name, Description, Bulletin ID and KB ID. A Patch has to have at least one field matched (partial or full) with the keyword; in case there are multiple keywords, the Patch has to have at least one field matched for each keyword.
A search query can be made up of pre-defined options and keywords. In any case, the output yields Patches that satisfy all the parameters of the search query.
Between two different conditions of the same option type OR logic is followed. Between different types AND logic is observed. Between keywords, and keywords and conditions AND logic is followed. An example of same option type contradiction is Severity Equals Important vs. Severity Equals Critical.
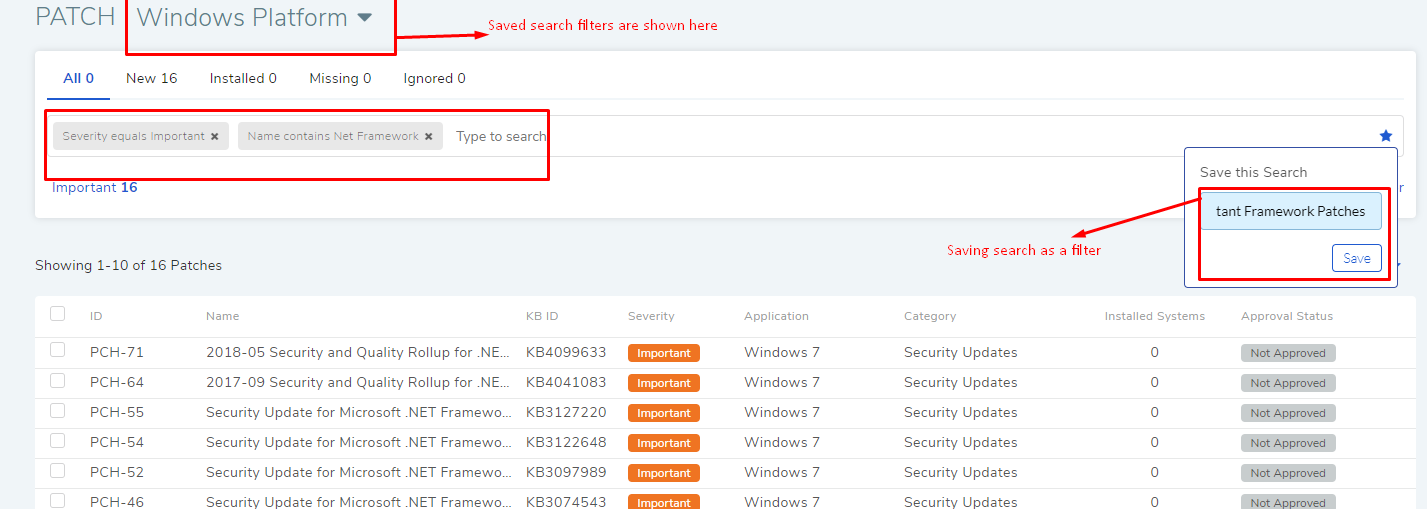
12.6.3.1.1. Custom Filters
You can make a filter using search options and keywords and save it by
clicking on the star icon to the far left of the search bar. Saved
search filters appear along with the platform filter in pf-22.1.
Custom filters are specific to a particular platform.
For example, a user saves a search query that filters Patches with severity Important and the keyword Net Framework in the Name.
12.6.3.1.2. Default Filter
You can make a filter in pf-22.2 as the default filter. The default filter is applied whenever someone opens the Patch
module.

12.6.3.2. Filters
You can search for a Patch in the List View using Quick Filters. Motadata gives you two types of Quick Filters:
Filter based on OS platform.
Filter based on download status.
Status-based filter.
Severity type based filter.
The first filter you can apply is to see Windows Patches, which can be selected from the Patch Menu.
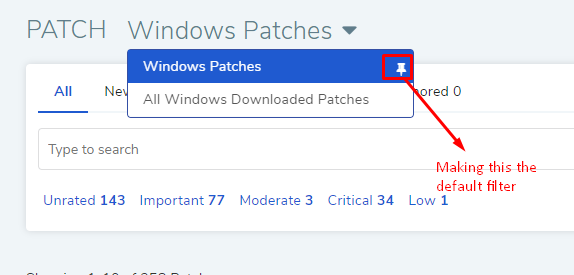
You can filter patches that have been downloaded in the File Server from Patch List View; this is a pre-defined filter.
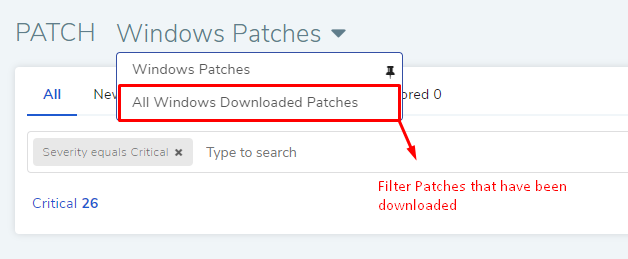
The Pin Icon in pf-23.1 allows you make a filter option the default filter for the Patch List View. So when you land on the
Patch List View the default filter is applied.
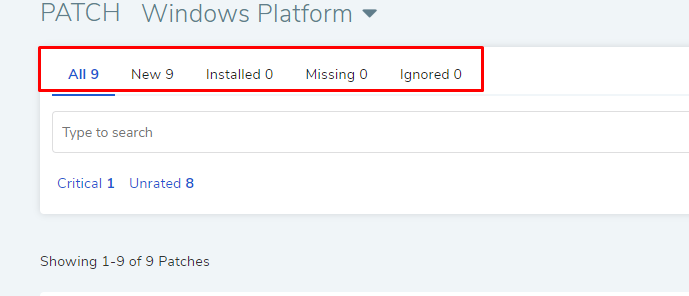
Another way to filter Patches is by using status:
All: Refers to all available Patches in the system.
New: These are newly discovered Patches on which no action has been taken.
Installed: Refers to Patches that have already been deployed and installed.
Missing: Refers to Patches that Computers ought to have installed but still being demanded, then they are highlighted as Missing. Learn more about Missing Patches.
Ignored: Refers to all Patches that have been tagged as Ignore.
You can also filter Patches based on their severity label:
Critical
Moderate
Important
Low
Unrated
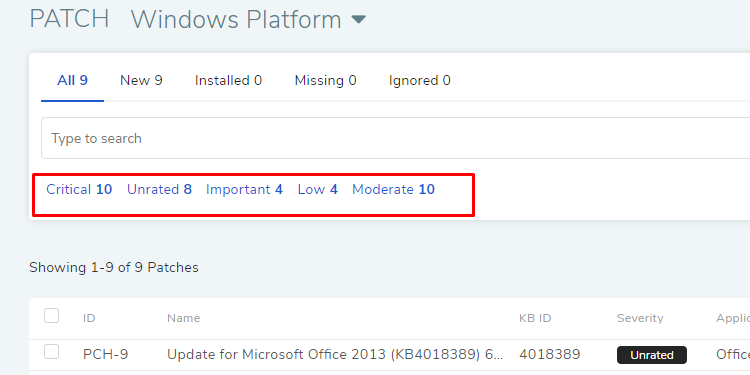
The severity labels are assigned by the Software Vendor based on their criteria
12.6.4. Patch Details View
The Patch aspect is made up of two views: the Patch List View and Details View. The Details View shows essential details about a Patch and gives access to Patch related functionalities.
To open the Details View of Patch:
Go to the Patch List View.
Click on a Patch from the list area to open its Details View.
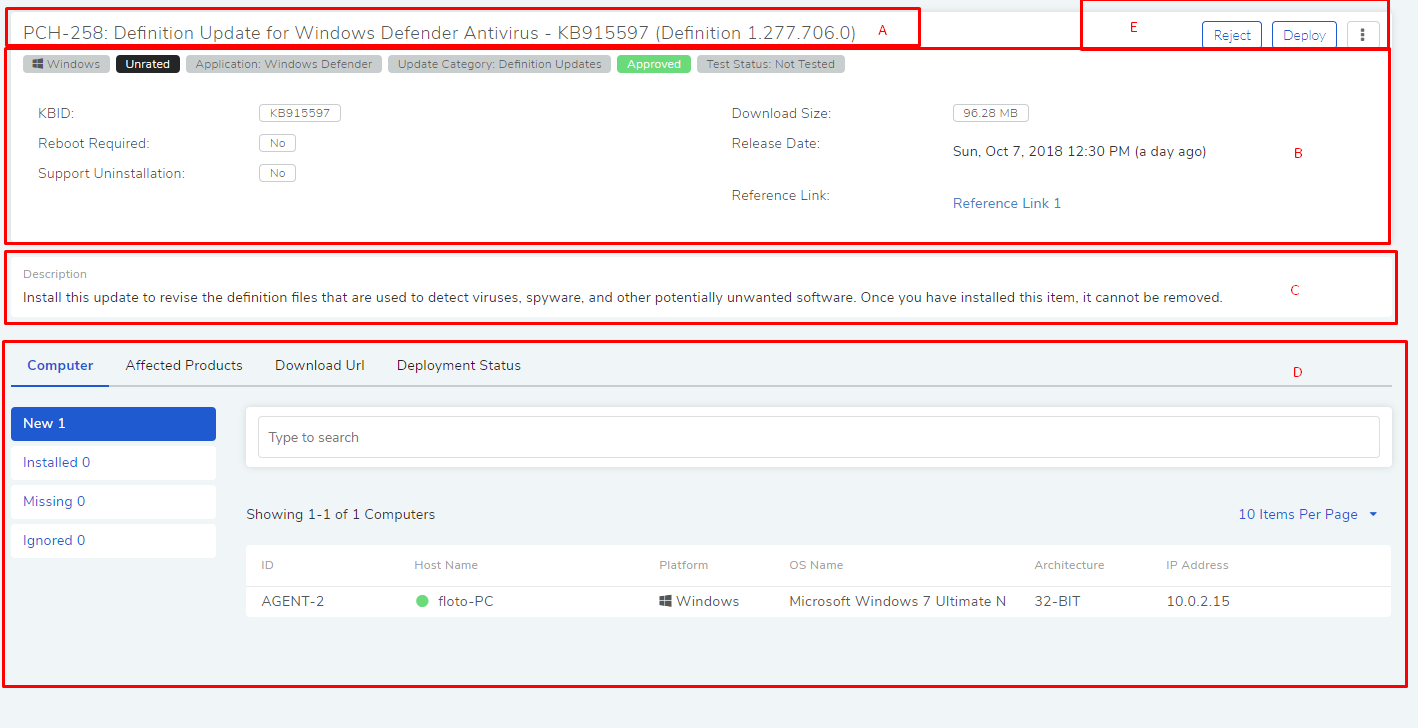
The Patch Details View has the following fields and options:
Section-A identifies the Patch. It starts with the Patch ID then the Name and ends with the KB ID. None of them are editable.
Section-B shows the details of the Patch. The information shown in this section is deemed as critical, and the same information (excluding description) is available when you are glancing the details of a Patch from the List View. The data points that are as follows:
Severity information as stated by the Software Vendor.
The related OS platform of the Patch.
The related application name of the Patch.
The Update category as provided by the Software Vendor.
The Approval status of the Patch. It can be either Approved,Pending, Rejected or Not-Approved. You can choose the method of Approval from Approval settings in the Admin.
The Test Status which shows the result of an Automatic Patch Test.
The KB ID of the Patch fetched from the update servers.
Information about whether the Patch requires a reboot after installation.
Information about whether the Patch supports un-installation.
The Download size of the Patch.
The release date of the Patch.
Section-C shows you the description of the Patch. It is fetched from the update server.
Section-D gives you four features which are as follows:
In the Computer tab, you can view all associated Computers that have performed or about to perform certain operations with the Patch. The Computers are divided across these categories:
New: Shows all the Computers that are yet to deploy the Patch.
Installed: Shows the Computers that have installed the Patch.
Missing: Shows the Computers that were supposed to have the Patch but they do not have the Patch. Learn more about missing Patches.
Ignored: Shows in how many Computers the Patch is ignored.
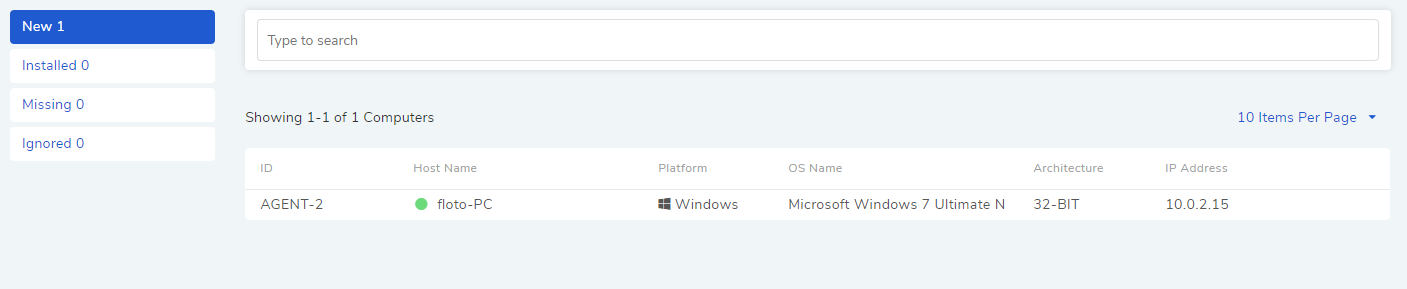
The tab provides a search bar for searching Computers. The search bar supports the Advance Search feature where you get search options by clicking on the search bar.
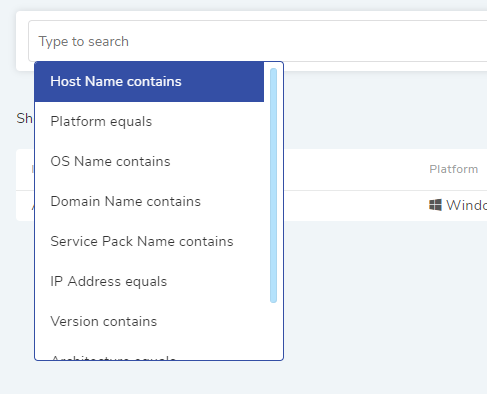
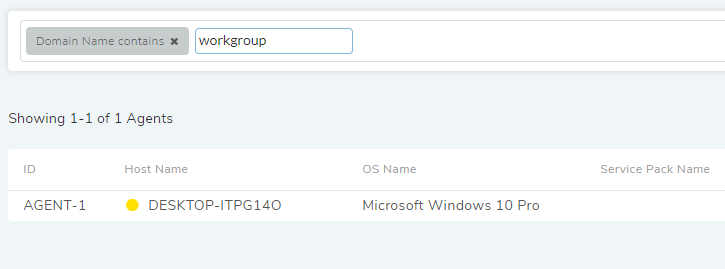
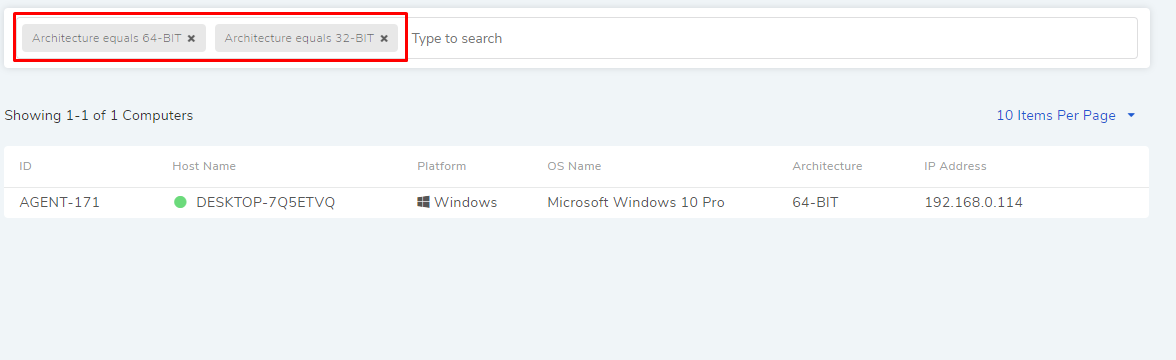
You can also enter keywords to search for a Computer. When entering a keyword, the product explores all the Computers with the keyword in their Name, Hostname, Domain name, OS name and Service Pack. A Computer has to have at least one field matched (partial or full) with the keyword; in case there are multiple keywords, a Computer has to have at least one field matched for each keyword You can combine search options with keywords. Between two different conditions of the same type OR logic is followed. Between different types AND logic is observed. Between keywords, and keywords and conditions AND logic is followed. An example of same type contradiction is Architecture equals 64-BIT vs. OS Architecture equals 32-BIT.
In the Affected Products tab, you can view which application/OS is affected by the Patch.
In the Download URL tab, you can view the download location of the Patch. You can also download the Patch file locally onto a machine using the Download button or Copy the URL.
In the Deployment Status tab, you can view all the associated Deployment Requests and their statuses. A Patch can be associated with multiple Deployment Requests, and the status shows two essential things: download status of the Patch (in the File Server) and the installation status in the Computers.
Section-E houses the following options:
The Approve/Reject button for manual approval of a Patch.
You can directly open the Create page for deployment with the Patch preselected using the Deploy button.
Configure Package to add a download location for manually added patches.
The Action menu is where you can Ignore/Un-Ignore the Patch and Download Patch in the File Server.