RHEL Patch Management for Air Gap Networks
Keep RHEL endpoints patched in completely isolated networks by syncing Red Hat Satellite metadata through a secure offline transfer process, without exposing your closed network to the internet.
This guide shows you how to use the RHEL Patch Management Utility to sync Red Hat Satellite metadata and deploy RHEL patches to endpoints in an air-gapped ServiceOps environment.
How Does RHEL Patch Management Work in Air-Gapped Networks?
Air-gapped networks have no direct internet connectivity. Patch distribution relies on a Red Hat Satellite Server that sits on the internet-connected side. The RHEL Patch Management Utility runs on the Satellite Server to export metadata and patch binaries. You transfer those files to the ServiceOps server using physical media, trigger a database sync, and then deploy patches to managed RHEL endpoints from within the closed network.
Prerequisites
Before you start, confirm the following:
- Your Red Hat Satellite Server has internet connectivity
- All required RHEL OS repositories are synced on the Satellite Server before running the metadata sync
- You have Admin access in ServiceOps
- A USB drive or other physical transfer media is available
- Sufficient free disk space is available on the Satellite Server (space depends on the patches you plan to download)
Procedure
Follow these steps in order. Start on the internet-connected Red Hat Satellite Server, then move to the ServiceOps server when indicated.
1. Download the Utility
Download and prepare the RHEL Patch Management Utility on the Satellite Server before running any sync operations.
Download the RHELPatchManagementUtility file on the Red Hat Satellite Server.
Give the file execute permissions:
chmod 777 RHELPatchManagementUtility
Run the utility with sudo privileges:
sudo ./RHELPatchManagementUtility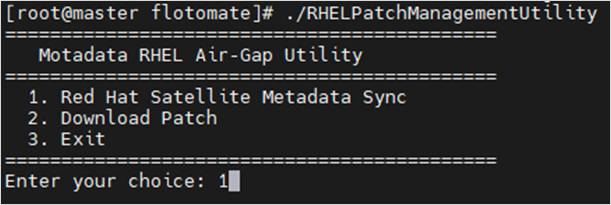
After execution, the utility shows three options: Red Hat Satellite Metadata Sync, Download Patch, and Exit. Run the metadata sync first, then download patches.
2. Sync Red Hat Satellite Metadata
Sync the Red Hat Satellite metadata to generate the patch database ZIP file for transfer to the ServiceOps server.
Enter
1to select Red Hat Satellite Metadata Sync.
When prompted to reuse credentials, enter
yto use saved credentials ornto enter new credentials.Enter the Satellite Server URL when prompted.

Enter the Username and Password when prompted.
Admin Credentials RequiredUse the credentials of a user with full administrative privileges on the Satellite Server GUI.

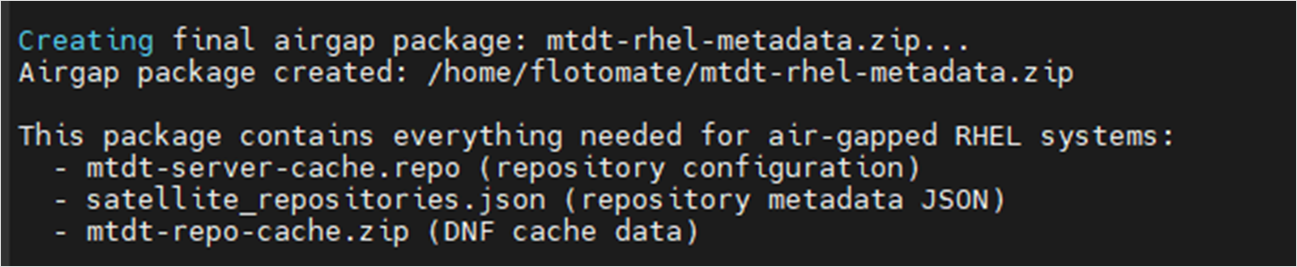
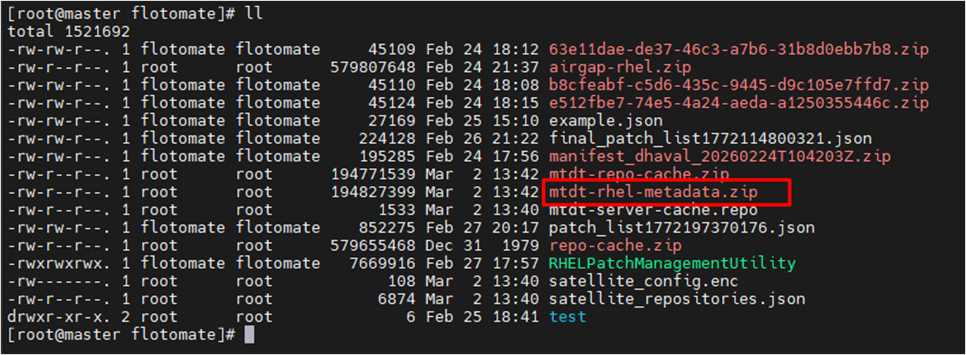
The utility fetches the available repositories and creates a ZIP file in the directory where the utility is located.
3. Transfer Metadata to ServiceOps Server
Copy the generated ZIP file to the ServiceOps server and prepare it for the patch database sync.
- Copy the ZIP file to a physical drive and transfer it to the ServiceOps server.
- Move the file to the following path on the ServiceOps server:
/opt/flotomate/main-server/config - Extract the file:
7z x {filename} - Assign fmt user permissions:
chown -R fmtuser:fmtusergroup {filename}
4. Configure Red Hat Patch Preference in ServiceOps
Set the patch source to Red Hat Satellite Server in ServiceOps before triggering the database sync.
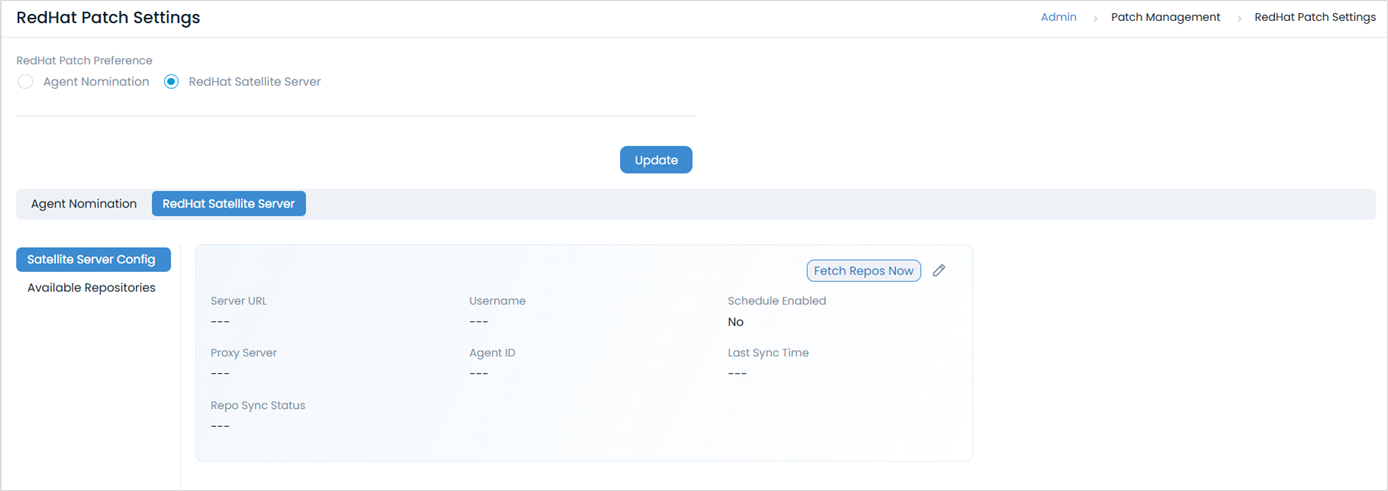
Navigate to Admin > Patch Management > RedHat Patch Settings > RedHat Satellite Server tab.
Set Red Hat Patch Preference to Red Hat Satellite Server.
No Existing Satellite ServerConfirm that no satellite server is already configured before applying this setting.
5. Sync Patch Database
Trigger a manual patch database sync in ServiceOps to process the transferred metadata and identify missing patches.
Navigate to Admin > Patch Management > Patch Settings > Update Patch Database.
Click Update Now to start the sync.
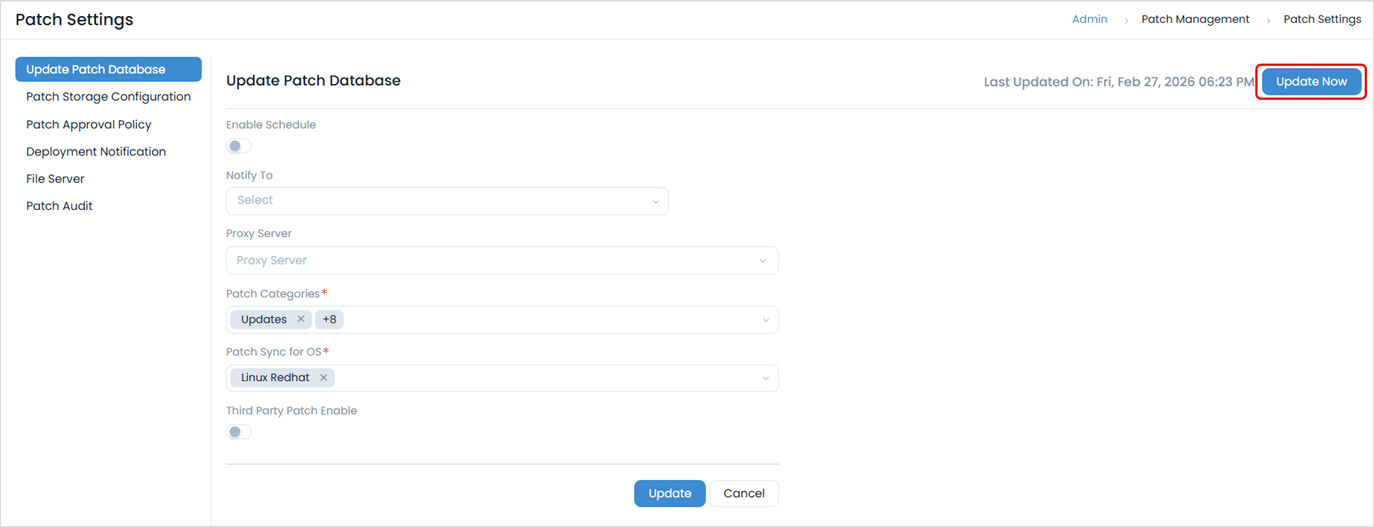
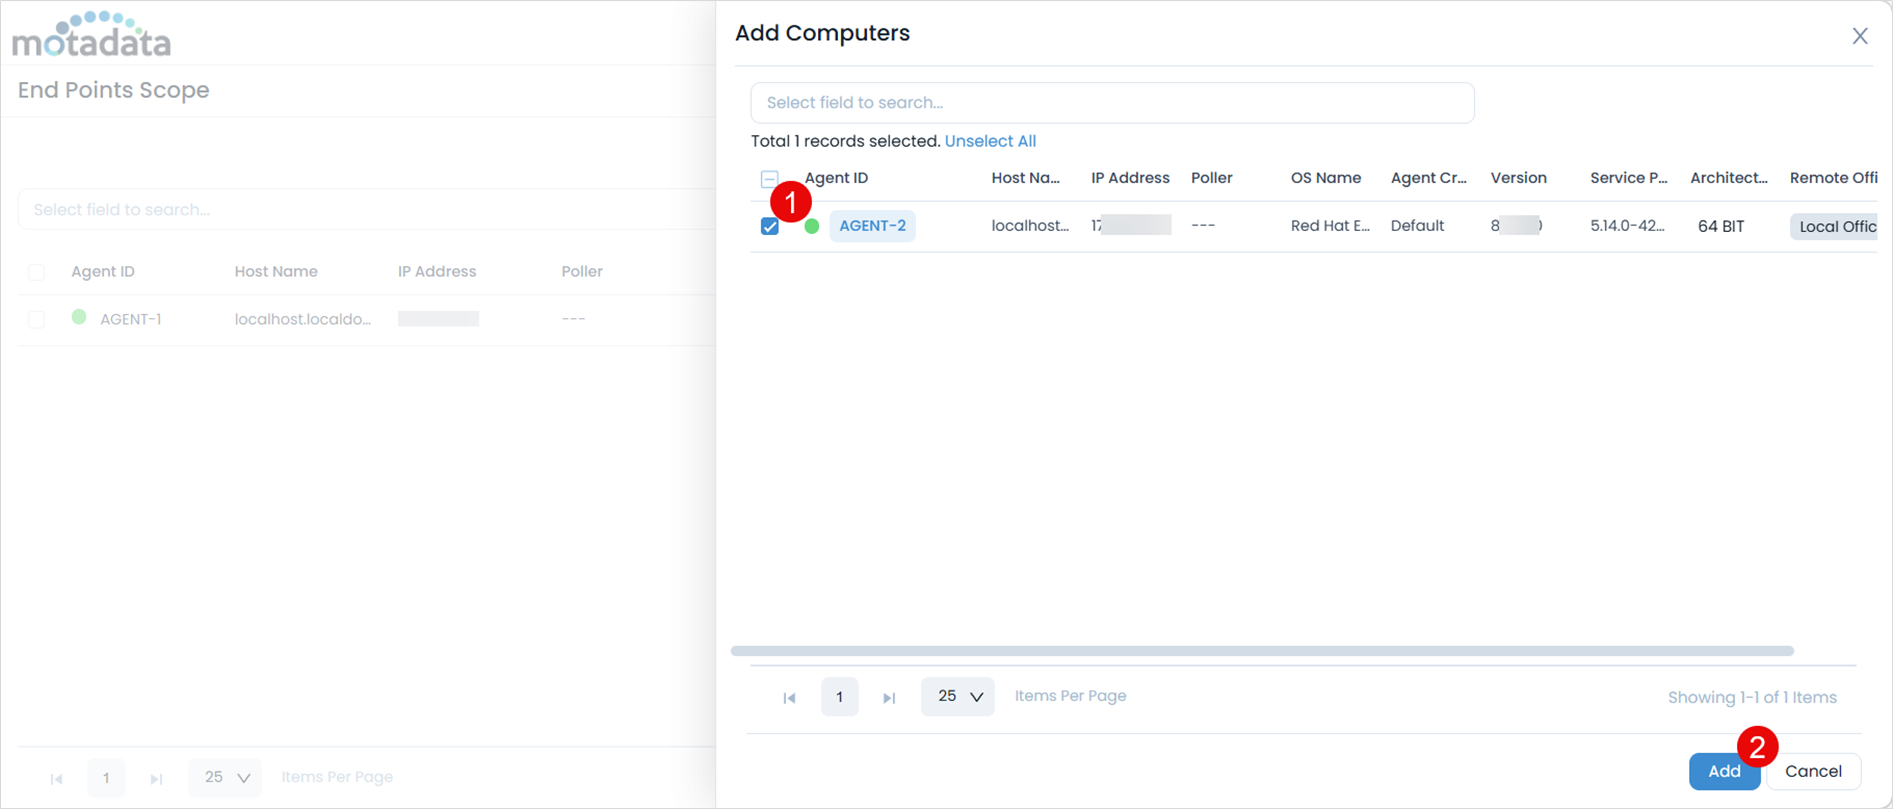
After the sync completes, add computers to the End Points Scope.
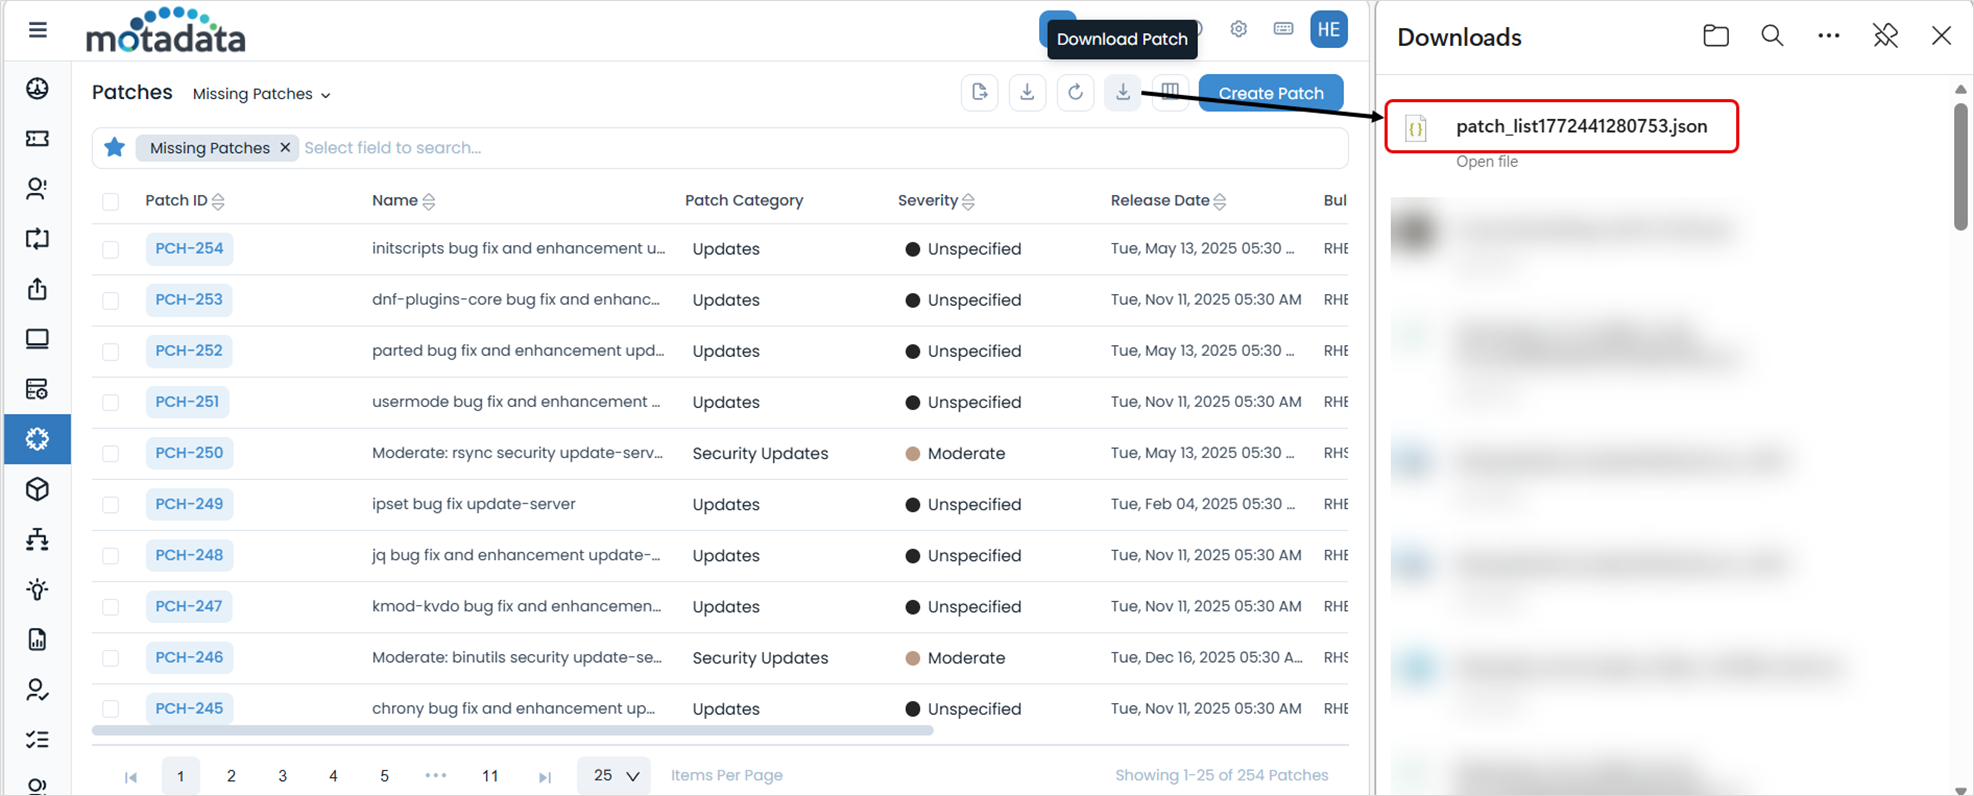
Navigate to Patch Management > Patches. Locate the missing patches and click the Download Patch icon to export a JSON file containing the patch list.
6. Download Patches Using the Air-Gap Utility
Return to the Satellite Server and use the exported JSON file to download the actual patch binaries.
Run
RHELPatchManagementUtilityagain on the Satellite Server.Enter
2to select Download Patch.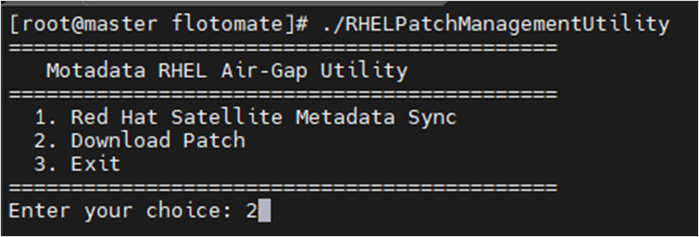
Enter the path to the JSON file exported from ServiceOps.

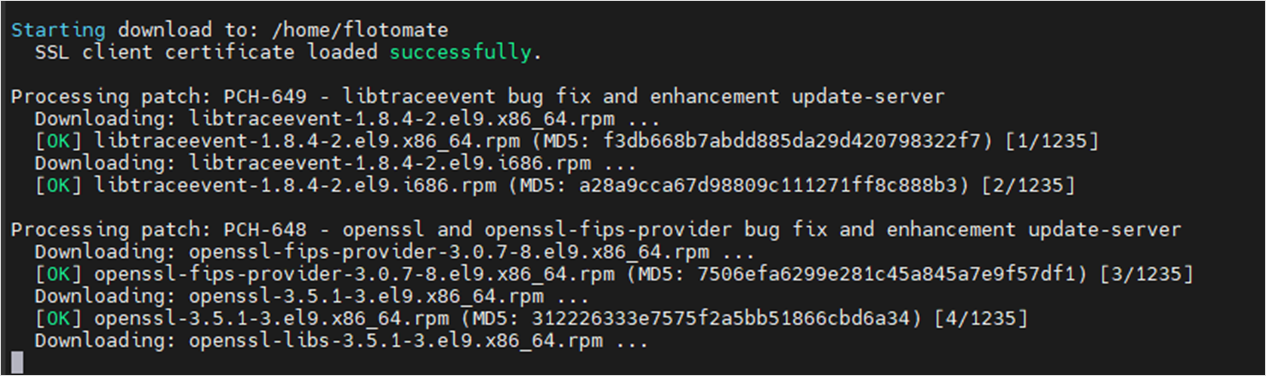
Enter
ywhen prompted "Download all patches? (y/n)".
The download process begins. Once complete, the utility creates a file named mtdt-patches.zip in the directory where the utility is located.
7. Prepare the Patch Directory in ServiceOps
Copy the downloaded patches to the ServiceOps file server so they are available for deployment to managed endpoints.
Check the operating system of your file server before proceeding. The steps differ for Linux and Windows environments.
Linux Environment
Follow these steps on a Linux-based file server.
Navigate to
/opt/flotomate/file-server/filedbon the ServiceOps server. Verify the tenant folder exists. If it doesn't, create it:mkdir {tenant-name}Example:
mkdir apoloCreate the patch folder inside the tenant folder:
mkdir {patch-folder-name}Example:
mkdir patchCopy
mtdt-patches.zipto a physical drive, transfer it to the ServiceOps server, and place it at:/opt/flotomate/fileserver/filedb/{tenant_name}/patchExample:
/opt/flotomate/fileserver/filedb/apolo/patchExtract the file:
7z x {filename}Grant fmt user permissions to the tenant folder:
chown -R fmtuser:fmtusergroup {tenant_name}
Windows Environment
Follow these steps on a Windows-based file server.
- Navigate to
/fileserver/filedb/on the Windows machine where the file server is installed. Verify the tenant folder exists. If it doesn't, create one. - Create the patch folder inside the tenant folder.
- Copy
mtdt-patches.zipto a physical drive and upload it to/fileserver/filedb/{tenant_name}/patch. - Extract the ZIP file.
Best Practices
Follow these recommendations to keep your RHEL air-gap patching process reliable and repeatable.
- Sync all required repositories on the Satellite Server before running the utility. Missing repositories cause incomplete metadata exports. Verify all RHEL OS repositories are synced on the Satellite Server before starting the metadata sync.
- Use a dedicated transfer folder with no spaces in the name. The utility and the 7z extraction tools fail silently on paths with spaces. Use short, hyphenated folder names such as
rhel-patches. - Reapply fmt user permissions after every file transfer. Whenever you copy files to the ServiceOps server, run
chown -R fmtuser:fmtusergroupon the target path. Skipping this step is the most common cause of sync and deployment failures. - Always click Update Now after transferring metadata. The patch database does not refresh automatically in an air-gapped setup. Trigger the sync manually each time you transfer new metadata.
- Export a fresh JSON file for each patch cycle. The JSON file reflects the missing patches at the time of export. Reusing an old JSON file causes the utility to download patches that are already installed or no longer relevant.
- Keep the
mtdt-patches.zipfilename consistent. The utility always creates the output asmtdt-patches.zip. Renaming it before transfer can cause path mismatches when extracting to the file server.
Troubleshooting
Use this section to resolve common issues when running RHEL patch management in an air-gapped environment.
Metadata sync fails after entering credentials
Cause: The Satellite Server user does not have full administrative privileges, or the Satellite Server URL format is incorrect.
Fix: Verify the user account has full admin rights on the Satellite Server GUI. Confirm the URL includes the protocol prefix, for example https://satellite.example.com. Re-run the utility and enter the corrected credentials.
Missing patches do not appear after patch database sync
Cause: The ZIP file was not extracted to the correct path on the ServiceOps server, or fmt user permissions were not applied after extraction.
Fix: Confirm the file is at /opt/flotomate/main-server/config and run chown -R fmtuser:fmtusergroup {filename} to reapply permissions. Then click Update Now on the Update Patch Database page to re-trigger the sync.
Patch deployment fails after patches are prepared in the file server
Cause: The mtdt-patches.zip file is in the wrong directory path, or the tenant name in the path does not match the tenant configured in ServiceOps.
Fix: Confirm the patch files are at /opt/flotomate/fileserver/filedb/{tenant_name}/patch and that {tenant_name} matches exactly the tenant name in your ServiceOps configuration. Reapply fmt permissions with chown -R fmtuser:fmtusergroup {tenant_name}.
Next Steps
- Create a patch deployment to push the downloaded RHEL patches to managed endpoints.
- Review the patch list to confirm all missing patches are now available in ServiceOps.