Create a Service Category
A Service Category is a general classification of the type of services that the IT Service Offering provides. It allows you to group the Templates into specific categories.
For example: a new category, called IT is created for the Laptop template.
By default, there are below available Service Catalogs for use.
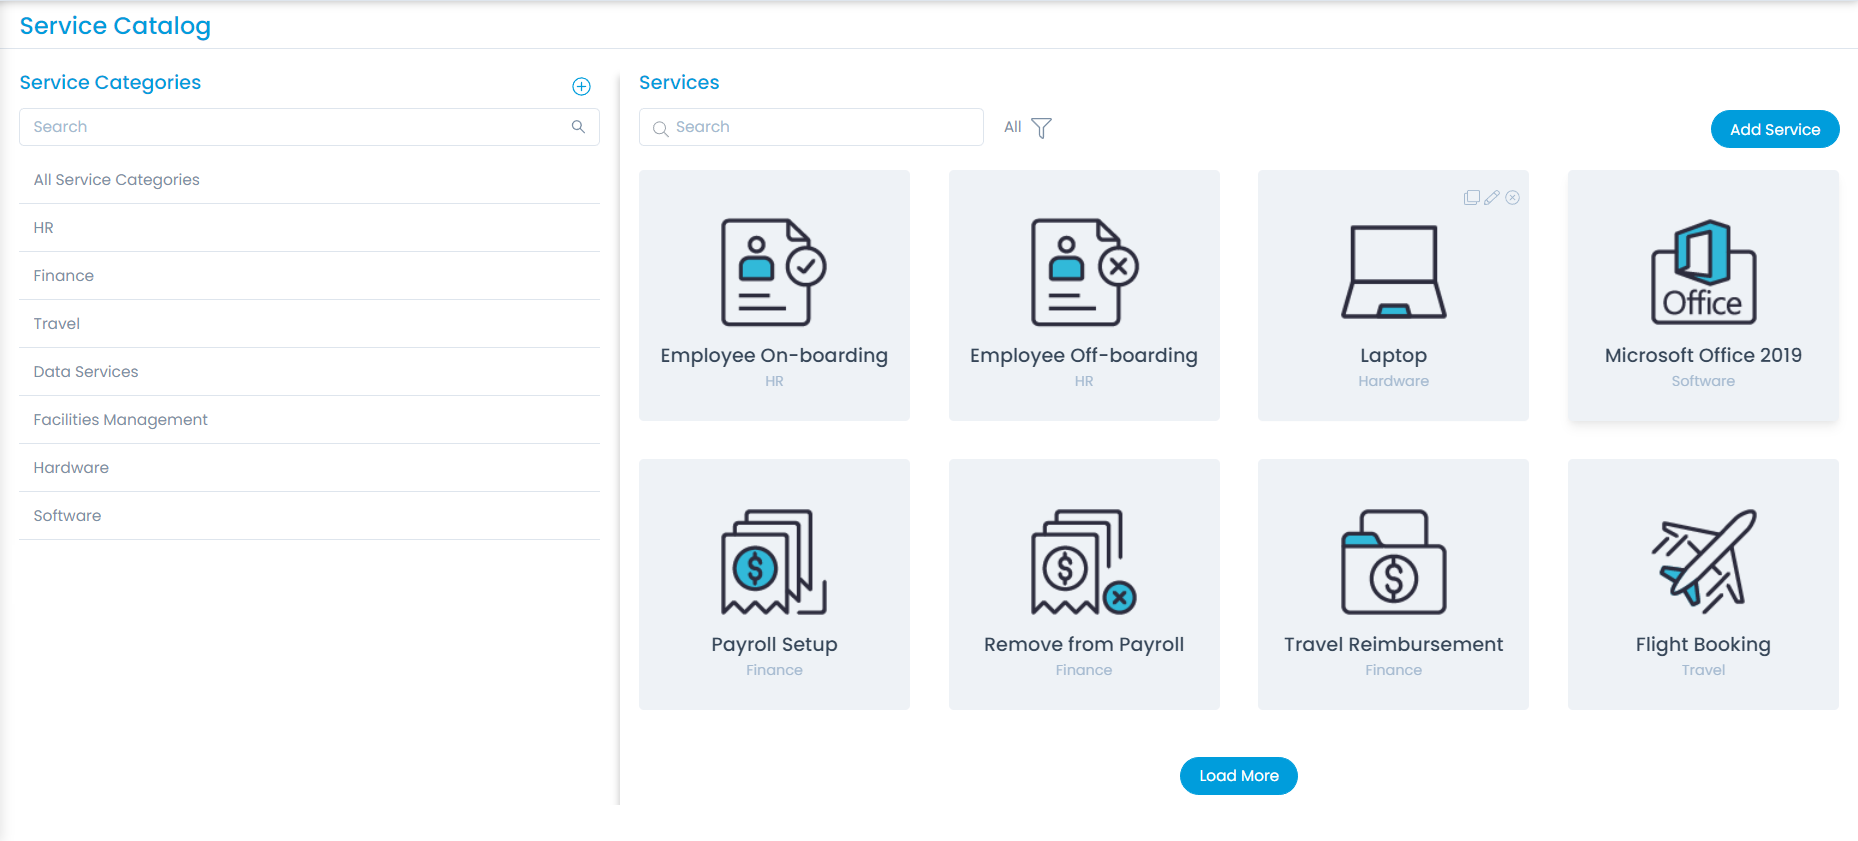
Adding Service Catalog Categories
To add a category, follow the below steps:
- Click the Plus icon next to the Service Categories panel and Add Service Category popup appears.
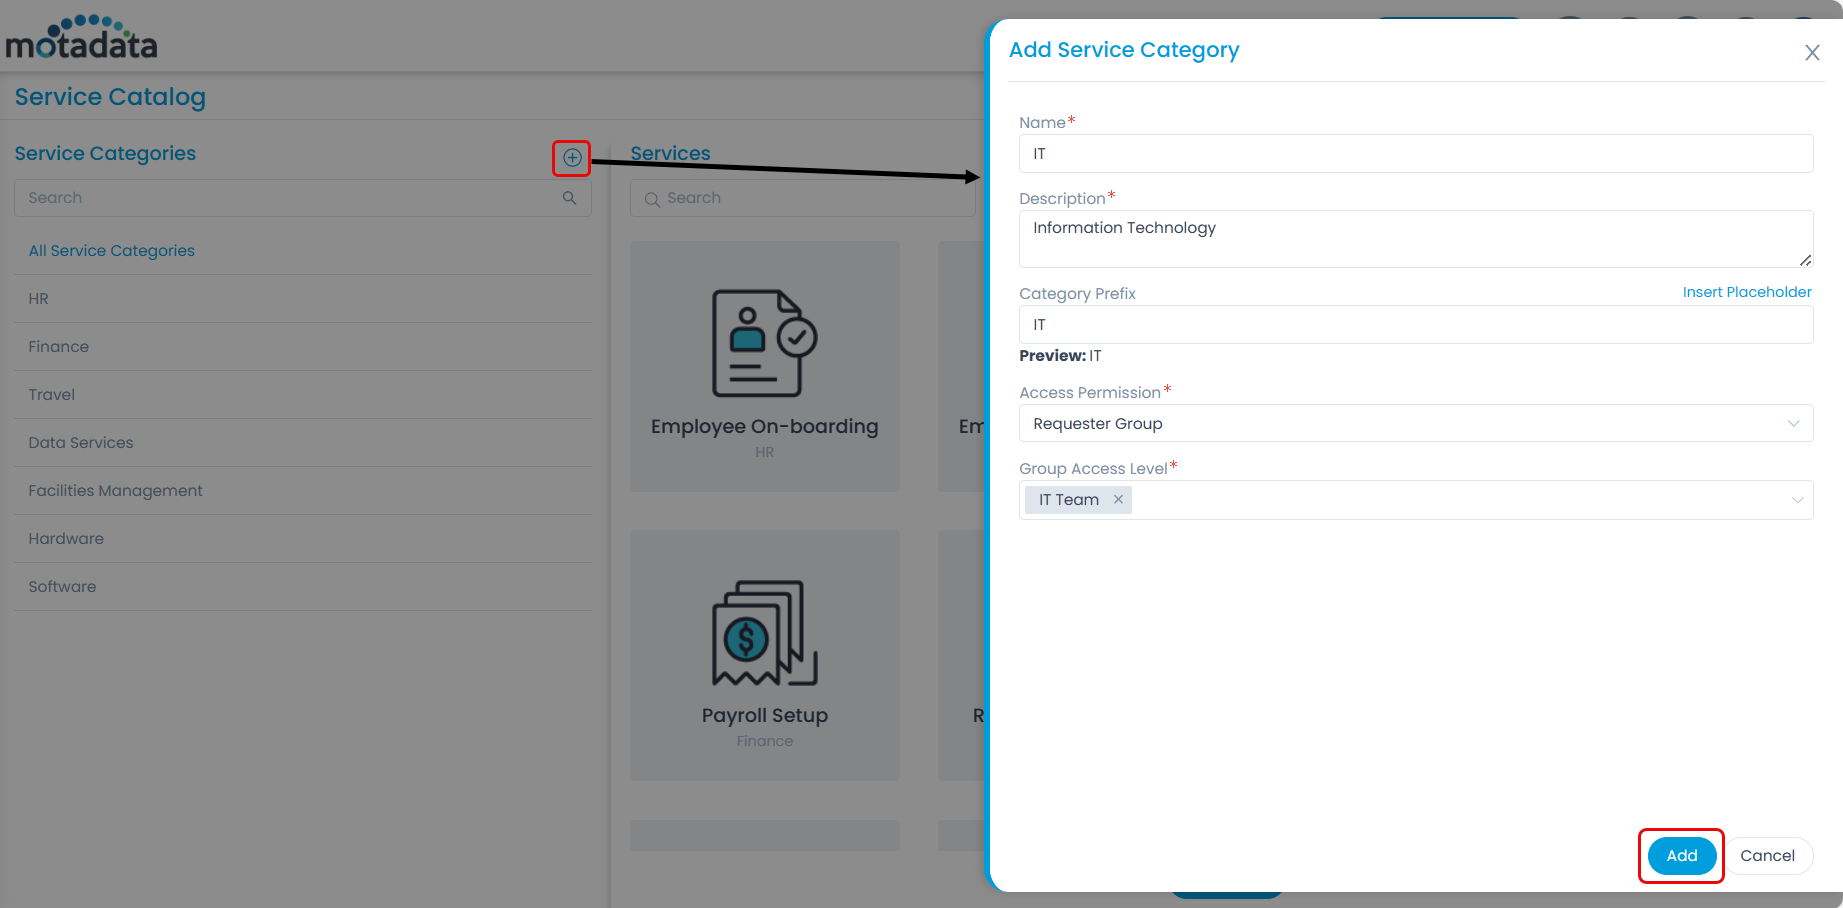
Enter the below details:
- Name: Enter the name of the service category. Here, the name is IT.
- Description: Enter a brief description of the category.
- Category Prefix: Enter a prefix for the category to ease the listing for which the service request belongs to. You can also use placeholders to add the date in the prefix. The default prefix for Service Requests is SR. It can contain 5-24 characters and supports all the characters including dot(.), hyphen (-), and forward slash (/).
noteThe changes made in the prefix will be applicable to the new request tickets, not the existing ones.
Access Permission: Define the access level for a service category. You can define the access permission at three levels:
- Public: If selected, all requesters, including the guest requesters, will have the right to request the respective service.
- All Logged-in Users: If selected, all logged-in requesters or technicians will have the right to request the respective service through the Support Portal.
- Requester Group: If selected, requesters will have the right to request the respective service through the Support Portal, based on the access provided according to the selected group in the Group Access Level field.
- Group Access Level: Select the Group based on which the Service Categories and services will be visible to the requester while creating a Service Request. Only those Service Categories and services that match the user's group will be displayed. note
The Group in the Category and Service should be the same.
Company Access Level: Select the Company based on which the Service Categories and services will be visible to the requester while creating a Service Request. Only those Service Categories and services that match the user's Company will be displayed.
Once done, click Add. You can also edit or delete it if not required later.
Once a category is created, associate it with a request, and its prefix will be visible in the service request subject. Further, it changes as per the category selected. You can add or edit an existing service and associate it with the category.
Adding and Associating a Service to the Category
To add a service,
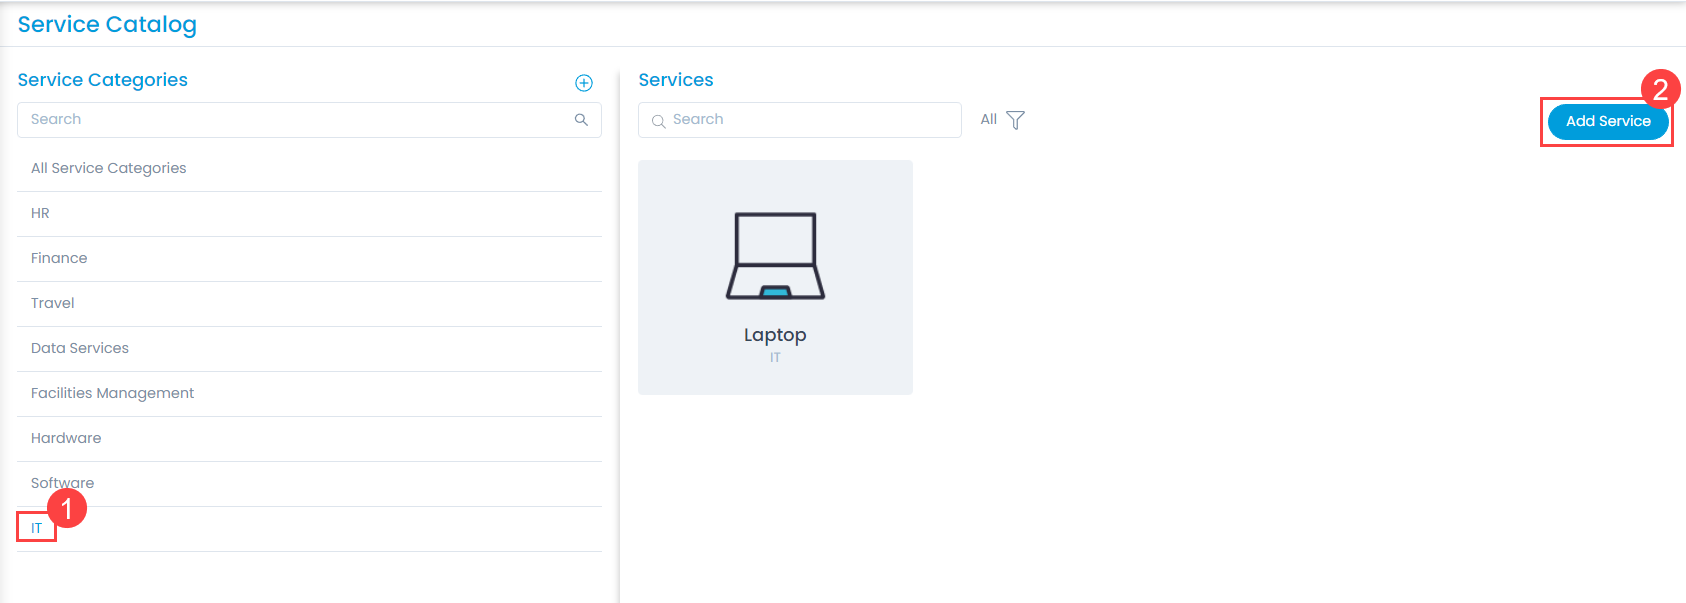
- Click the Service Category (IT) to which you want to associate the service. A list of associated services will appear.
- Click Add Service from the top-right corner as shown below.
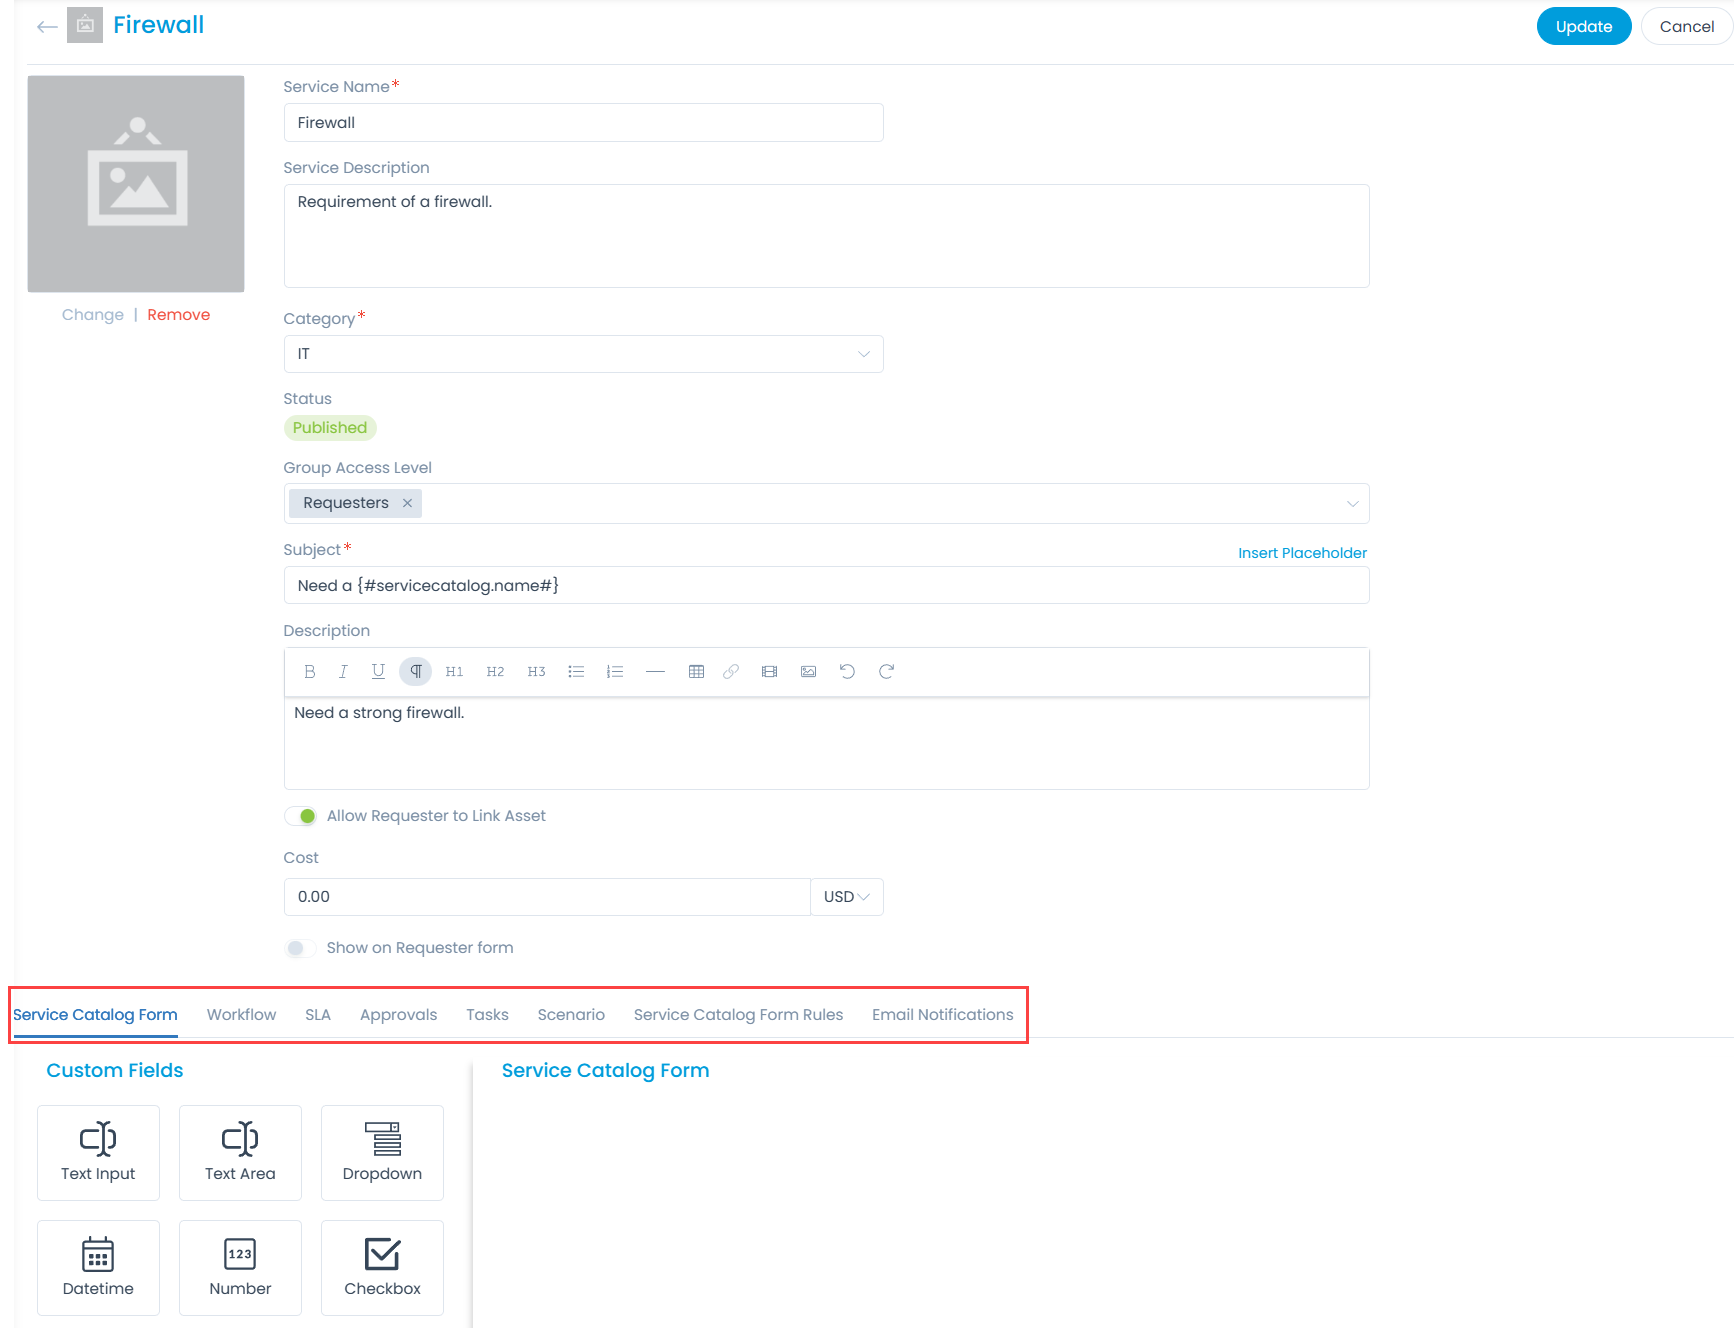
On the Create Service page, enter the below details:
- Service Name: Enter the name of the service.
- Service Description: Enter a short description of the service.
- Category: Select the service category with which you want to associate the service.
- Status: Define the status of the service as Draft or Published. If published, the service will be available to the requesters for selection.
- Group Access Level: Select the groups to whom you want to allow access to the service.
- Company Access Level: Select the companies whose users you want to allow access to the service.
noteWhile creating Services under any Service Category, only those Companies and Groups will be available that are defined in the related Service Category.
- Subject: Enter the subject of the service request. You can also insert a placeholder using the Insert Placeholder link.
- Description: Enter the description of the service request.
- Allow Requester to Link Asset: Enable to allow the requester to link assets while creating a Service Request. If enabled the Link Assets button will be available at the time of Service Request creation on Technician and Support Portals.
- Allow Requester to Link CI: Enable to allow the requester to link CIs while creating a Service Request. If enabled the Link CI button will be available at the time of Service Request creation on Technician and Support Portals.
- Cost: Enter the cost of the service and select the currency accordingly. The list of currencies will appear based on the currency selected on the Account Details page.
- Profile Picture: Select the image for the service.
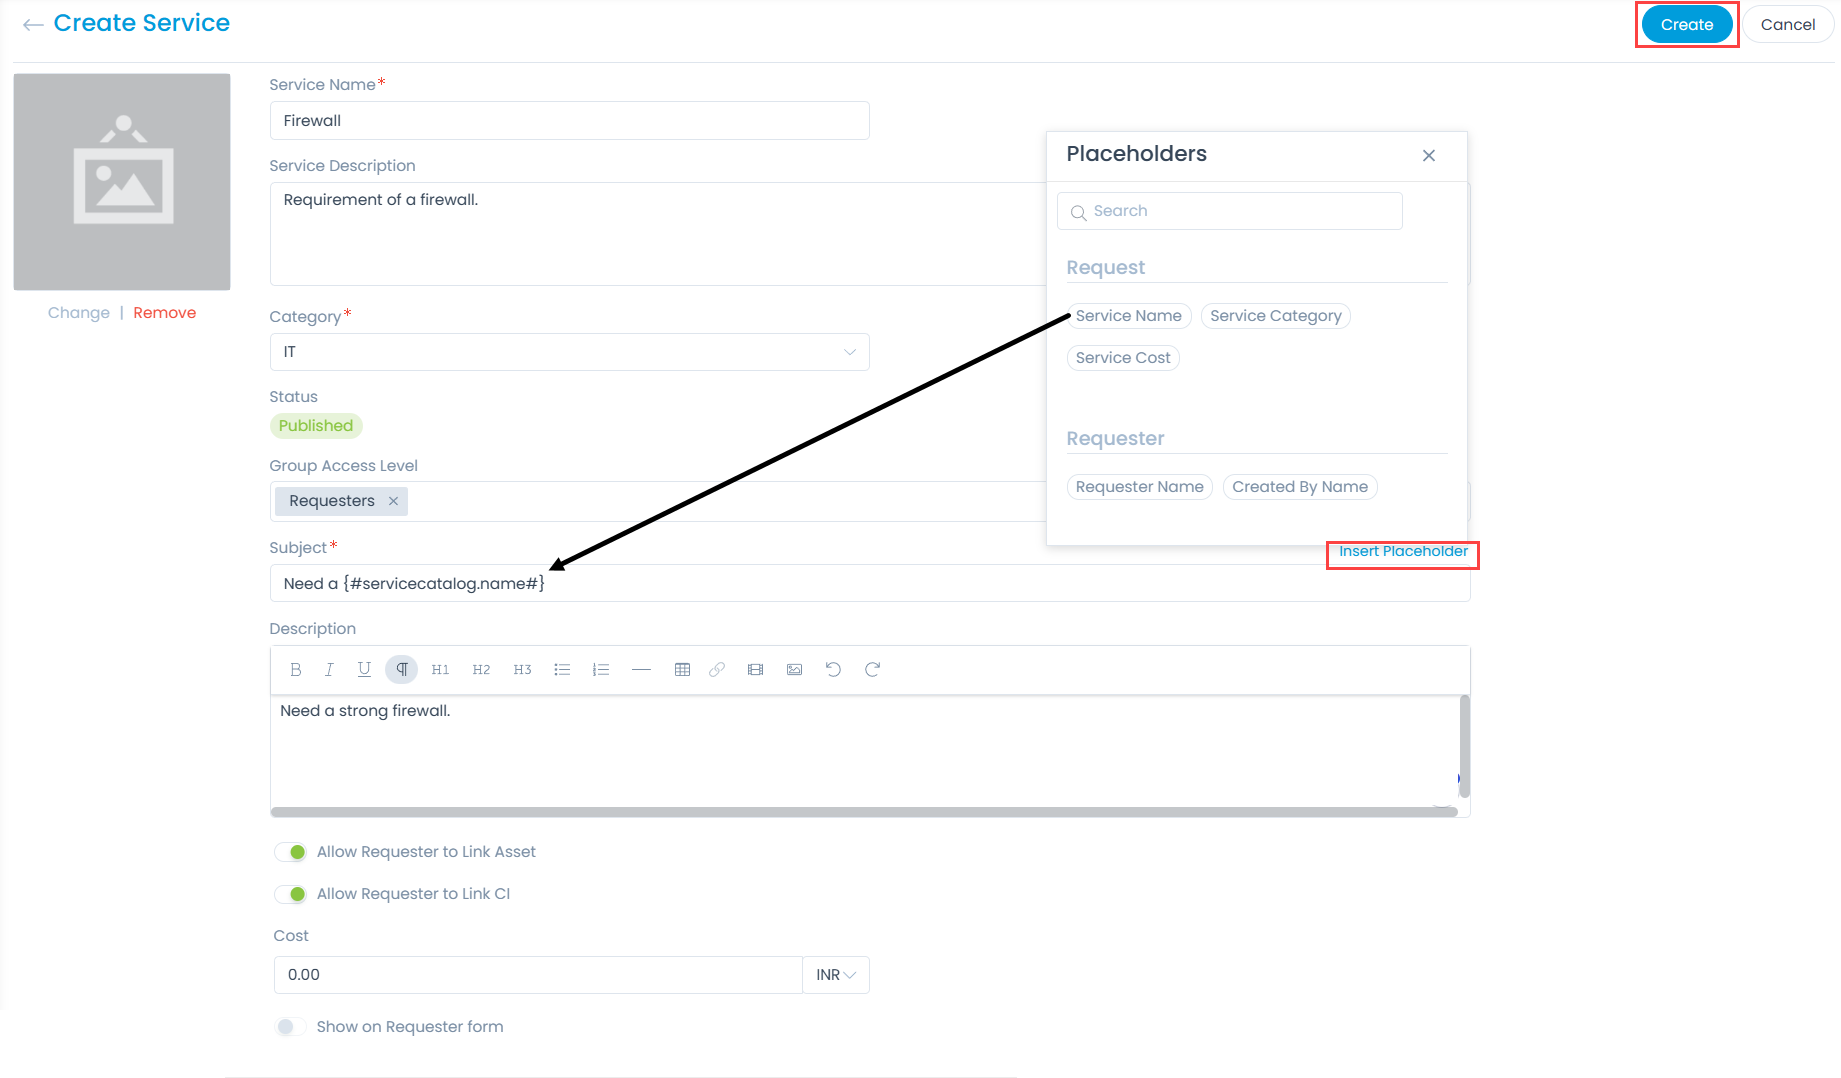
- Once the details are filled in, click Create. You can now create a service catalog template and define the form fields, Workflow, SLAs, Approval Workflow, Tasks, Scenarios, Form rules, and Email Notifications for it.
