How to Integrate NMS with ServiceOps?
ServiceOps supports integration with a monitoring tool like Network Monitoring System (NMS). Using this, tickets of the alerts generated in NMS can be automatically created in ServiceOps. Then, NMS communicates with ServiceOps to send the Alert status, update the alert status, and show the ticket information from the tool on the NMS screen. Thus, whenever an alert will generate for some devices in NMS, a ticket will get created in ServiceOps for the same. Once created, a technician will be assigned to analyze and resolve the ticket. The entire communication between ServiceOps and NMS is based on Rest API. You can view the communication through the below figure.

Follow the below procedure to learn how ServiceOps can be integrated with NMS.
Configuration in ServiceOps
To integrate NMS with ServiceOps, follow the below steps:
In the ServiceOps server, navigate to the below location:
/opt/flotomate/main-server/configSet the application's custom properties using the below command:
nano application-custom.propertiesIn the following screen, then type the below text as shown in the below figure:
com.flotomate.nms.producer.ipaddress=<nms_ipaddress>Once done, Save and exit from this window.
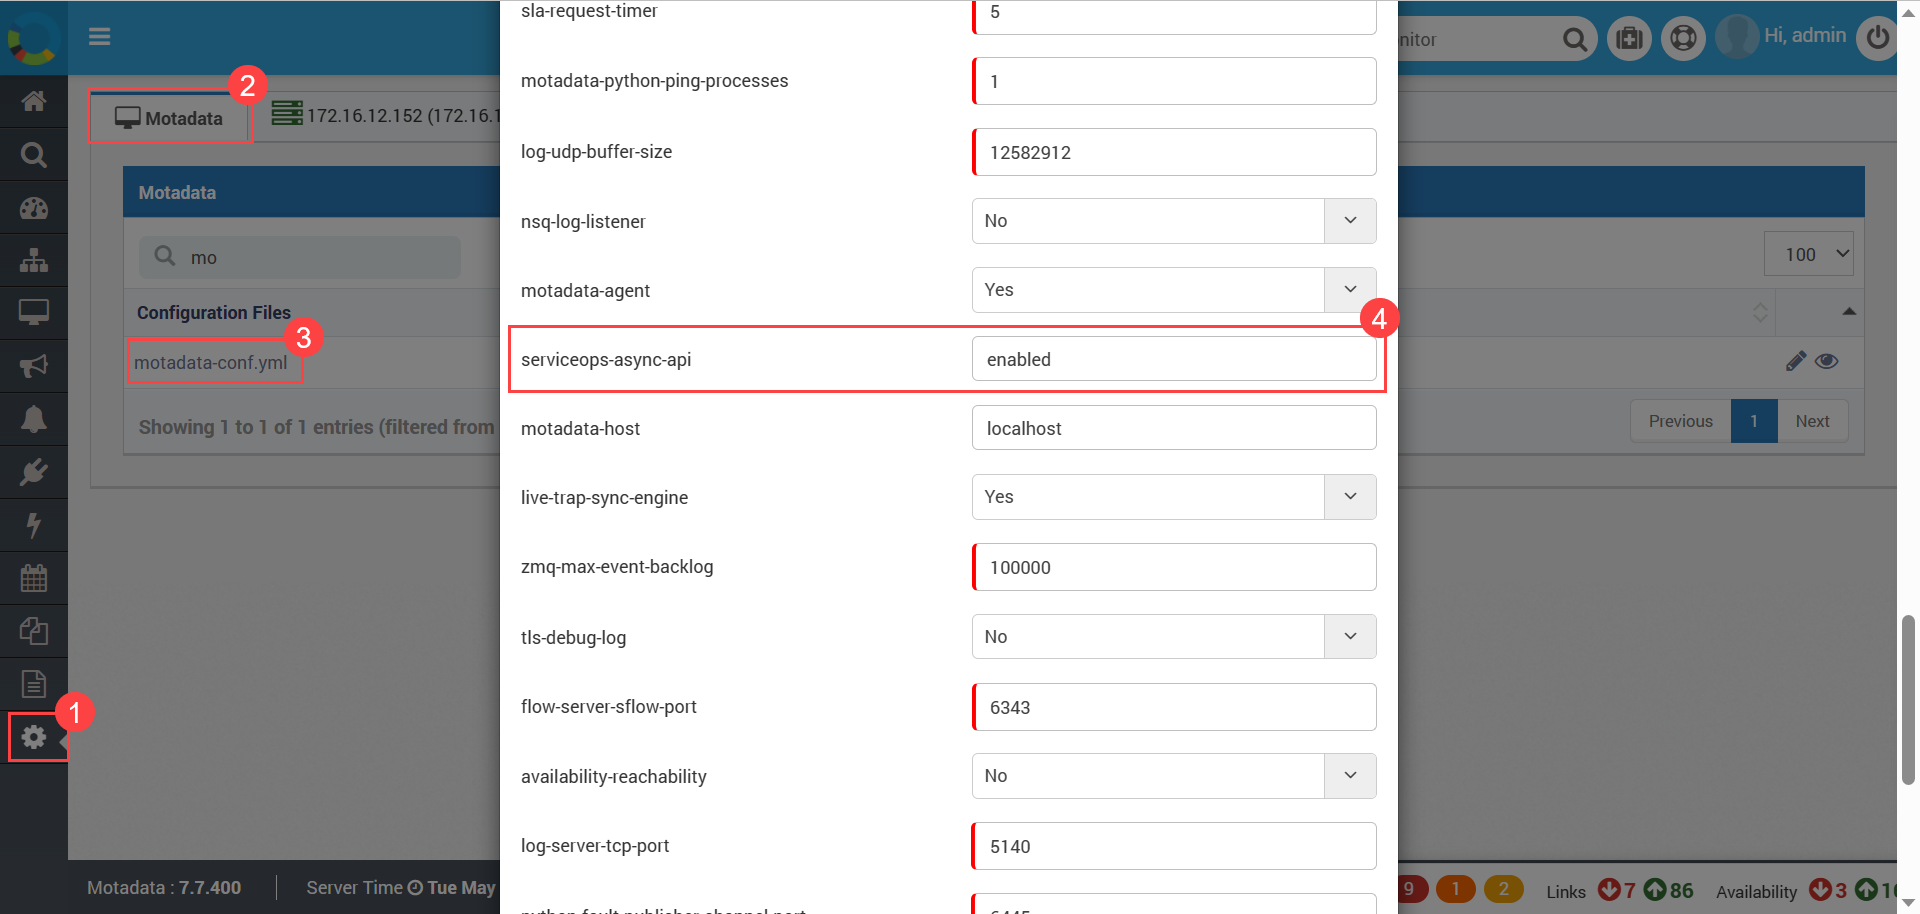
noteThe custom property must be configured if the parameter serviceops-async-api is enabled in the NMS application.

In ServiceOps, navigate to Admin > Automation > Integrations > REST Integration and click Add Integration. The following popup appears.
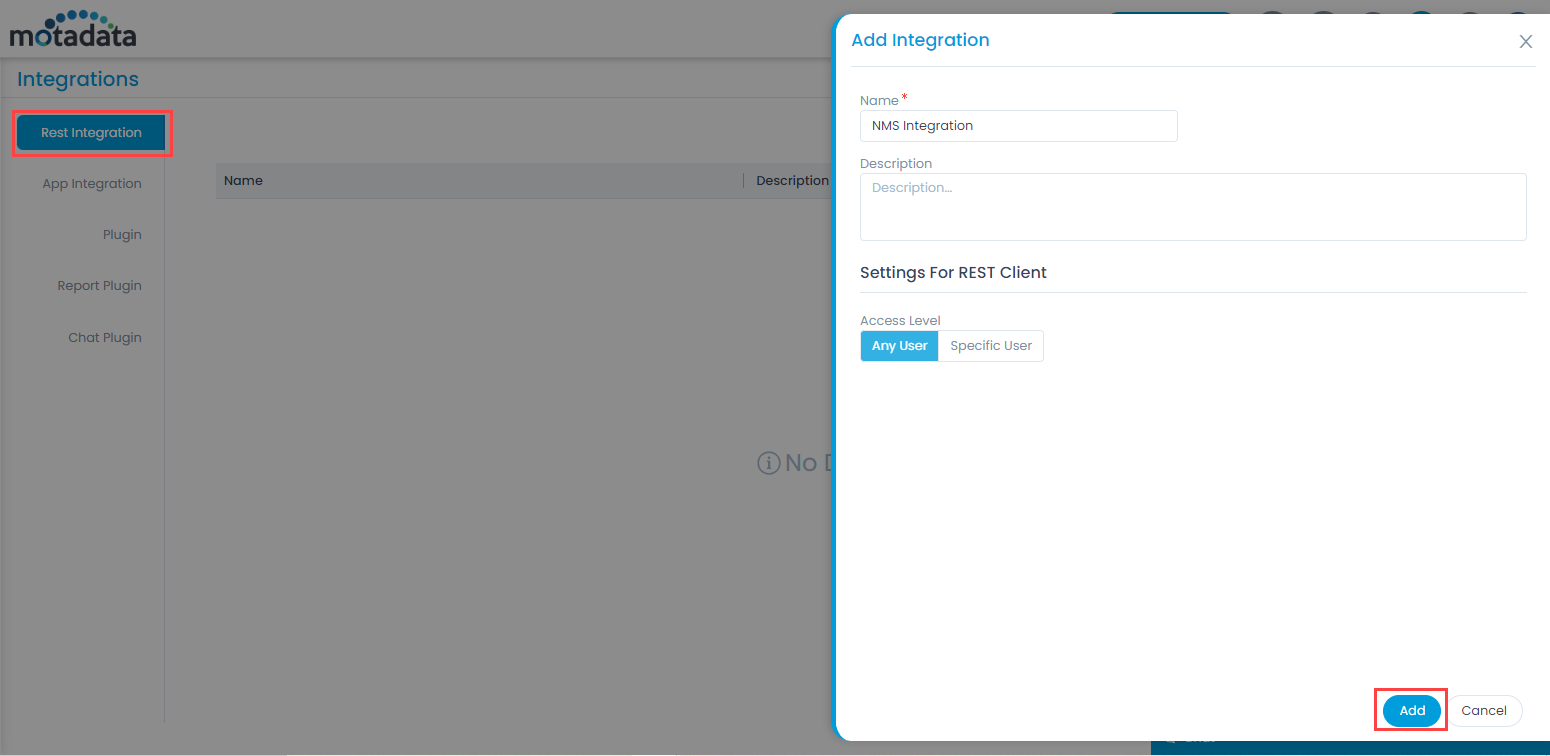
- Enter the Name, select the Access Level, and click Add.
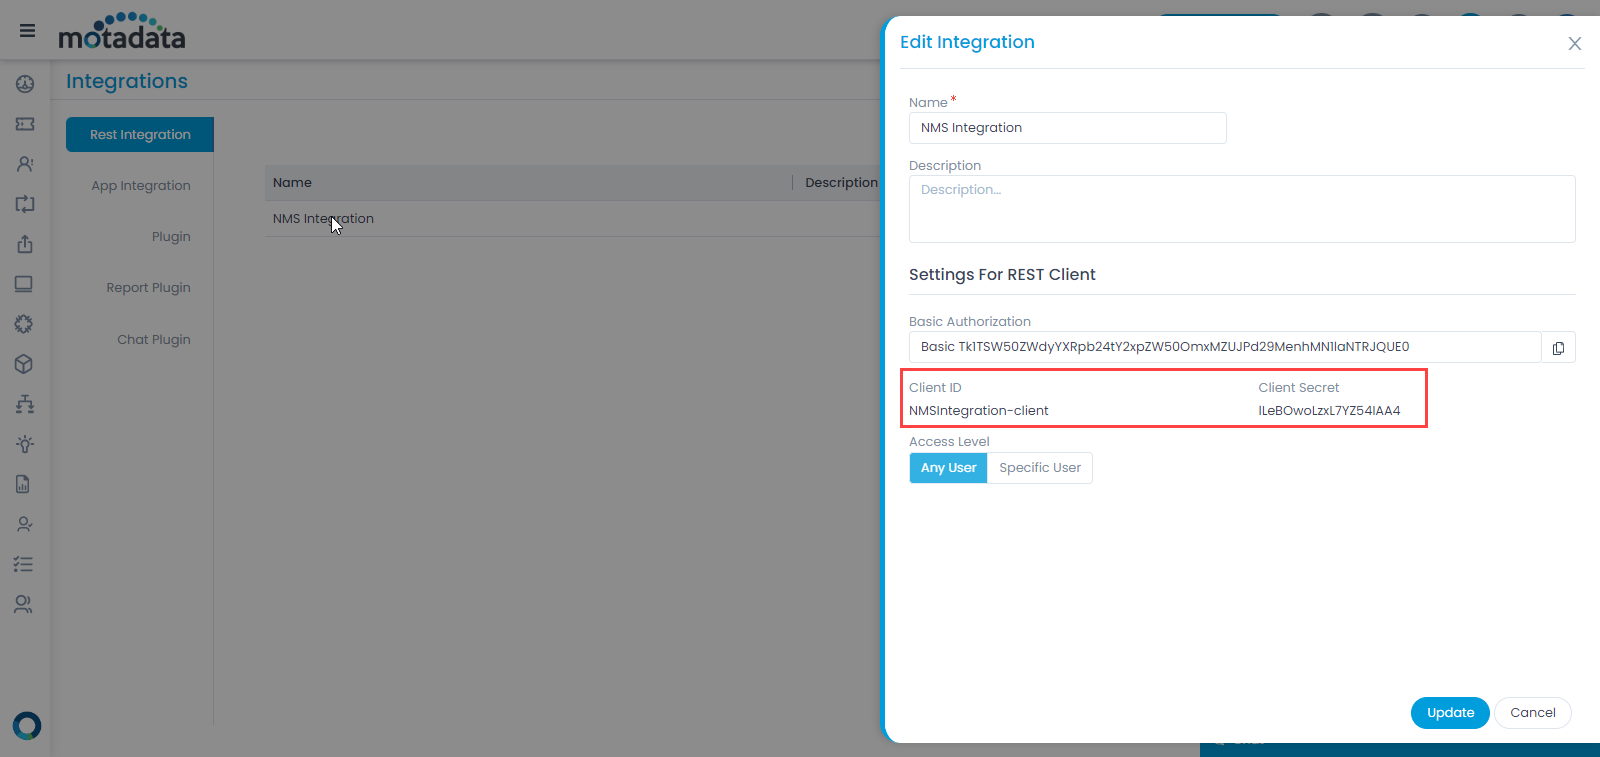
- Once done, click the created Integration, copy its Client ID and Client Secret, and paste it into the NMS application.
Configuration in NMS
- Navigate to Admin > Motadata Configurations and edit the motadata-conf.yml file. In the file, enable the parameter "serviceops-async-api" and click Update.
- Next, navigate to the Actions menu, and click the +New button. The following popup appears.

Enter the following details:
- Action Name: Enter the name of the integration.
- Action: Select the action as "ServiceOps Trouble Ticket".
- User Name: Enter the username of the ServiceOps user.
- Password: Enter the password of the ServiceOps user.
- Client Id: Paste the Client ID copied from ServiceOps.
- Client Secret: Paste the Client Secret copied from ServiceOps.
- Server URL: Enter the URL of the ServiceOps server. For example: http://dummy.com
- Fail Over Email: Enter the backup email address for alert notification in case of failure.
- URL Timeout: Provide the timeout time for the URL to refresh.
- Priority/Urgency Low: Select the ticket's Priority to map with the ServiceOps ticket having Priority low. For example: If Warning is selected in NMS, then in ServiceOps, the ticket's Priority will be Low.
- Priority/Urgency Medium: Select the ticket's Priority to map with the ServiceOps ticket having Priority Medium. For example: If Major is selected in NMS, then in ServiceOps, the ticket's Priority will be Medium.
- Priority/Urgency High: Select the ticket's Priority to map with the ServiceOps ticket having Priority High. For example: If Critical is selected in NMS, then in ServiceOps, the ticket's Priority will be High.
- Priority/Urgency Urgent: Select the ticket's Priority to map with the ServiceOps ticket having Priority Urgent. For example: If Unreachable is selected in NMS, then in ServiceOps, the ticket's Priority will be Urgent.
- Priority For Clear: Select the ticket's Priority in ServiceOps for clear as Resolved or Closed.
- Auto Close On/Off: Select On if the ticket is to be automatically closed in ServiceOps when the field "Priority for Clear" is set as Closed.
- Source: NMS
- Business Hour: Set the business hours within which the integration between ServiceOps and NMS should work. For example: If the Business Hour is set as Monday to Friday and time 10 to 7. The alerts generated within this duration will be sent to ServiceOps for creating tickets. If an alert is generated outside the business hour, the ticket will not be created in ServiceOps.
Once all the details are filled in, click Create. ServiceOps is now integrated with NMS. Now, whenever an alert is generated in NMS,
- The ticket will be created in ServiceOps, displaying the alert status and details.
- When the alert status changes, NMS will update the alert status in the ServiceOps ticket.
- A technician will monitor the ticket and make the required changes to bring the ticket to a clear state.
- When the alert is clear, NMS will close the ticket automatically in ServiceOps.
If the ticket is closed manually in ServiceOps, its status can be updated in NMS using the Workflow.
To create a workflow in ServiceOps, follow the below steps:
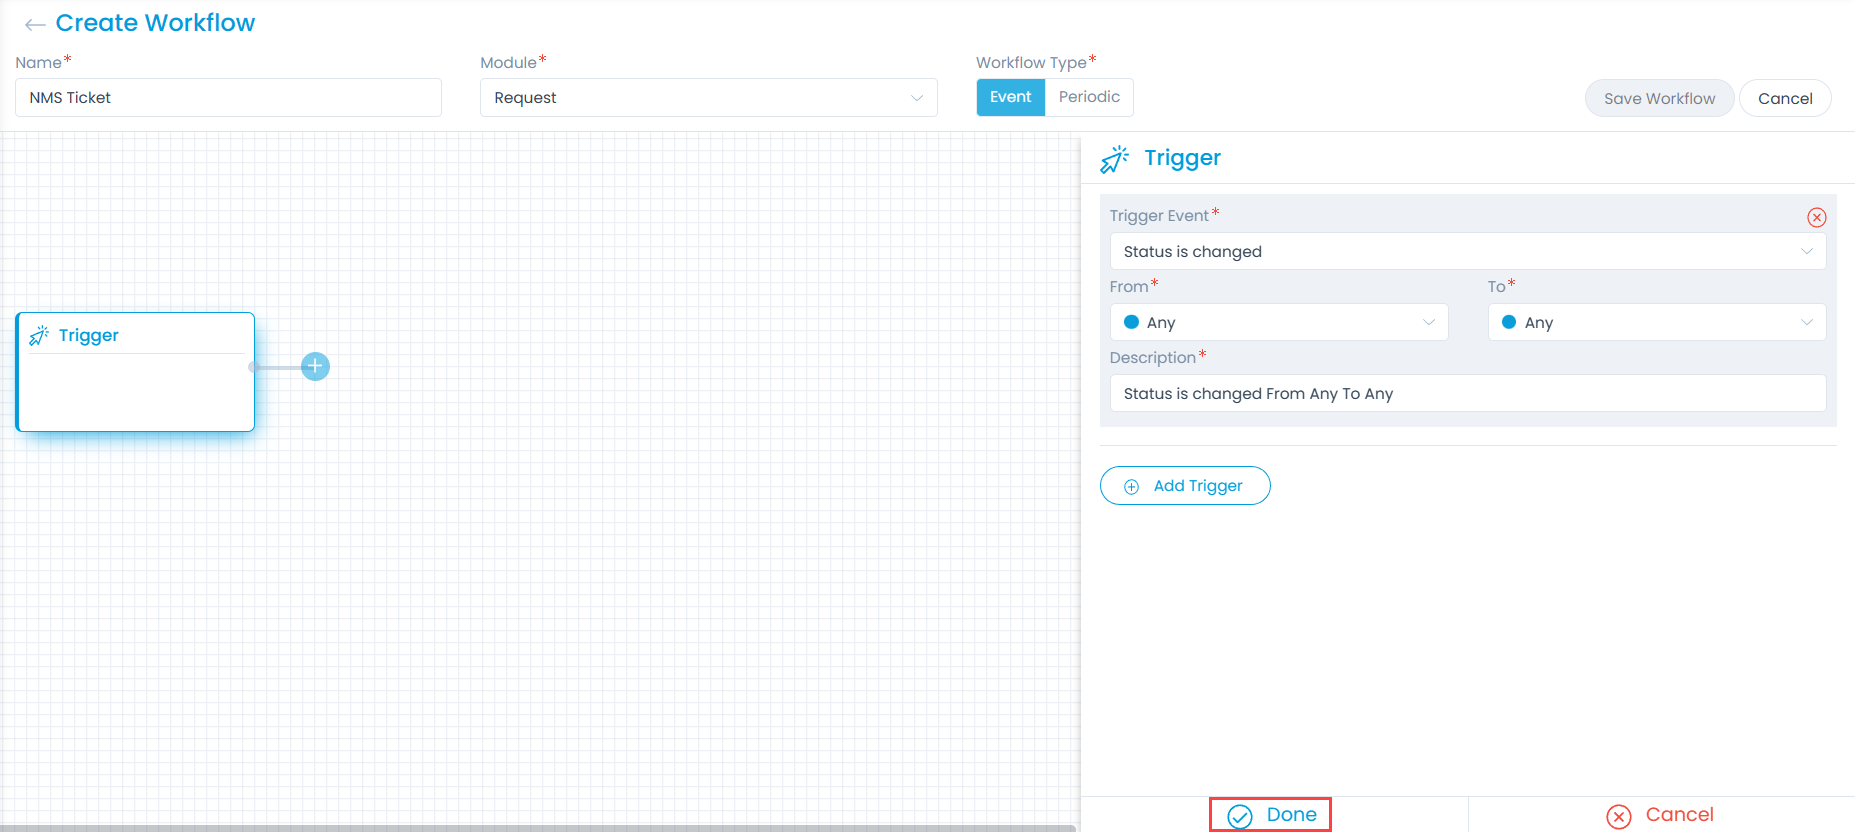
Navigate to Admin > Automation > Workflow and click Create Workflow.
Enter the Workflow Name, and select the Module, and Workflow Type.
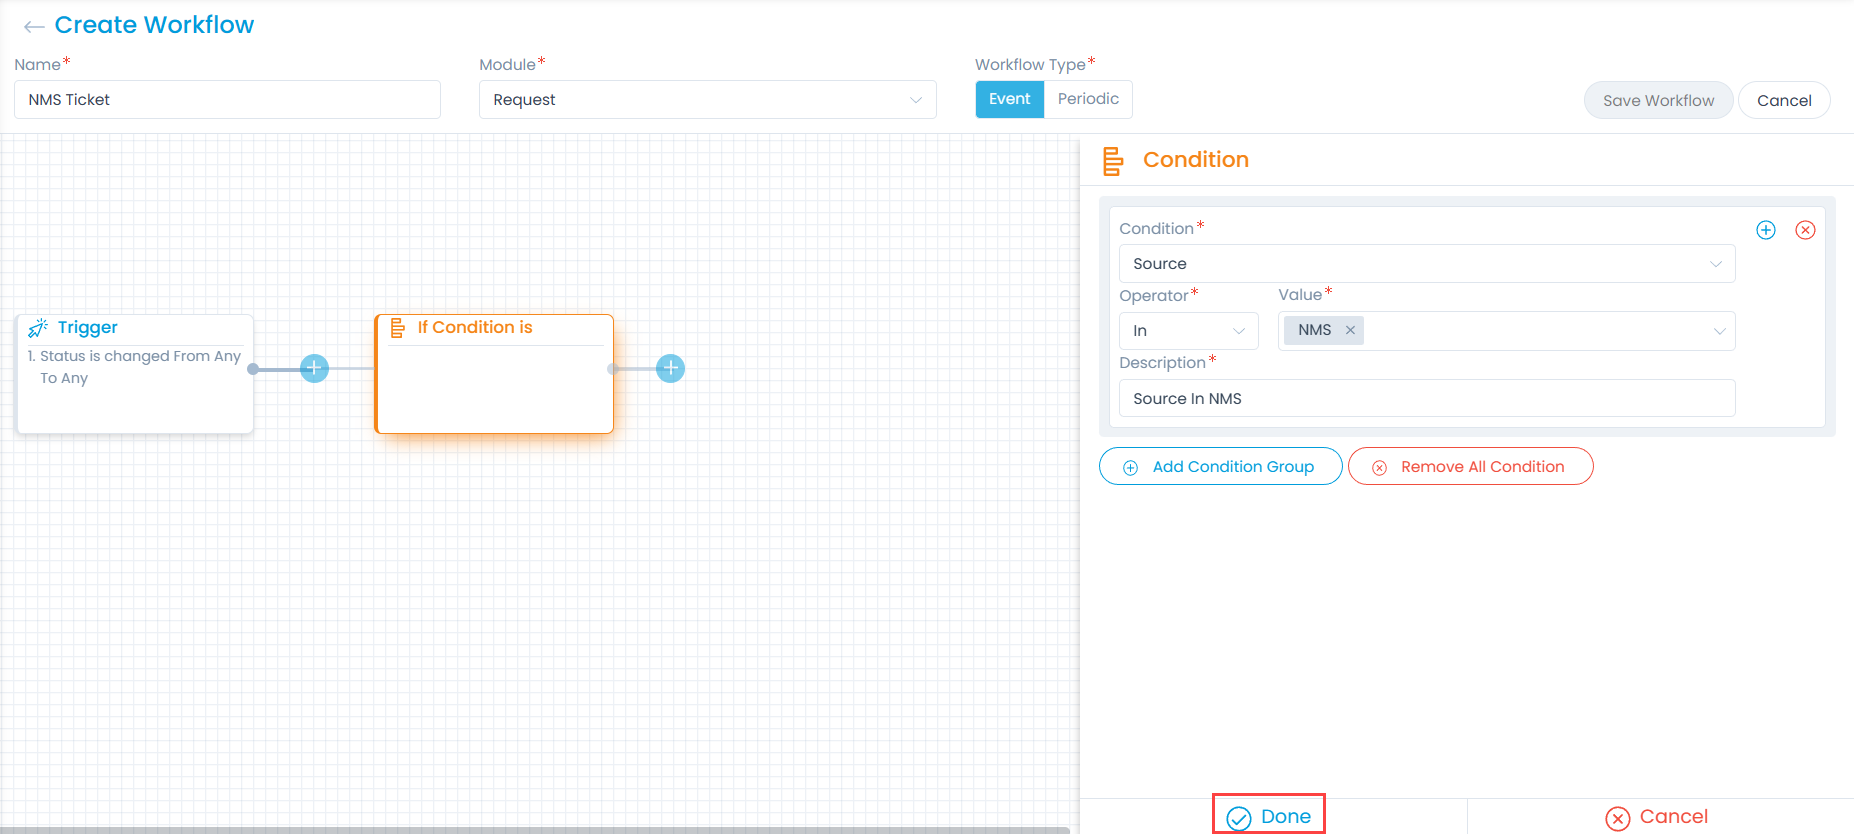
Add the Trigger Event as the Status is Changed from Any to Any.
- Add Condition as Source in NMS.
- Add Action as Run Webhook.
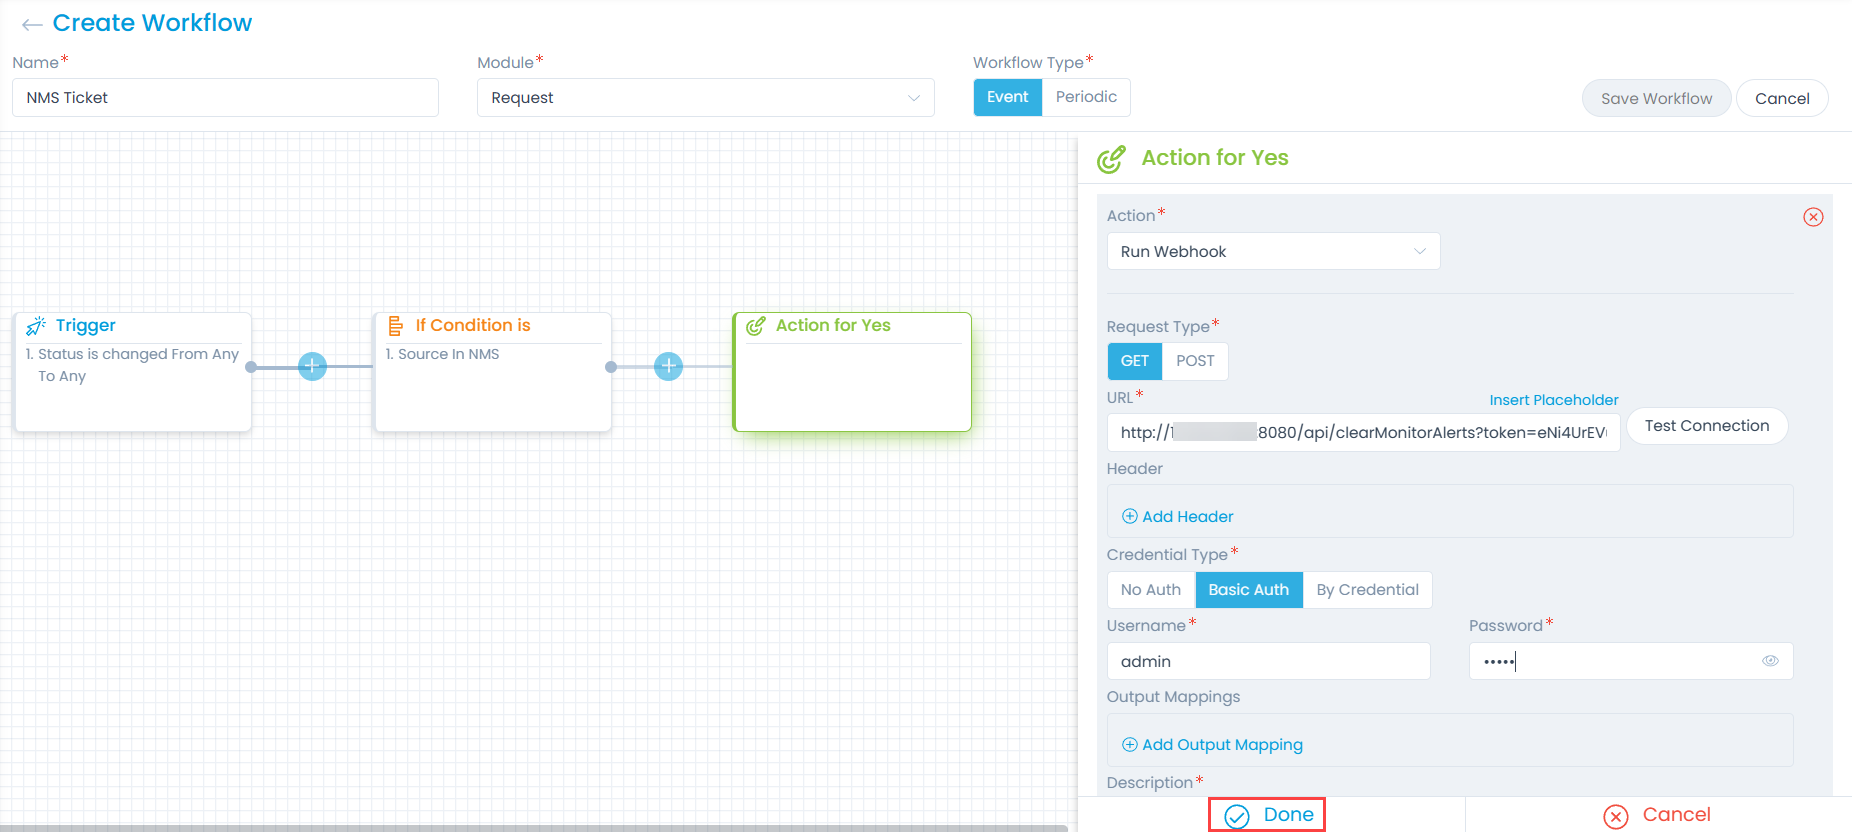
Fill in the required details:
URL: Enter the NMS URL using the below format. You can also use placeholders to provide a relative URL.
Format: http://{nms-server-url}:8080/api/clearMonitorAlerts?token={token-id}=&ticketId={#id#}&type=any
In NMS, you can get the token ID from the Generate Access Key field of the User Information page.

- Credentials Type: Select the type of credentials you want to use. Here, Basic Auth is used. Once selected, enter the username and password of the NMS application.
Click Done. The Workflow is created.
Now whenever the ticket status is changed manually in ServiceOps, this Workflow will get executed and update the ticket status in NMS.